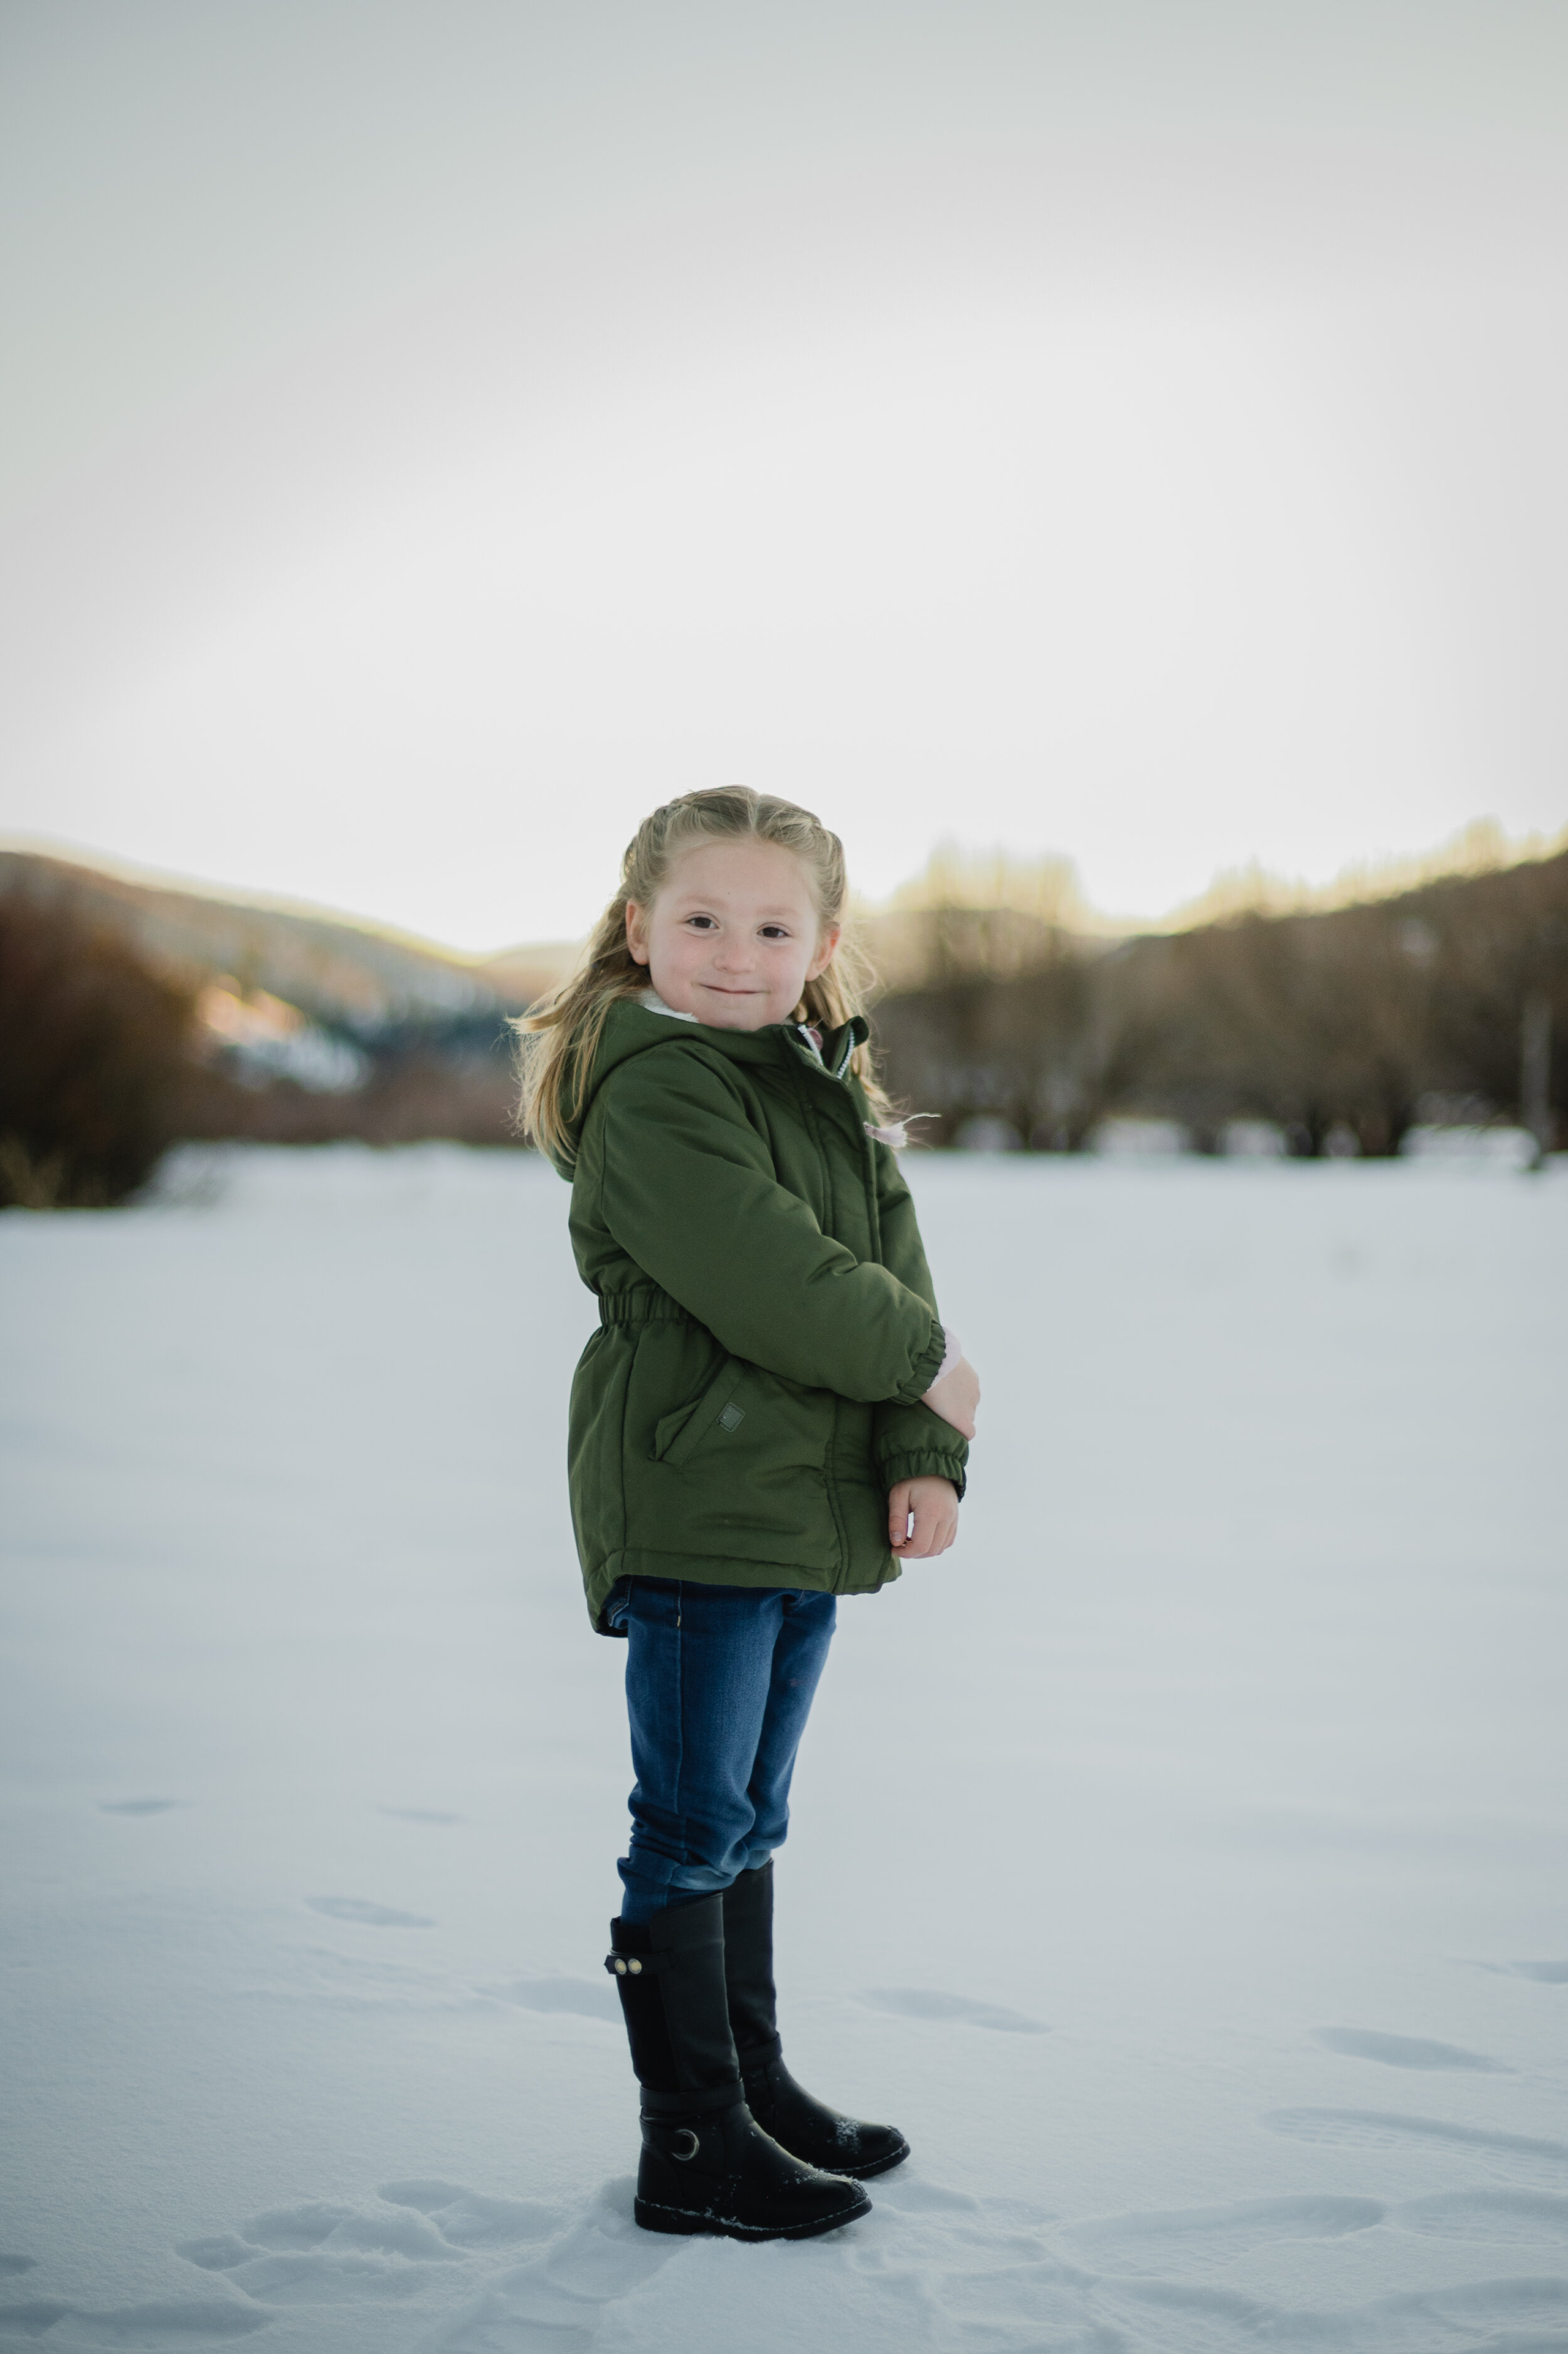
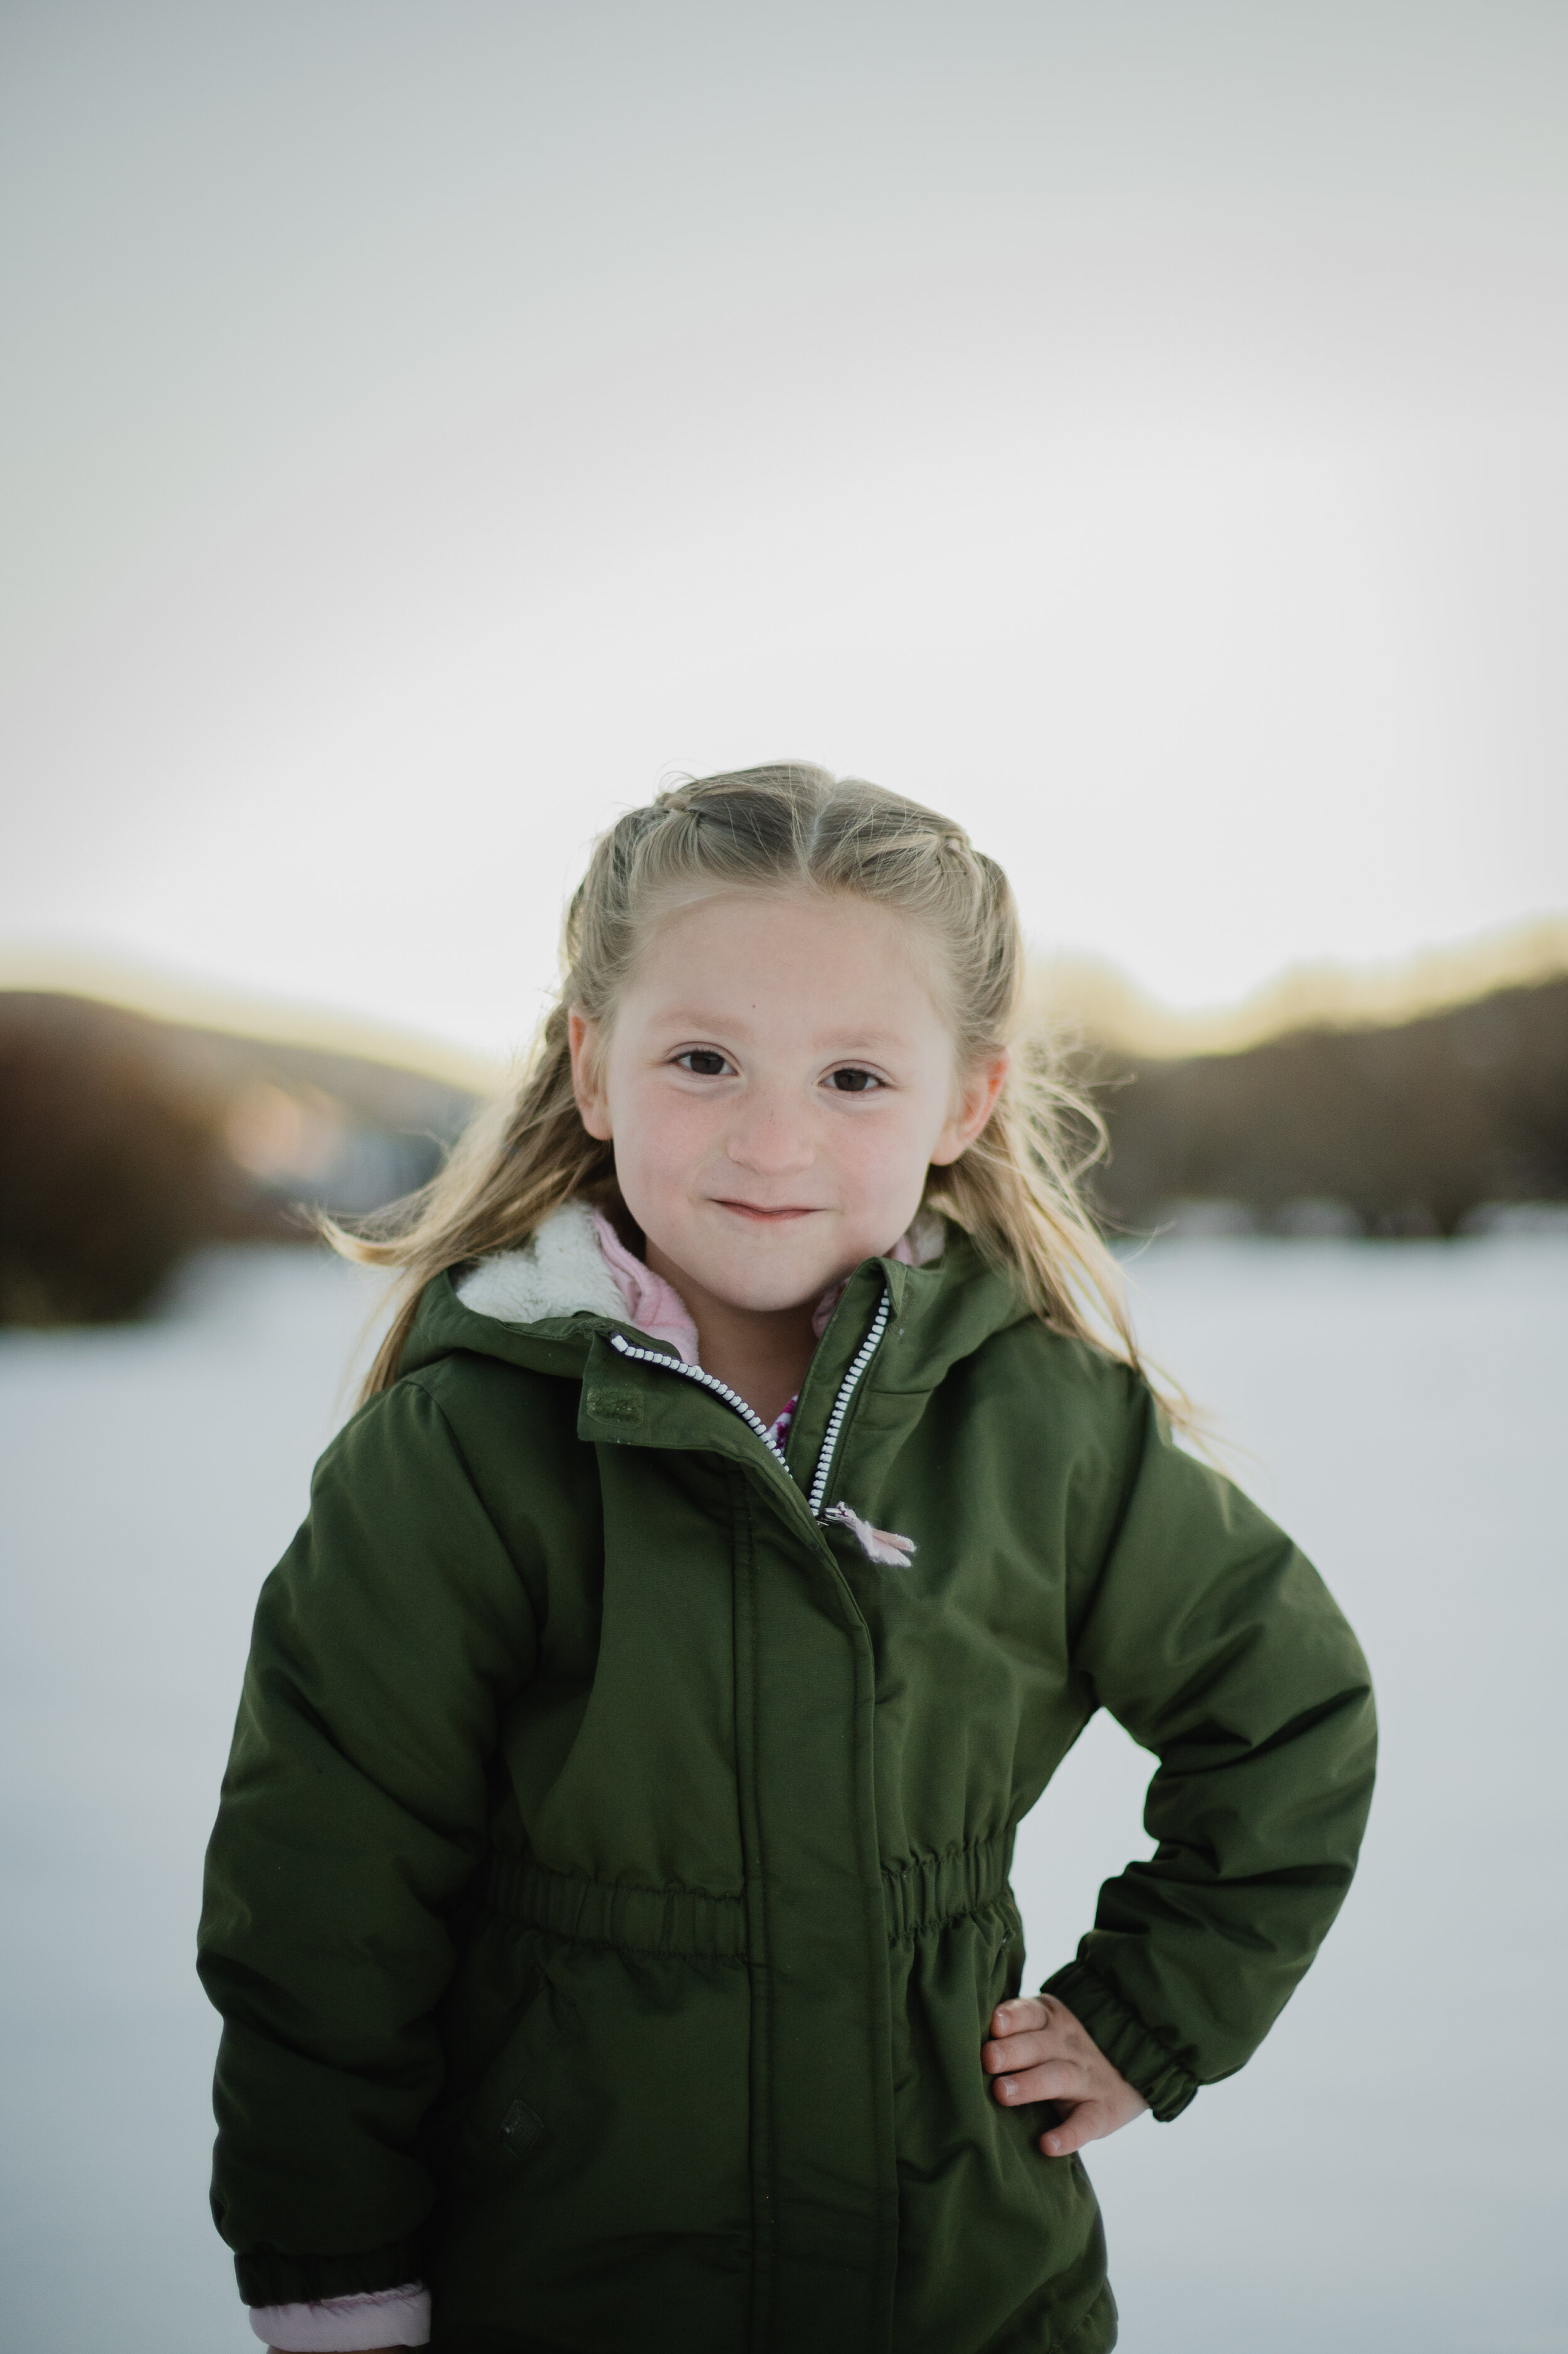
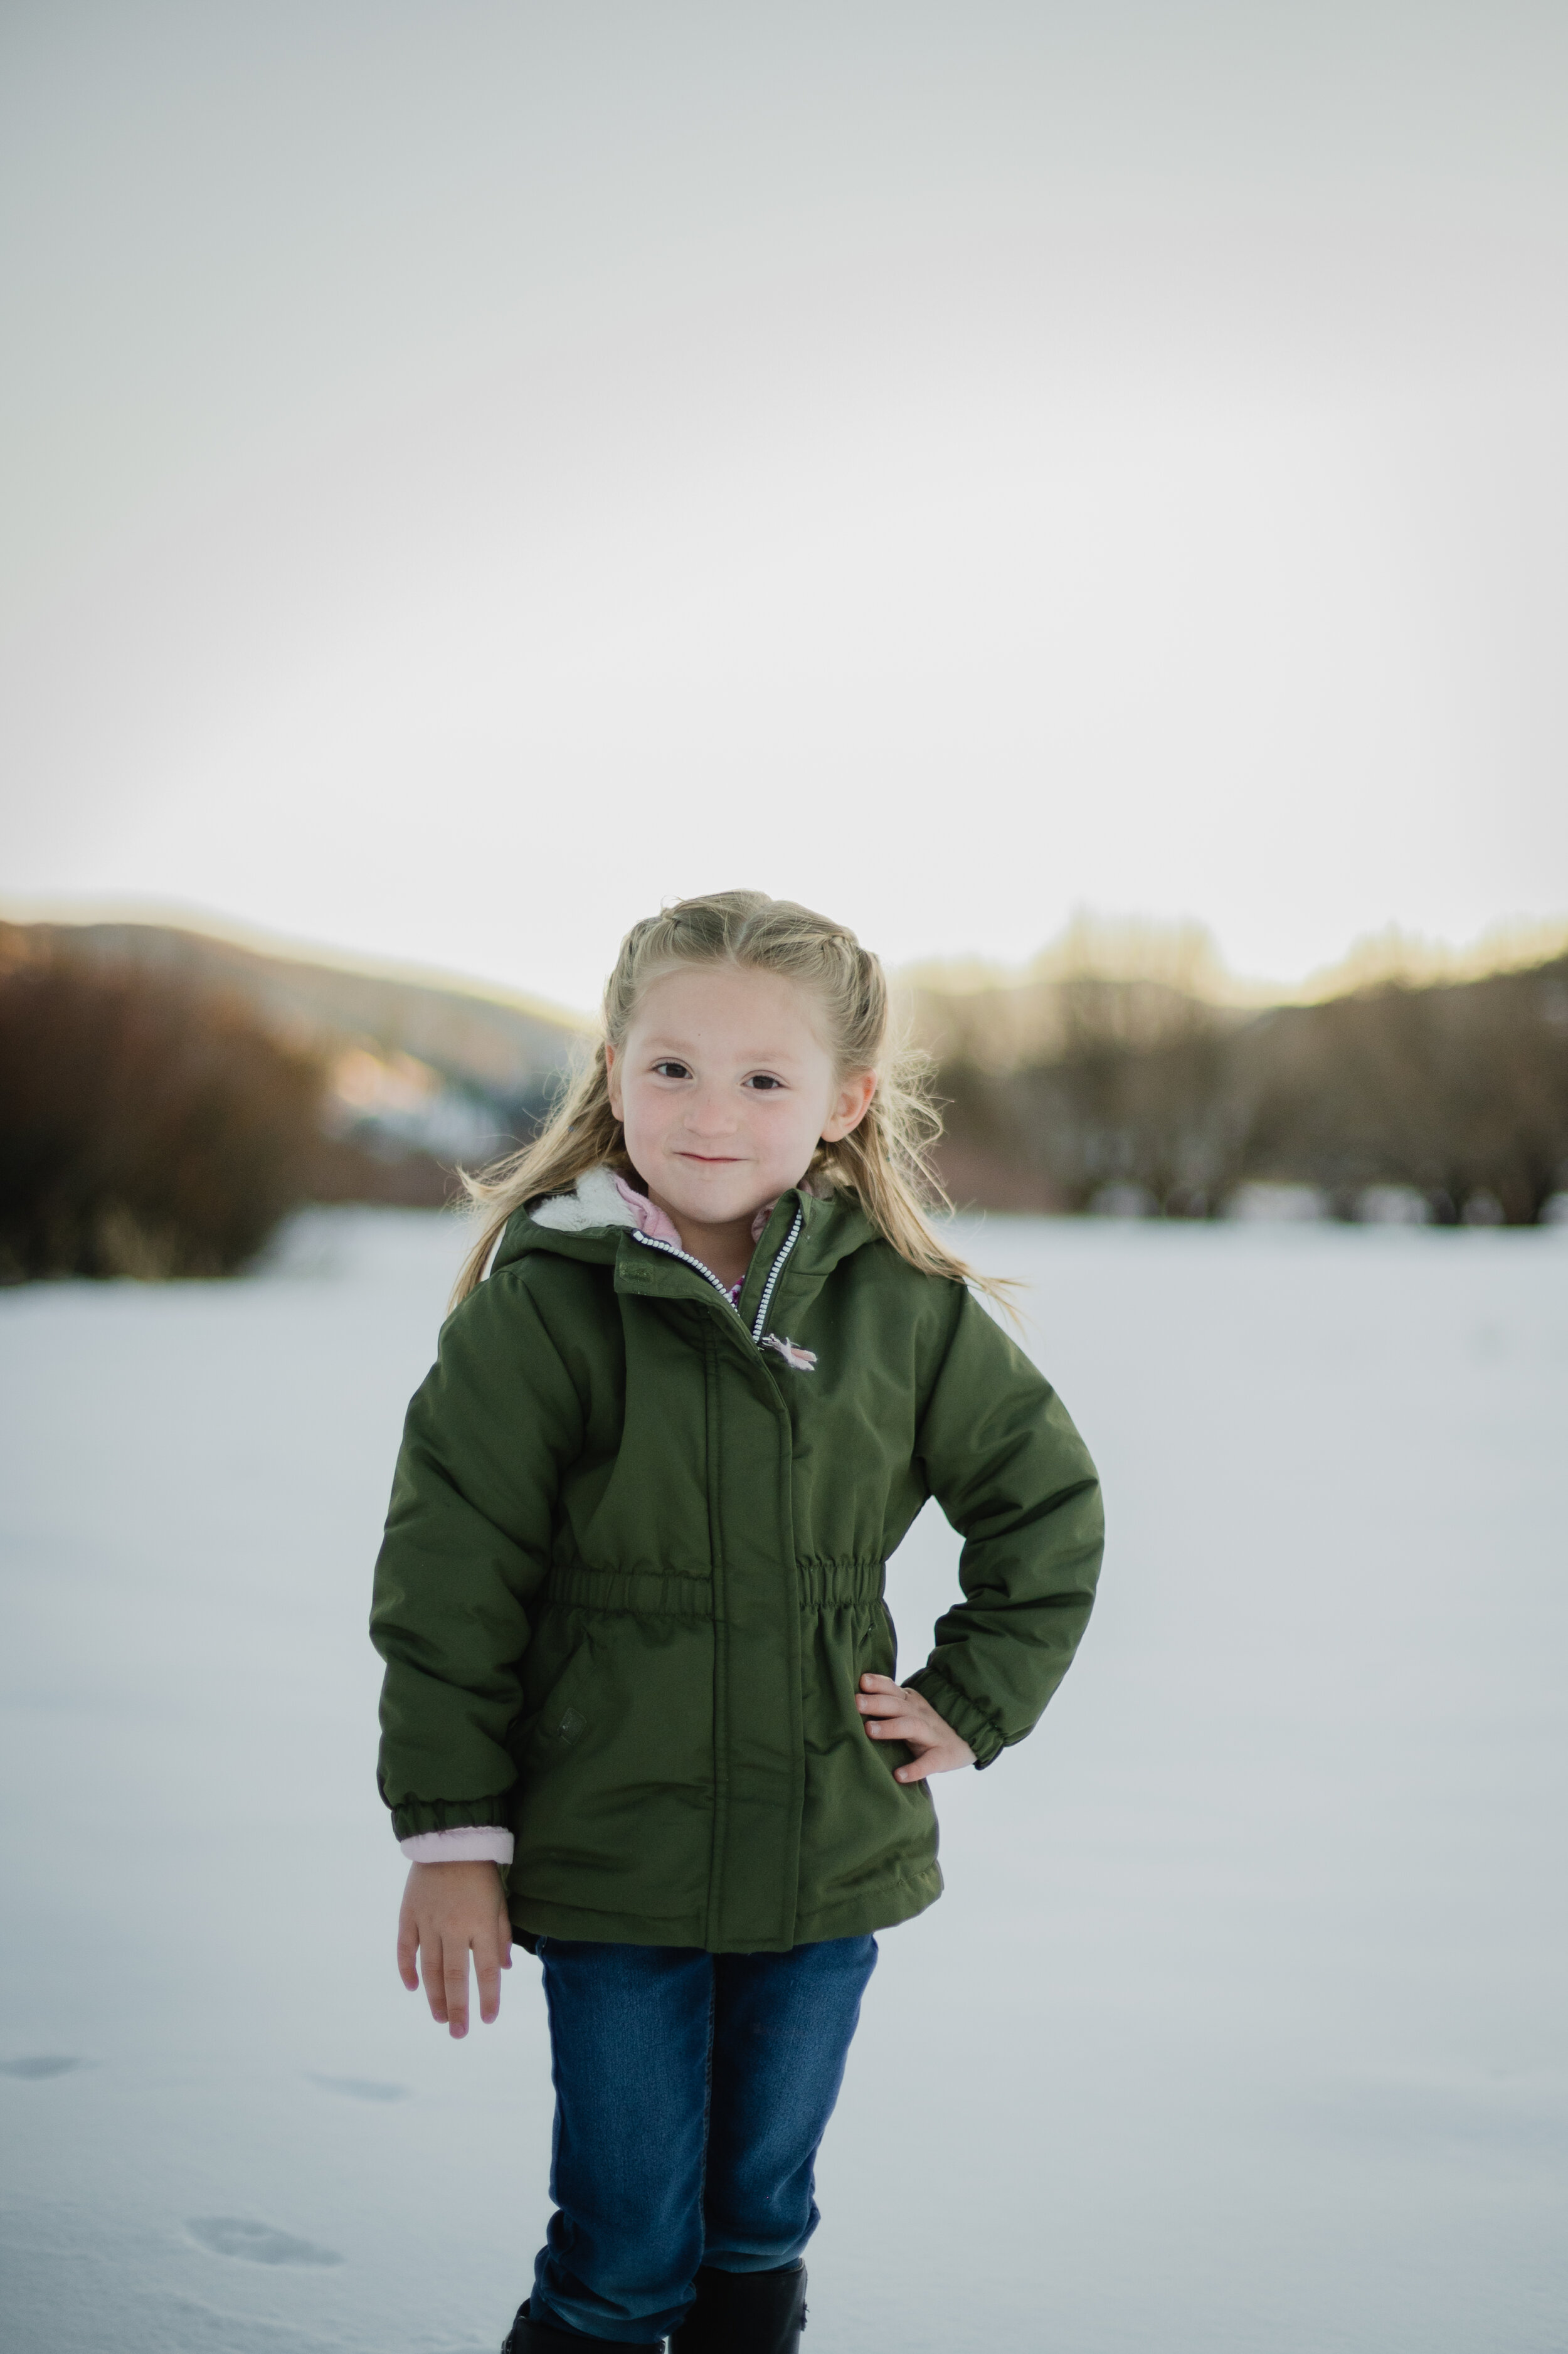
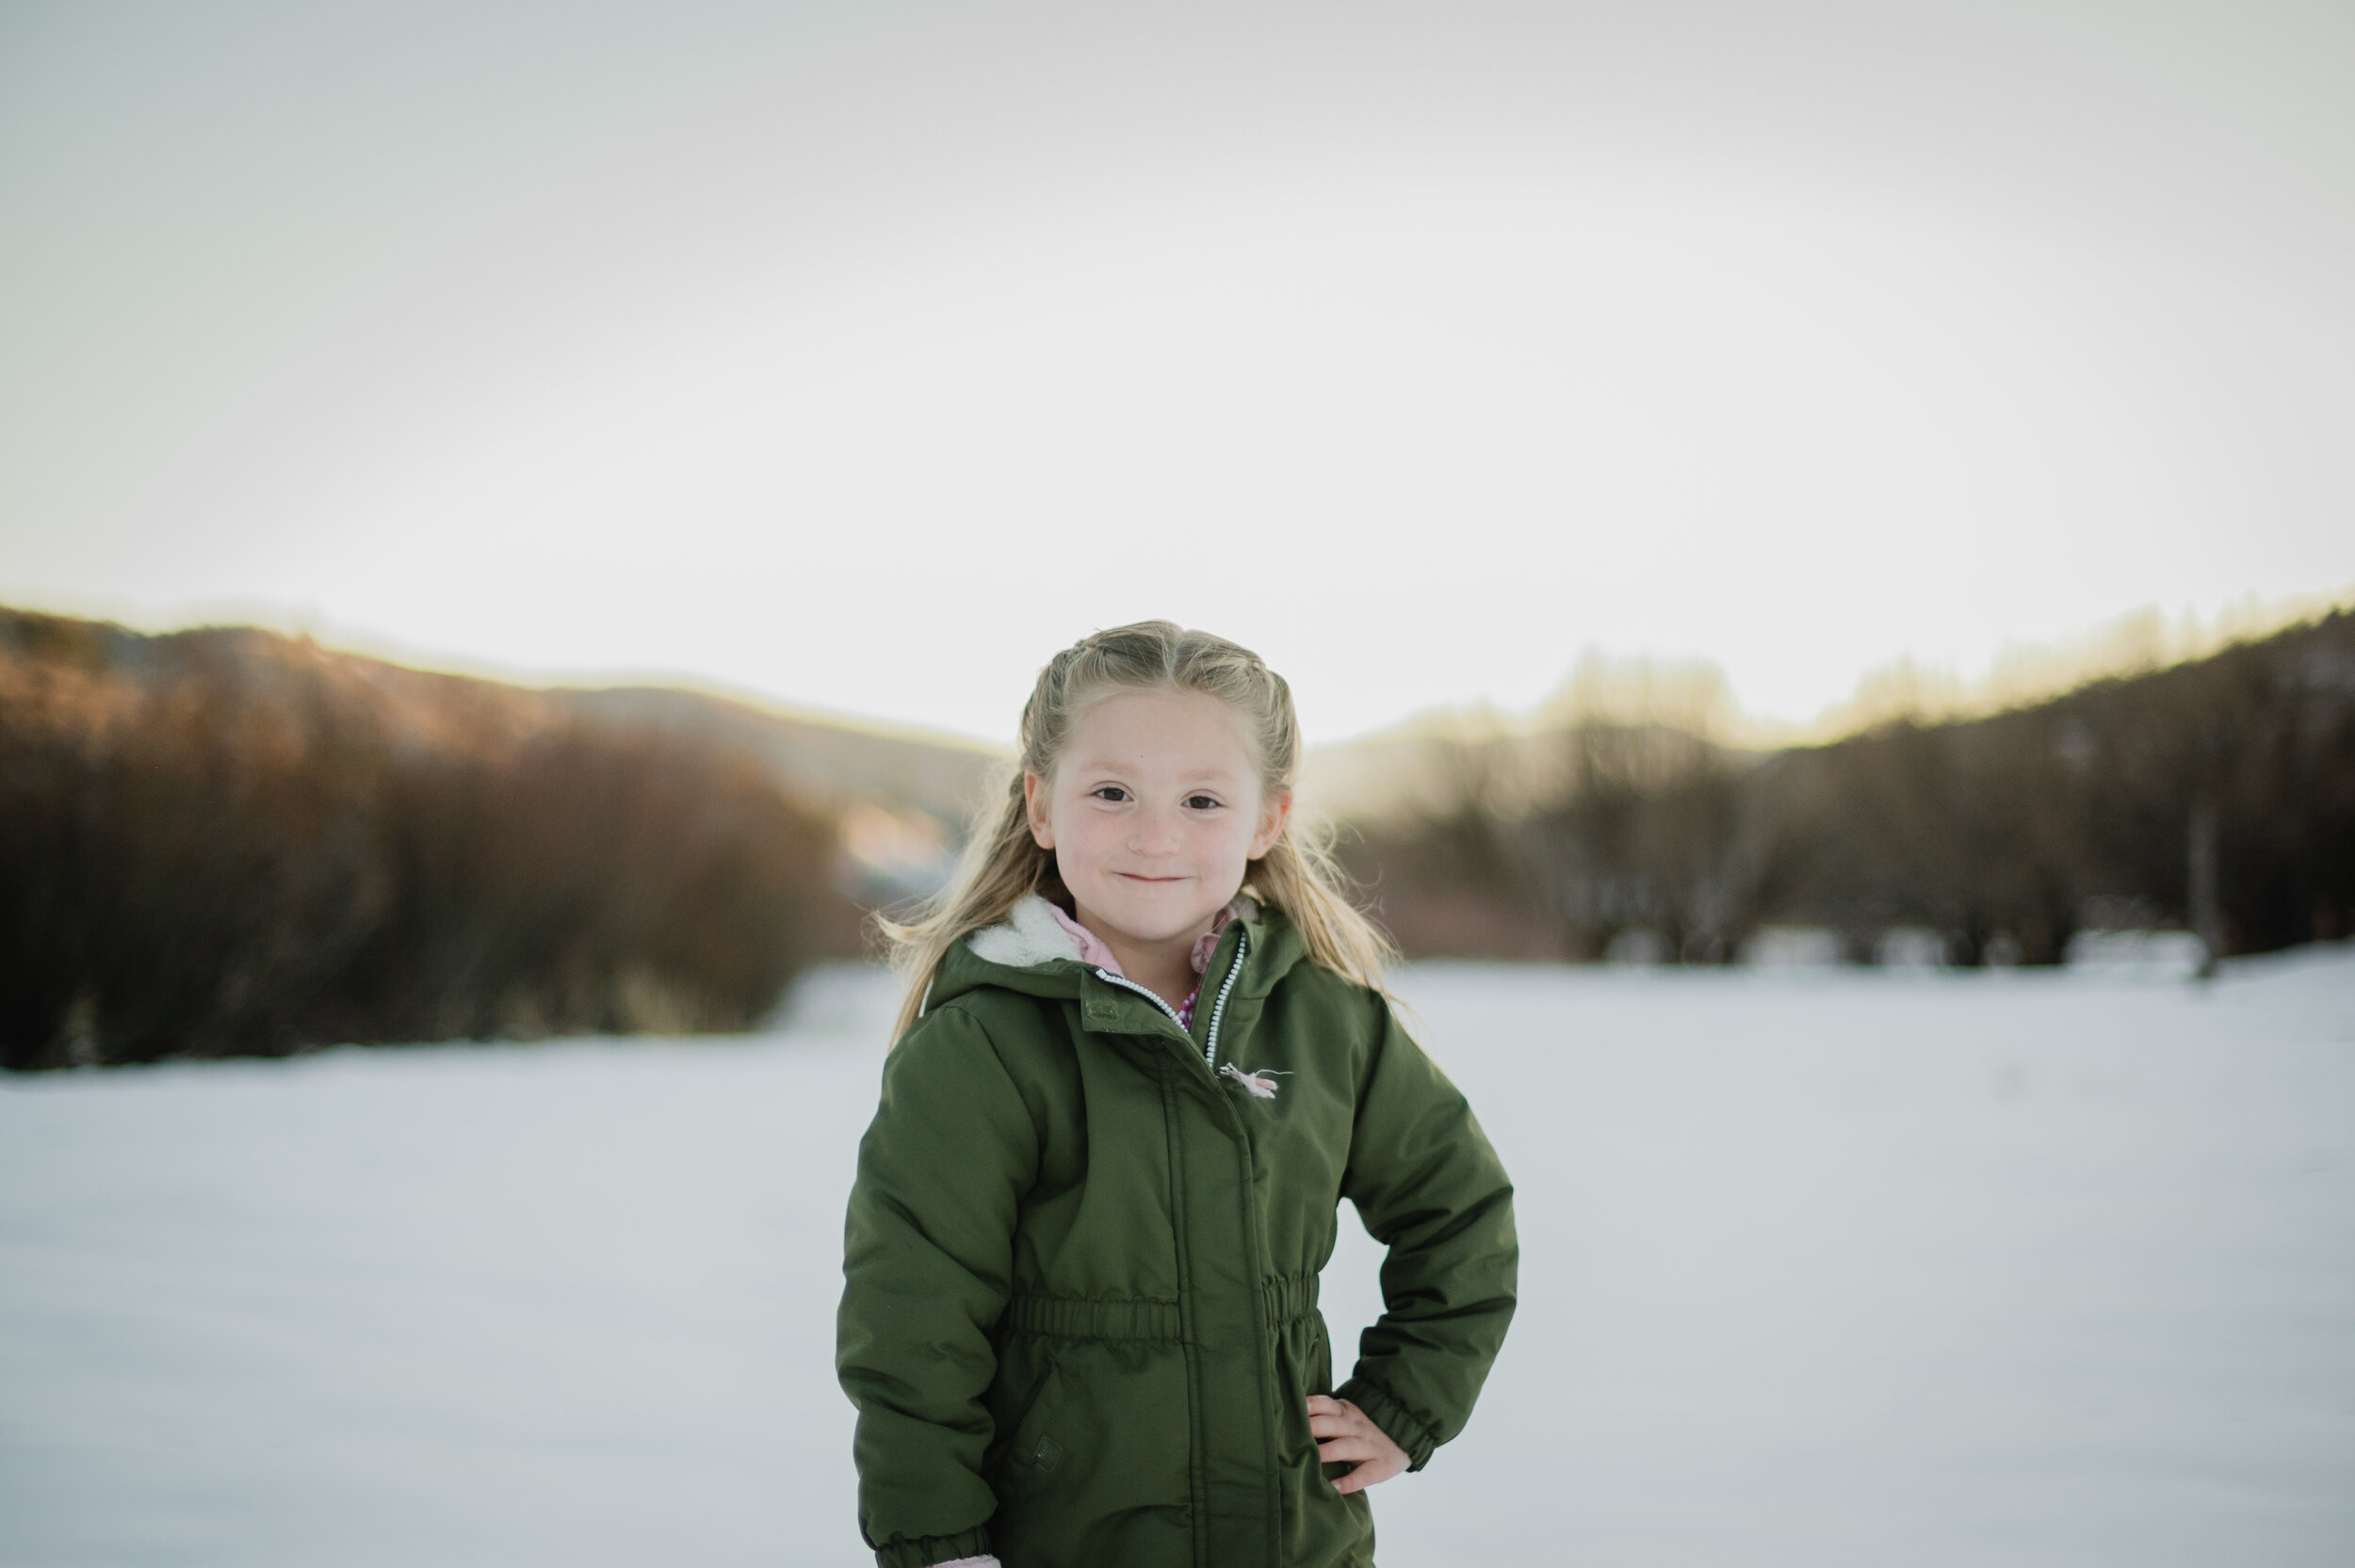
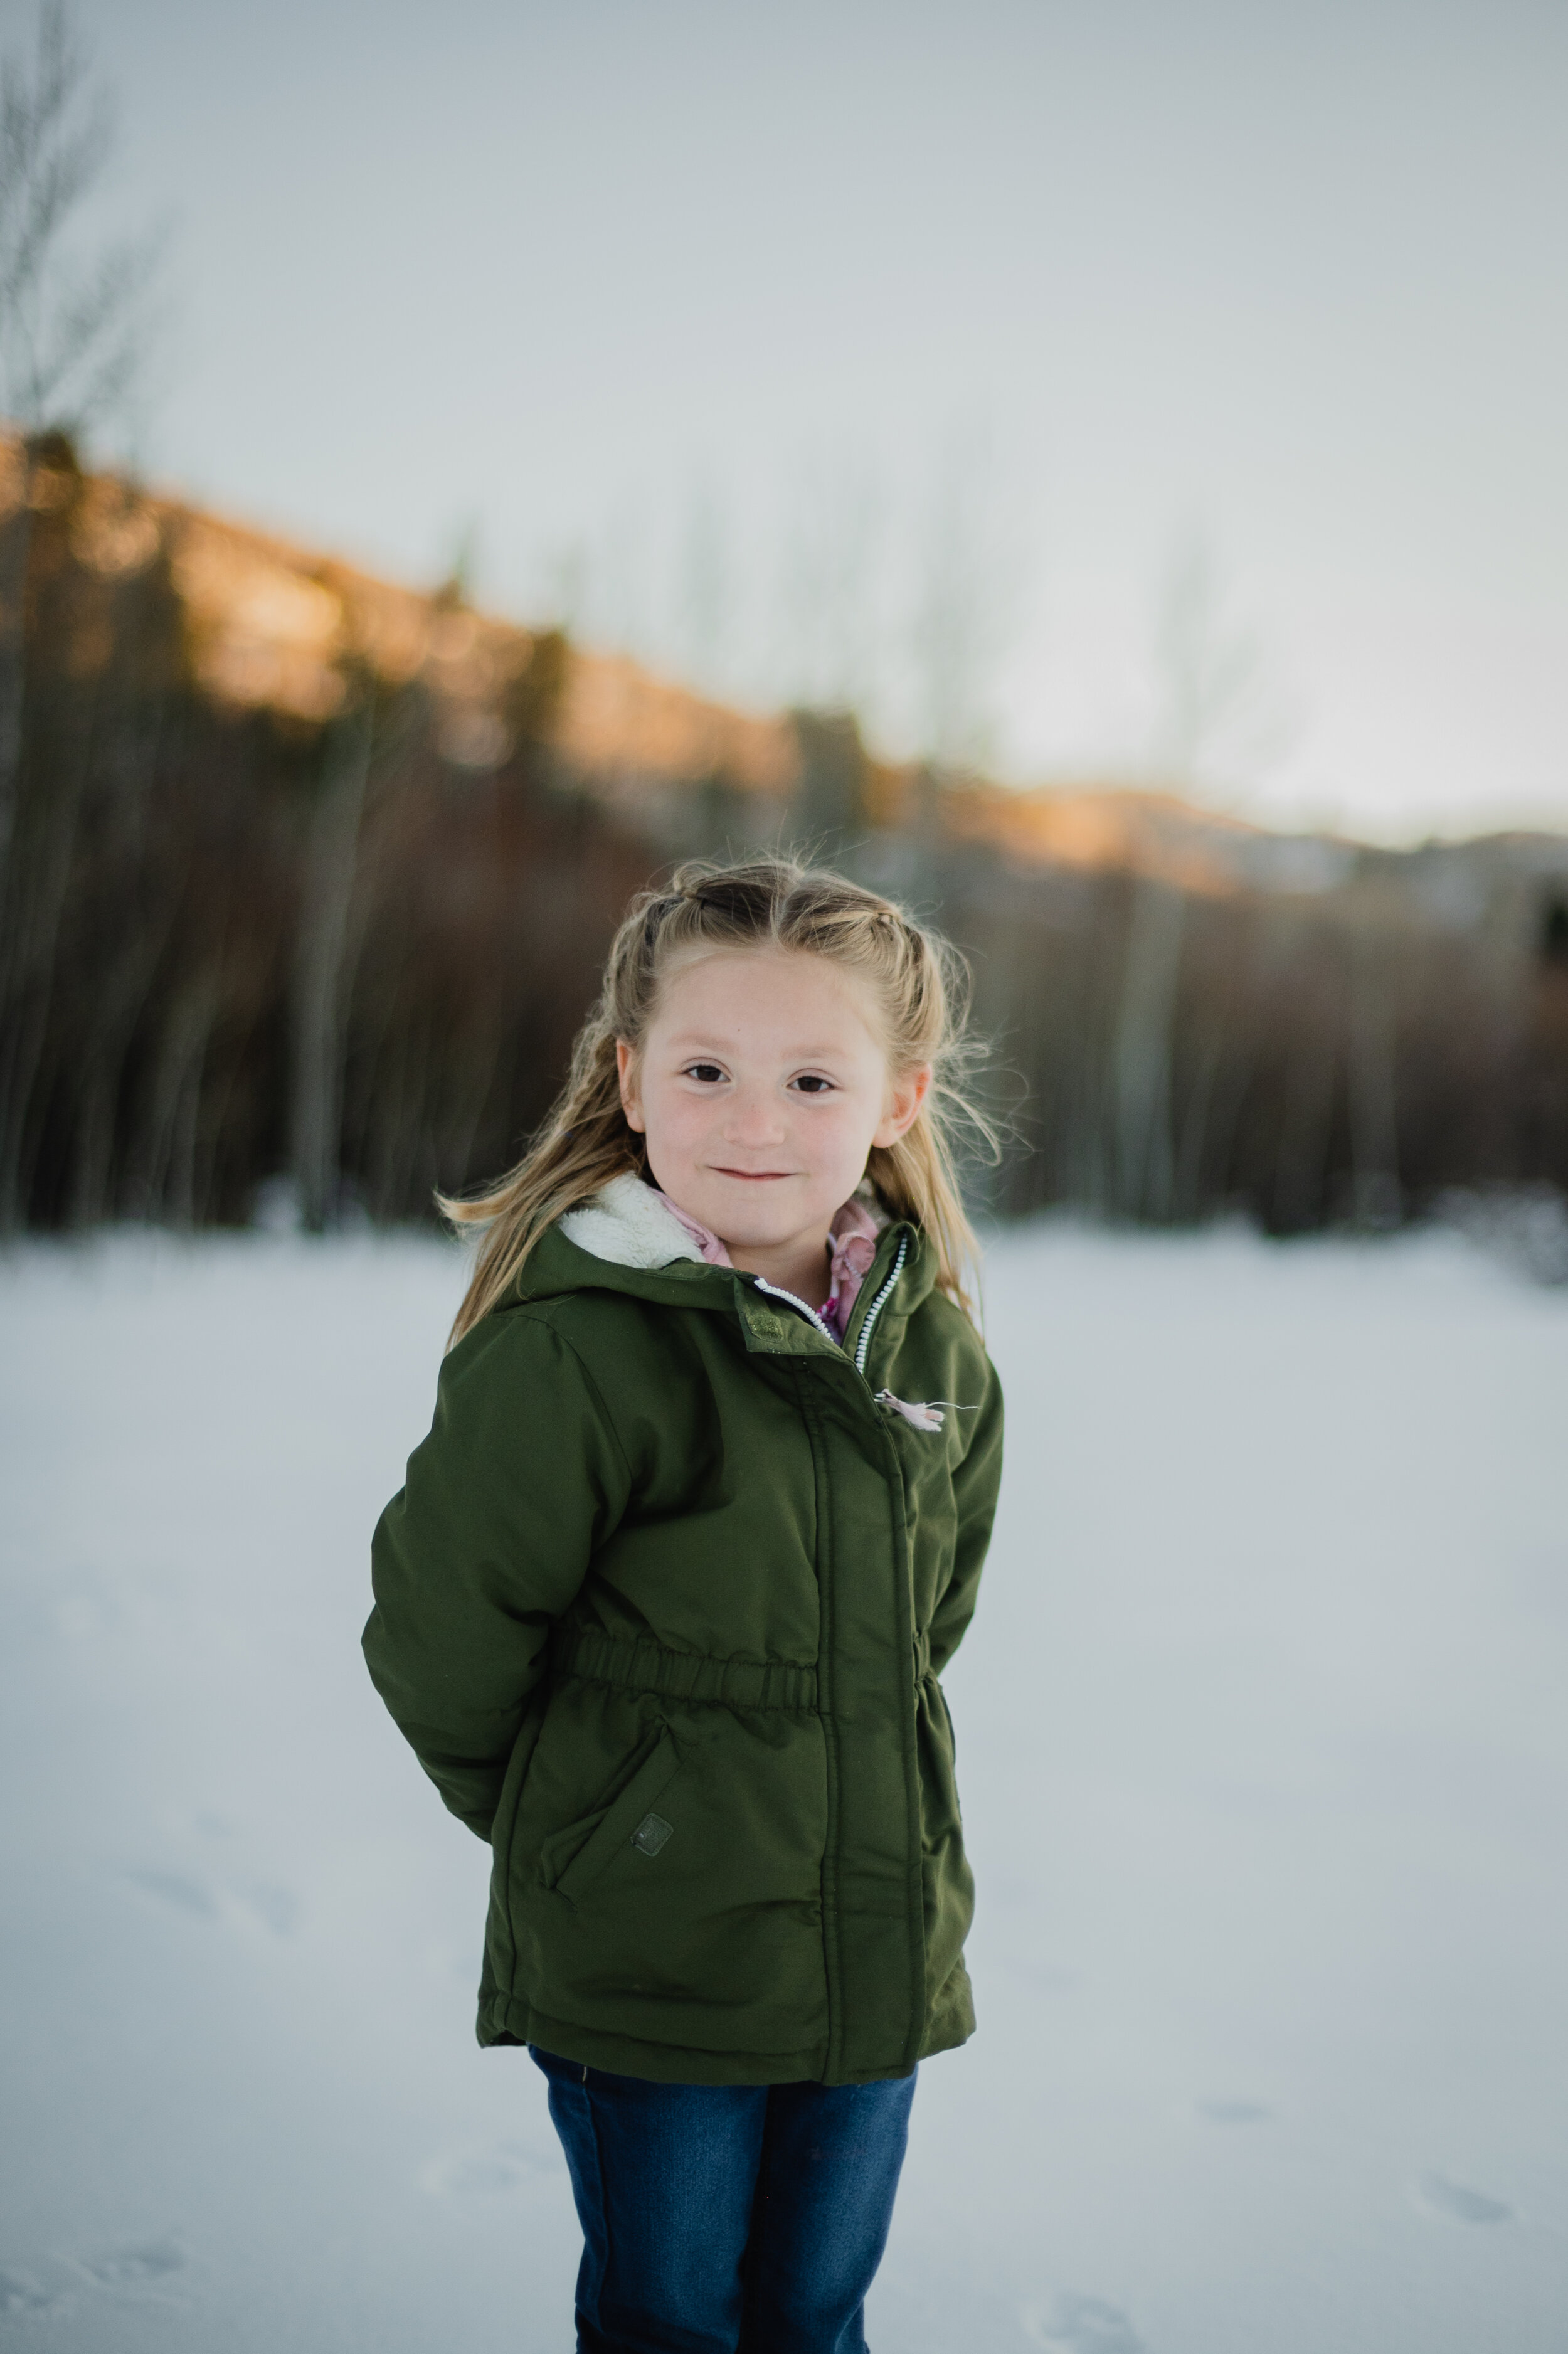
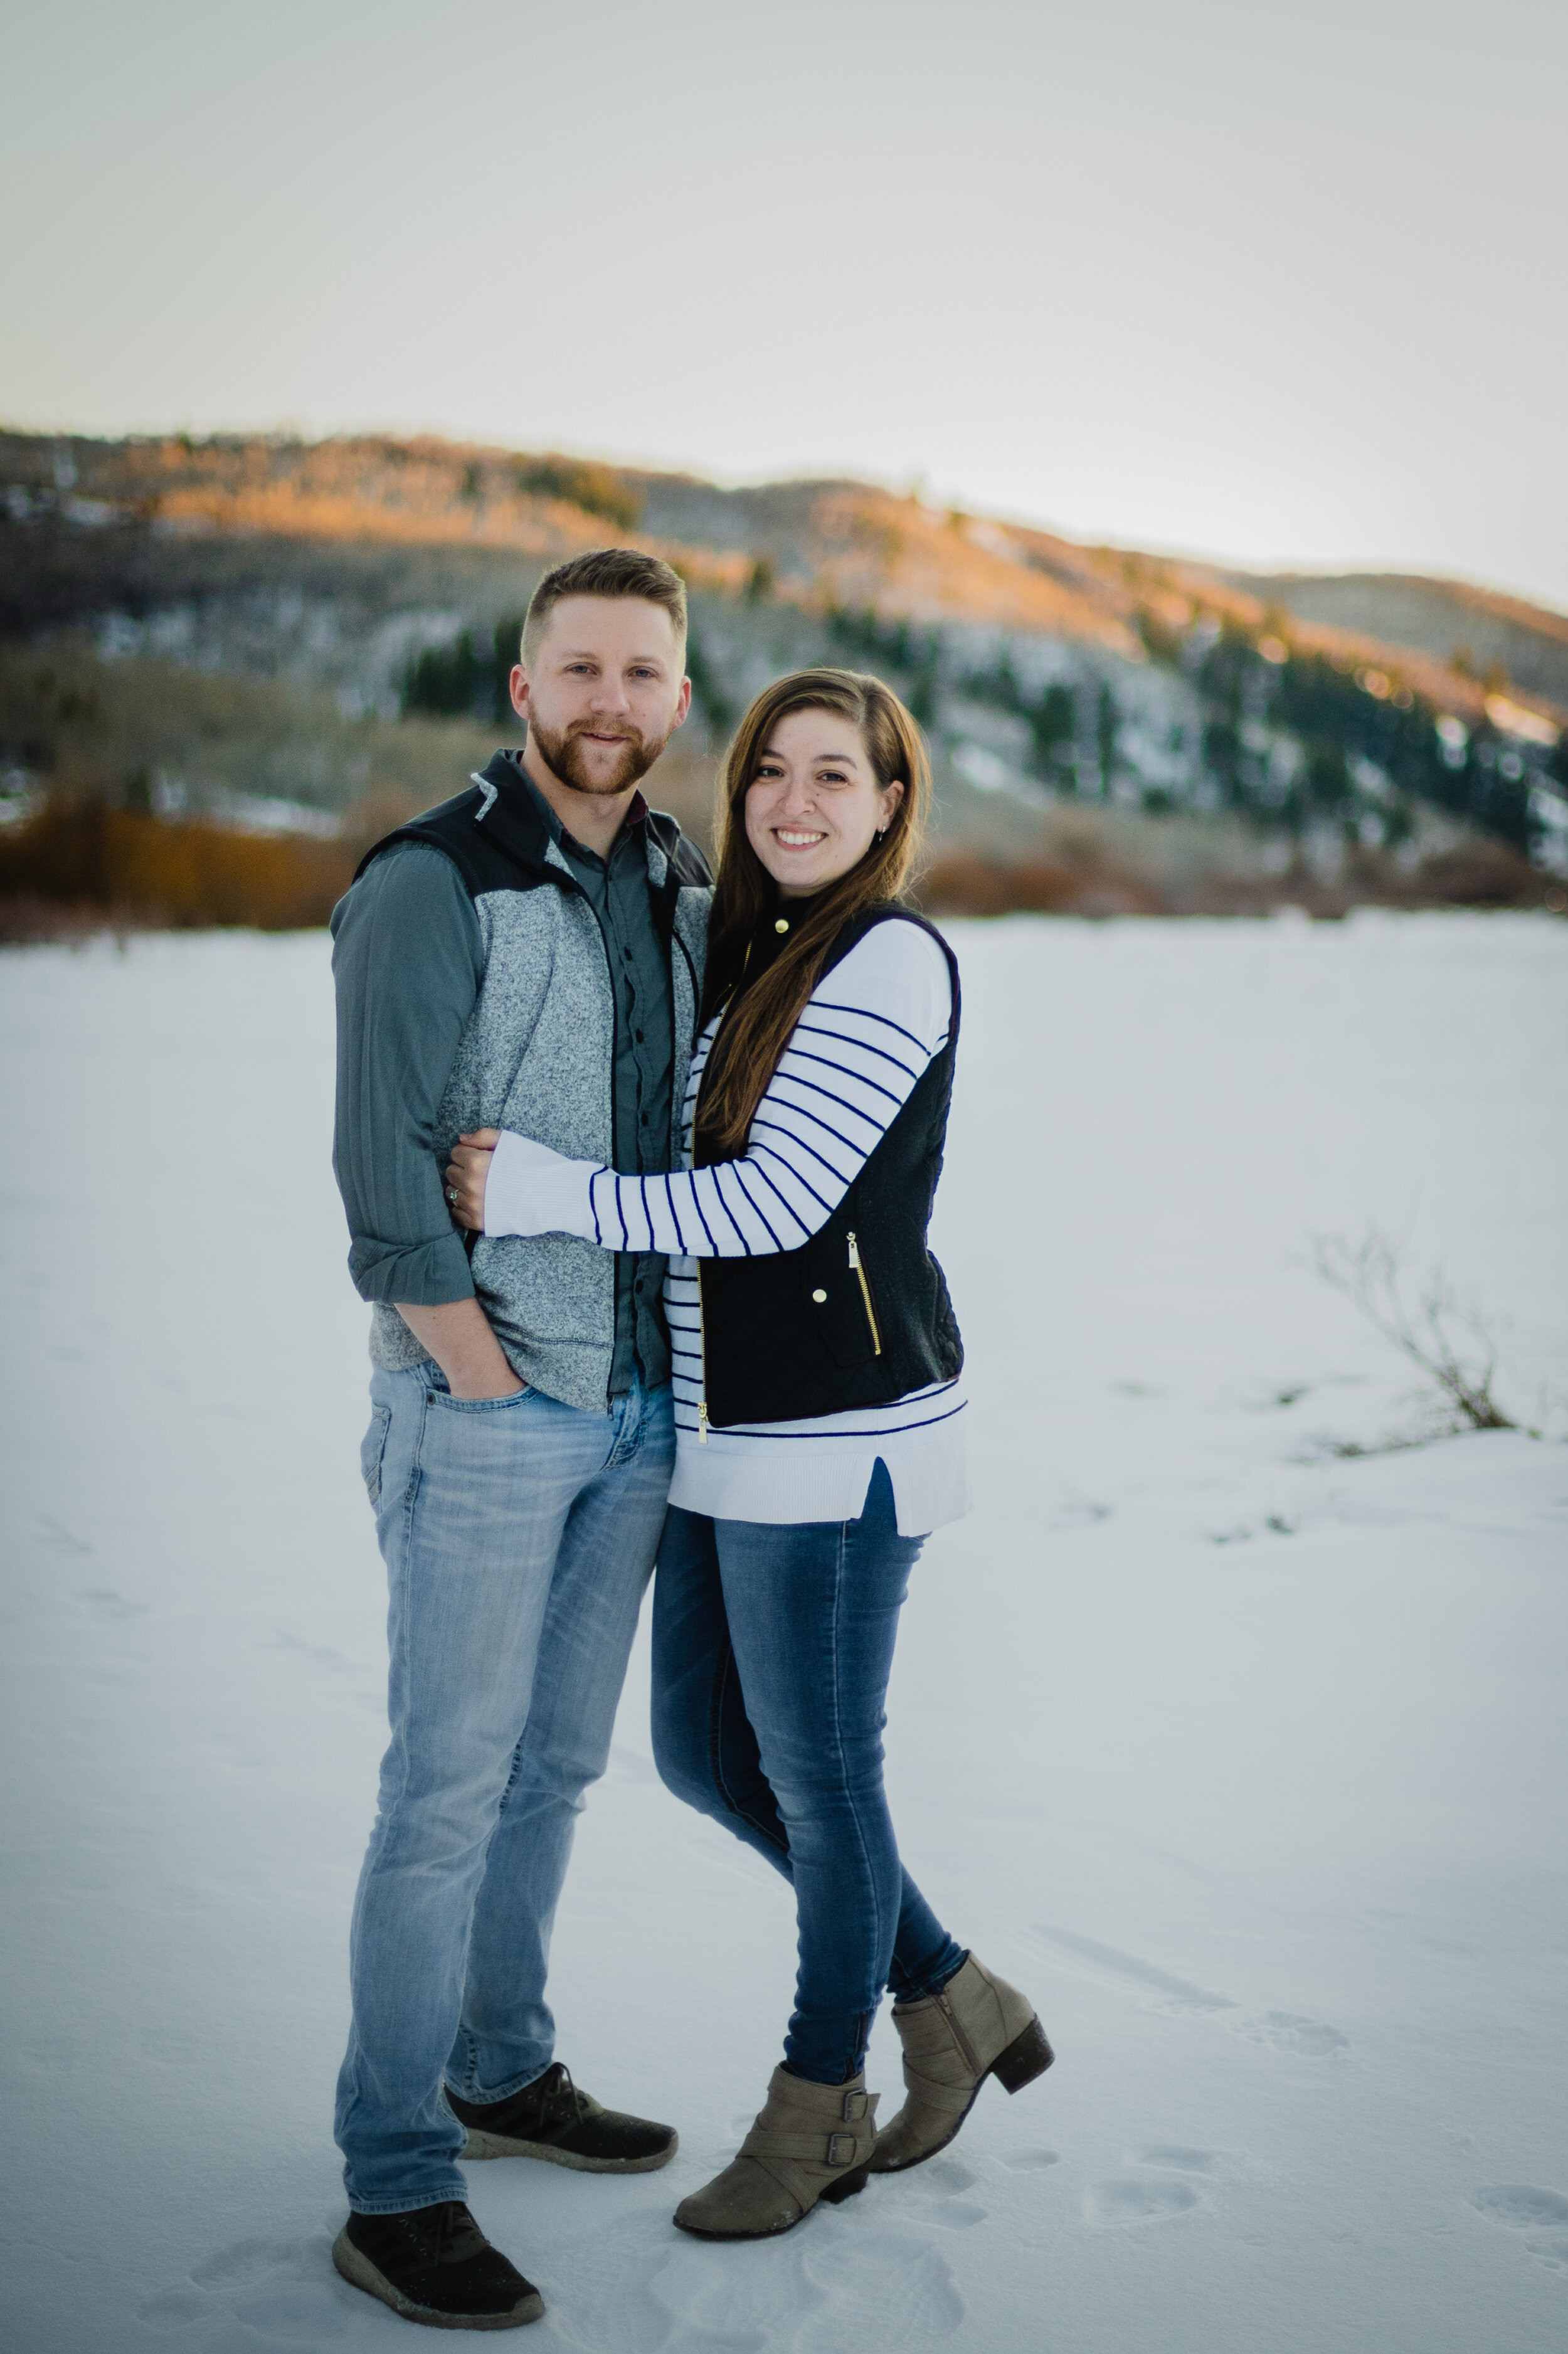
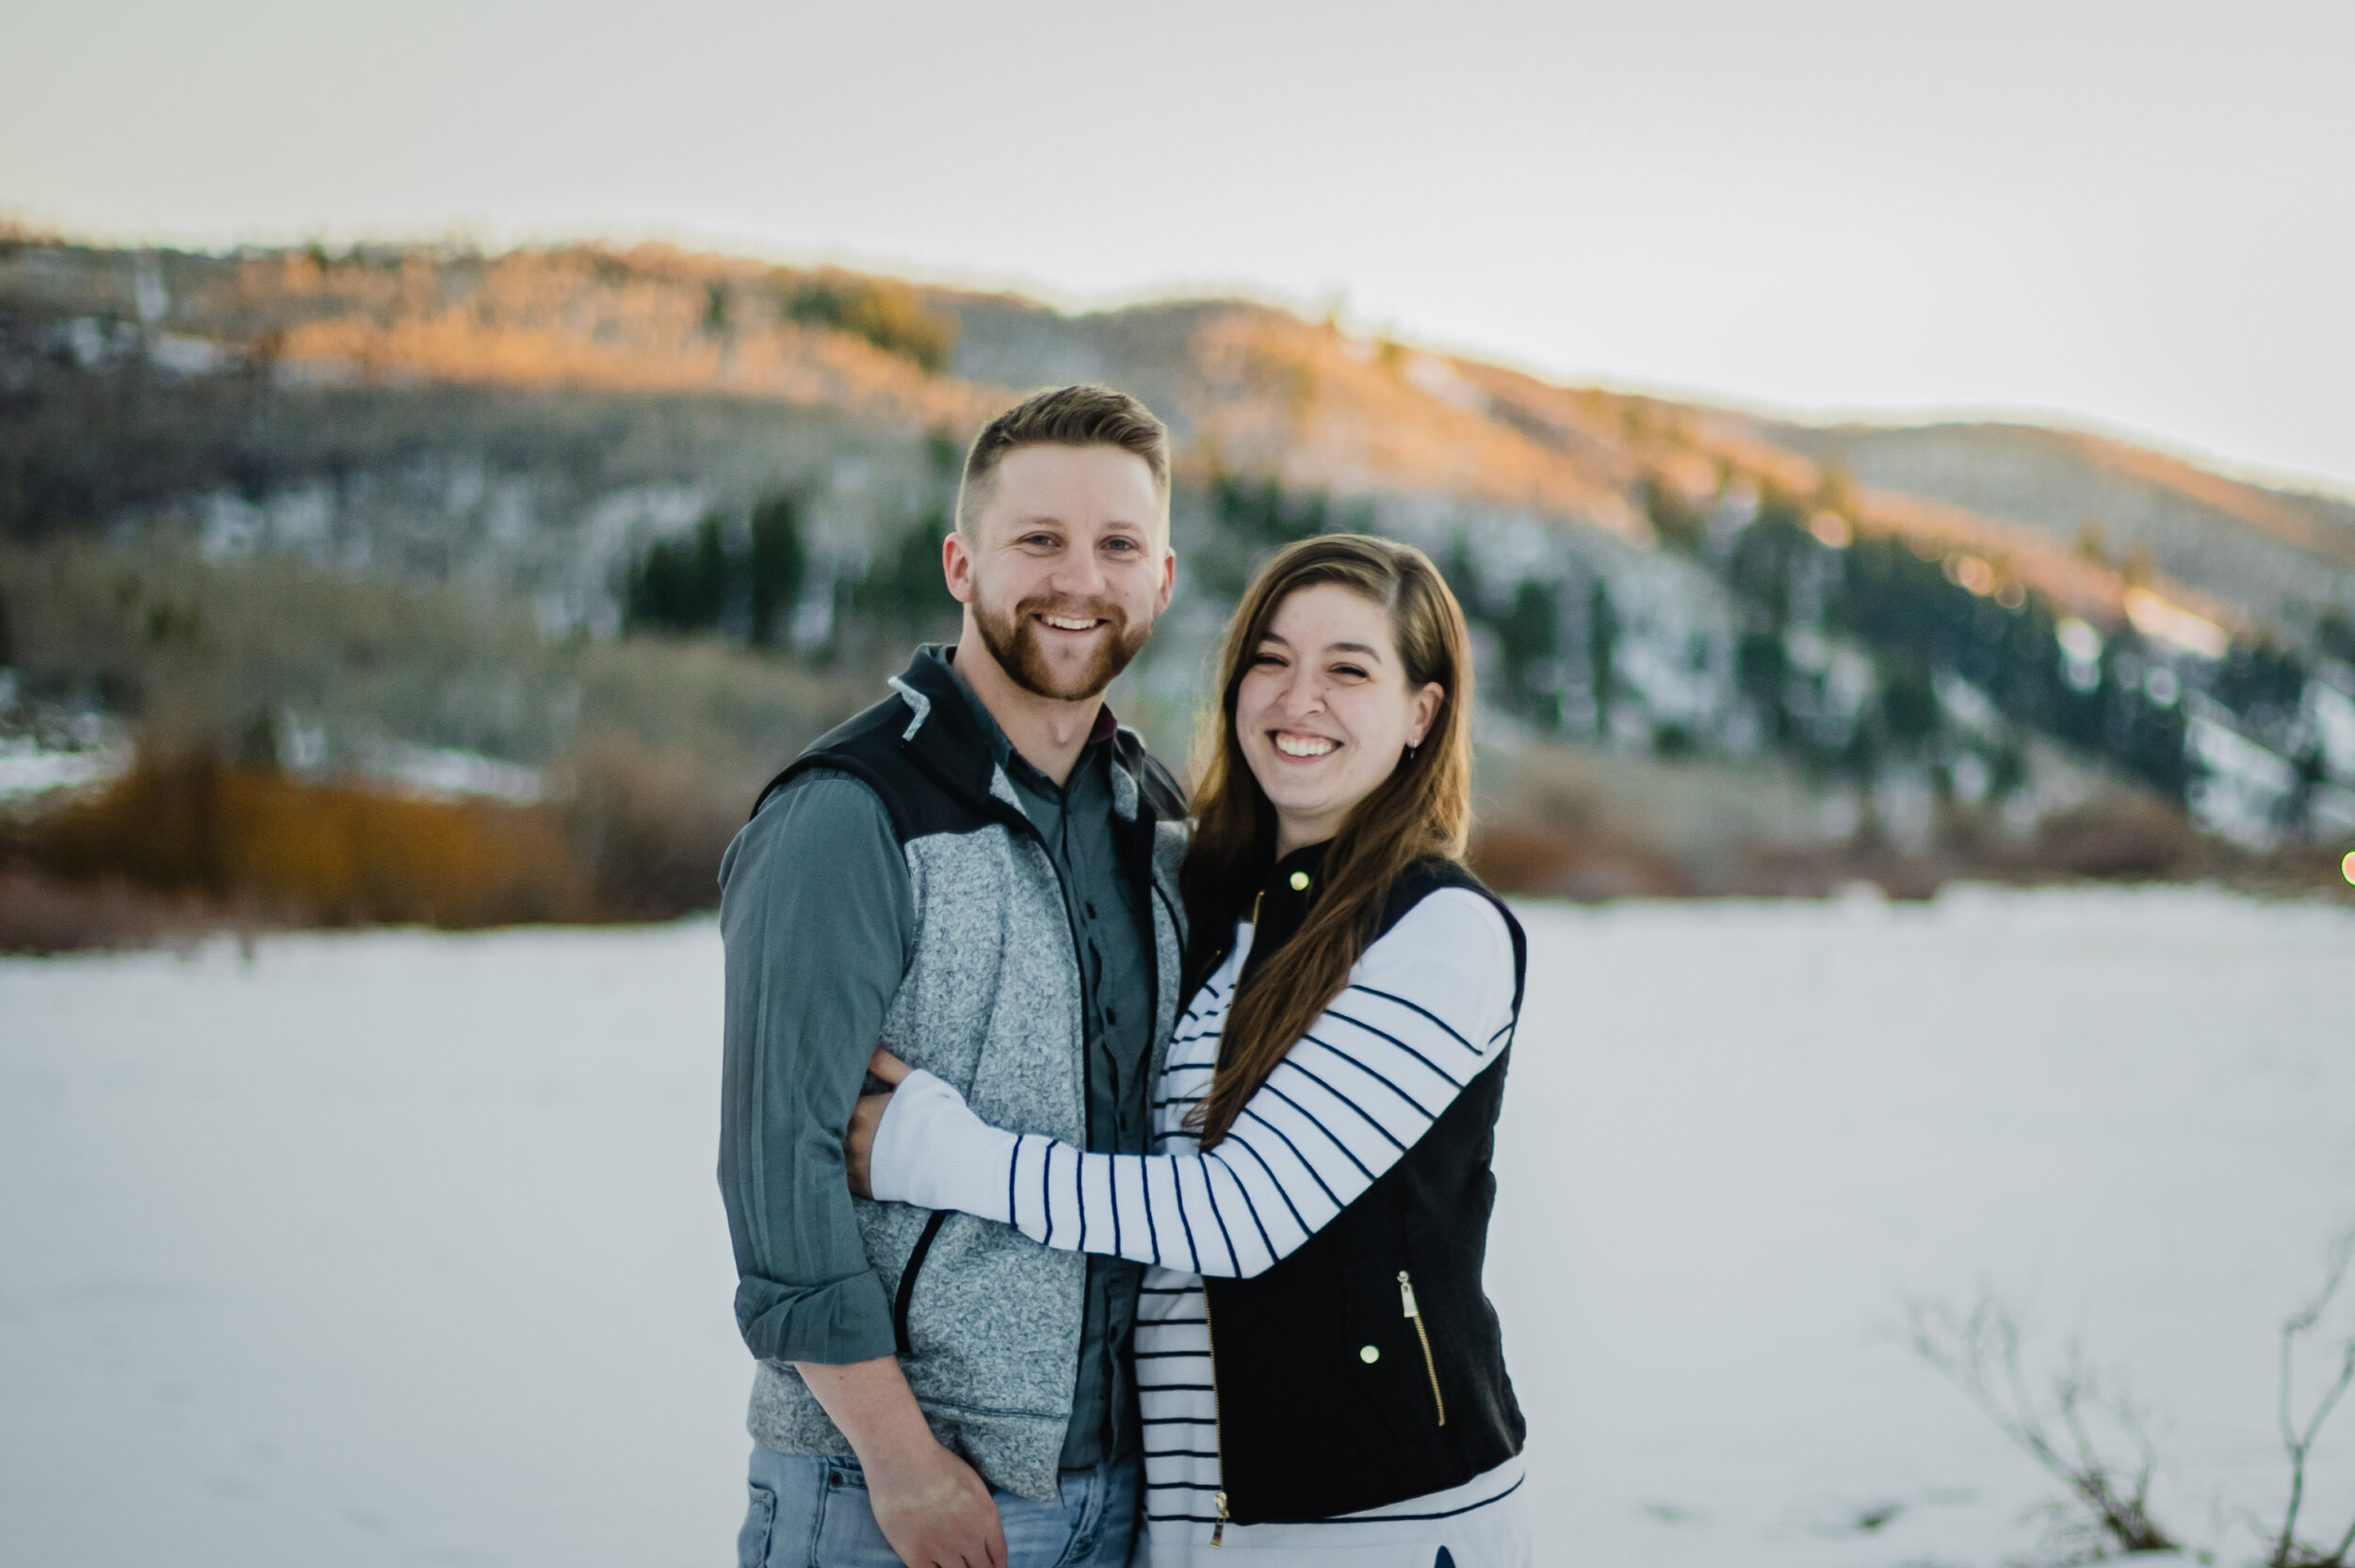
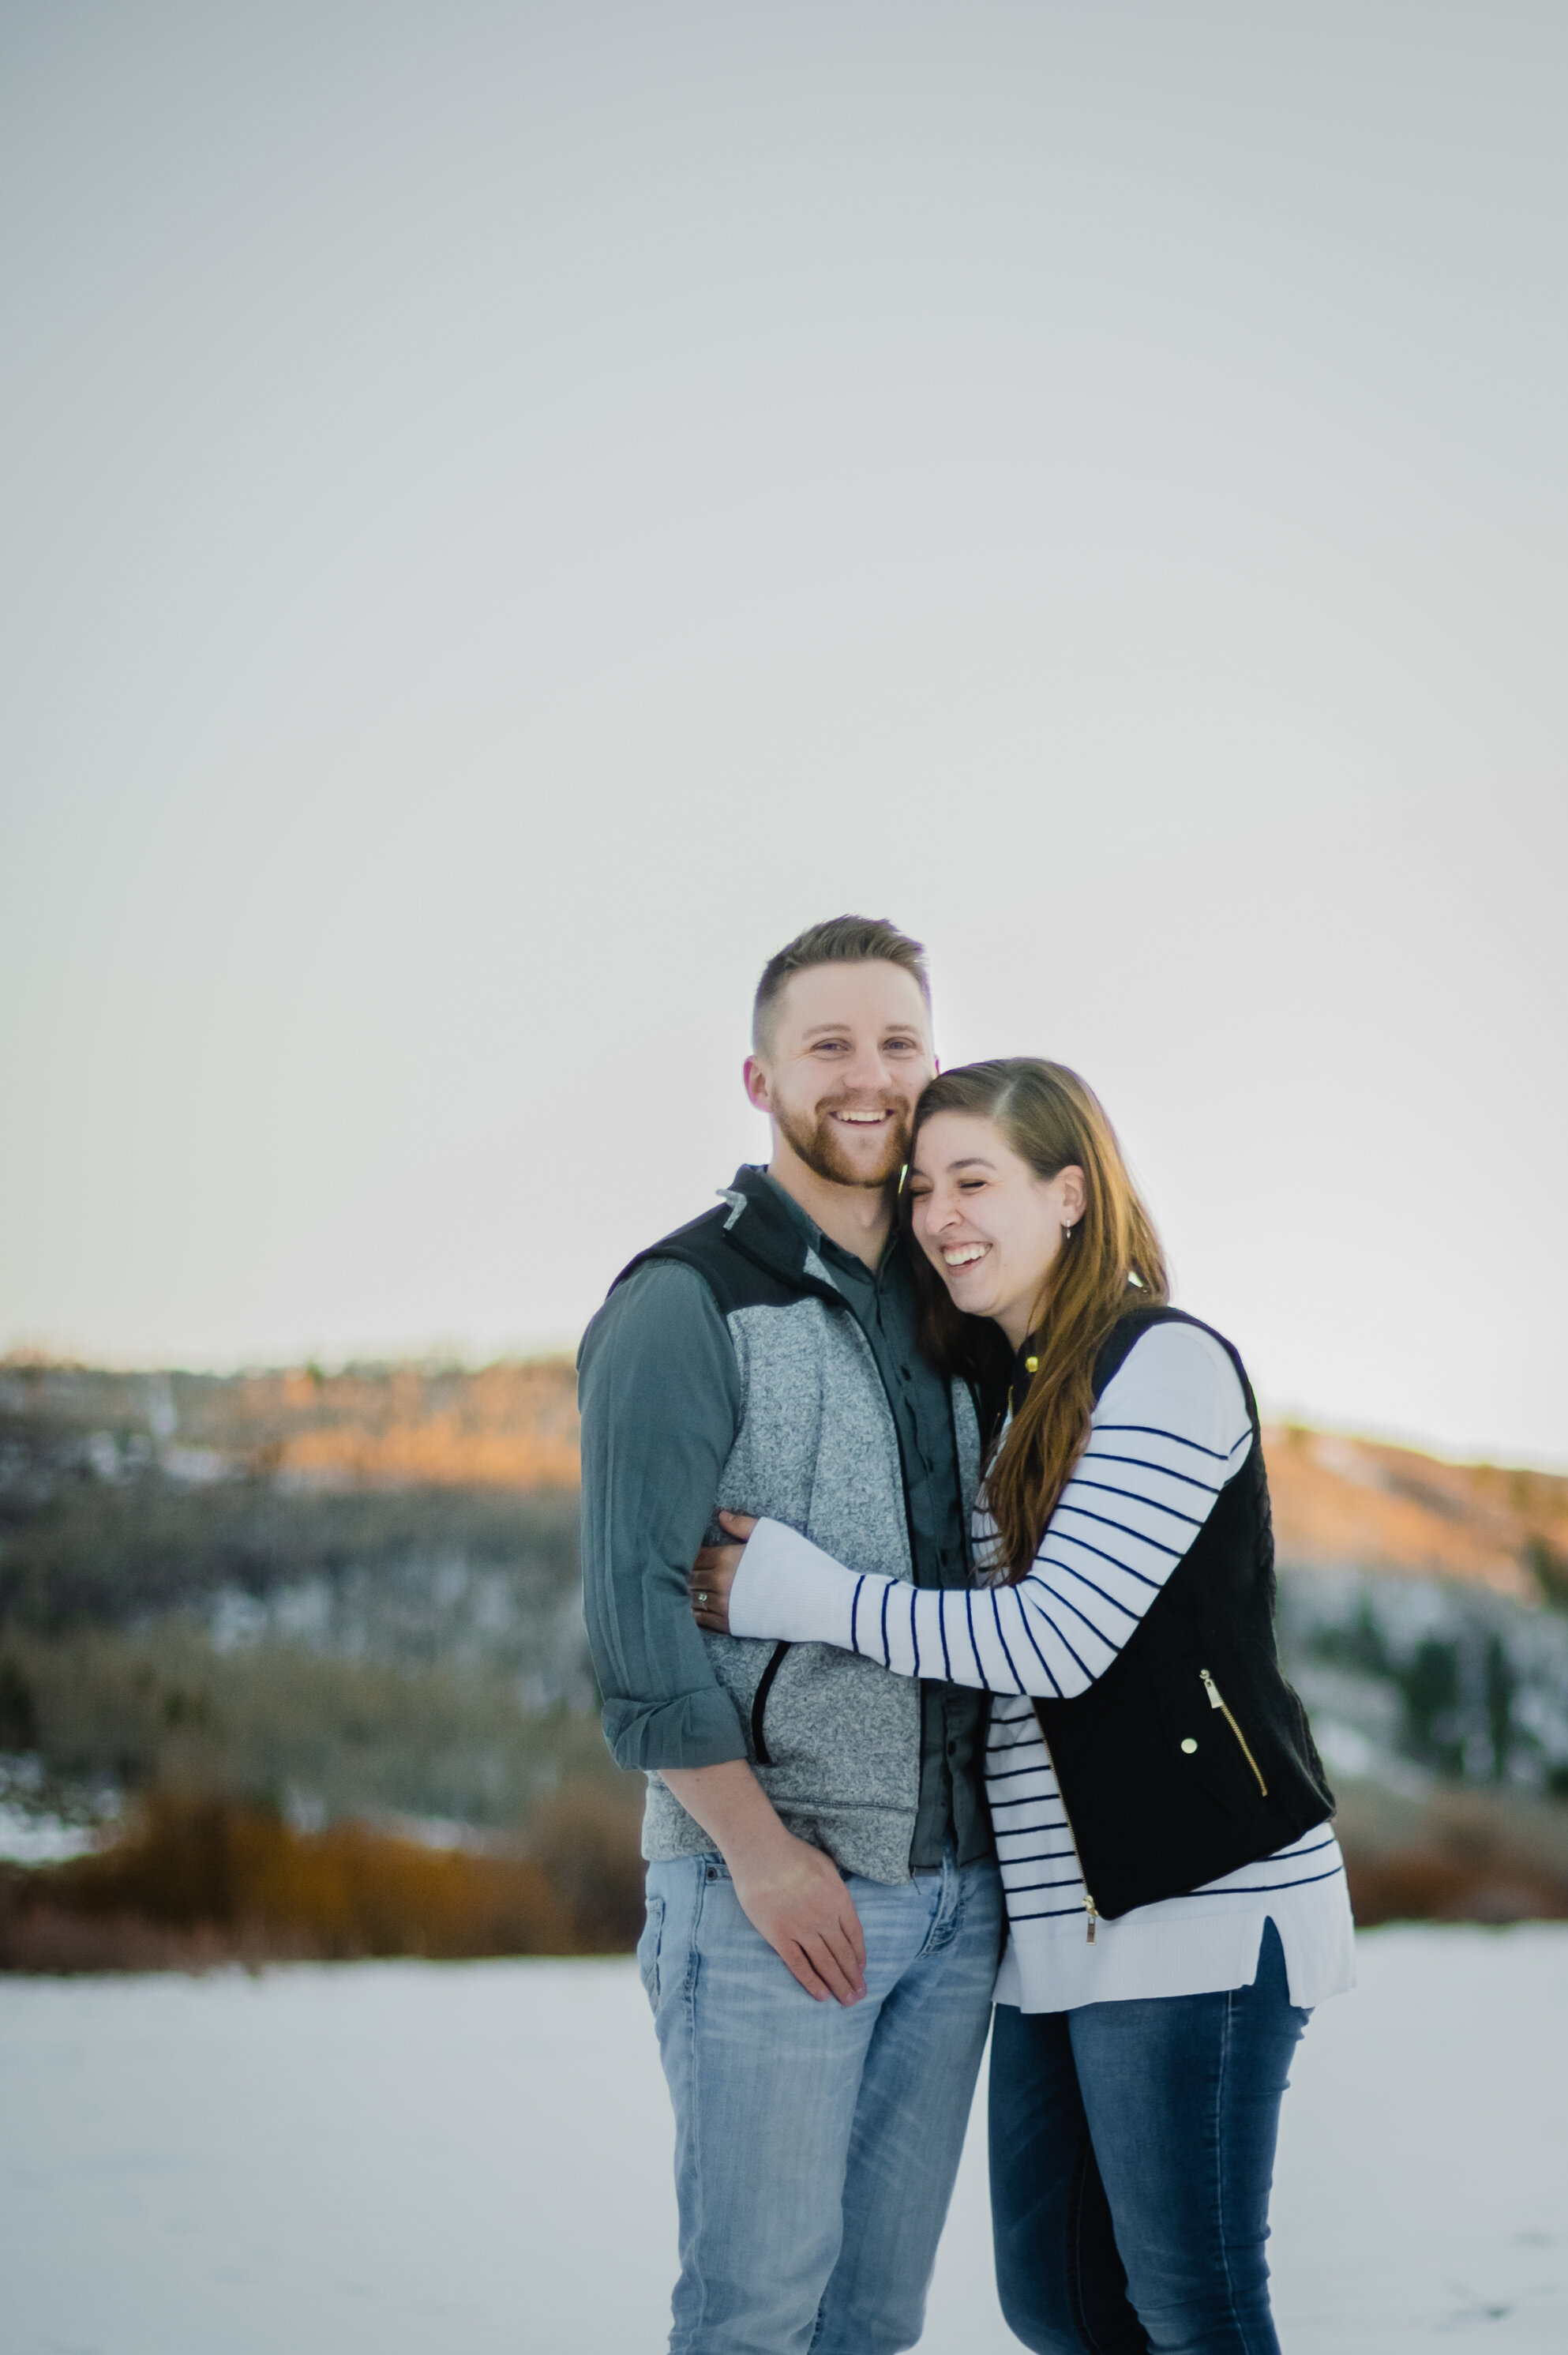
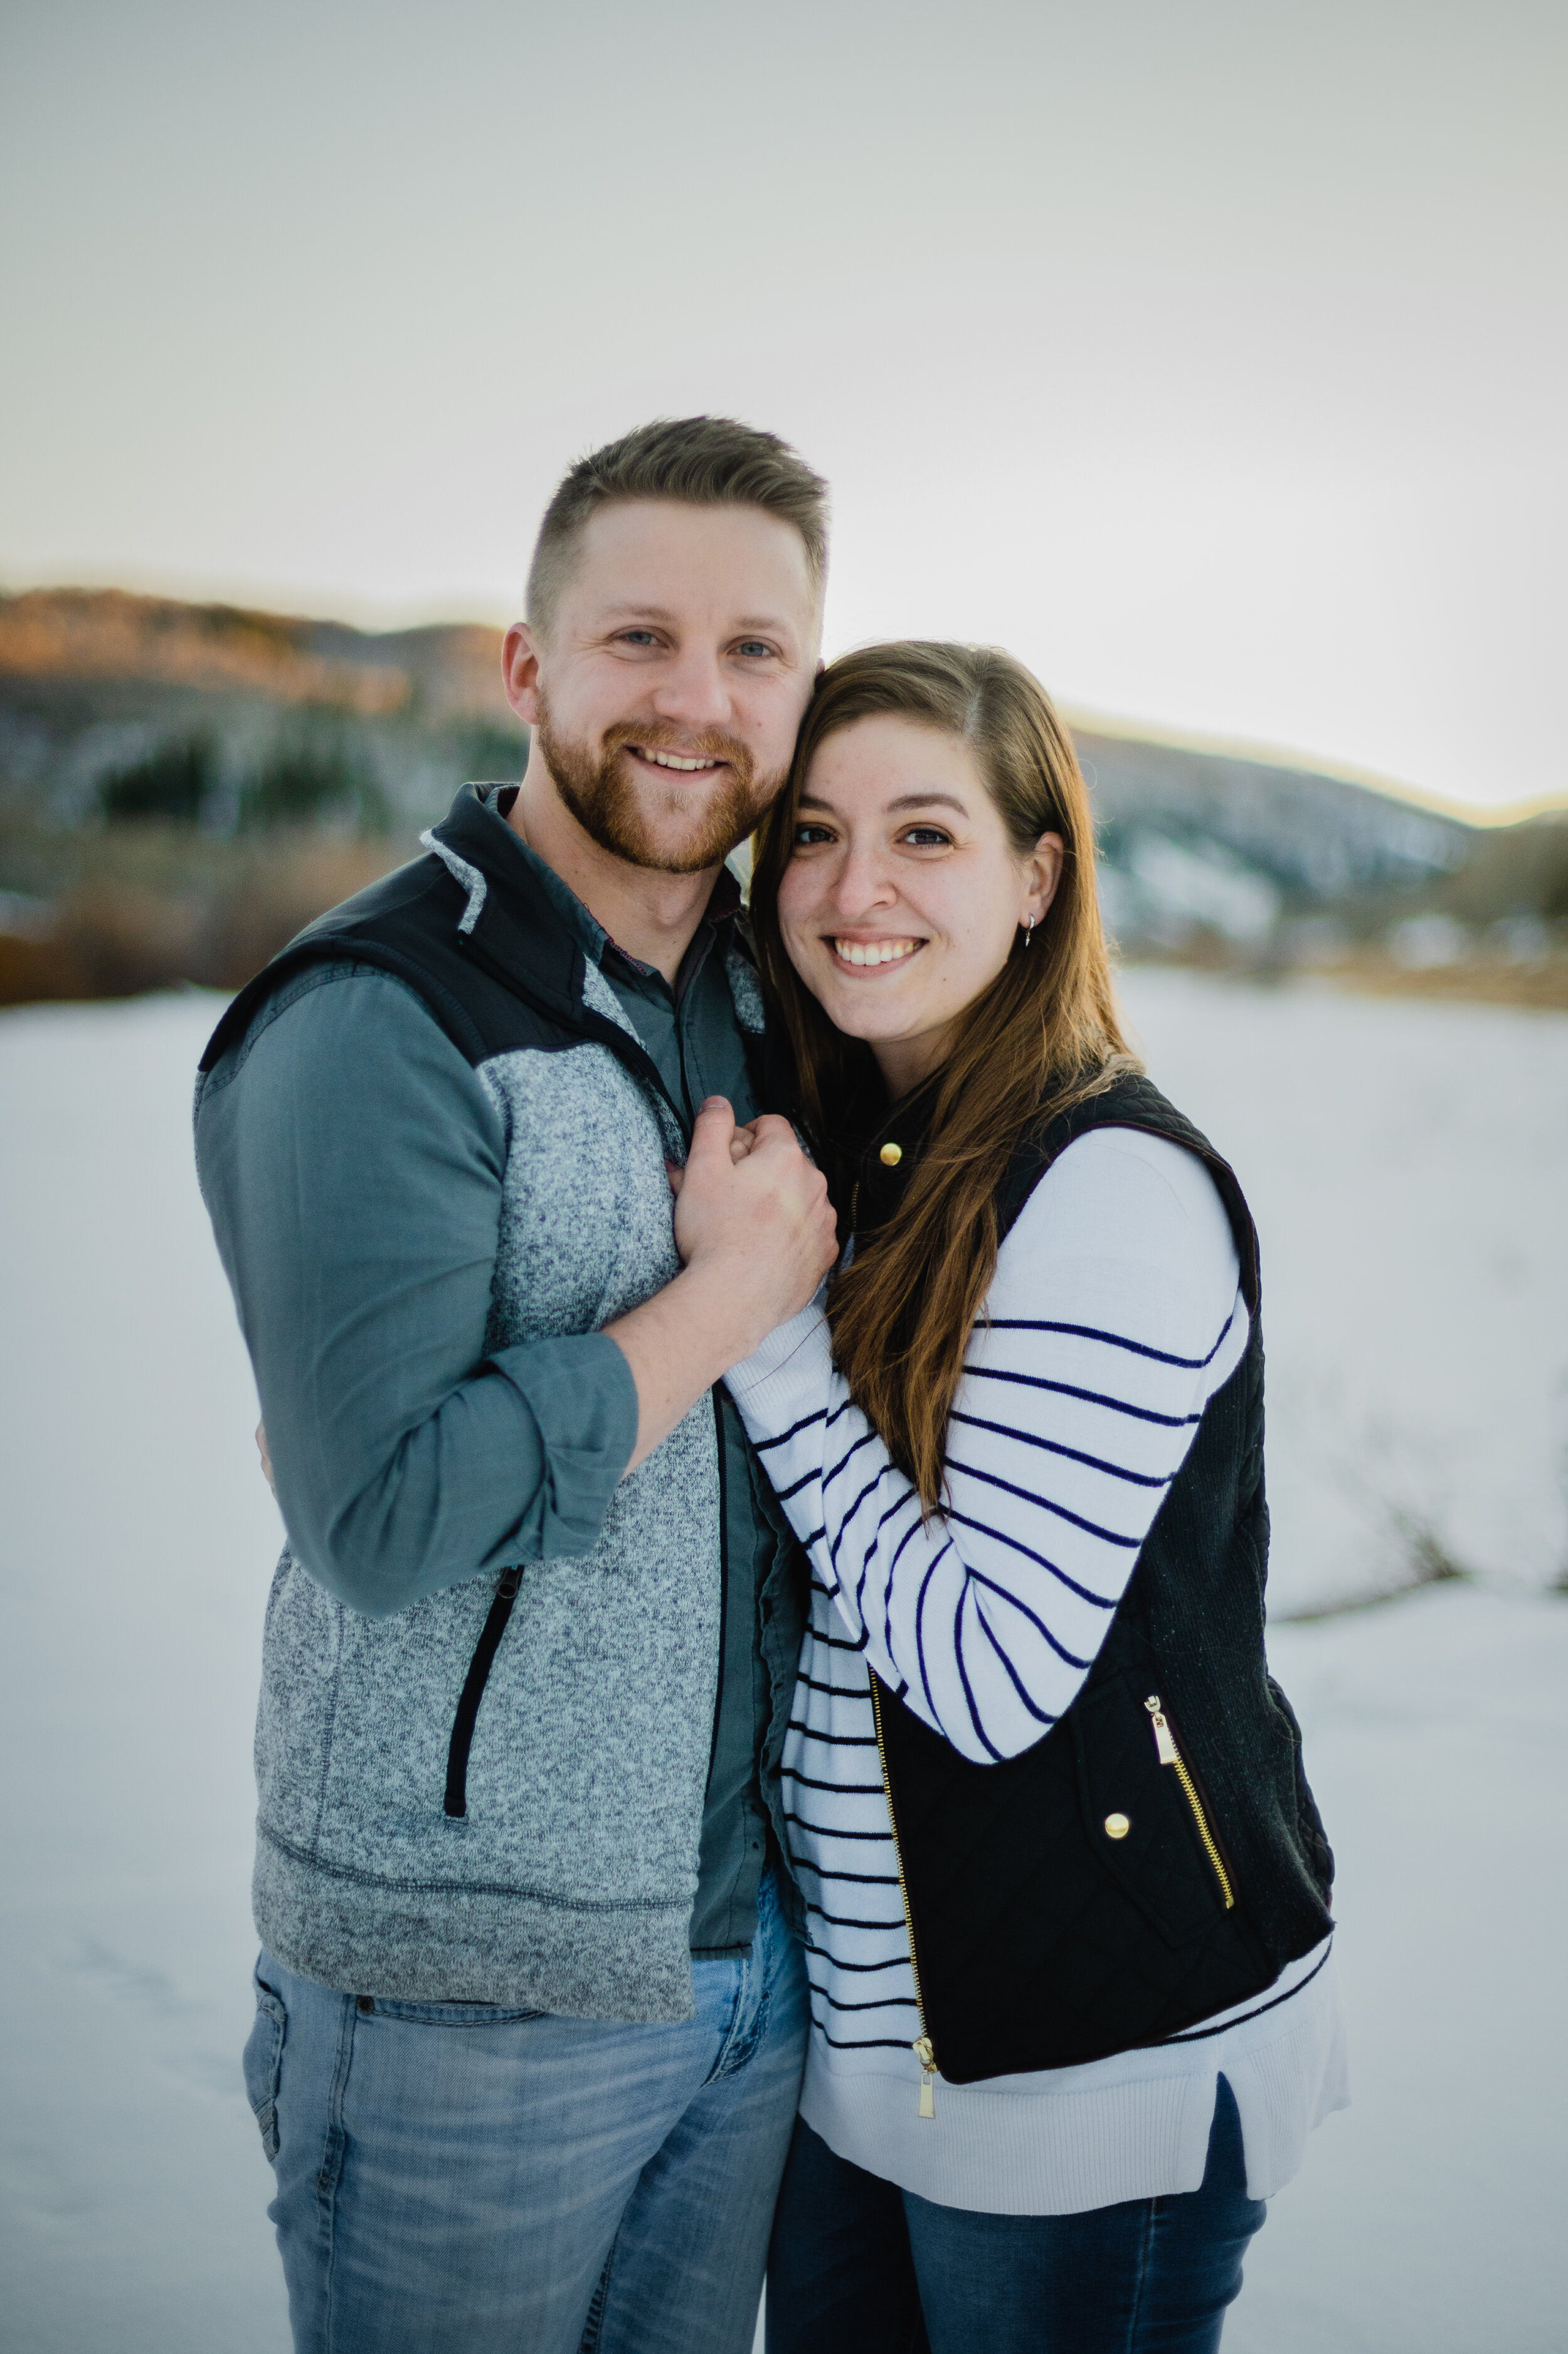
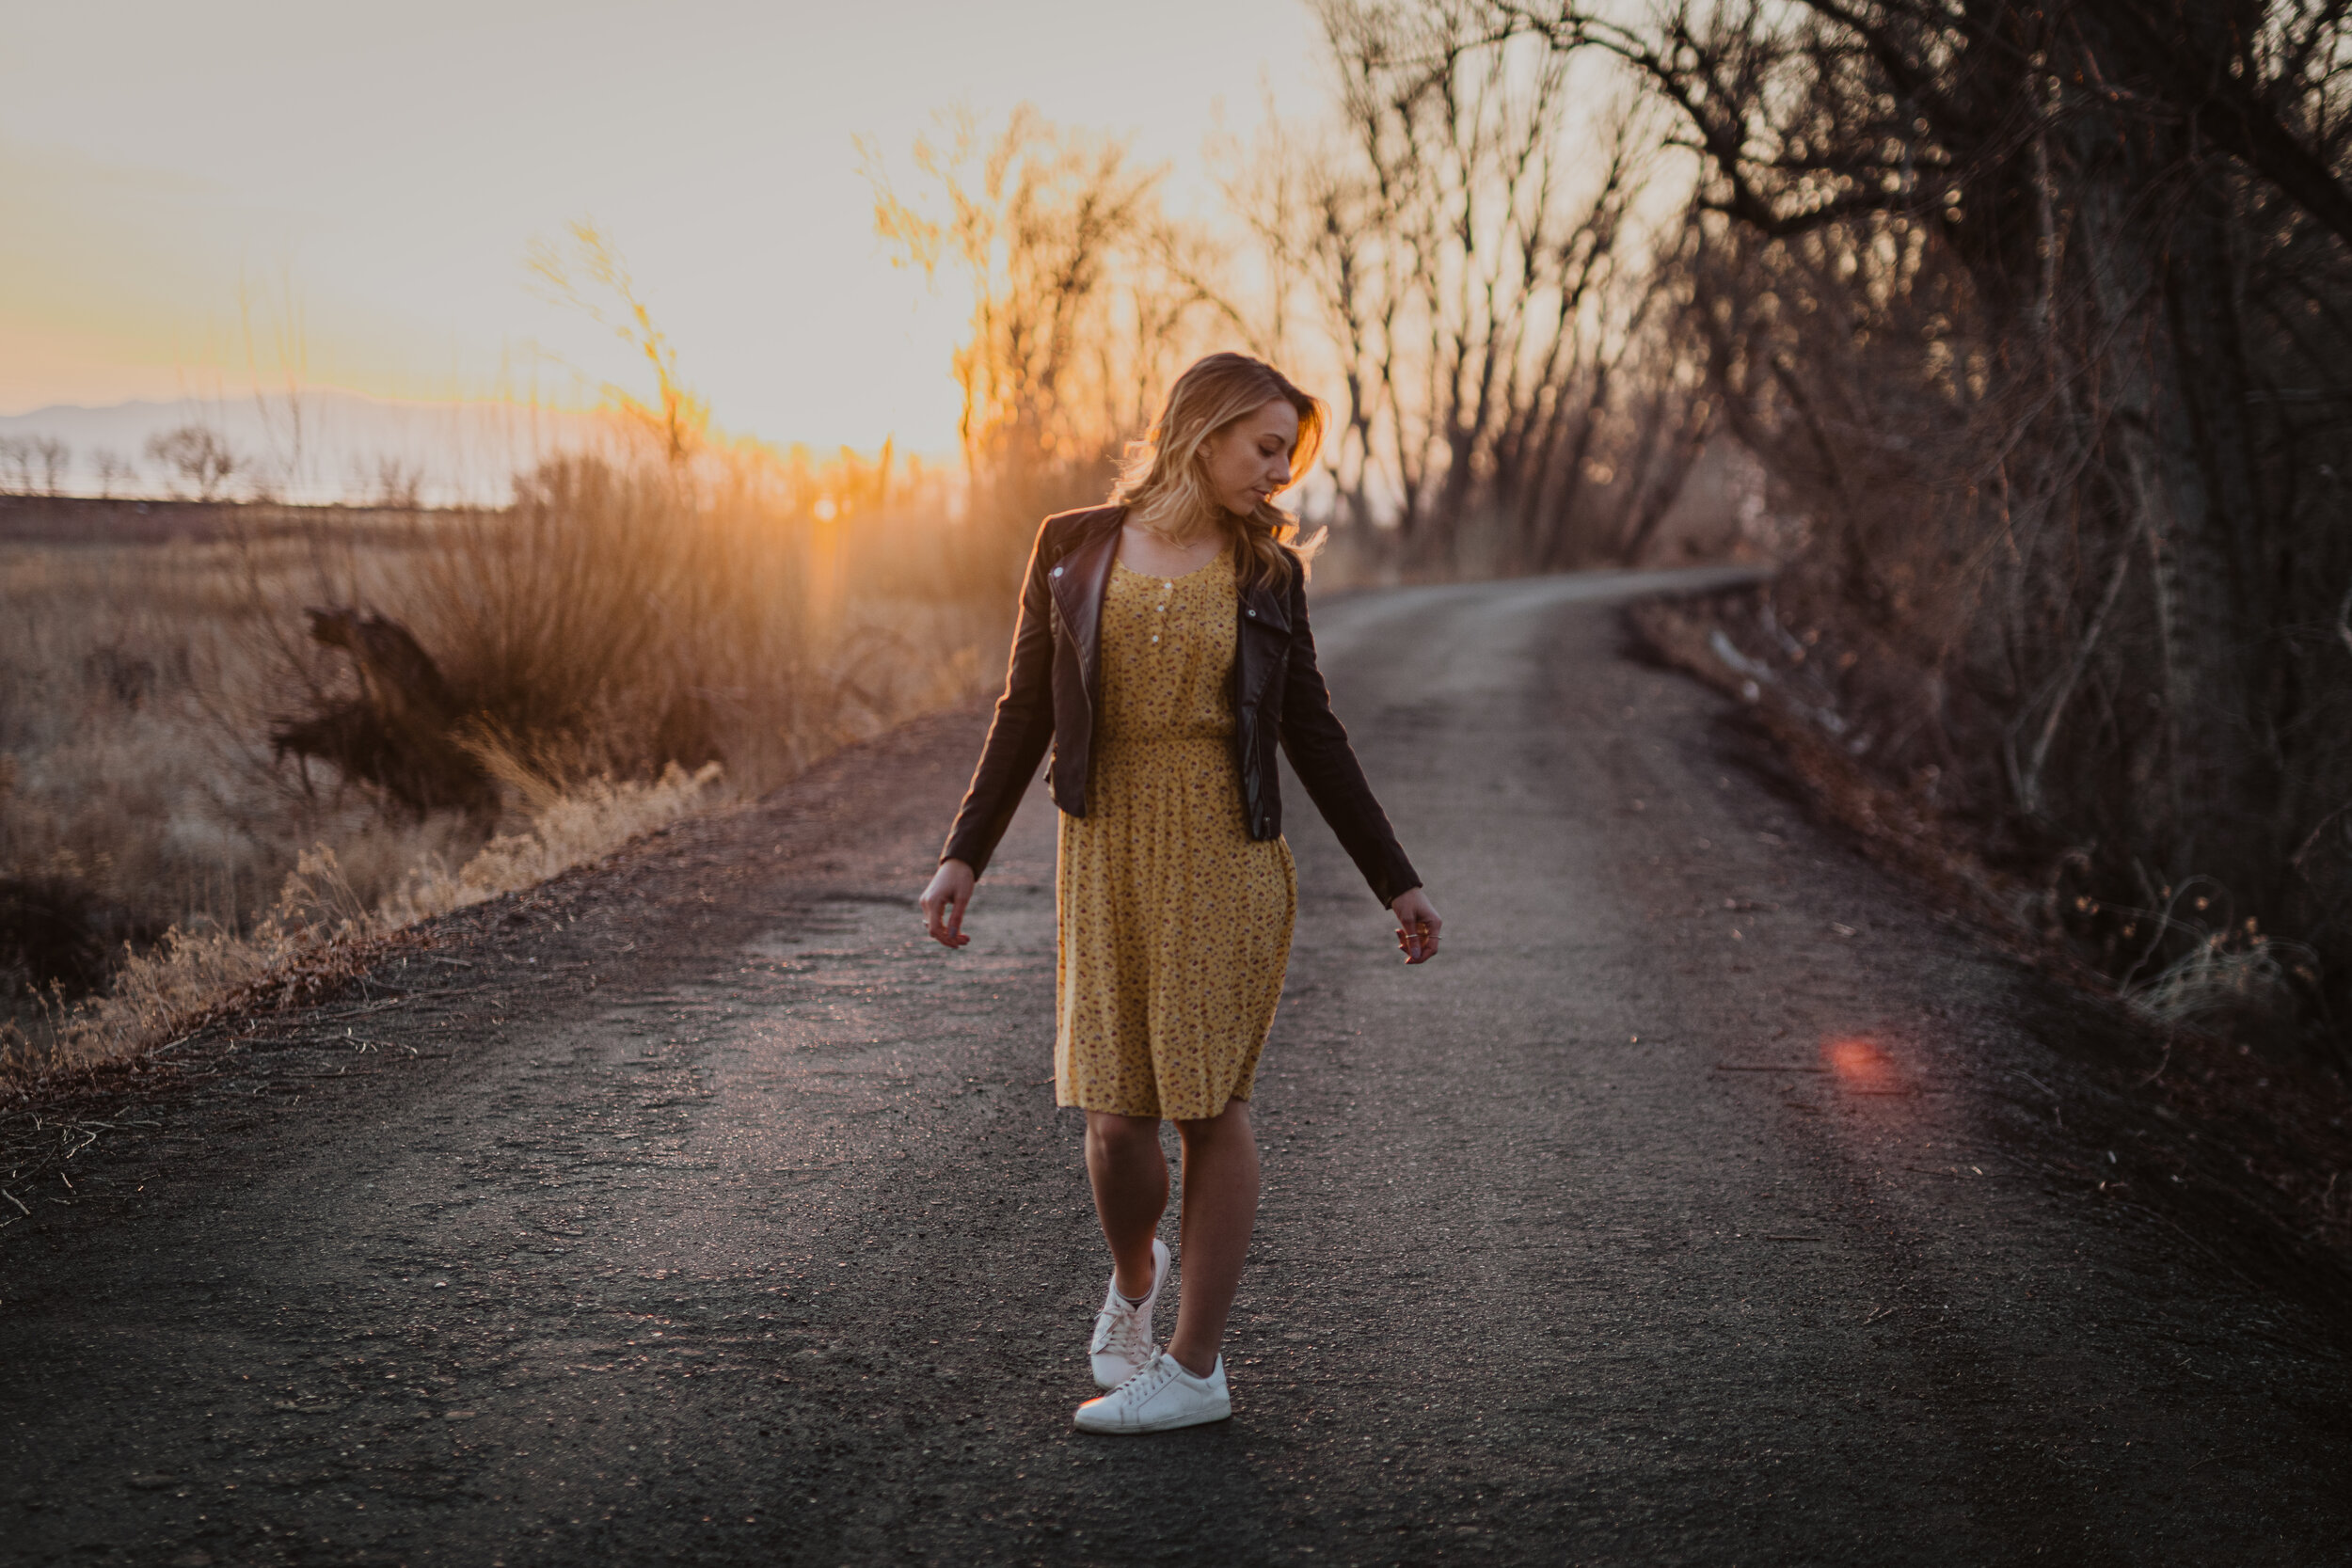
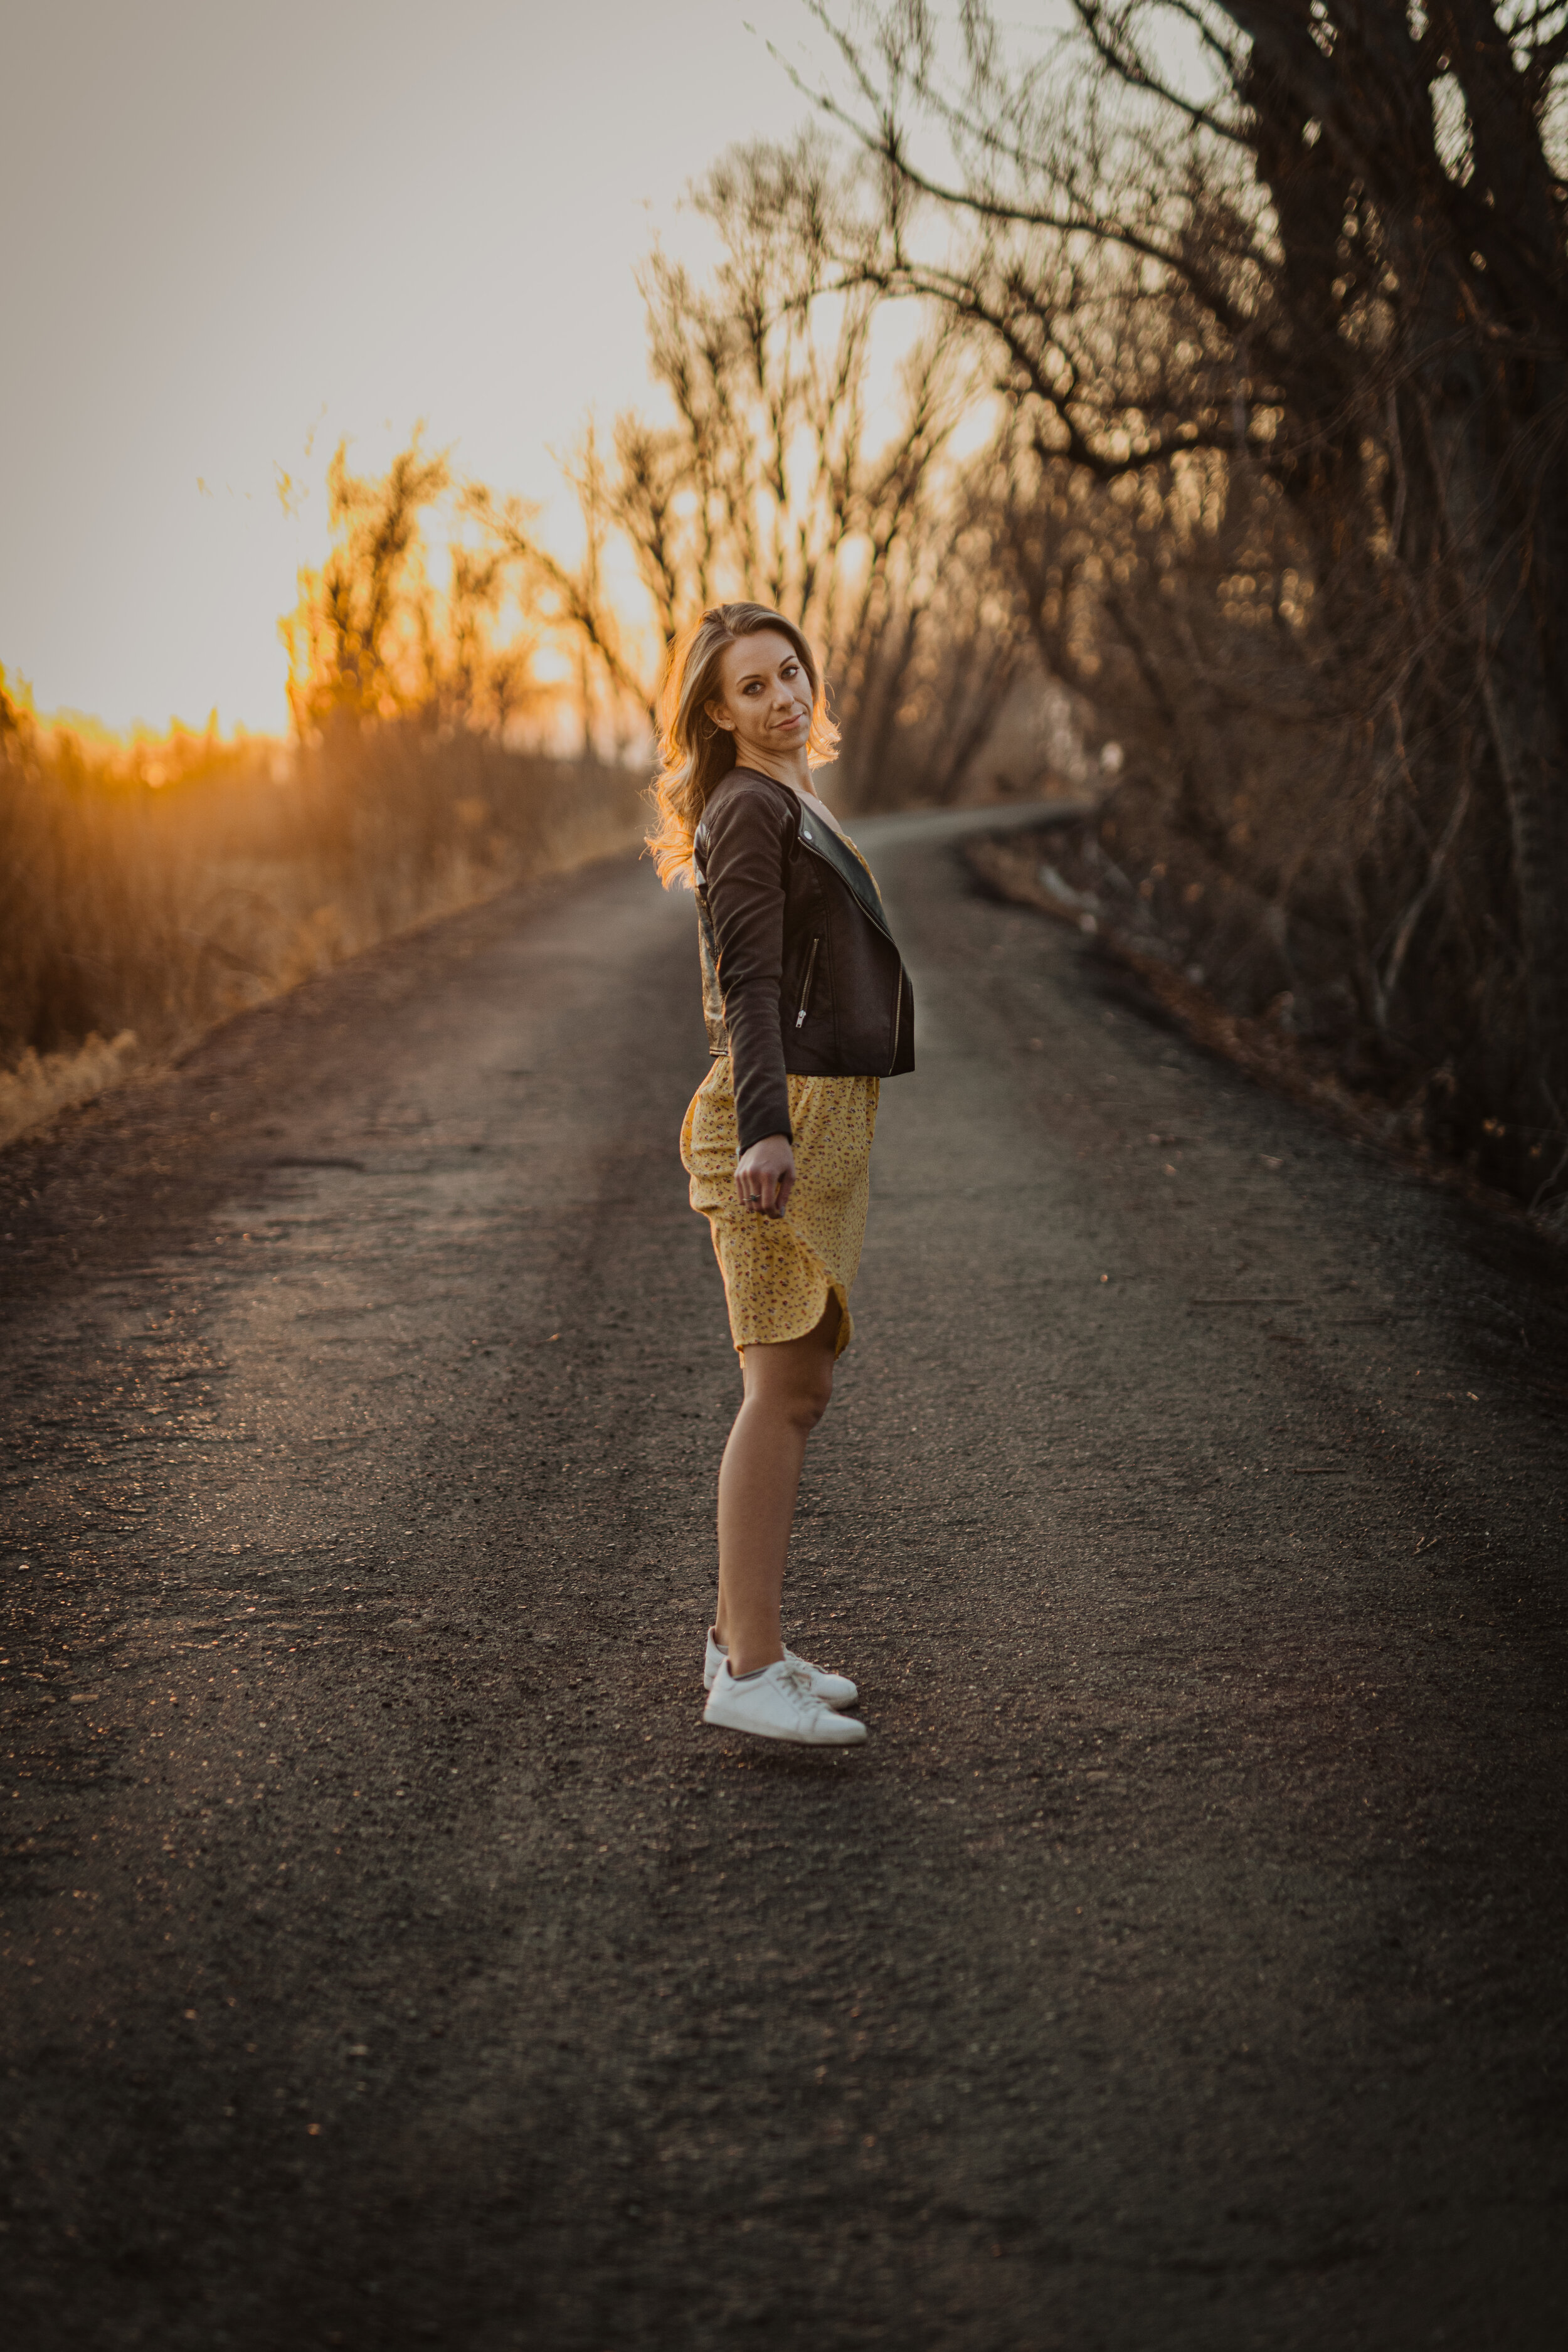
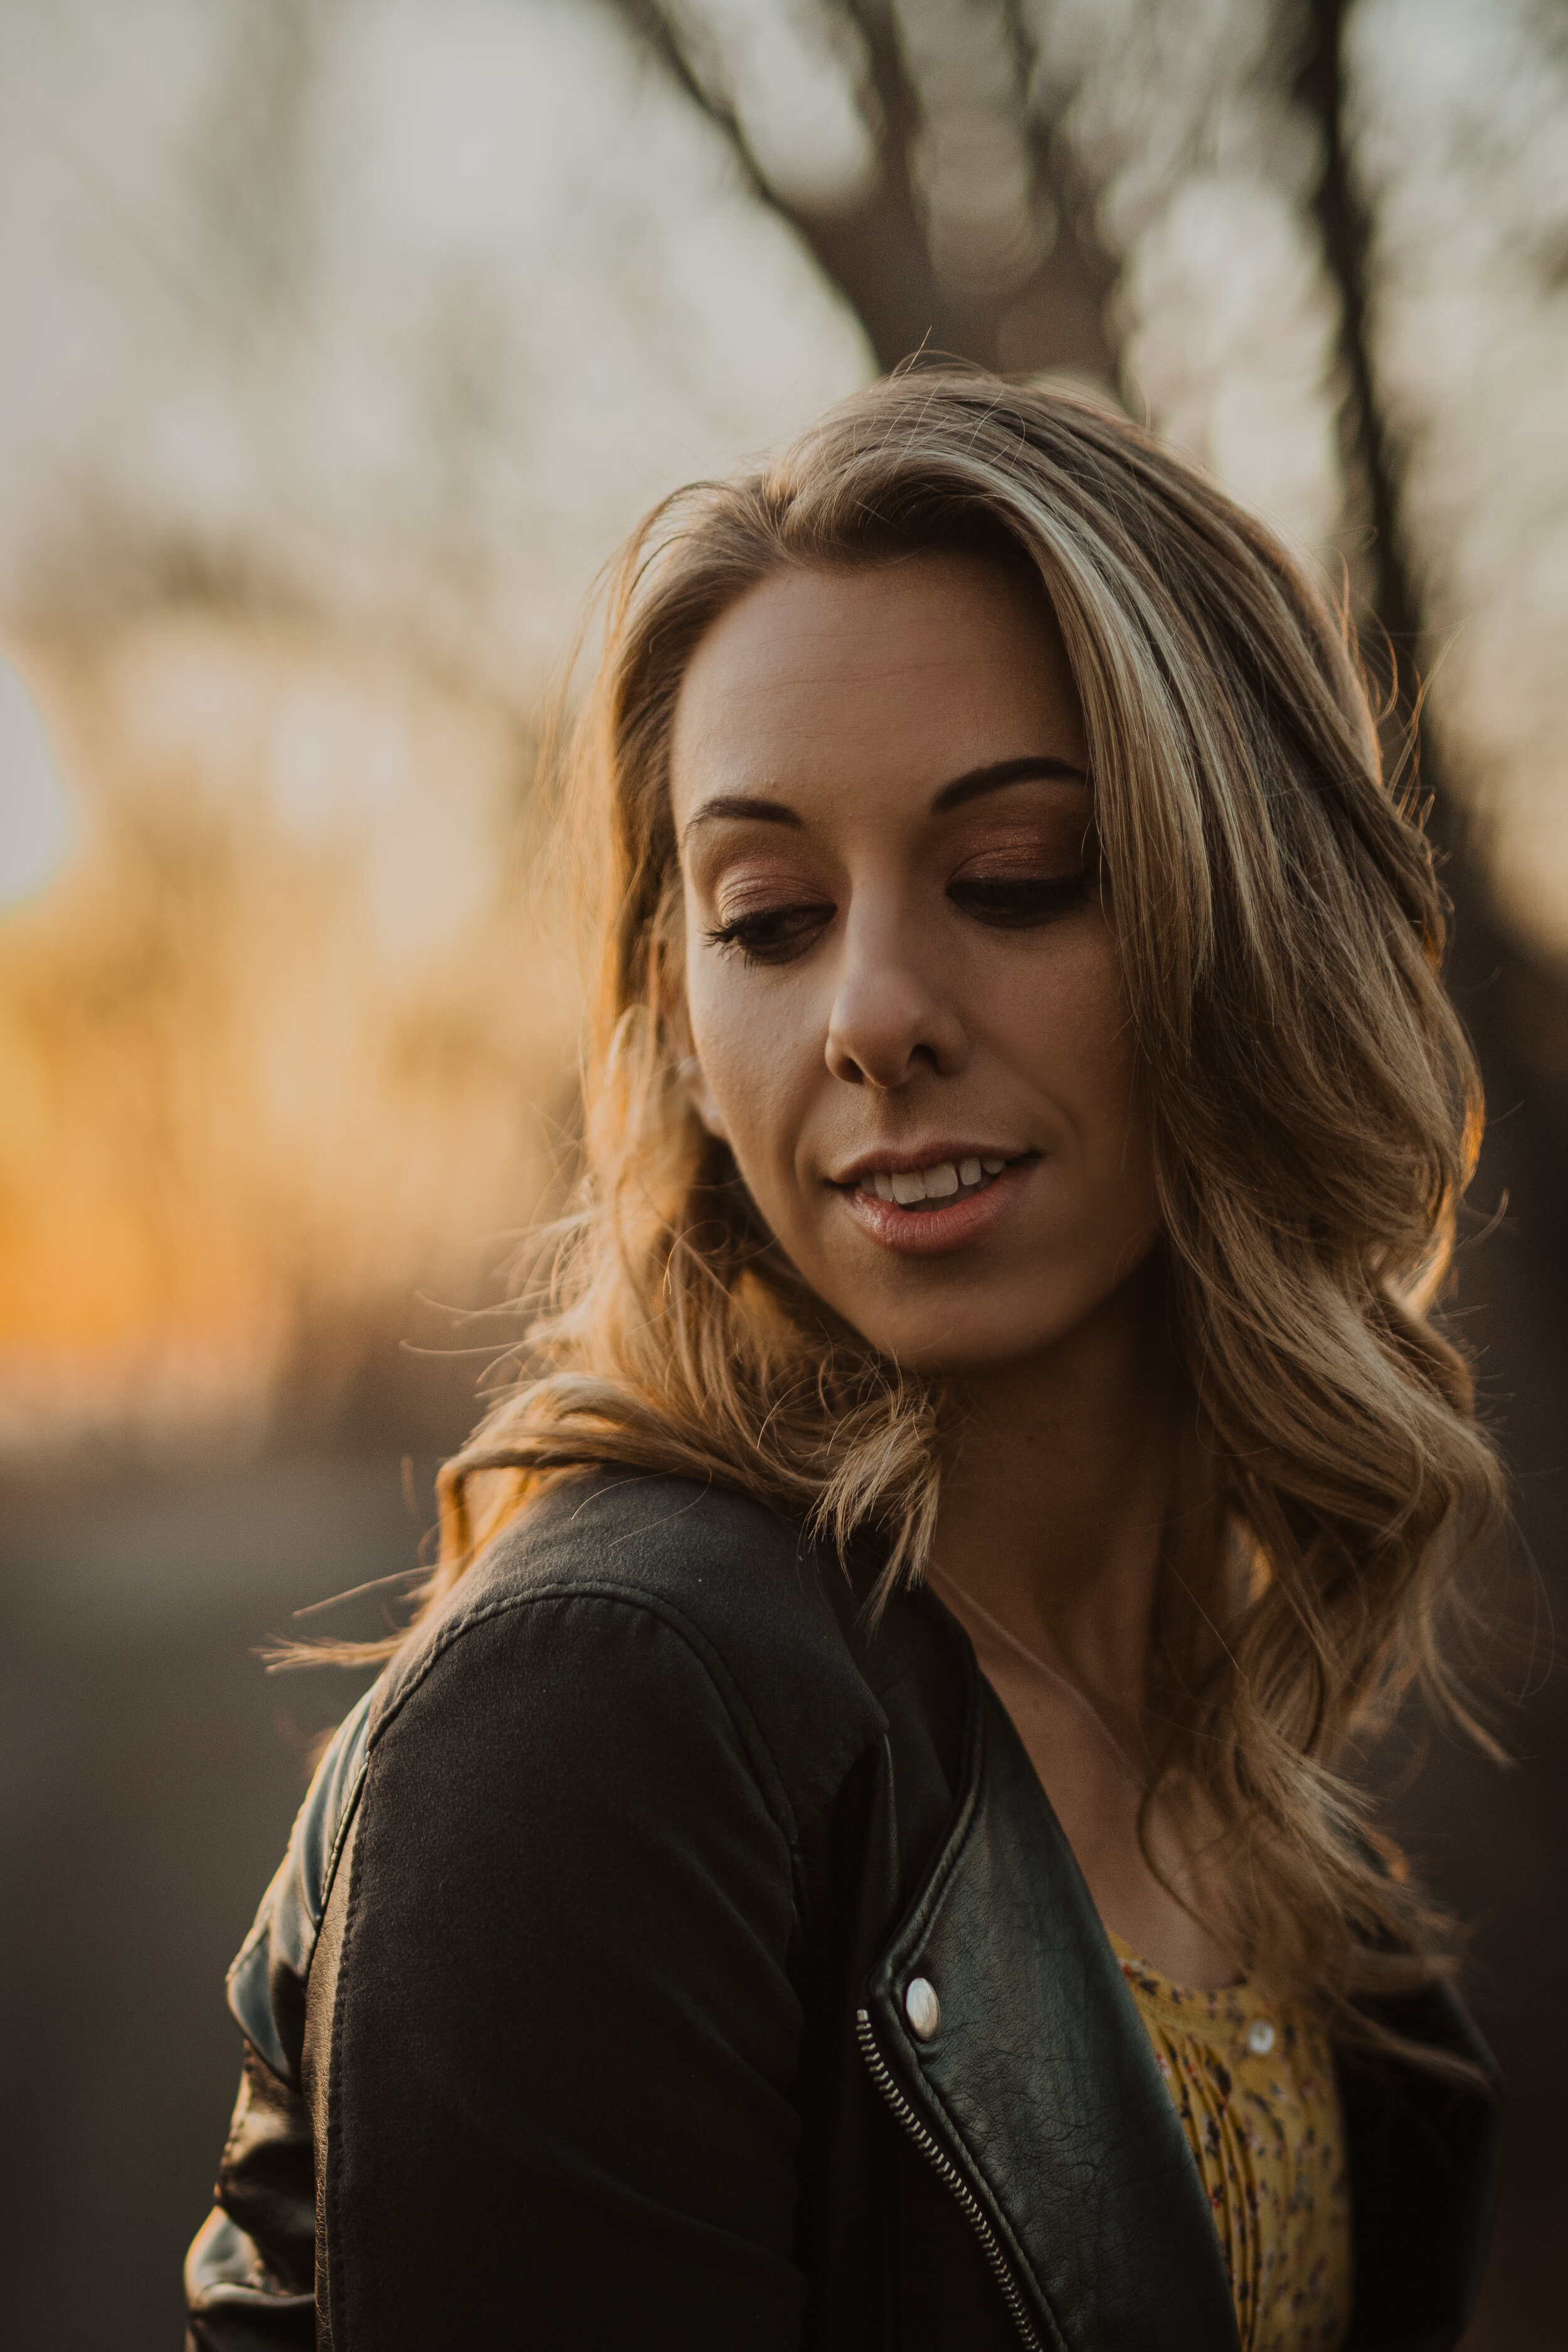
About Me

What to say, what to say… I’ve never really enjoyed talking about myself, to be honest. Maybe it’s just an introvert thing? As I’m here thinking about what anyone would possibly care to know about me, my mind goes to.. I don’t know, personality type? (My fav is the Myers-Briggs 16 personality types. ISFJ over here if anyone wants to know 🙋🏻♀️). I don’t feel like my life is really all that unique enough to share, to be honest.
Let’s go through the basics, yeah? I was born in Crescent City, California, moved to Gresham, Oregon when I was three, and have always (and stubbornly, will always) consider myself an Oregonian! I love the rain, the green, the mountains and hills, basically everything about Oregon. I would move back there in a heartbeat if it weren’t so dang expensive to live there. I was raised in a big family with only one sister, so if you think I was beat up by a bunch of brothers for the duration of my adolescence, you’re 100% correct
My family was always doing something musical or artsy. To this day, one of our favorite pastimes is rocking out to ELO or listening to one of the kids playing Rachmaninoff or Chopin on the piano. We love singing and whistling. It’s all quite tender. And weird.
You can probably tell that my family is super important to me. I love being around family, capturing the love between couples and family members. There’s nothing more important in life!
Anyway, in between the tackles and half-nelsons from the bros, I was taking pictures with anything I could get my hands on: my mom’s camera phone, little digital cameras, even those cheap disposable film cameras. During high school, my mom got involved with the wrestling team my brothers were on. She took it upon herself to be the designated photographer at the wrestling meets and making highlight videos. I was often her second-shooter during those meets and I got some great exposure to the world of sports photography. Definitely got some great facial expressions at those tournaments.
If I remember correctly, it was sophomore year of high school that I got one of the best Christmas presents ever: my own DSLR camera 🥳 A Canon Rebel T3i. Man, was I on cloud nine. Now, photography was just a hobby at this point still, so my parents weren’t about to drop $2-3,000 on a brand new, super fancy camera. This thing was old. Like, old old. Something they purchased off of eBay from someone that had owned it for years. I didn’t care, though. It was a camera and I was going to make the most out of it. I think it came with two kit lenses, haha! At the time, I didn’t know much about how lens quality can really make a difference.
So, I set out taking pictures. Well, I wasn’t going crazy with the picture taking, but I took my best friend’s Senior pictures, a family friend wanted photos of her little toddlers, a newly engaged couple, etc. I would go outside and take pretty pictures of the fall leaves, or snow, or the sun shining through the trees in the Oregon forests. I loved witnessing beautiful scenes and making them last forever with my camera, in remembering the beautiful things in life that really help us get through those rough times.
Fast forward to a year after graduating college with a BA in music (suffice it to say, a career in music didn’t work out). I was working at a sales job in Utah, unhappy with what I was doing with my life and desperately wanting something… more. More meaningful, more fulfilling, something that would make me feel like I’m developing myself (and to keep me from dying of boredom). One day, my mom suggested that I make something more out of my photography. “You’re so talented at it—you could make it a business!” “Thanks mom, but you’re supposed to think that. I don’t know if I’m actually good enough to have people pay me. Plus, there are so many photographers out there. The market is saturated! I don’t know the first thing about starting my own business. The gear itself is crazy expensive. I would have to start my own website…” I was FULL of excuses. It wasn’t for another two years that I would finally decide to go for it and take a leap of faith. What changed? I’m not sure. I think it was the fact that I wanted to do something with my life that I was passionate about, that I could share with others, and that would bring meaning into my life. I was tired of the mundane tasks of a desk job (not that those can’t be fulfilling, not hatin’ on anyone). It was all those things, and the fact that I wanted to give something to people that they would cherish forever. I know, I’m getting pretty cheesy over here. That’s just how I roll.
Becoming a professional photographer has been one of the most exciting things in my life. There is always something to learn, to be happy about, to be worried about… It keeps life interesting and I love it. Capturing moments and making them into art is something so diverse, the possibilities are endless. I’ve met some amazing people! The people are what makes it all worth it. I love where I am so far, and I can’t wait to see where I end up on this journey! It’s gonna be great. 🥳
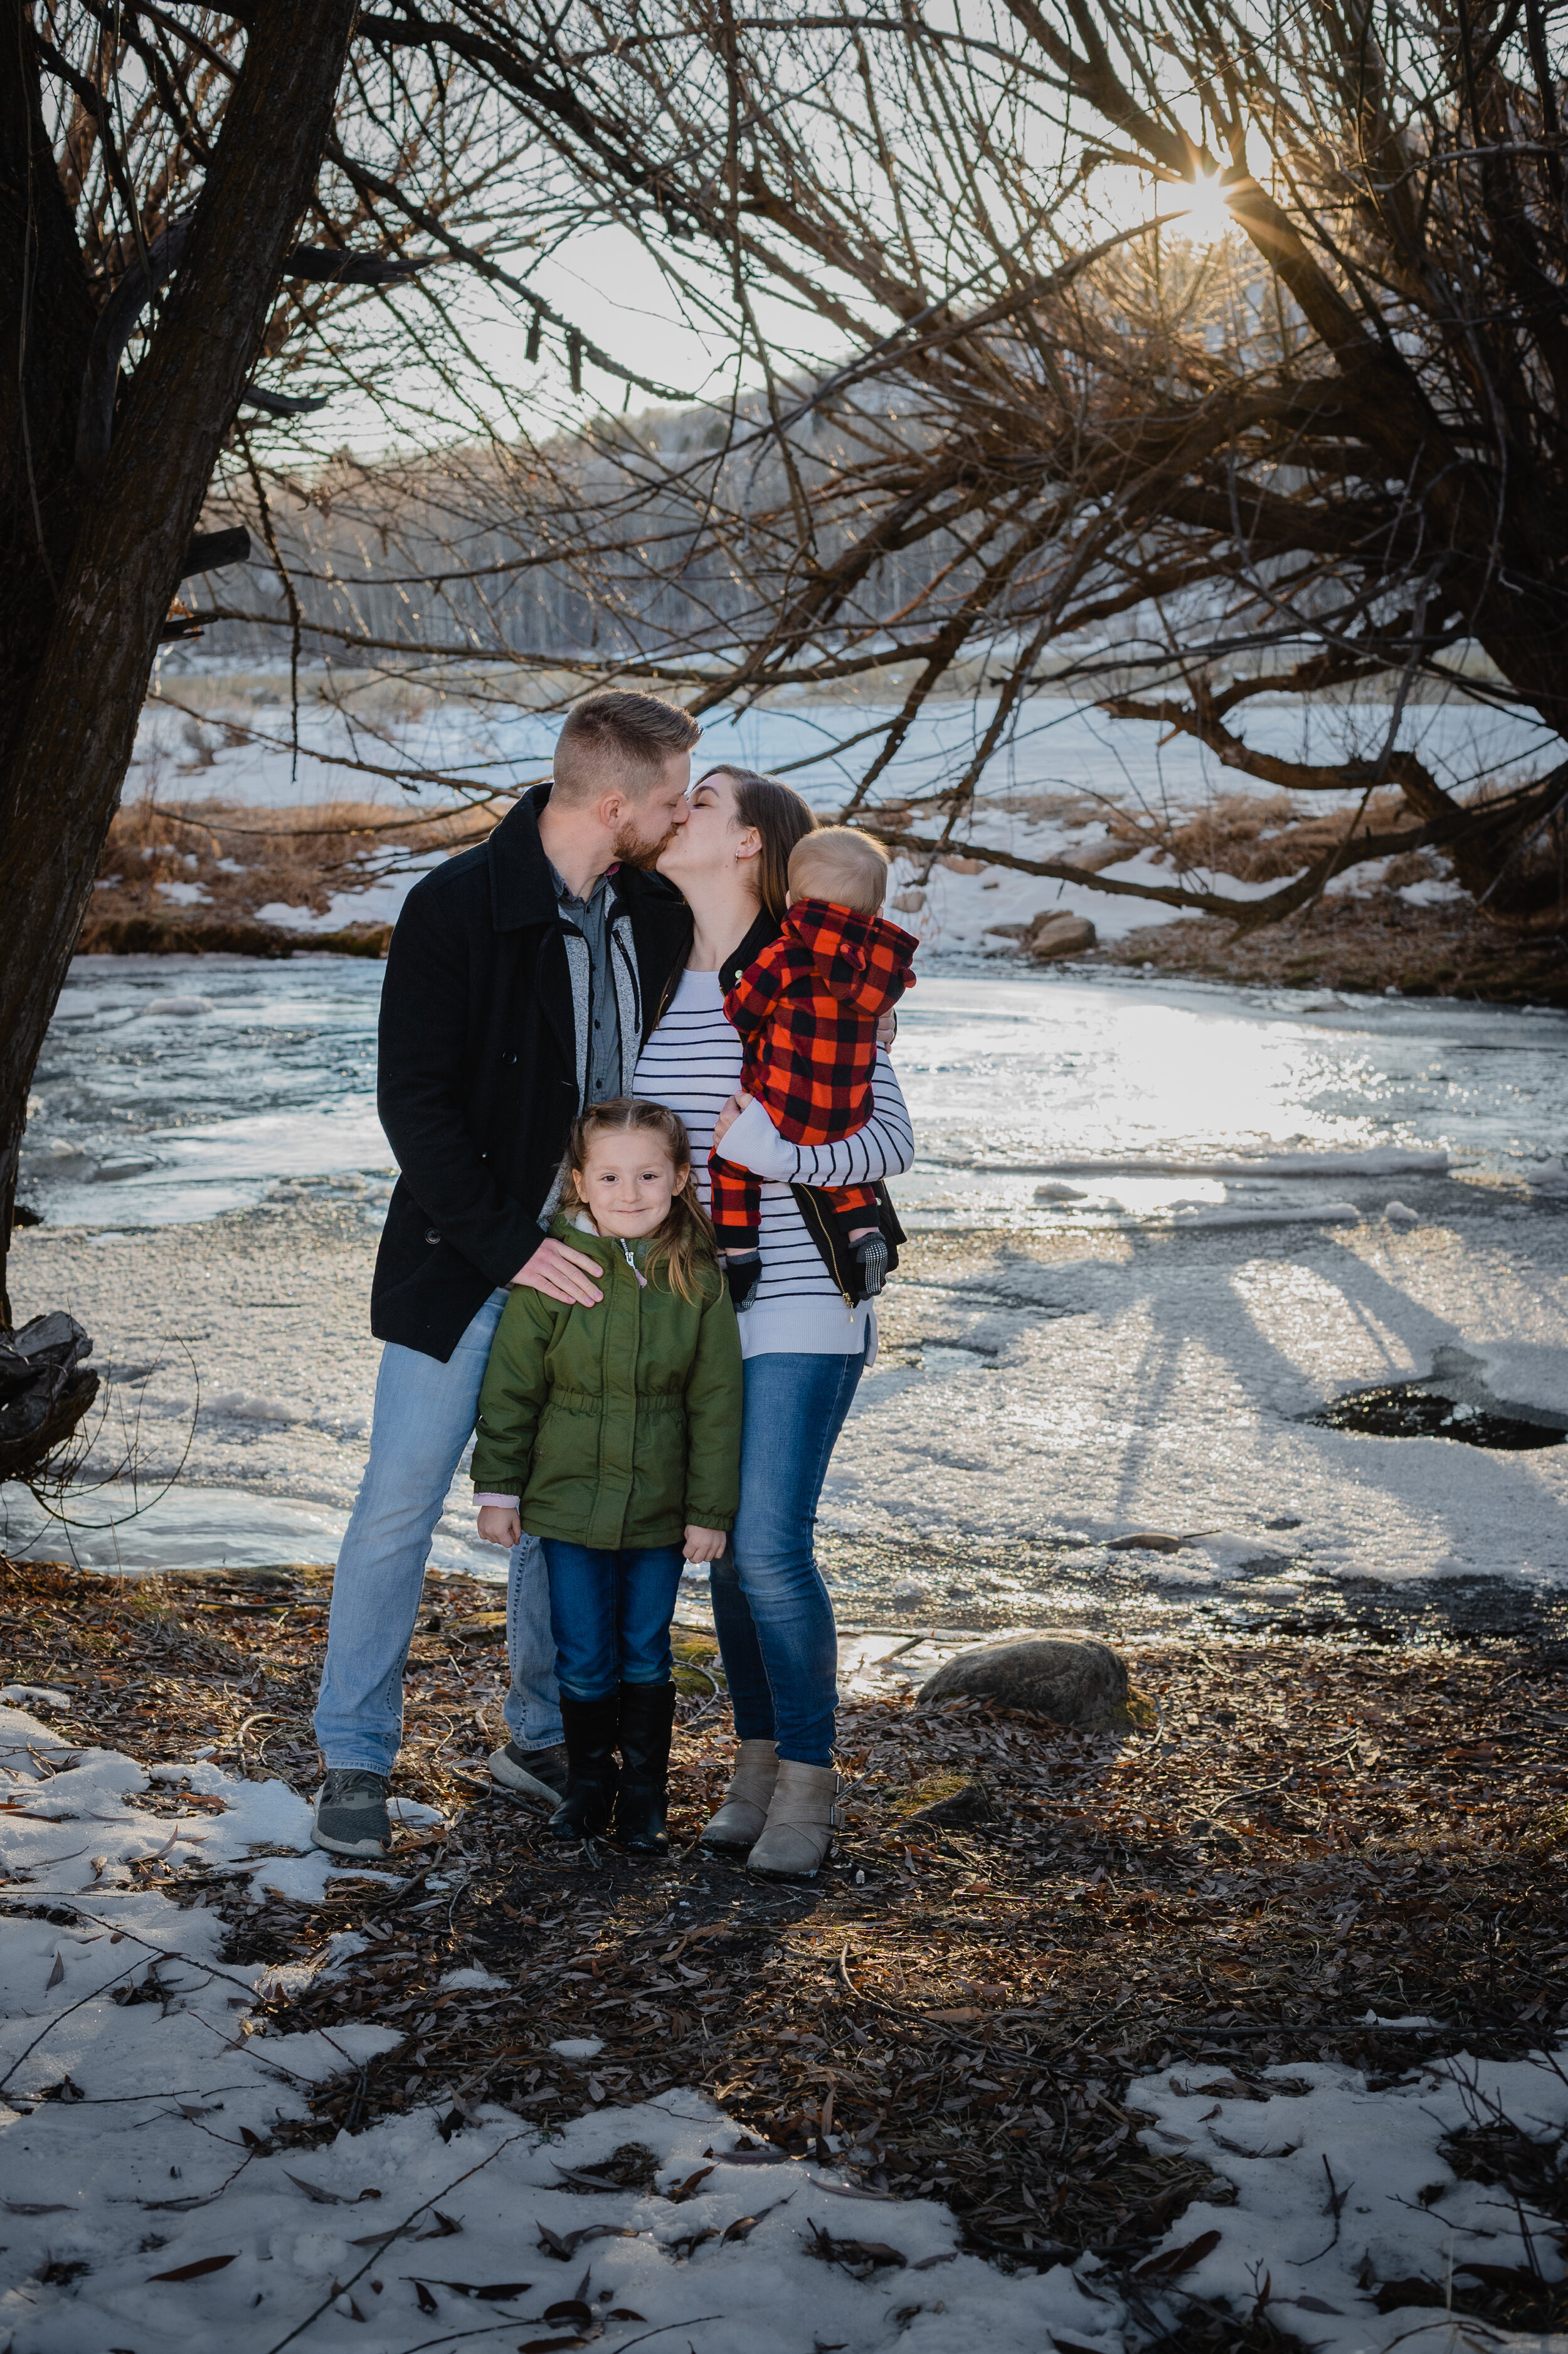
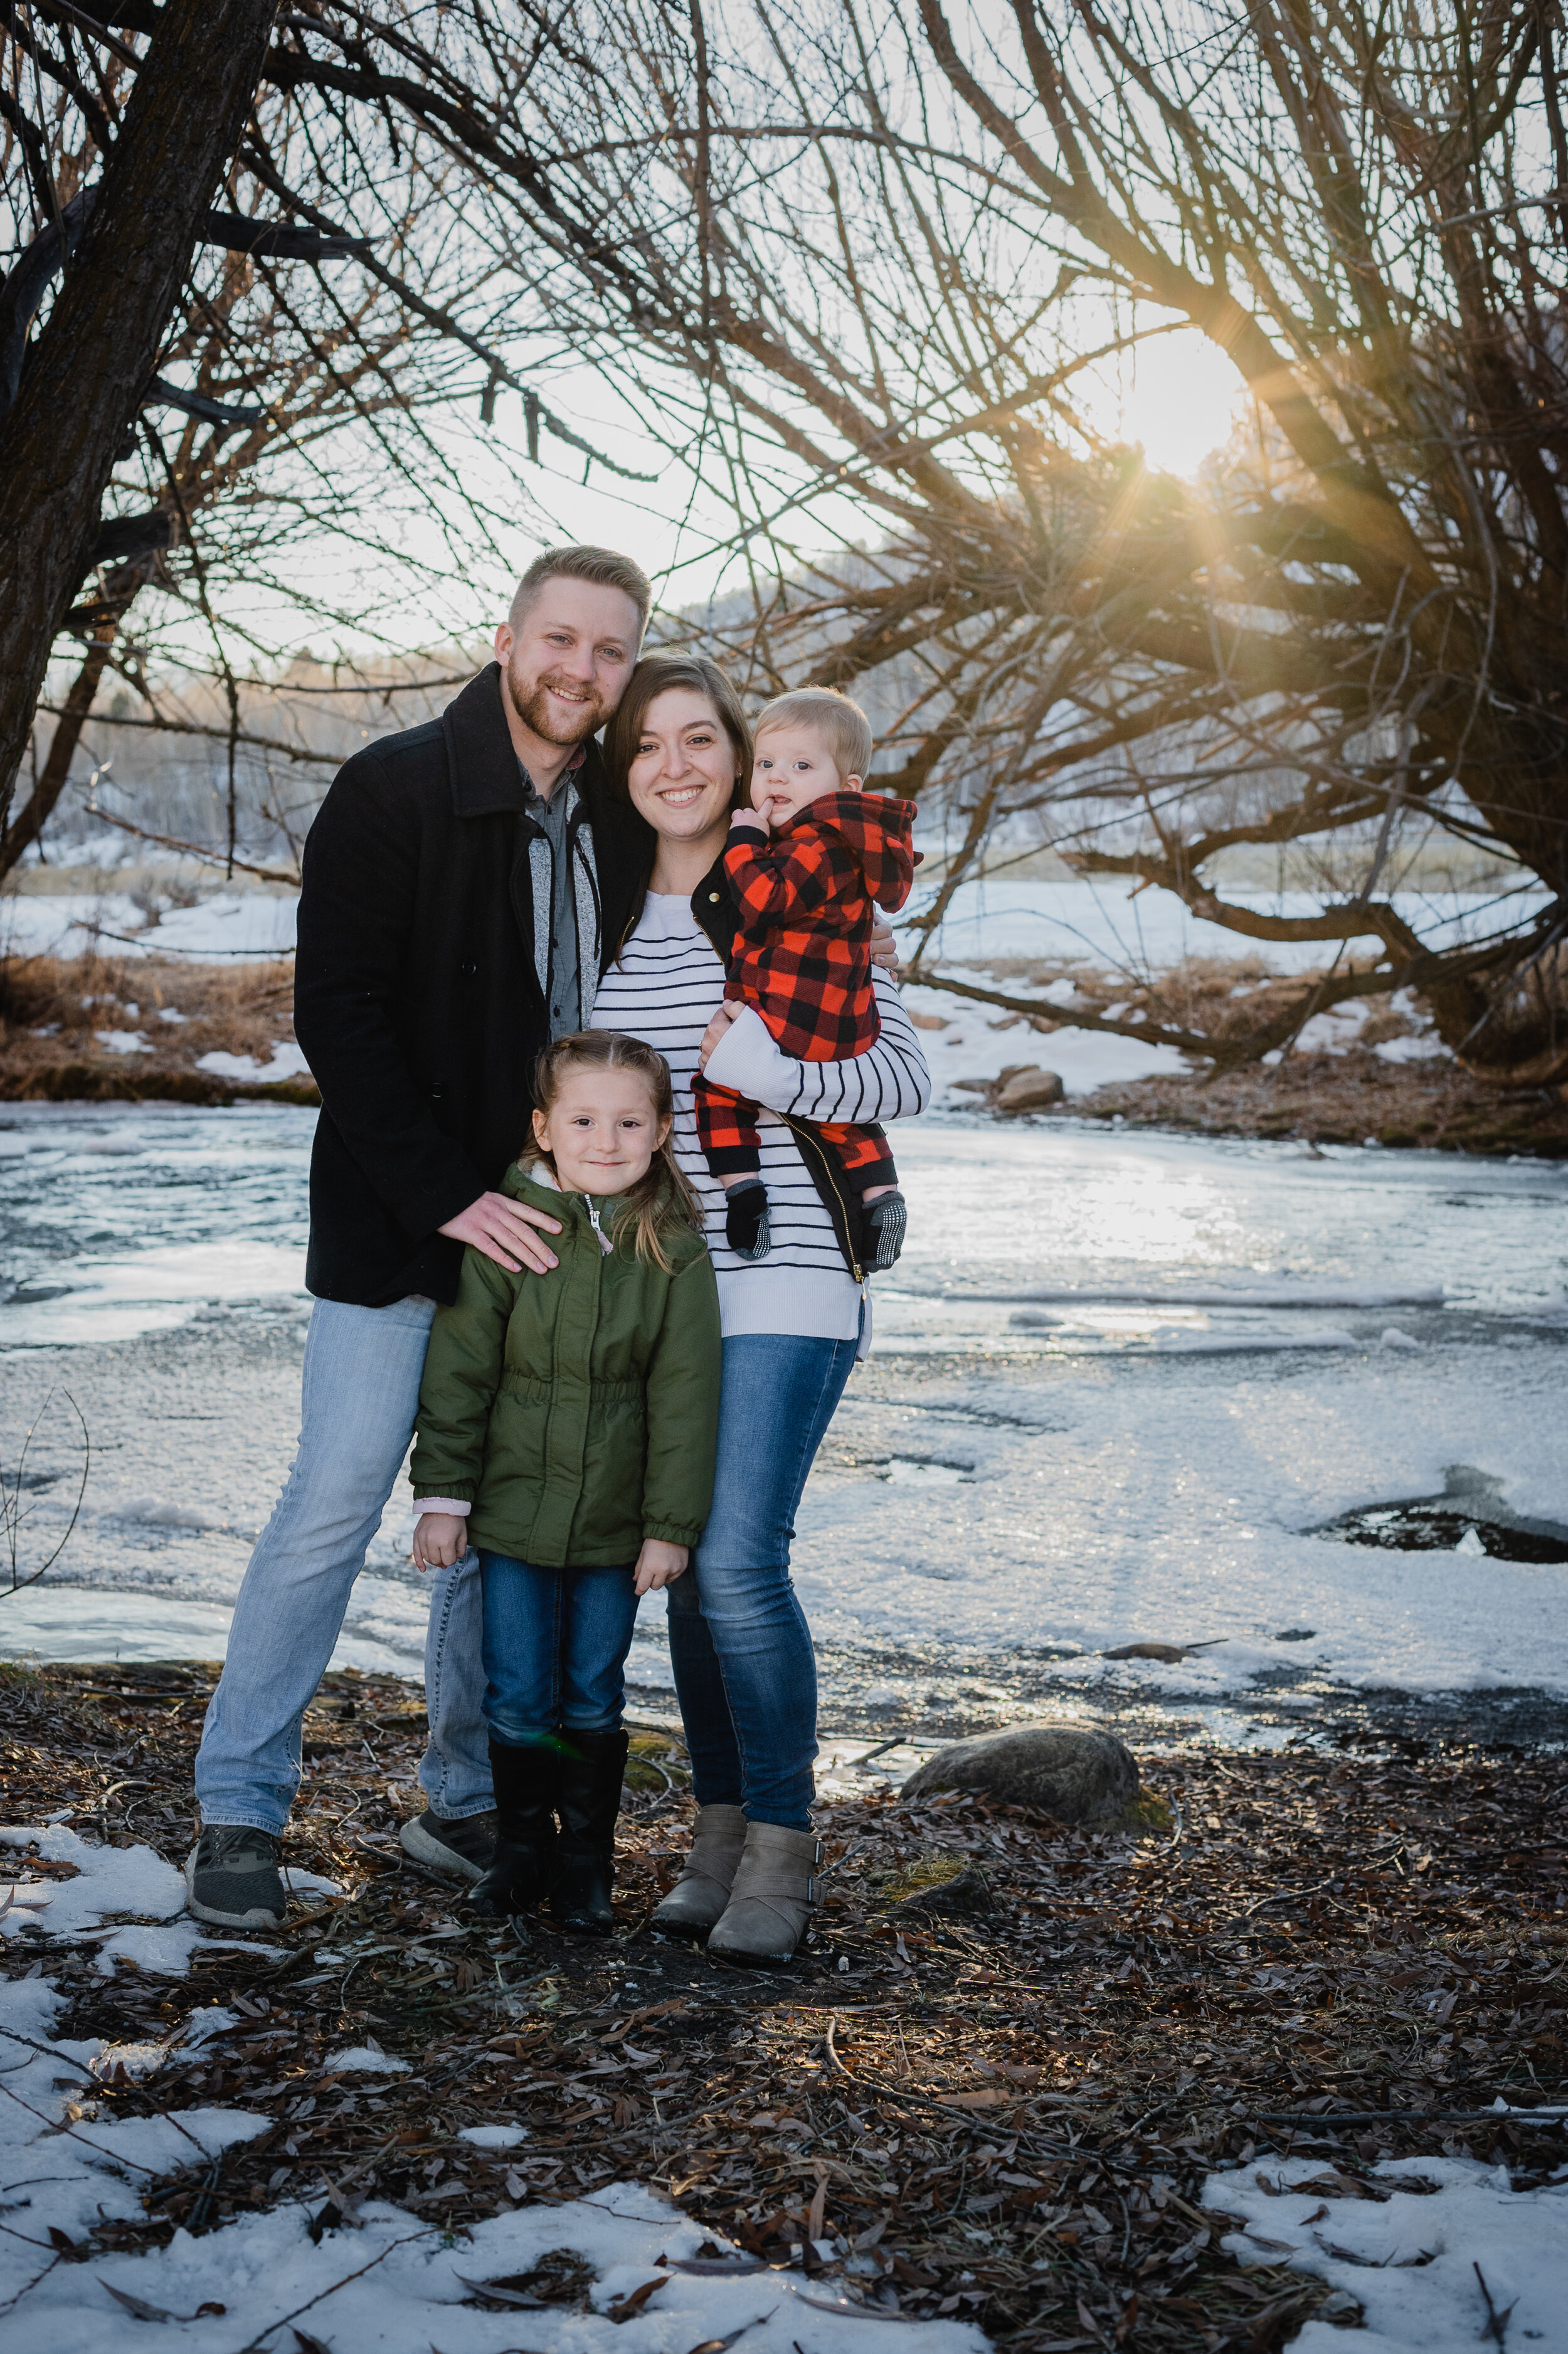
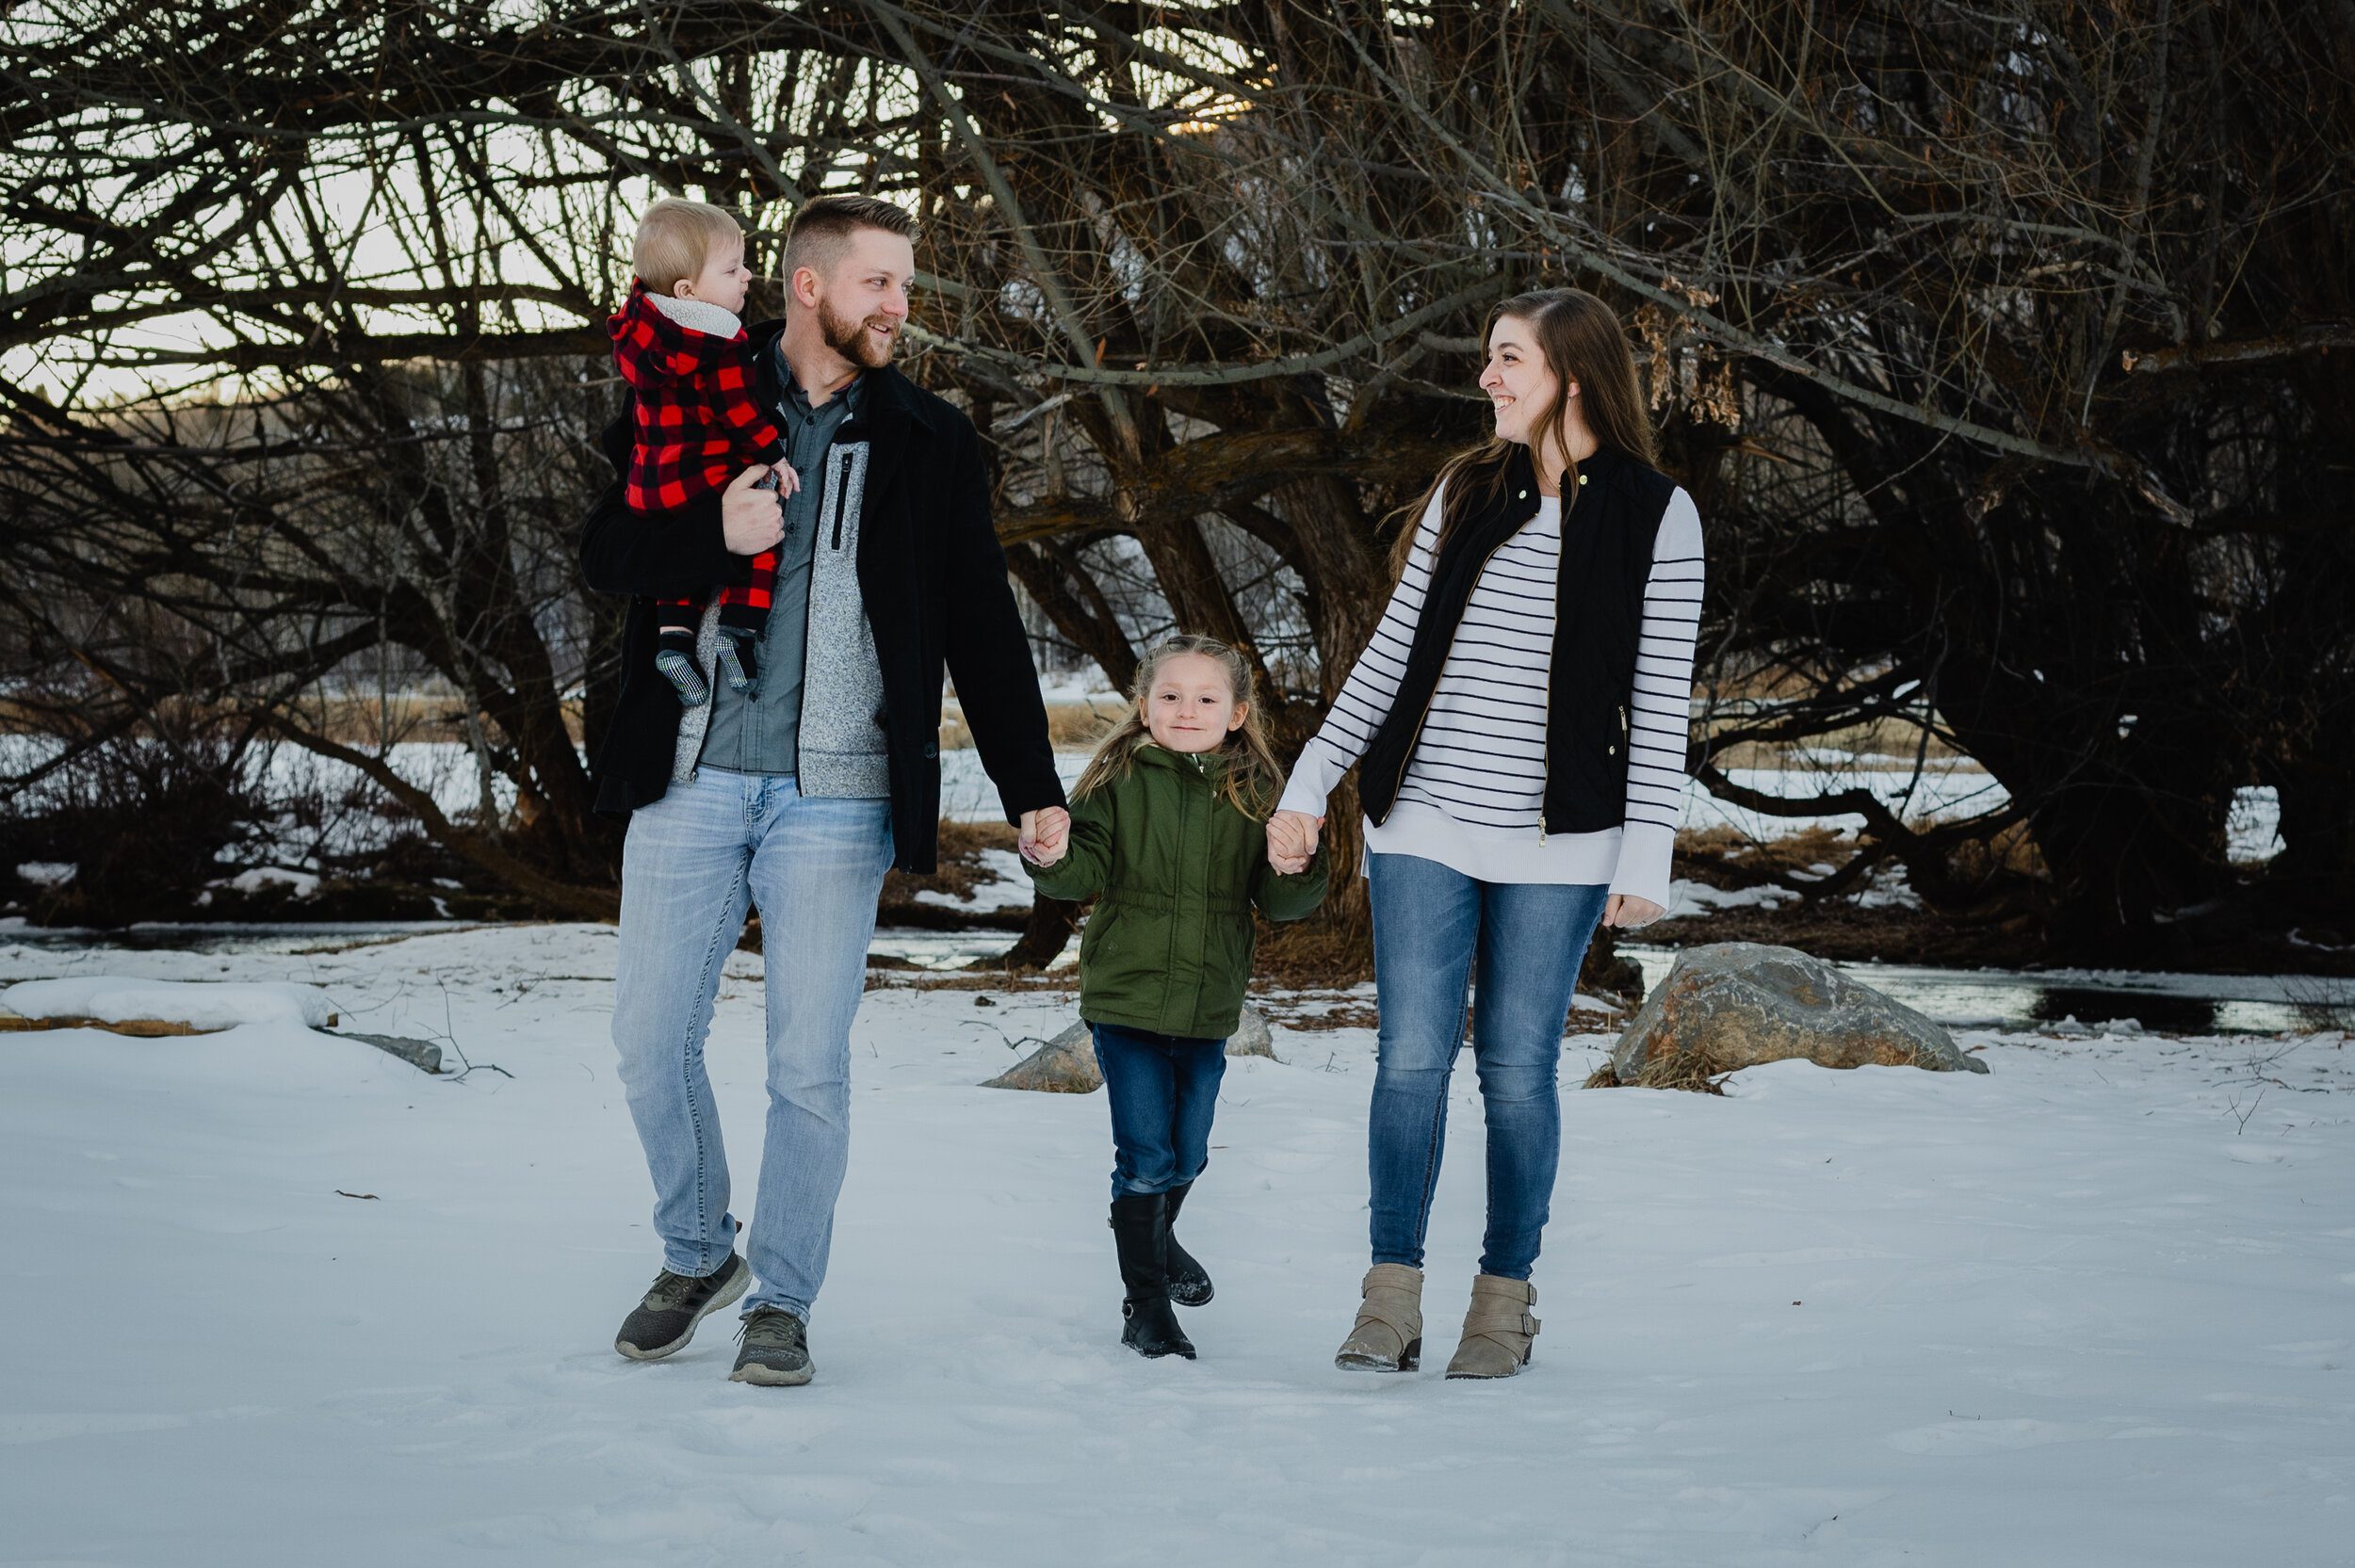
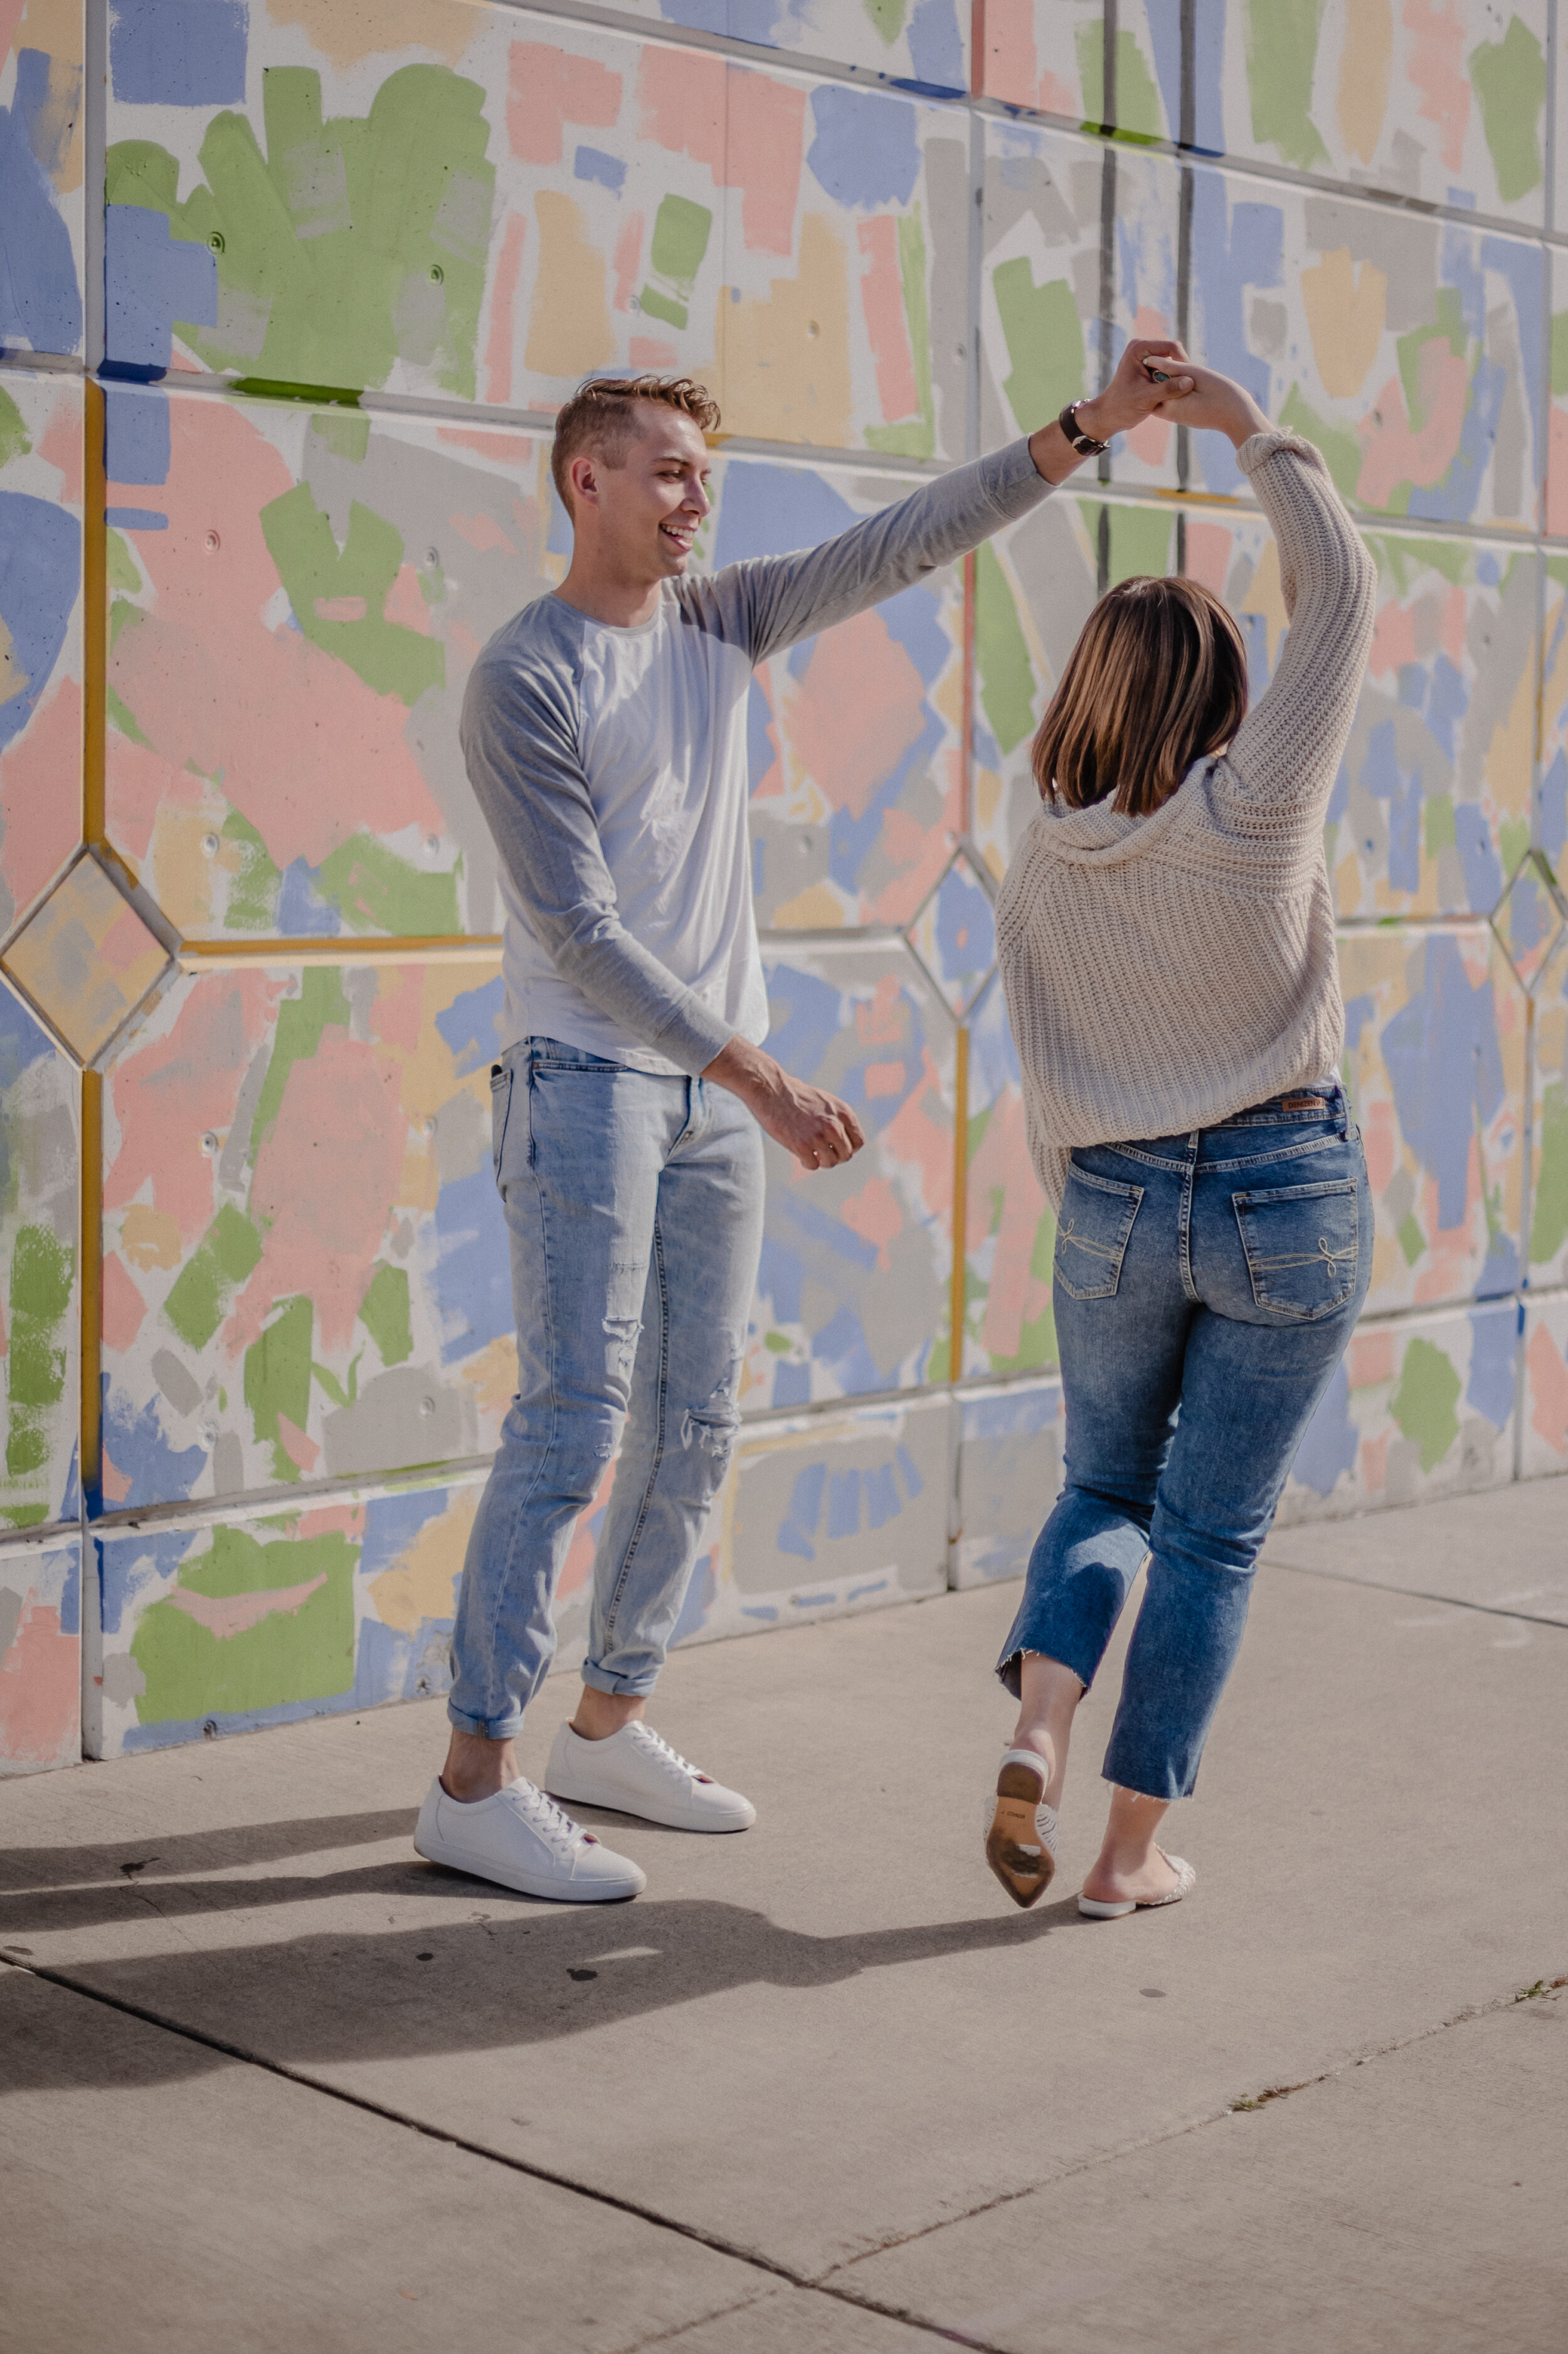
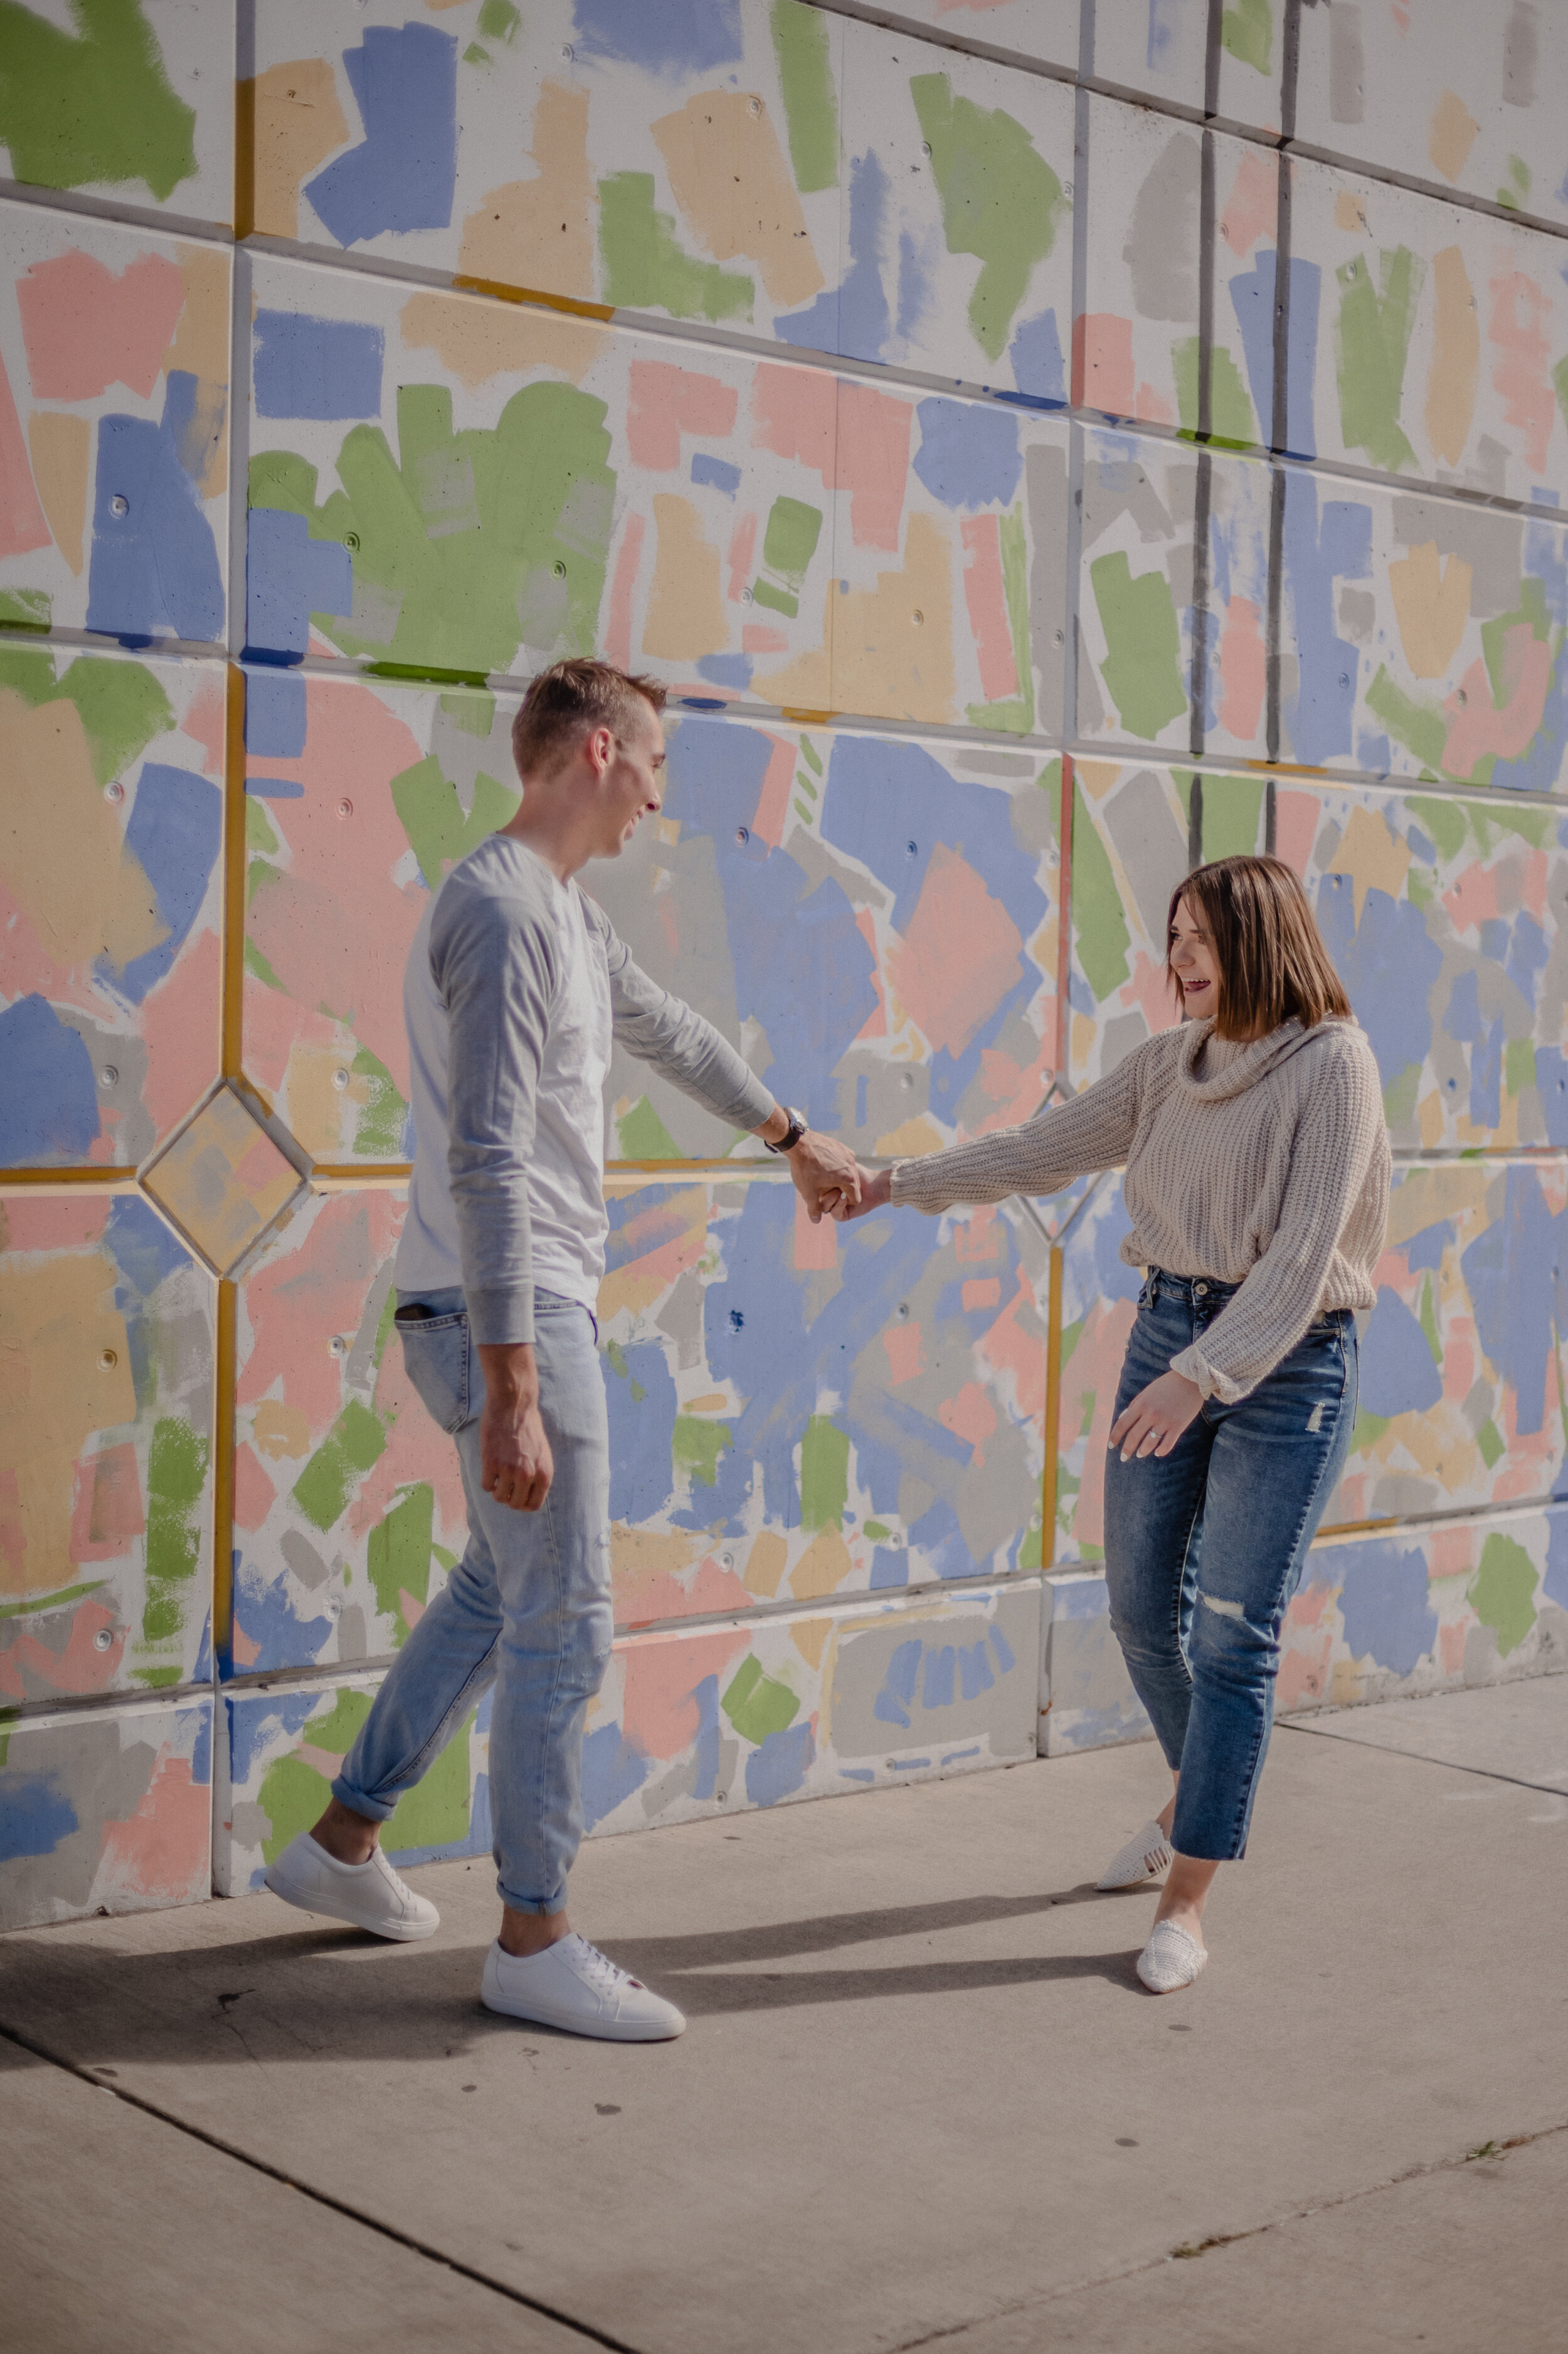
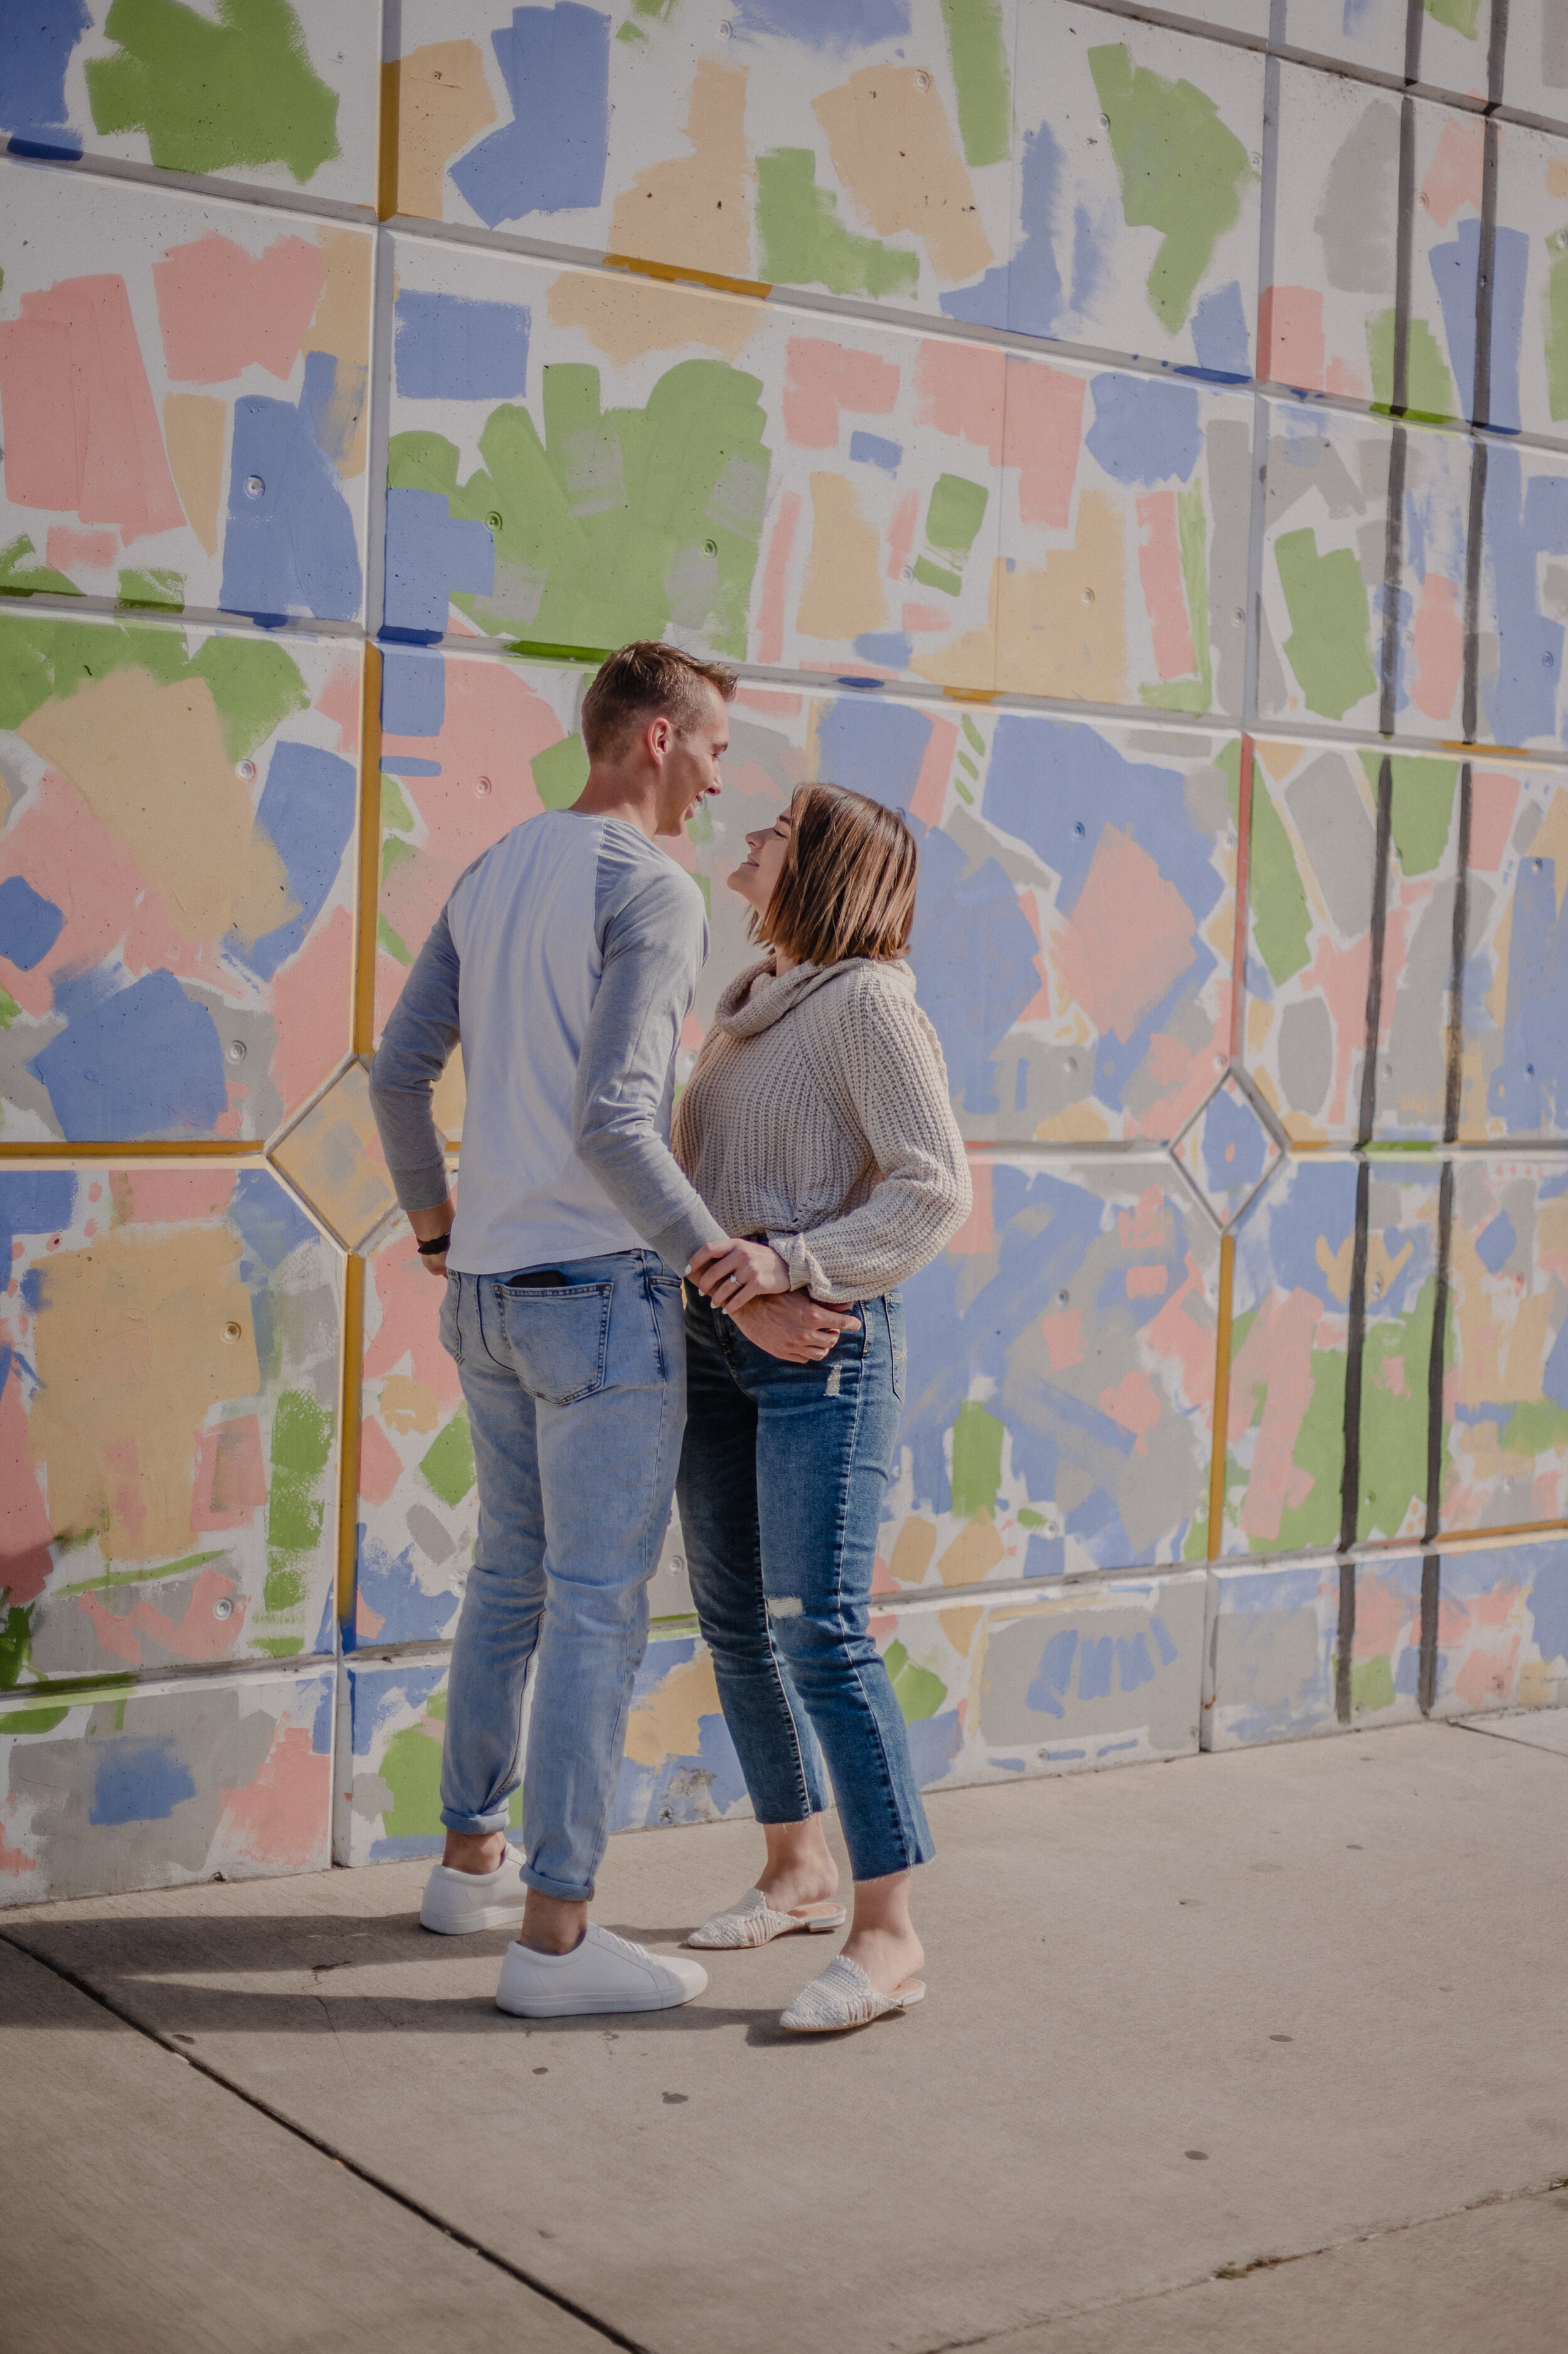
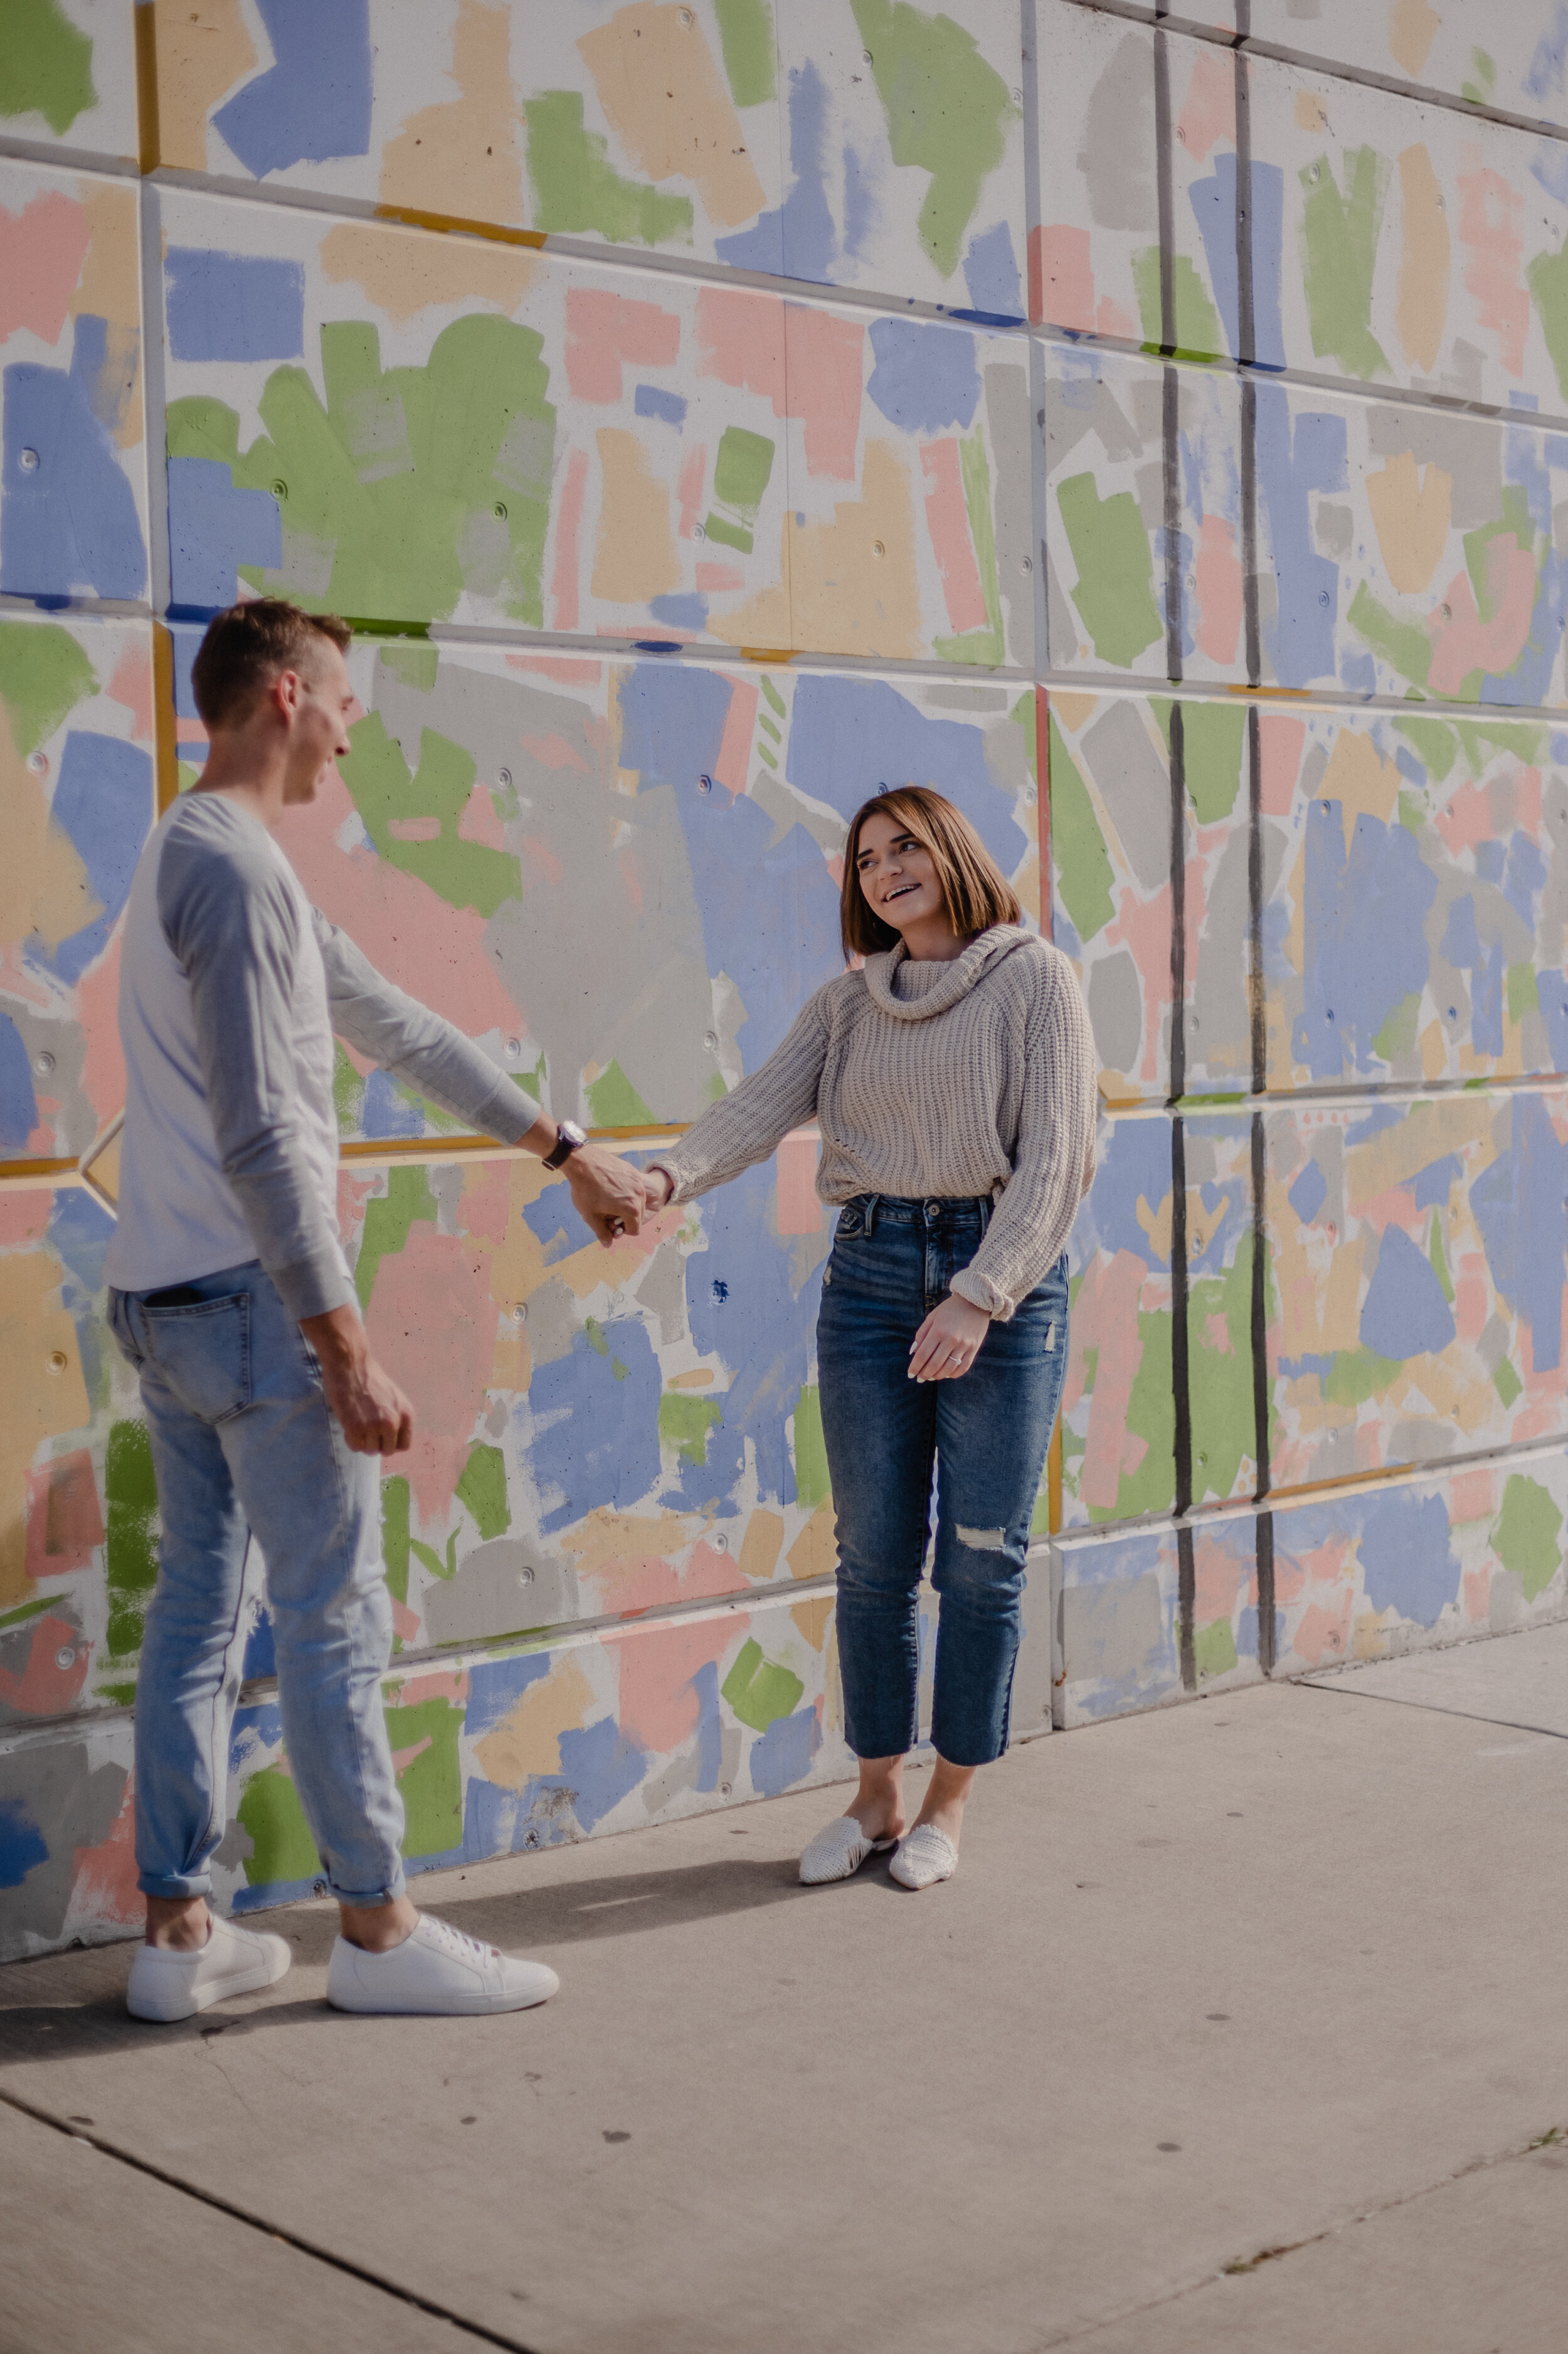
Couple’s Shoot with Kayla and Kyle

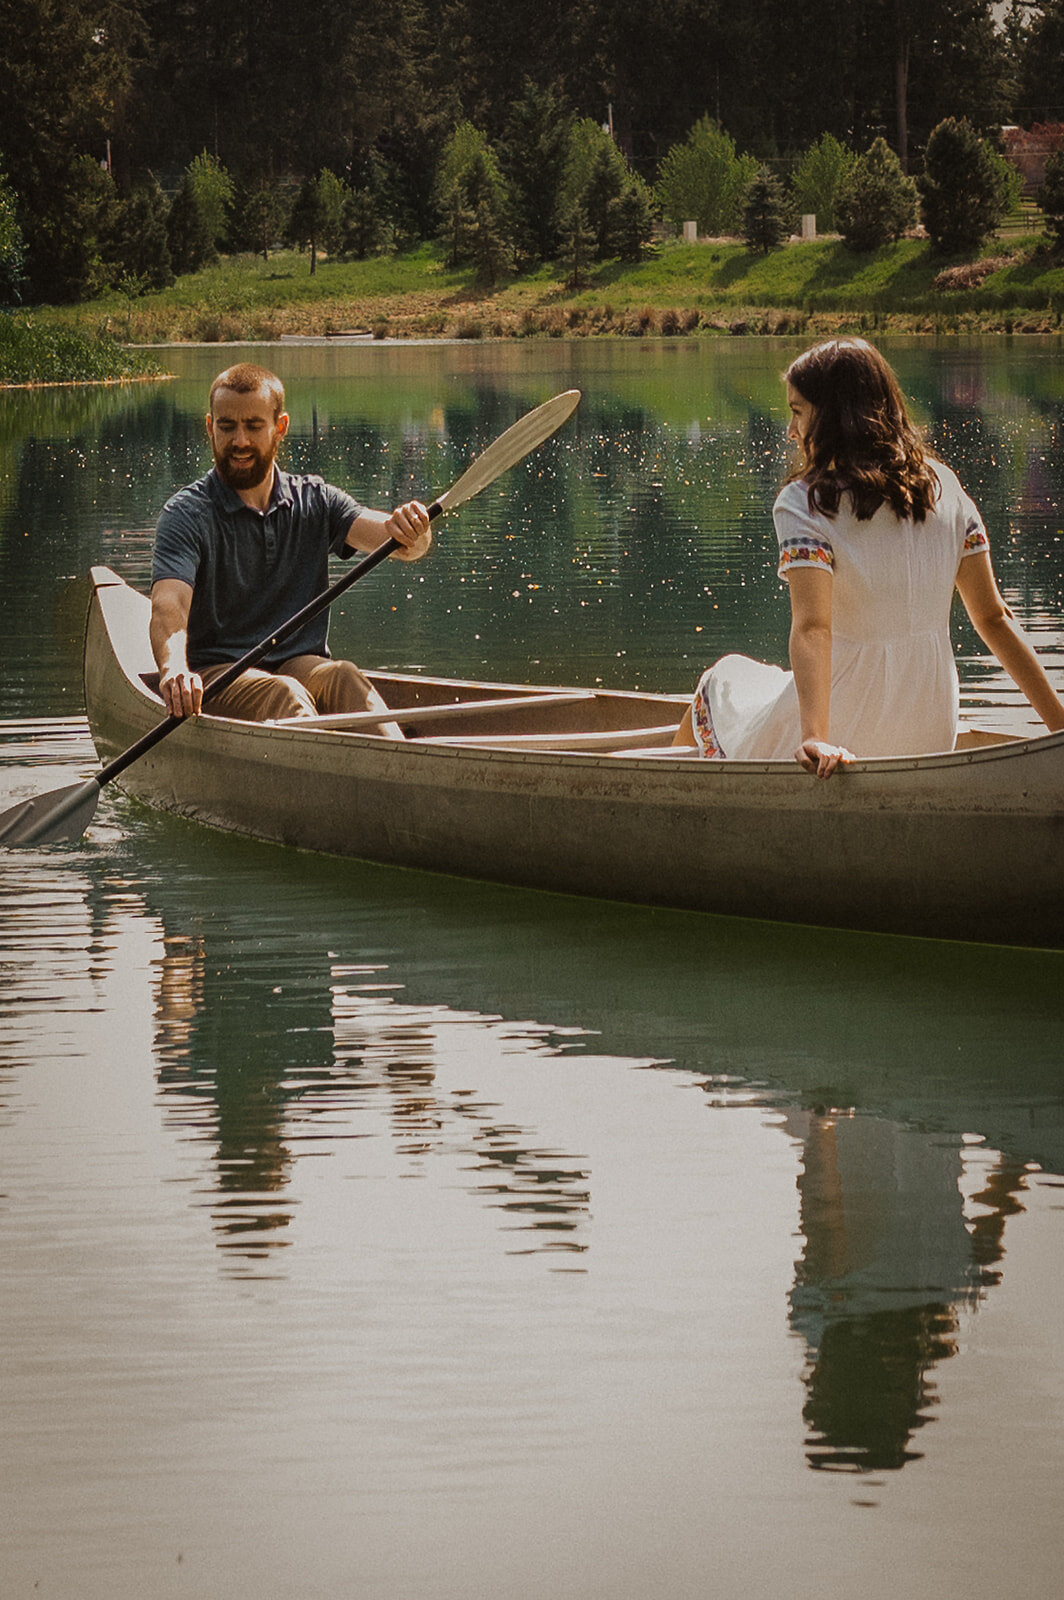
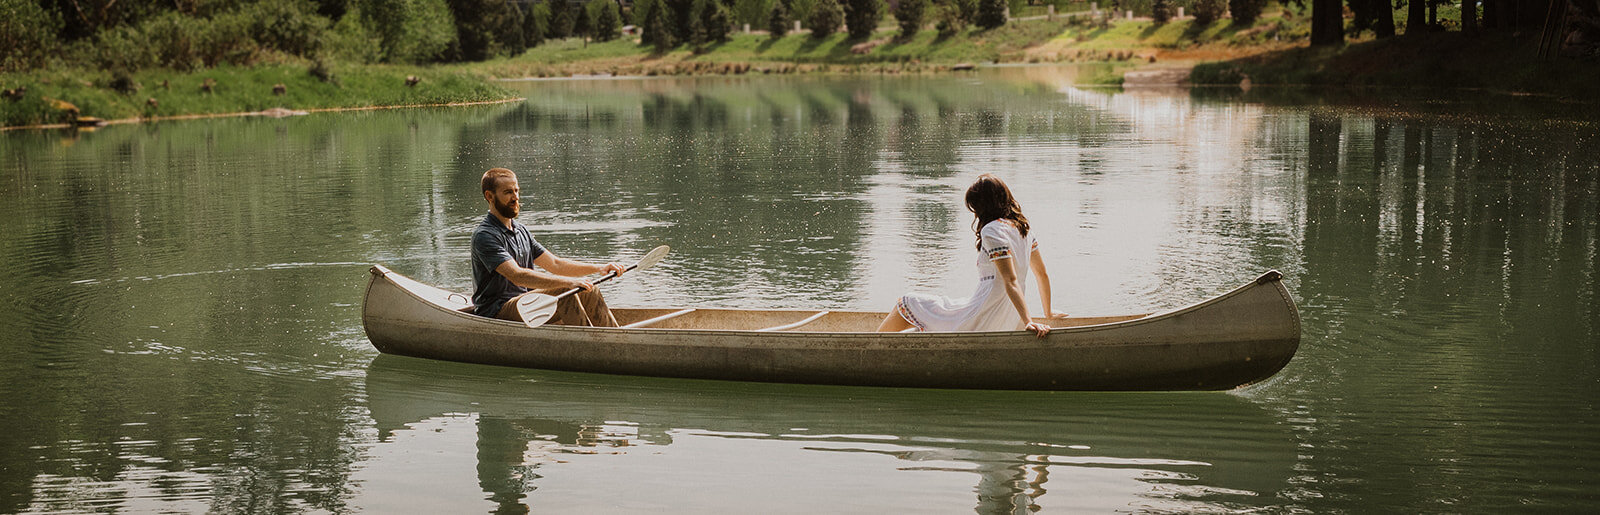
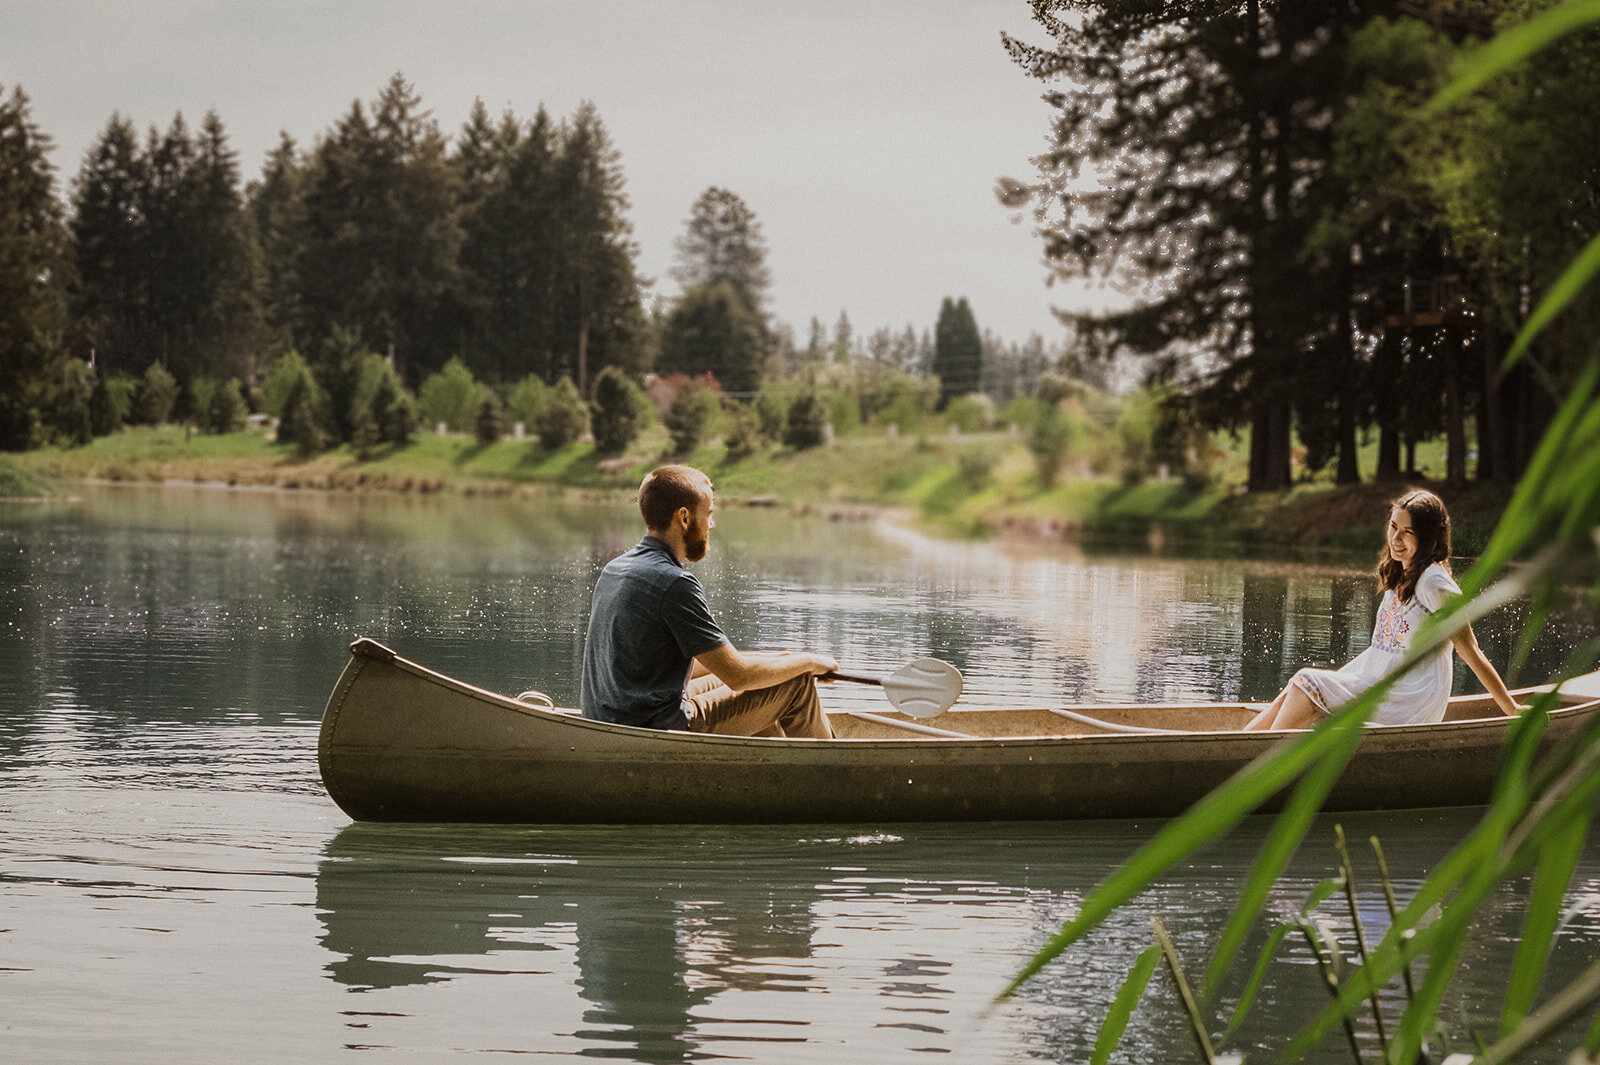
Alright, I gotta set the background for this story… it was the end of April, 2020. By this point, we were not about a month in to the Covid shutdown and I was trying to keep my brand new photography business afloat with new content and money coming in. I had sent out a deal on social media offering couple sessions at a discounted rate, and got some responses! One of them being Kayla and Kyle. They were recently married and wanted some pictures for their home. We set the date for early May.
This is a shoot I was really excited about. It was going to be at the property of a family friend that had a pond and a path through the woods. The day came, and it was unusually hot and sunny for spring time in Oregon. Now, I knew that clouds were usually best for outdoor photos, but I looked forward to some nice warm, spring-time photos.
My vision of how the pictures would turn out quickly shattered once we started the session—the sun was too harsh on my client’s faces and it made their skin tone all off, and they were often squinting due to the brightness. Even in the shade the sun shining through the trees created weird shadows across their faces. Though the location was great, the weather conditions were less than ideal. Not only that, but my frustration with the shadows and harsh sunlight combined with the heat was really getting to me, and I found it really hard to concentrate on being creative and having fun interacting with my clients.
Not trying to be a negative Nelly over here but these were the realities of this session, and I had to find a way to make it work in the moment…
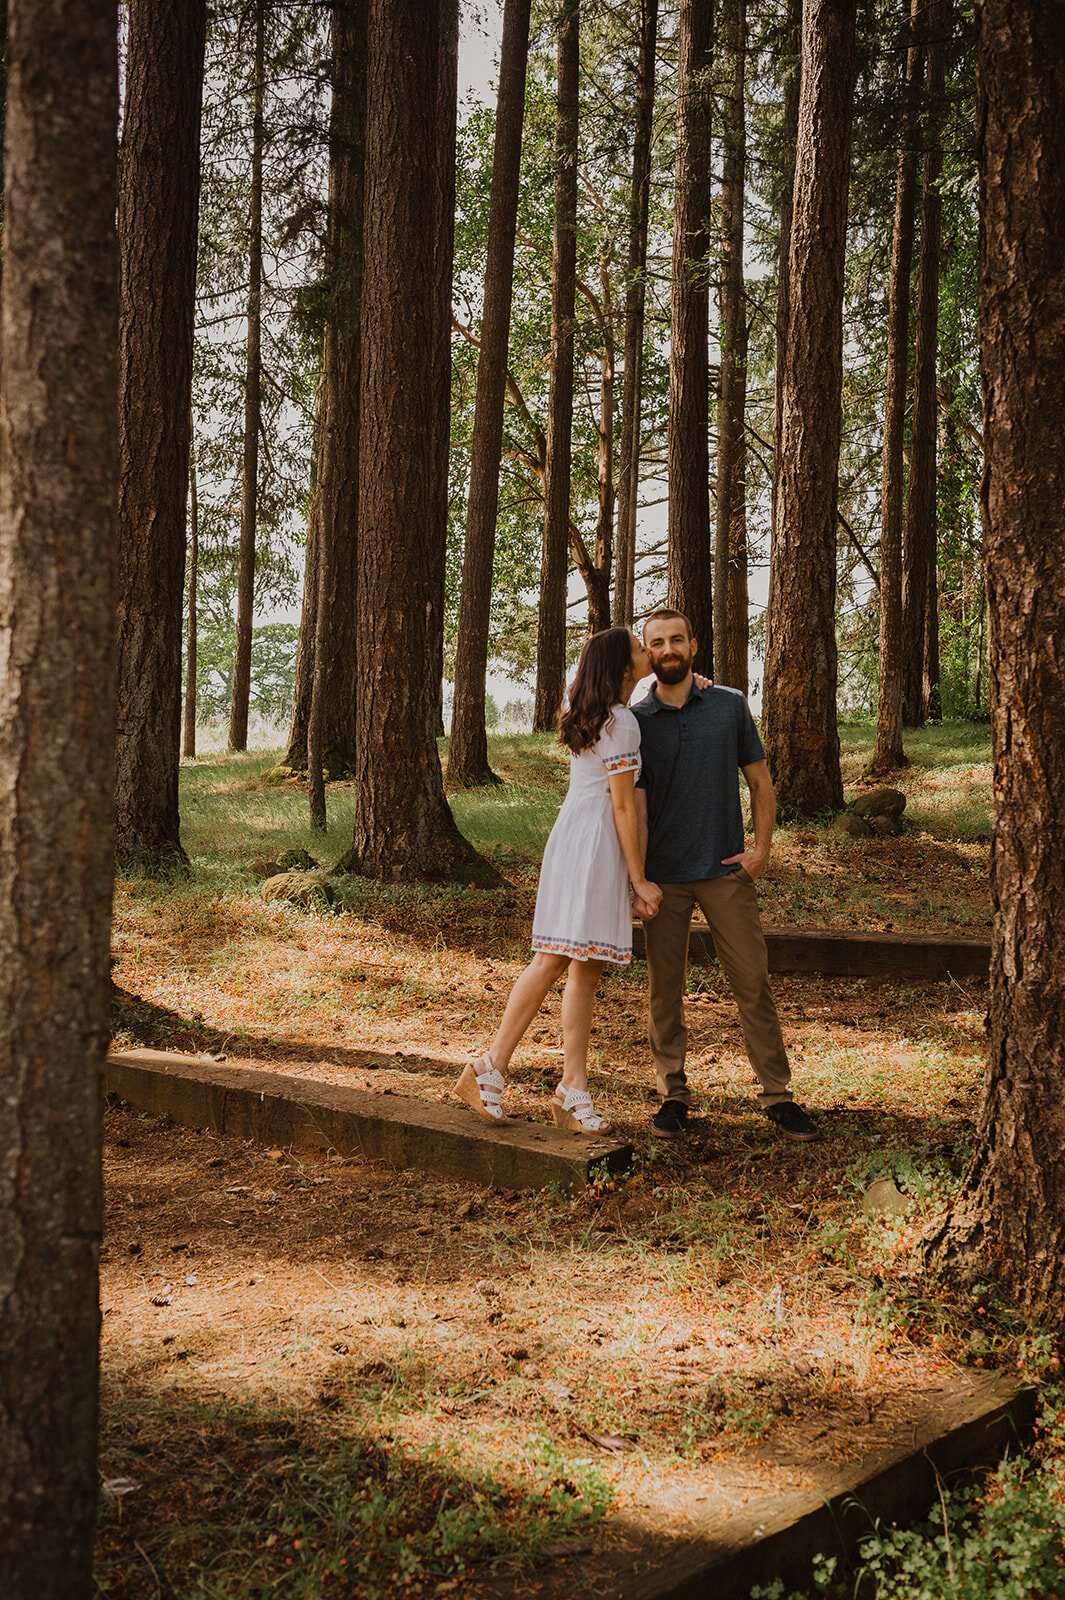
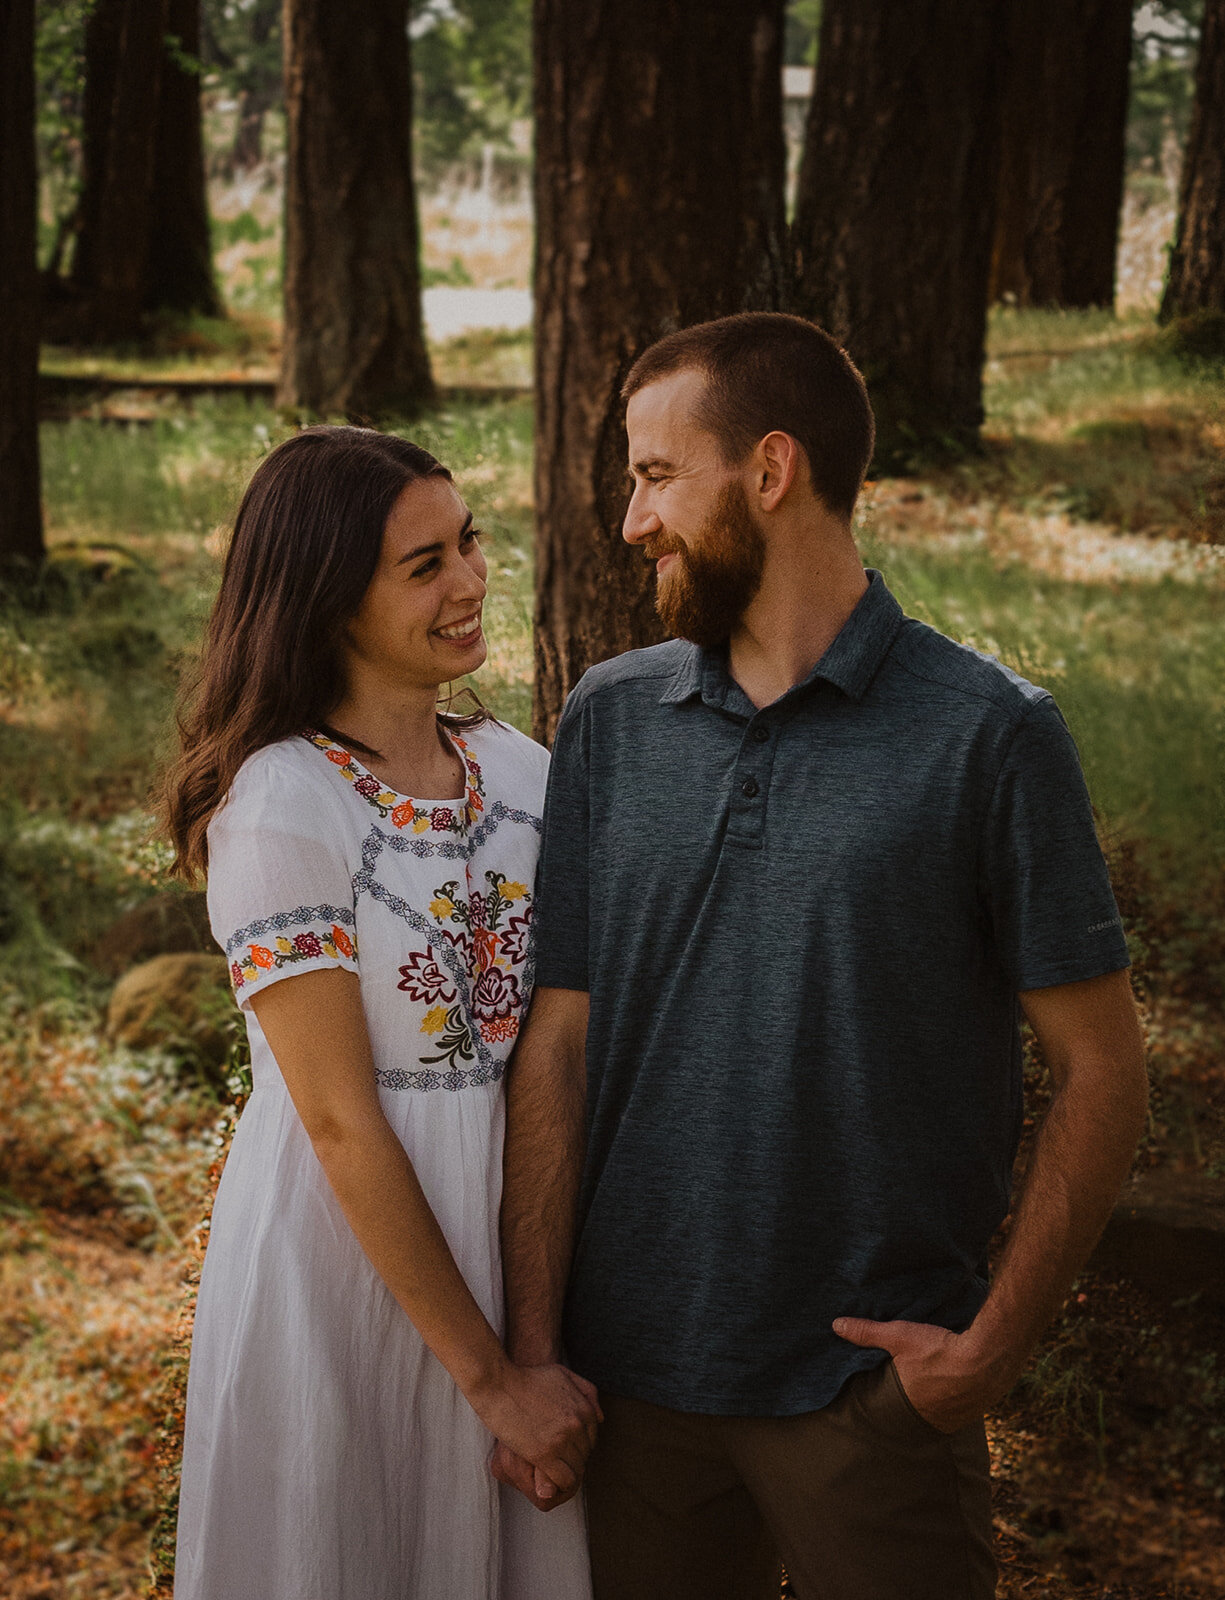
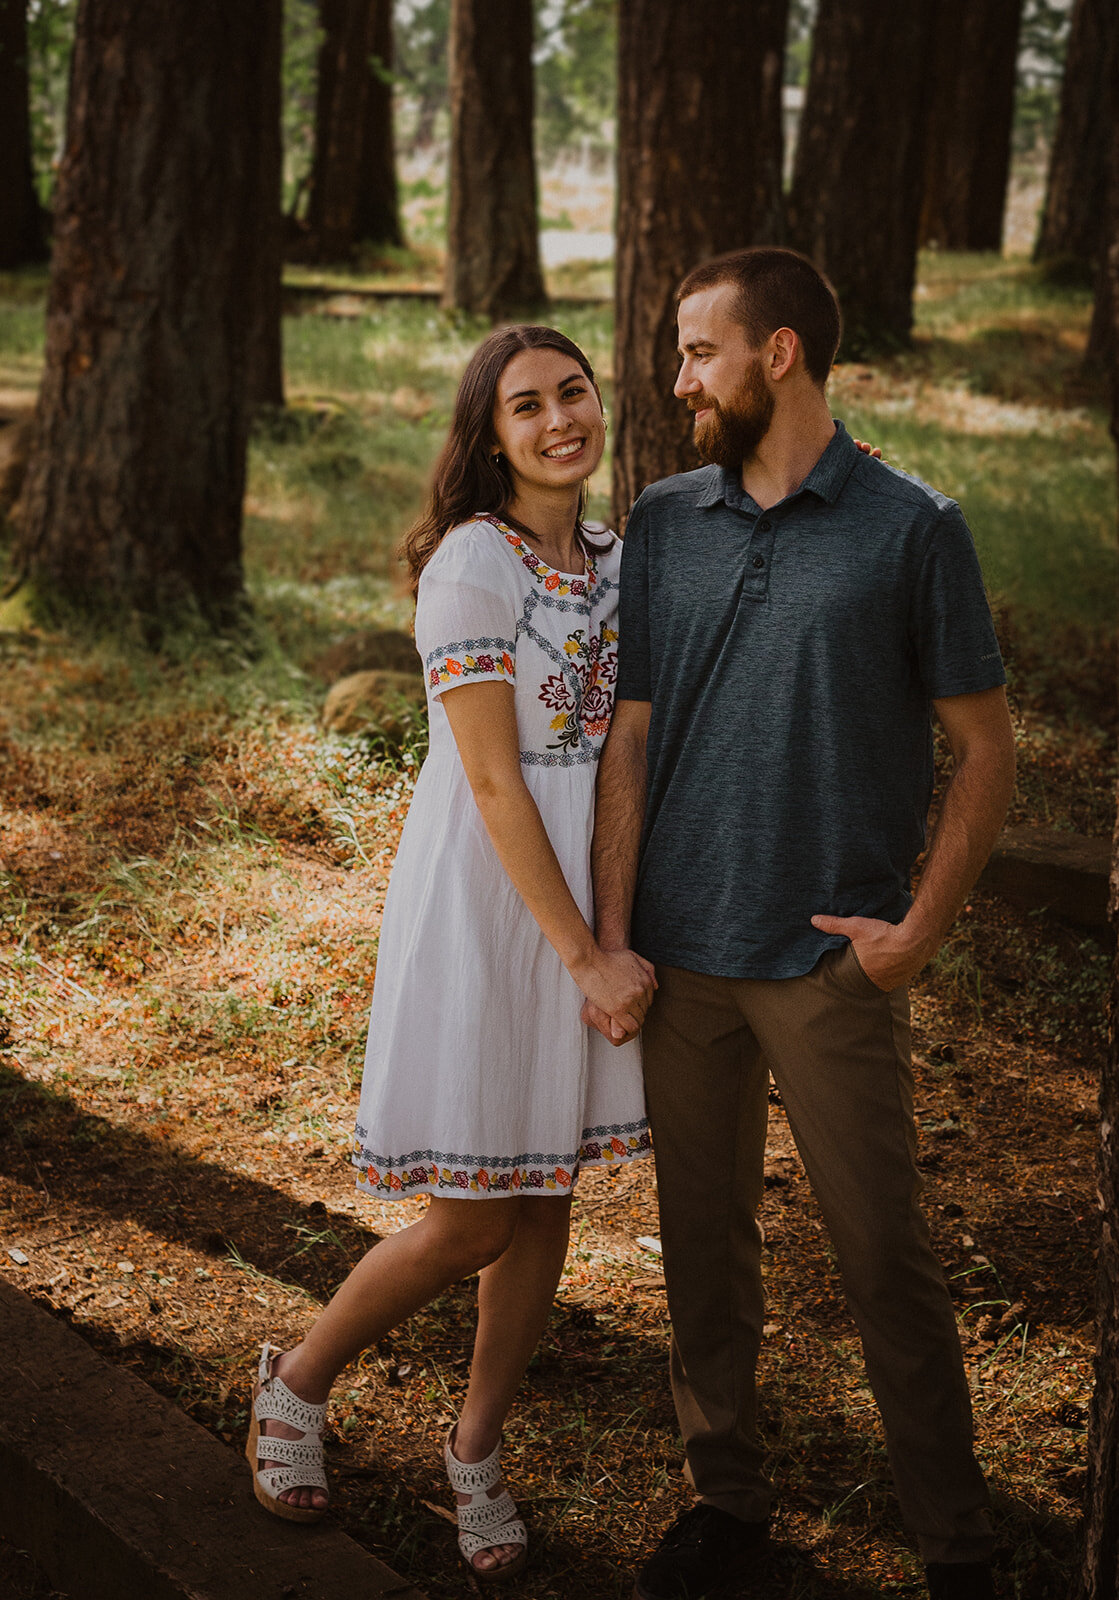
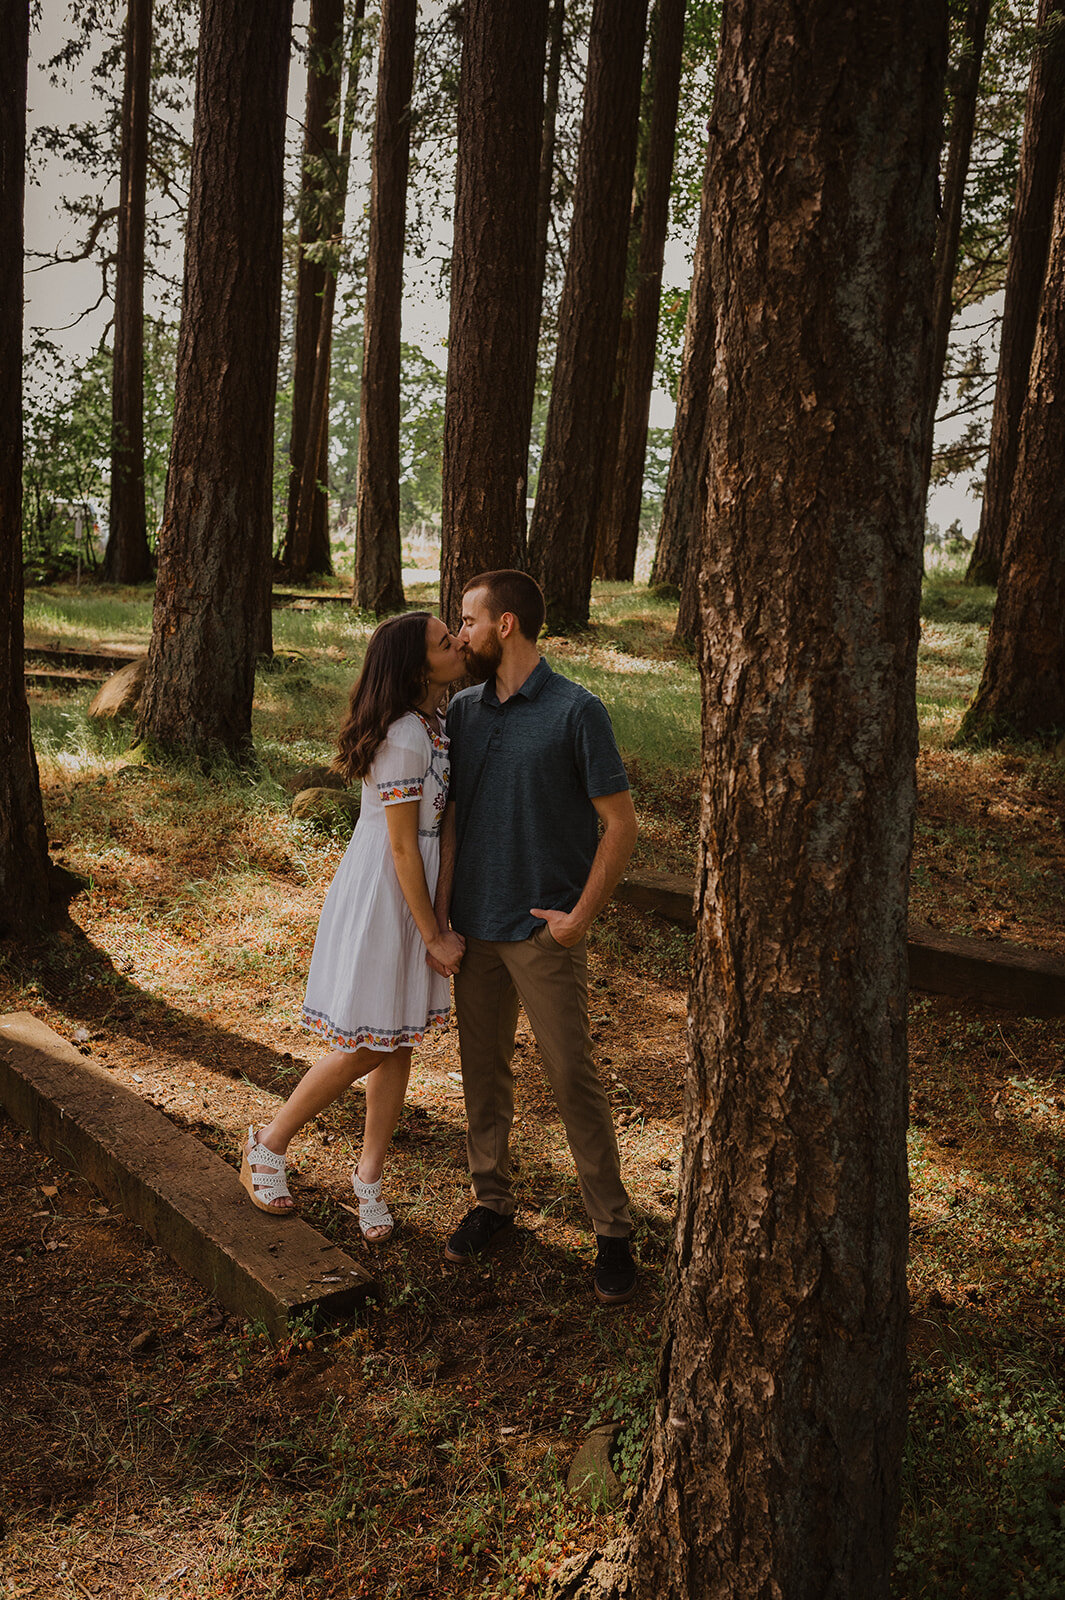
We were nearing the end of the session, and I realized that we hadn’t gotten any pictures of them in the canoe yet! We really saved the best for last, because these pictures turned out far better than the rest! It really saved the session, I think. Kayla and Kyle looked like a dream out there on the water with Kayla in her white sundress, and Kyle holding the paddles. The sun didn’t look as harsh on the water, and we got some great shots in!
Moral of the story: don’t let anything get in the way of your creativity! There were multiple times during this session where I wanted to throw in the towel and reschedule the session. I’m so glad that I didn’t, though. Creativity doesn’t always come easily, and I’m glad I kept fighting through the frustration to get the inspiration I was looking for. Also, Don’t be afraid to be creative out fo fear that it won’t work out the way you want it to. The truth is, sometimes it doesn’t. But, sometimes it’ll be better than you imagined it would.


A Beginner’s Guide to Photography: ISO, Shutter Speed, and Aperture
It all begins with an idea.

While there’s no question that there are plenty of photographers out there, who’s to say that you can’t learn a thing or two about it also?
So, if you’re new to your DSLR, there are a few basic things you should learn to really get you started and feeling confident in your abilities to get everything you want to get out of your new camera.
DSLRs can be beyond confusing. But once you get out of automatic mode and get comfortable with manually adjusting these settings, you’ll be shooting amazing pictures in no time! Like the saying goes, practice makes perfect. The three things that, once mastered, become real game changers are: ISO, Aperture, and Shutter Speed, otherwise known as the Exposure Triangle (Oooo so official). I suggest keeping your camera on and ready to experiment with each of these settings as you read this. Going practicing first hand is better than any article you read!
ISO:
Simply put, ISO refers to how sensitive your camera is to light. The higher number of ISO will make your camera MORE sensitive to light (brighter pictures) while a lower number ISO will make your camera less sensitive to light (darker pictures). Typically, you want to have a higher ISO is you are shooting indoors or if it’s later in the day if shooting outside. I wouldn’t go below 100 or 200 ISO If shooting outside during the day, and 800-1,3000 in darker-lit situations. Any more than that will result in your photos looking very oily and grainy.
Note: There are cameras out there these days that have become more capable and advanced in low-light situations with high ISO (around 25,600 ISO) without causing too much noise in the photos.
That being said, it is always best to rely on either natural light or an external flash to get the most out of your images. Whenever you shoot in low-light situations and as a result, crank us the ISO, you always risk having too much noise in your images. I like to rely on adjusting my shutter speed and aperture first before raising the ISO.
Try taking pictures as you adjust the ISO. Notice how brighter/noisier the pictures get as the ISO is raised.

As you can see in this image, it had gotten too dark to really get any good light from natural sources. Even the sparklers were barely enough to illuminate my subjects’ faces. I had to ramp up the ISO to make up for the lack of light.
Shutter Speed:
Shutter speed is the length of time your shutter stays open when a photo is being taken. If it is open for a longer length of time, the more opportunity for light to enter in through the lens. For example, if your shutter speed is set for a faster shutter speed like 1/1,000 (1 one-thousandth of a second) then your camera is letting in less light. Slower shutter speeds like 1/250 will allow more light.
Shutter speed can make a very big difference in the sharpness of your images. The faster the shutter speed, the more in-focus the picture. However, the picture will also let in less light. In lower light situations, this isn’t very ideal. Again, I would suggest setting up an external light source or flash to make up for the lack of natural light.
If you don’t have an external light source, then you will have to lengthen the shutter speed to let more light in. It’s more likely that the images won’t come out clear. That is, unless, you use a tripod and your subjects are able to stay very still. I don’t want to sound like it’s impossible to get good pictures in low-light—on the contrary, some of my greatest pictures have been taken with slow shutter speeds, it just takes a little more care and calculation.

Shutter Speed allowed me to capture my subject running. With a low aperture and fast shutter speed (1/1600) I was able to avoid blur as my subject moved quickly.
Aperture:
Okay, there’s a reason why I left this one last—it’s favorite to talk about! What to know why? It’s how photographers get that yummy blurry, soft background (known as bokeh, pronounced BOW-kah). You may not ALWAYS want a blurry background; for instance, if you’re shooting landscape photography, you will want everything in focus. For portraits, however, the bokeh allows the subject to more prominently stand out.
So, what does aperture mean, anyway? Aperture refers to the hole through which the light is let into your camera lens. Now, I can sense your confusion. You’re probably wondering “I thought ISO is what determined your camera’s sensitivity to light?” You’re right, but aperture is different. Think of it in terms of how the human eye functions. The wider an eye is open, the more light is able to enter. If you squint your eyes, then a less amount of light is allowed in.
Another important thing to remember is that the wider to hole (say, f/1.4) the blurrier the background will be. The wider the hole (f/22 for example) the more in focus the entire picture will be. I know, it seems a little counter-intuitive that the smaller number will make the hole bigger, but that’s just how it is.
Quick note about aperture: if you’re shooting group photos, I wouldn’t go below f/4. Any lower than that will risk some people being out of fussy in the pictures.

A wide aperture creates a nice blurry background. I was also. able to get closer to my subject and get some nice detail.
Conclusion:
You’re always going to be playing a give-and-take game with these three “pillars” of photography. As you lower the shutter speed, you’ll want to have a smaller aperture (or adjust the ISO if you don’t want to change the aperture). Or, If you have a larger aperture for a nice portrait image, then your shutter speed should be a little higher (1/300-1/1600 or so).
How are you feeling? I know, it’s kind of a lot of information to take in, but once you get over the learning curve you’ll be smooth sailing! Just keep playing around with it and experimenting with lighting and different subjects.
I would love to know if you have any questions! Let me know if you need any further explanation—I will do my best to answer any questions!
Hope you all have a great day. Happy photo-ing!

5 Mistakes New Photographers Make
It all begins with an idea.
When you’re first starting out as a photographer, or if you just want to know a few tips on how to improve your photos, this post here is gonna go through a few mistakes that beginners often make—and how to avoid them. Even those of you that consider yourselves a little more advanced might find some good pointers!
I’ve come up with 5 mistakes that I often see beginners make that should be avoided if possible.
1) Paying attention to composition.
Whether it’s getting the right angle, getting close enough, or simply eliminating some objects from the shot, this is one of the most obvious ways that you can tell a beginner from a pro. Composition is EVERYTHING. There are so many ways to get quality composition in your shot, and you bet there are a million Youtube videos out there with a multitude of ways to get good composition.
Far too often, I see beginners that don’t pay close attention to what is in their shot. If you’re a portrait photographer like me, you’ll want to make sure that there is nothing in the shot that is distracting the viewer from the main subject. This doesn’t mean that you can never have something more interesting than the subject, but that the subject needs to be in a place that will draw the eye to them. (Side note: the eye most is most naturally attracted to the lightest point in the picture).
For example, if you’re in a senior session and your subject is sitting in the middle of the road, legs criss-crossed. Oh look, there’s a busy street with passing cars in the background. You could use that photograph and maybe the cars aren’t too noticeable. However, I guarantee that a professional photographer is going to find a better angle so that there is no risk of distraction in their composition.
Now, here’s the thing. Sometimes you’re going to have a lot of distraction in a photo that you can’t get rid of. Say, you’re shooting a wedding and there are a million people around. What you COULD do is utilize those “distractions” to frame your subject. You can do this by blurring out the distractions and focusing on the subject, or make your subject the central point in the shot. Those are just a few suggestions; the possibilities are endless! A good rule of thumb though, is that you take a moment before capturing the scene in front of you and ask yourself, “is everything in this shot detracting or adding to this image? What does it add to the story? Is absolutely everything important in this composition?” When is doubt, simplify. Most viewers like to have 2-3 aspects of composition per photo. So don’t overdo it and don’t be afraid to eliminate some things!
2) Blurry Images
Blurry images mainly stem from a shutter speed that is too slow. Fast shutter speed = clearer photos. However, you’ll want to be careful when upping the shutter speed to also open the aperture wider so that your camera lets in more light. Without a wider aperture to let in enough light, the images might be less blurry, but they will be too dark to see what’s going on. Shutter speed and aperture have a give-and-take relationship. The faster the shutter speed (ex. 1/1600) requires a wider aperture. The slower the shutter speed (ex. 1/100) requires a smaller aperture (the higher the number aperture, the smaller the hole (ex. f/13). There is a balance that needs to be maintained in order to get consistent quality images.
A good guideline to keep in mind: your shutter speed should be faster than one divided by the focal length of your lens to avoid camera shake and blurry images. For example, if you have an 85mm camera, the shutter speed should be 1/85th or higher. If you’re in a situation where you need as much light as possible (say, for right photography) then you’ll need to set your camera on a steady surface or use a tripod. If you don’t have a tripod, then I would suggest keeping the shutter speed where it needs to be and instead upping your ISO (this is only if your aperture is the widest it can be). This is set of a last-resort since ISO tends to add a lot of noise and grain to an image, but it’s the next-best thing.
I like to use lenses that have the capability of shooting in a very shallow depth of field (like f/1.4) so that I can let in as much light as I can!
3) Shooting in manual mode.
I bet you’ve heard many a time how only real photographers shoot in manual mode. So, wanting to be a real photographer, you keep your camera in manual at all times. There have been far too many times in my early years of photography where I missed a great shot because I was fiddling with the exposure settings in manual. Those images were either way under or way over exposed.
This is not the case! For beginners, it can be very overwhelming when you first get your camera. All those buttons and settings… it’s a lot. As a beginner, get to know your camera one step at a time! Auto mode will help you ease into using your camera. Then, try moving to aperture priority.
Aperture priority allows you to change the aperture, and the rest of the settings (shutter speed and ISO) automatically adjust so that your image is evenly exposed. You could call this the semi-automatic setting for your camera. Don’t worry about staying in auto mode for a little longer! It’s hard when you’re first starting out and you’re worrying about composition, your subject, white balance, etc. on top of making sure your shutter speed is at the right speed. Also, always take a few test shots before beginning the session.
There’s nothing wrong at taking things at your own pace. As long as your improving, you’re doing great!
4) Using on-camera flash
Have you ever taken a picture on your camera using the pop-up flash? Well, you probably know what I mean when I say it’s… trash. Unless, of course, you’re trying to go for a specific look, and the camera flash is the look you want! What I mean by the camera’s built0-in flash is that generally your subject will look washed out, flat, and textureless.
The main problem with the flash is that you aren’t able to change the direction the light is flashing. The best way to use a flash is externally, something that can bend and turn so that it faces a wall, or the ceiling that will allow the light to bounce off surfaces and therefore, evenly illuminate a room and the subject(s).
There are flashes out there that you can attach to your camera that points up toward a ceiling, but this is only ideal for indoor venues with lower ceilings. A high ceiling will be too far away for the flash to bounce off of.
5) Being too timid with creativity
Far too often, new photographers are too afraid or shy of trying anything new. They stick with what they’ve seen or what they’ve been taught instead of stepping out of their comfort zones. I get it, it’s completely understandable! You don’t want to take the time to go out of a limb if you don’t know that the picture will turn out great! The chances are, the photograph may not turn out how you envisioned, but if you never try anything new, you’re never going to grow and progress as a photographer. There is no growth in the comfort zone. It’s so important not only for beginners to consistently try new things, but to KEEP trying new things after you’ve become more advanced.
There are a multitude of ways to stay creative: learn how to add something a little extra to your photos using Photoshop, go all-out on an indoor studio, try a funky new angle, use prisms in your photographs, experiment on some new poses, literally the possibilities are endless!
As you try new things and master them, before you know it you’ll become known for shooting in a certain style and your viewers will love you all the more for it. Branding comes naturally when you don’t let your fears keep you from developing your niches. So go out there are do something a little crazy, edgy, or completely different from what you normally do! I promise you won’t regret it.
What other things have you struggled with as a beginner photographer? I would love to hear your thoughts!
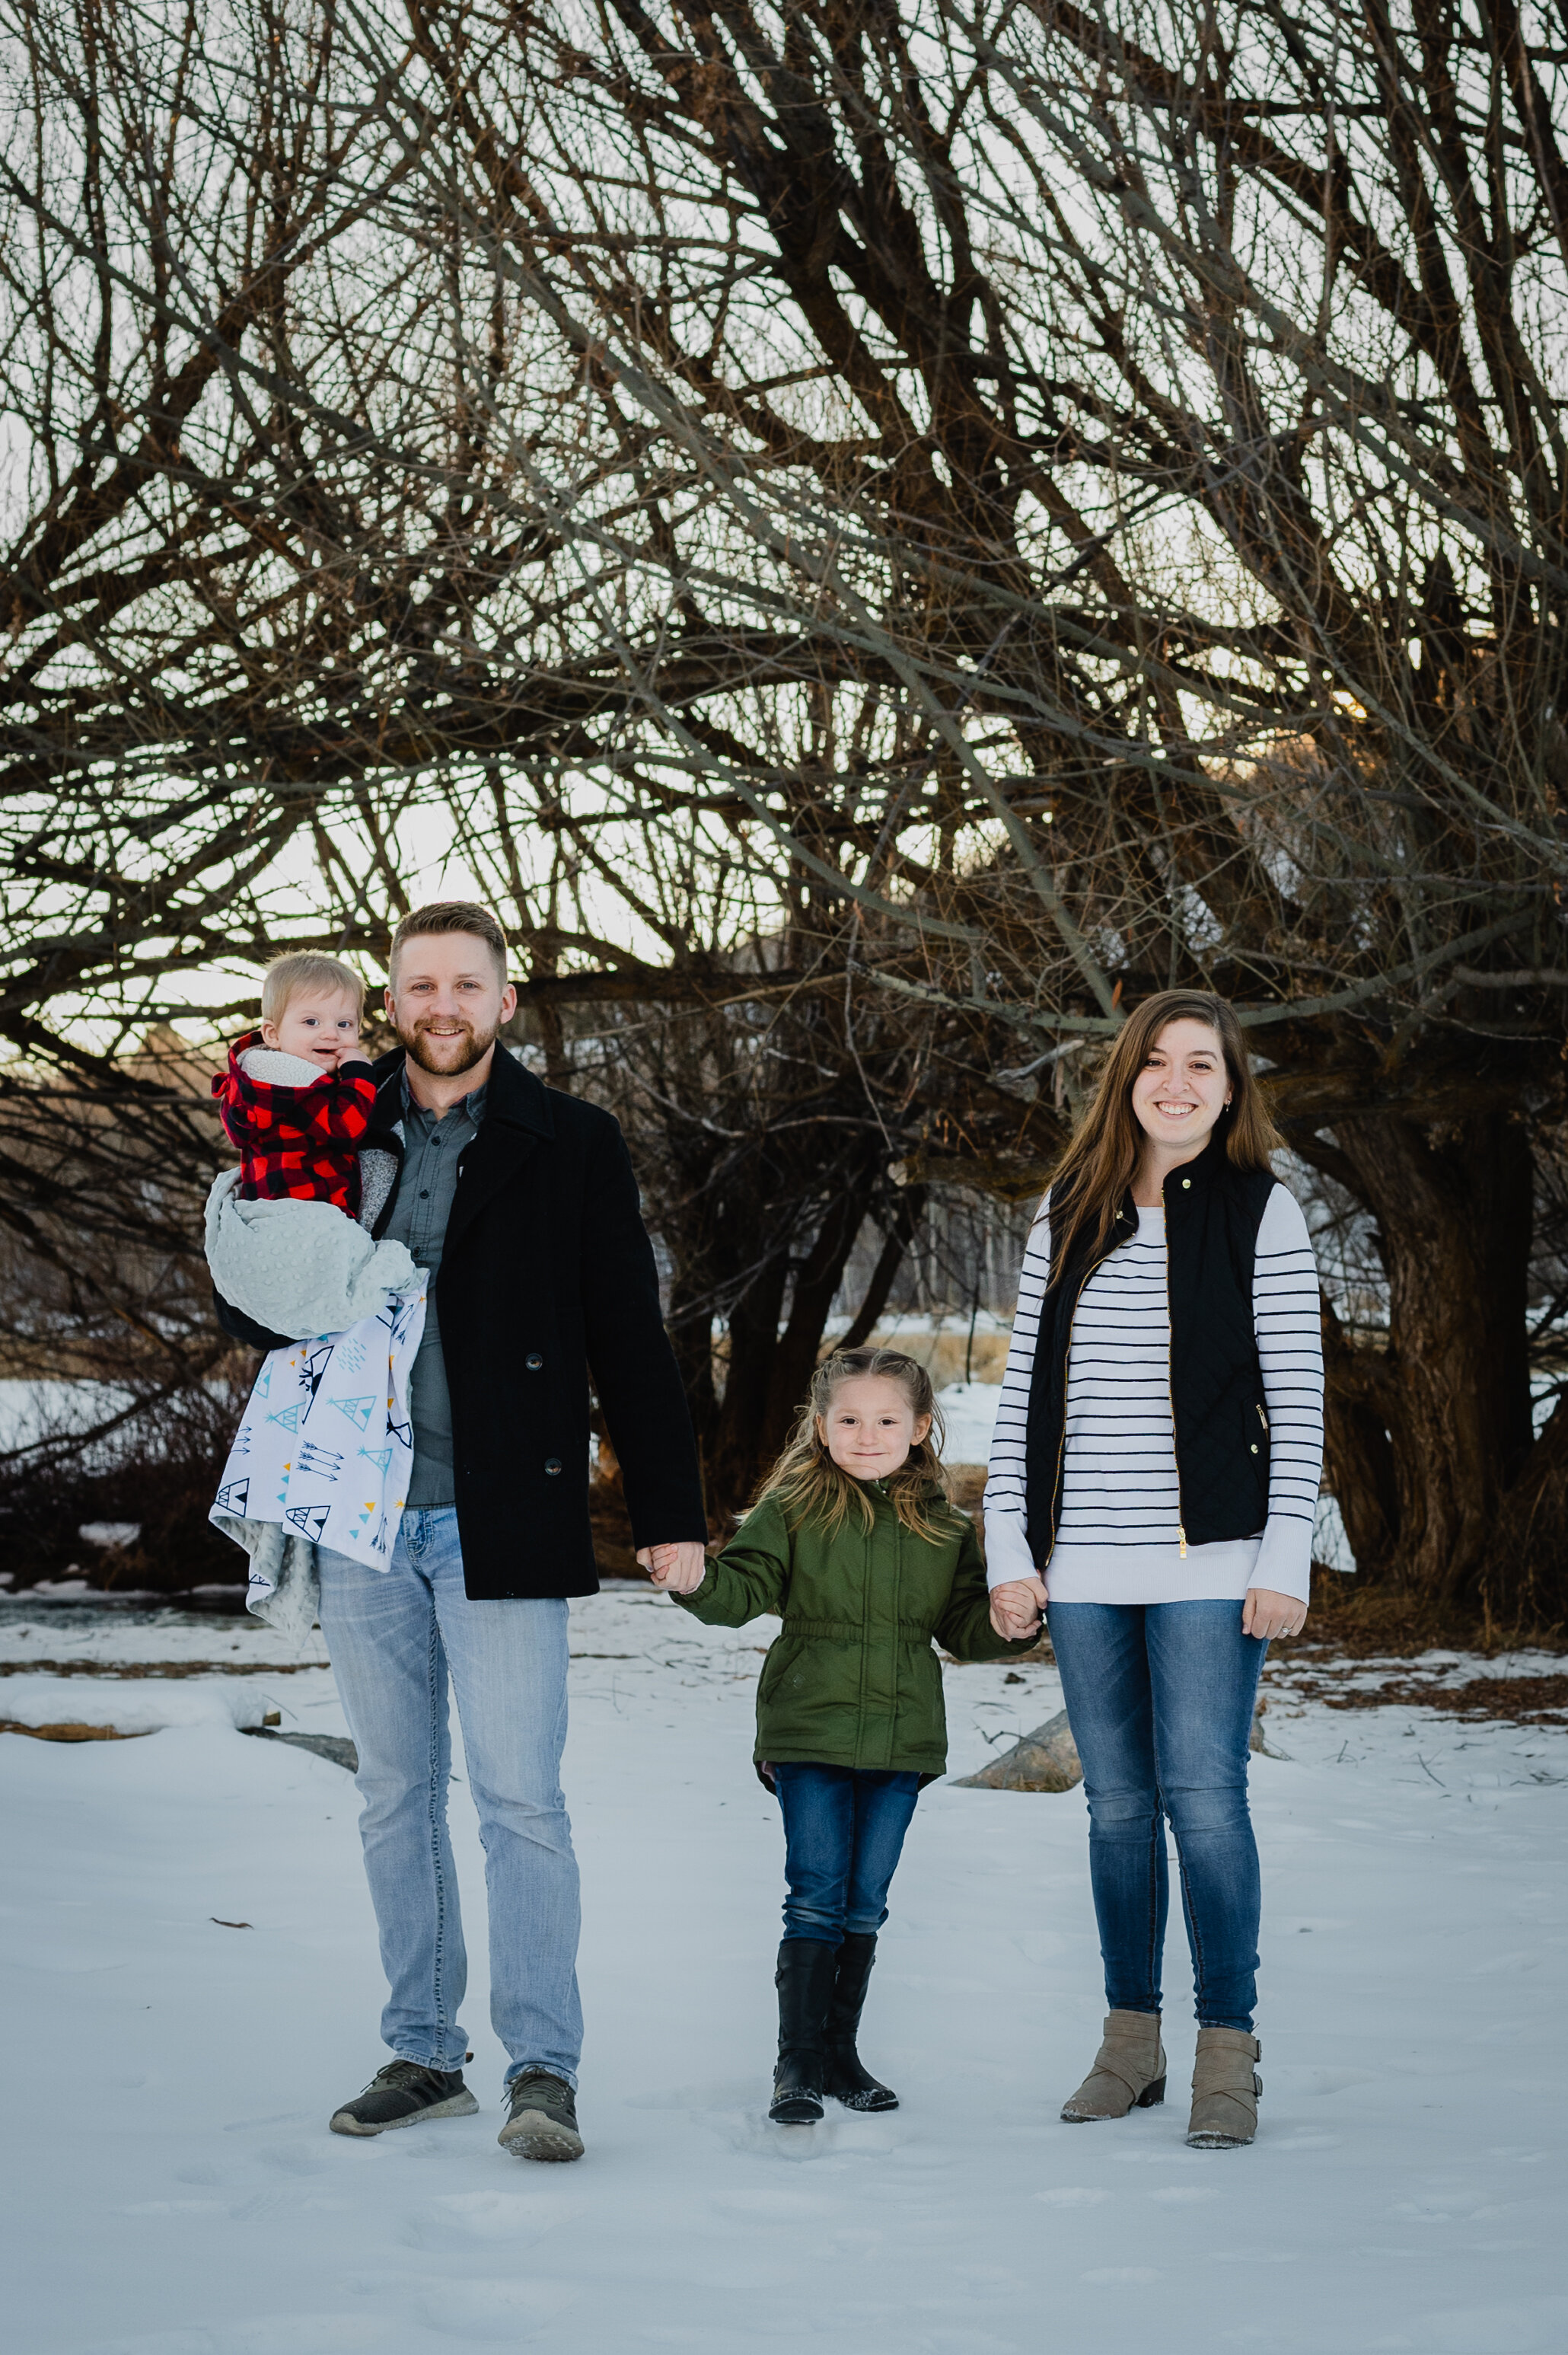
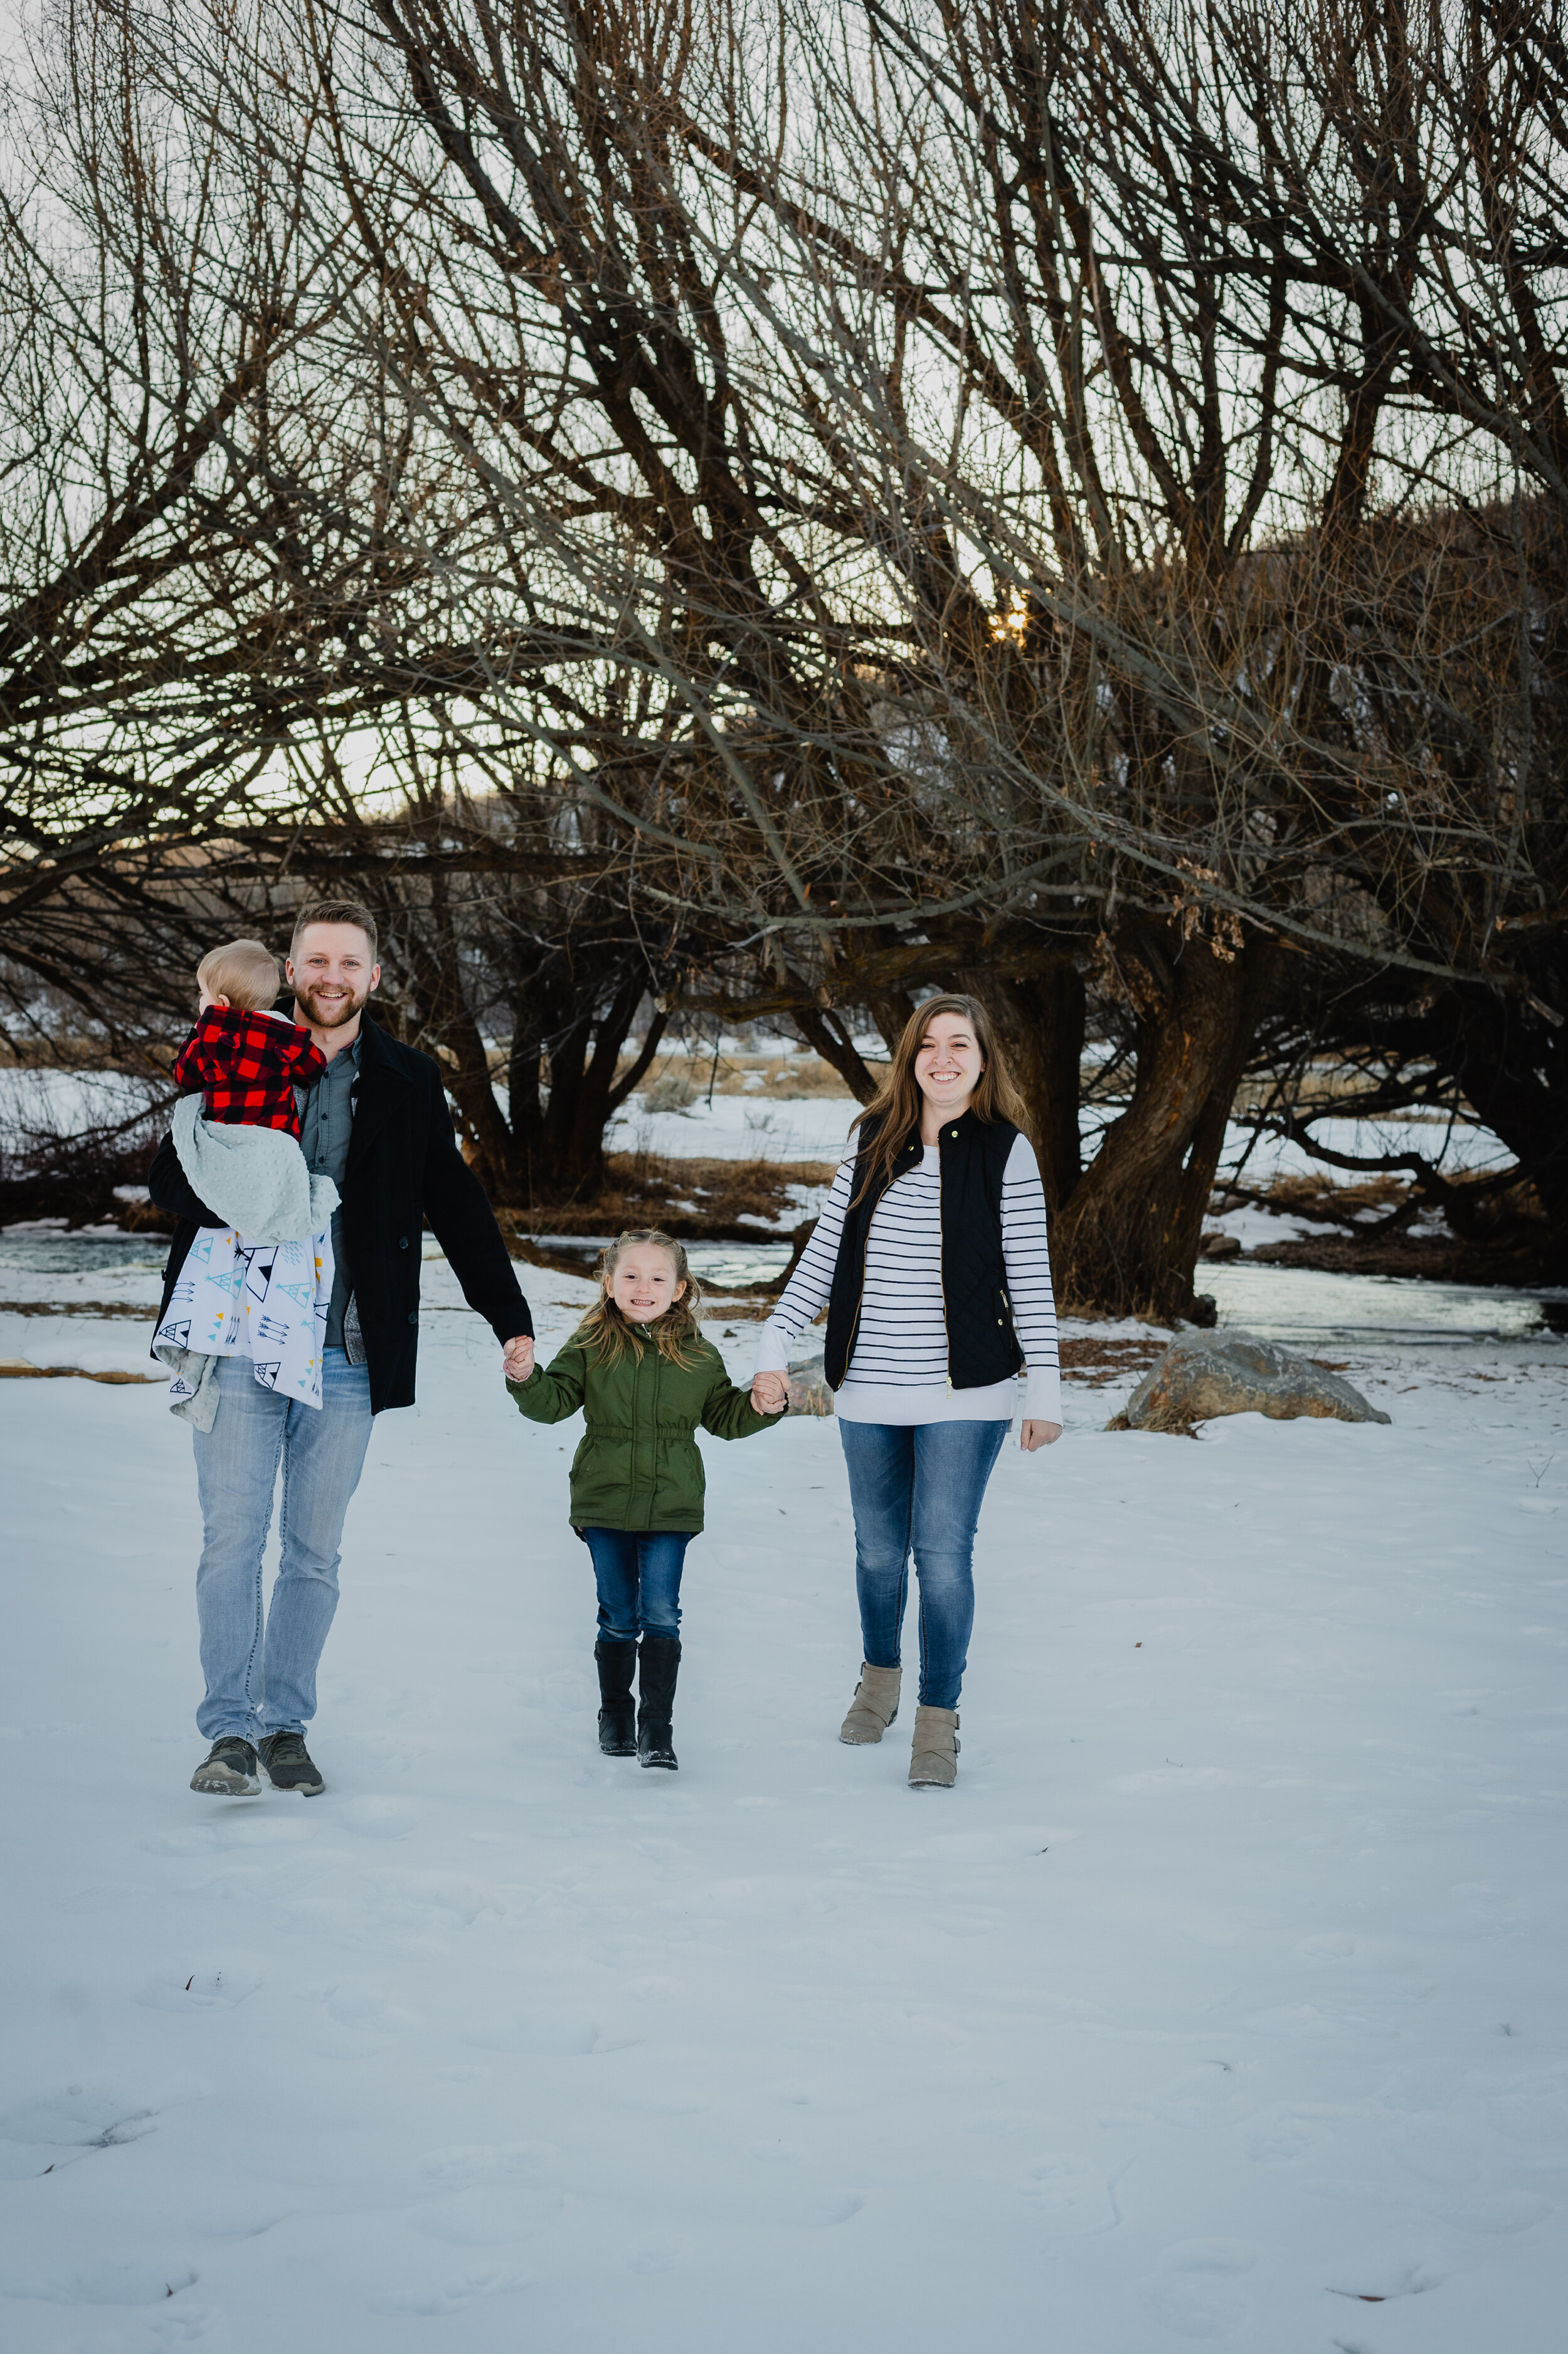
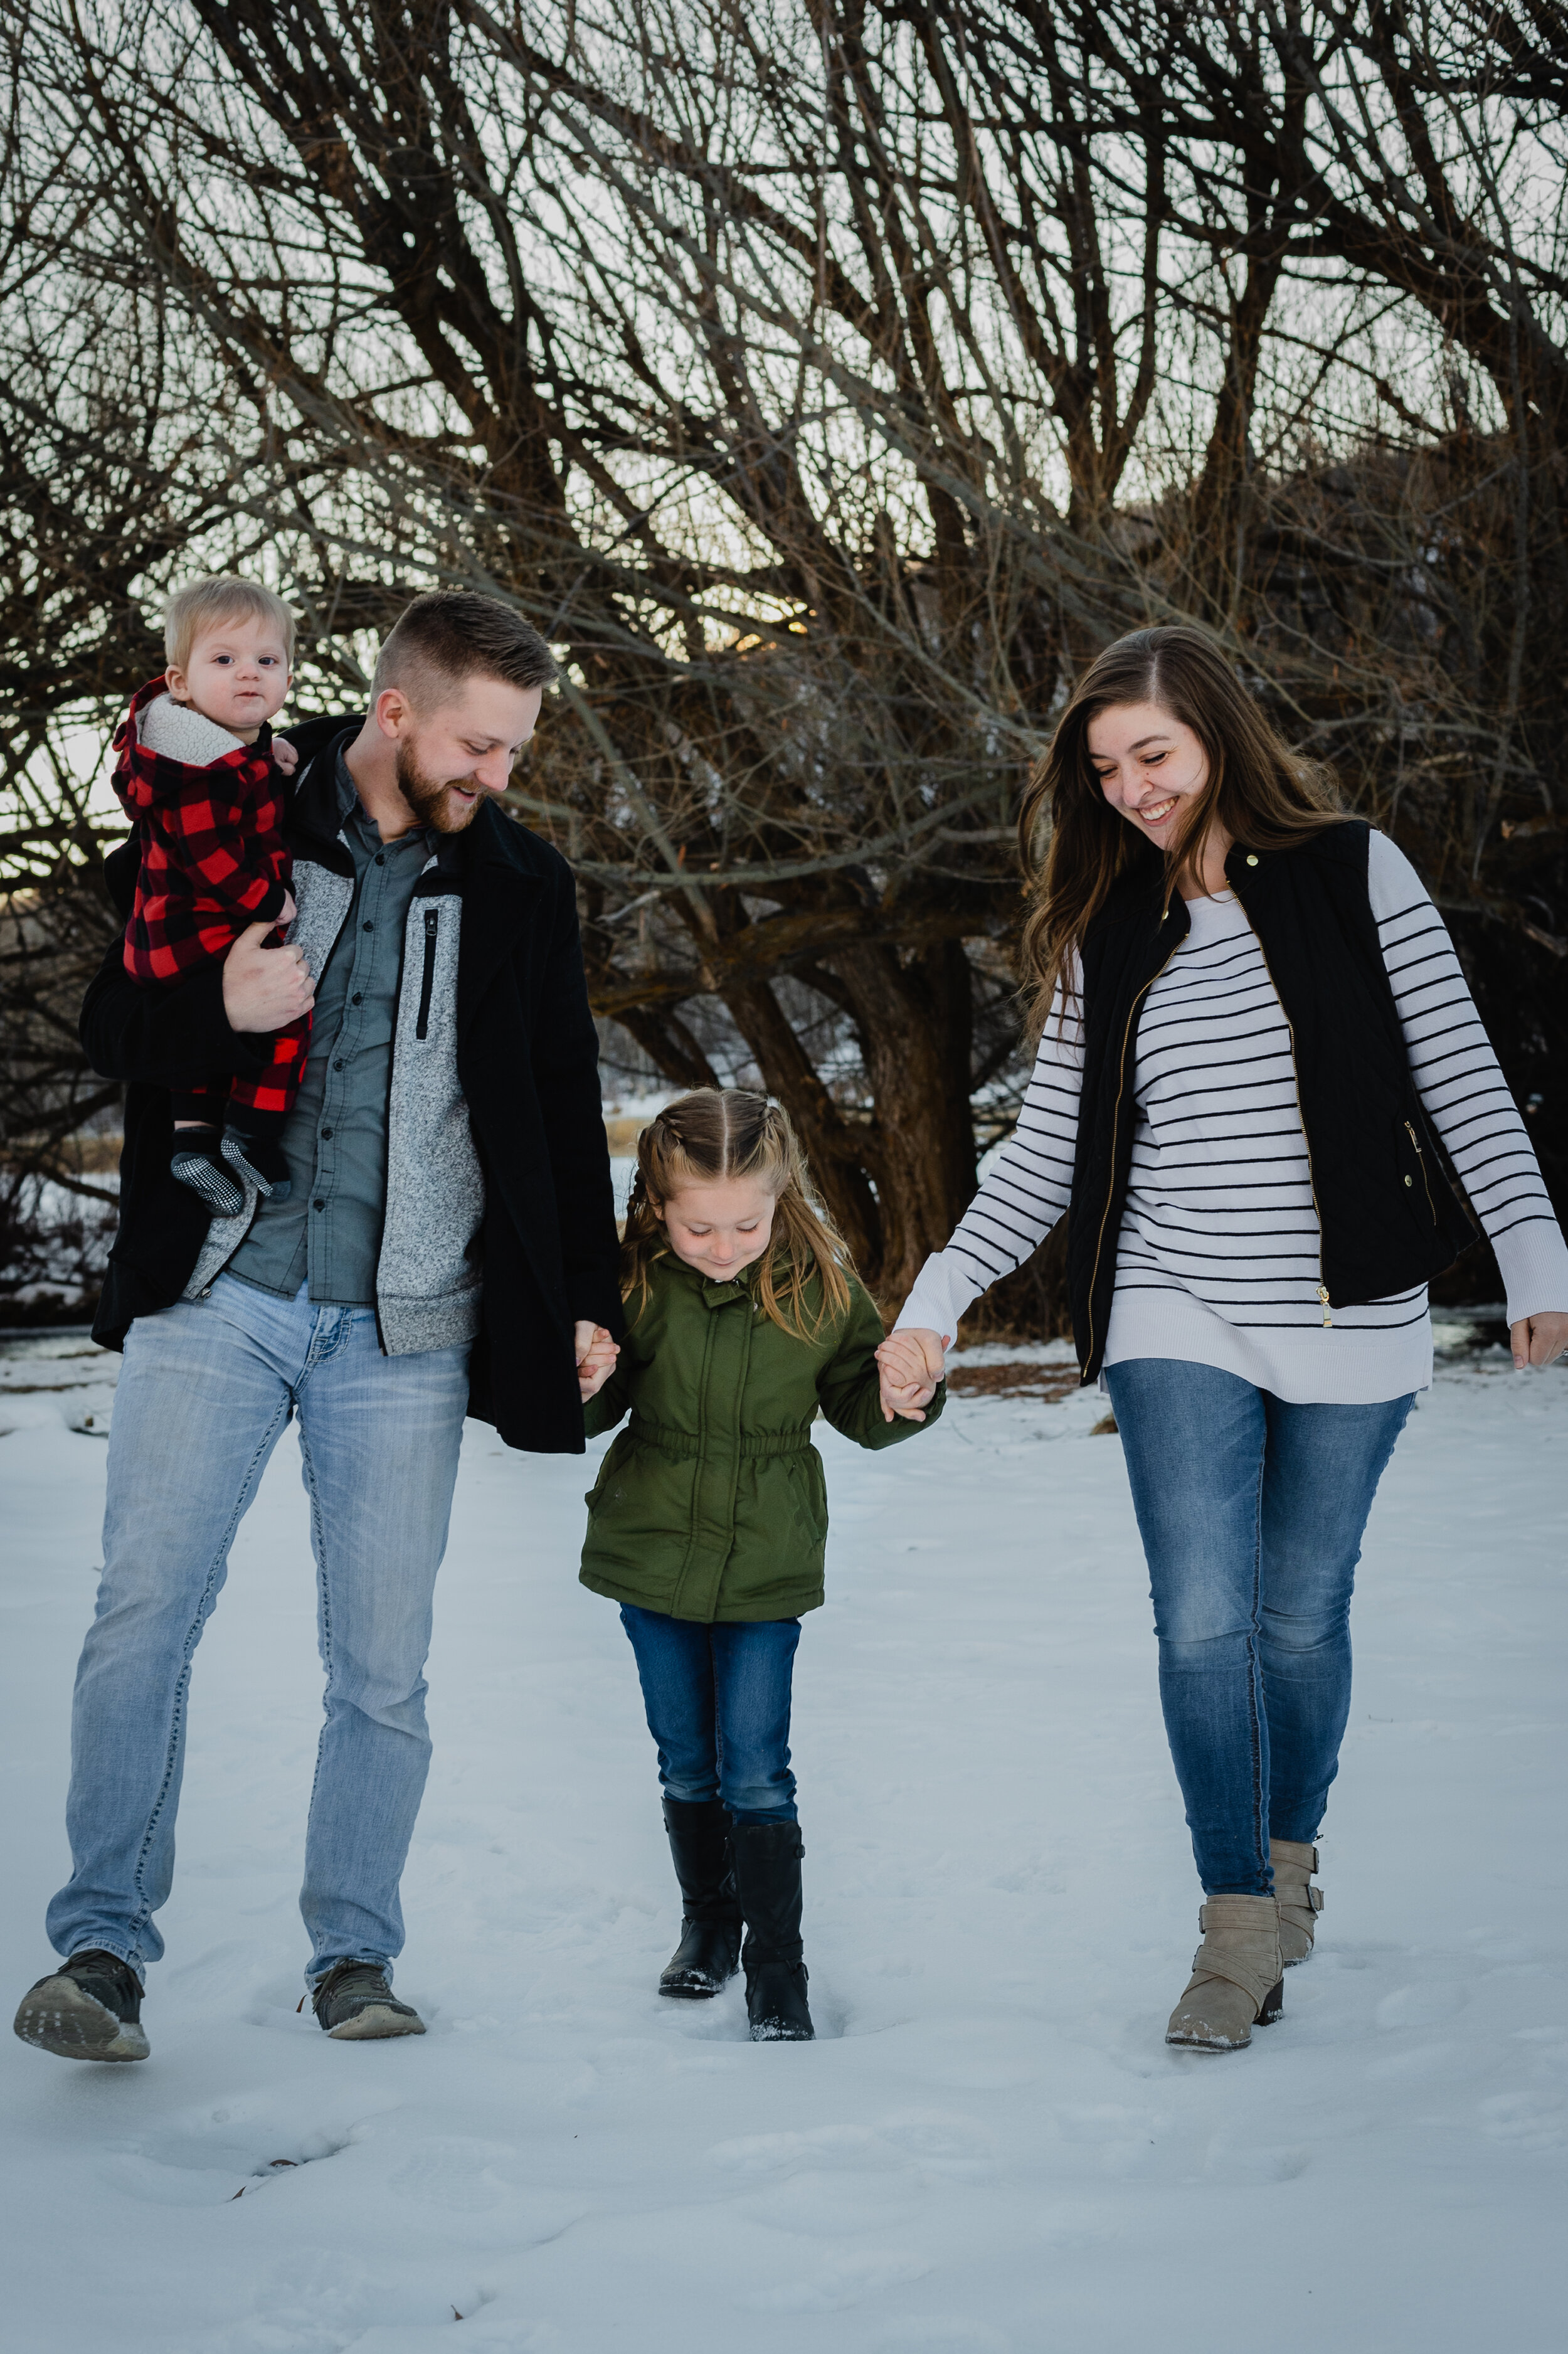
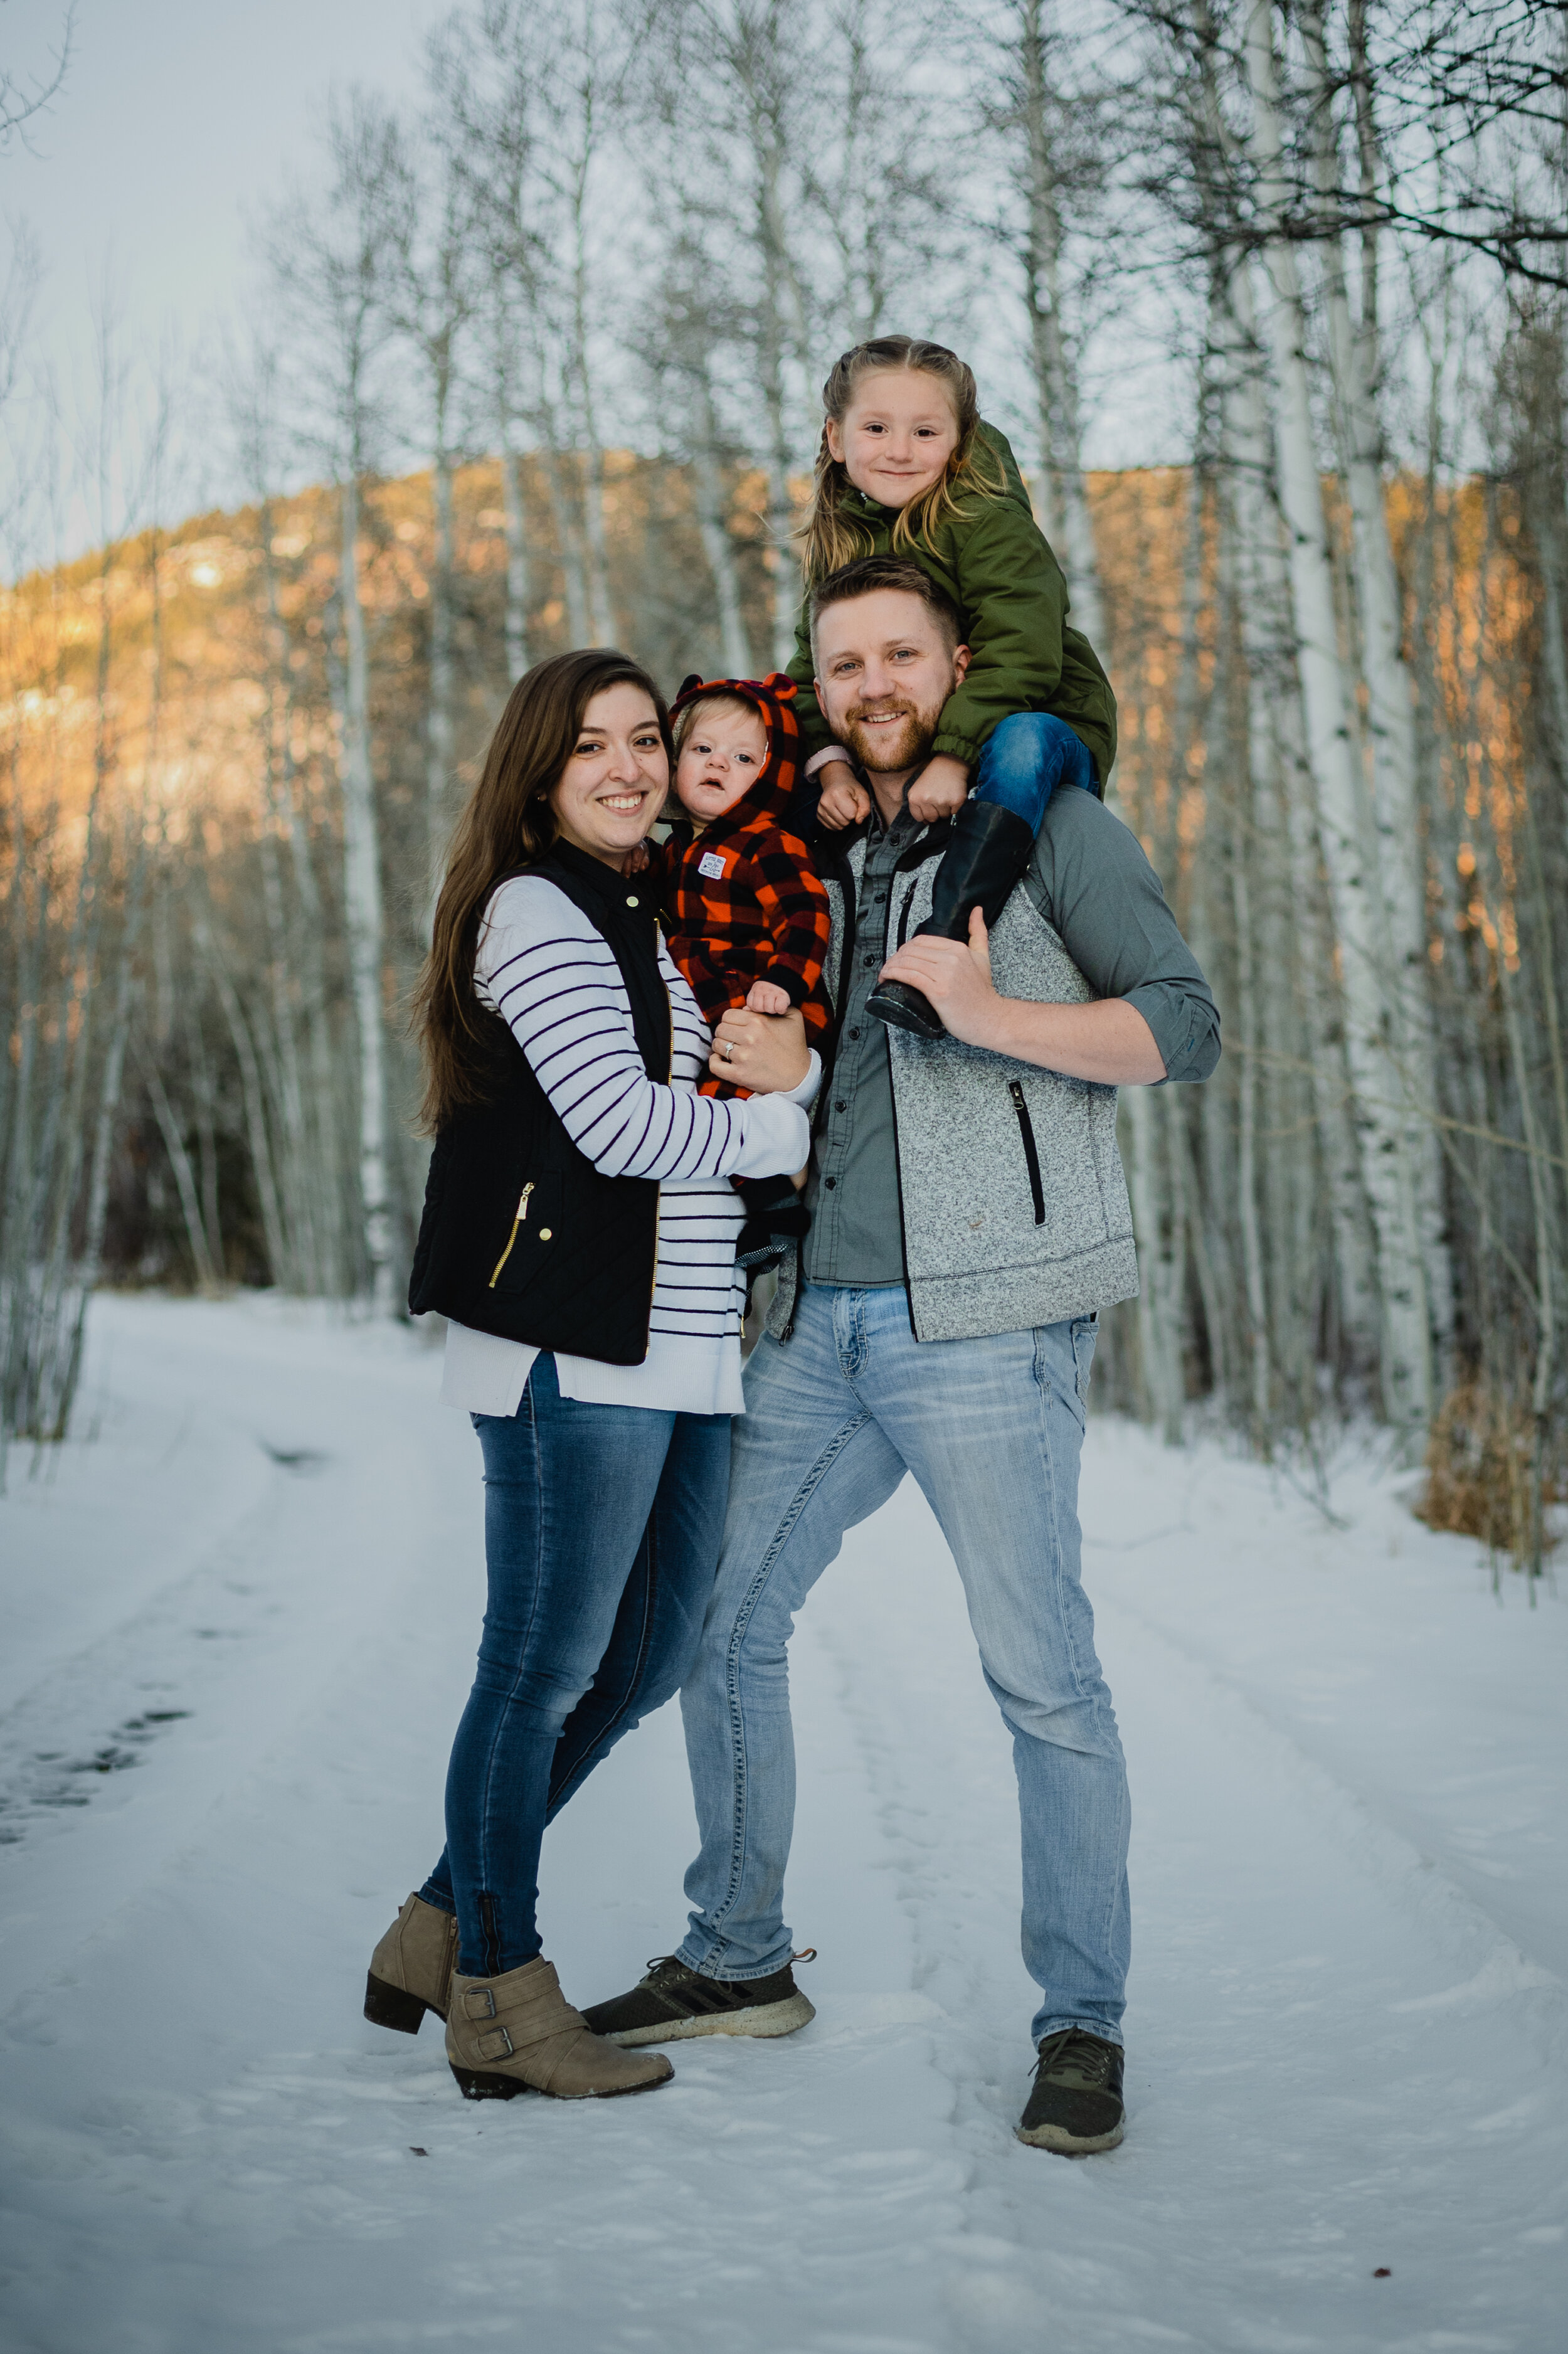
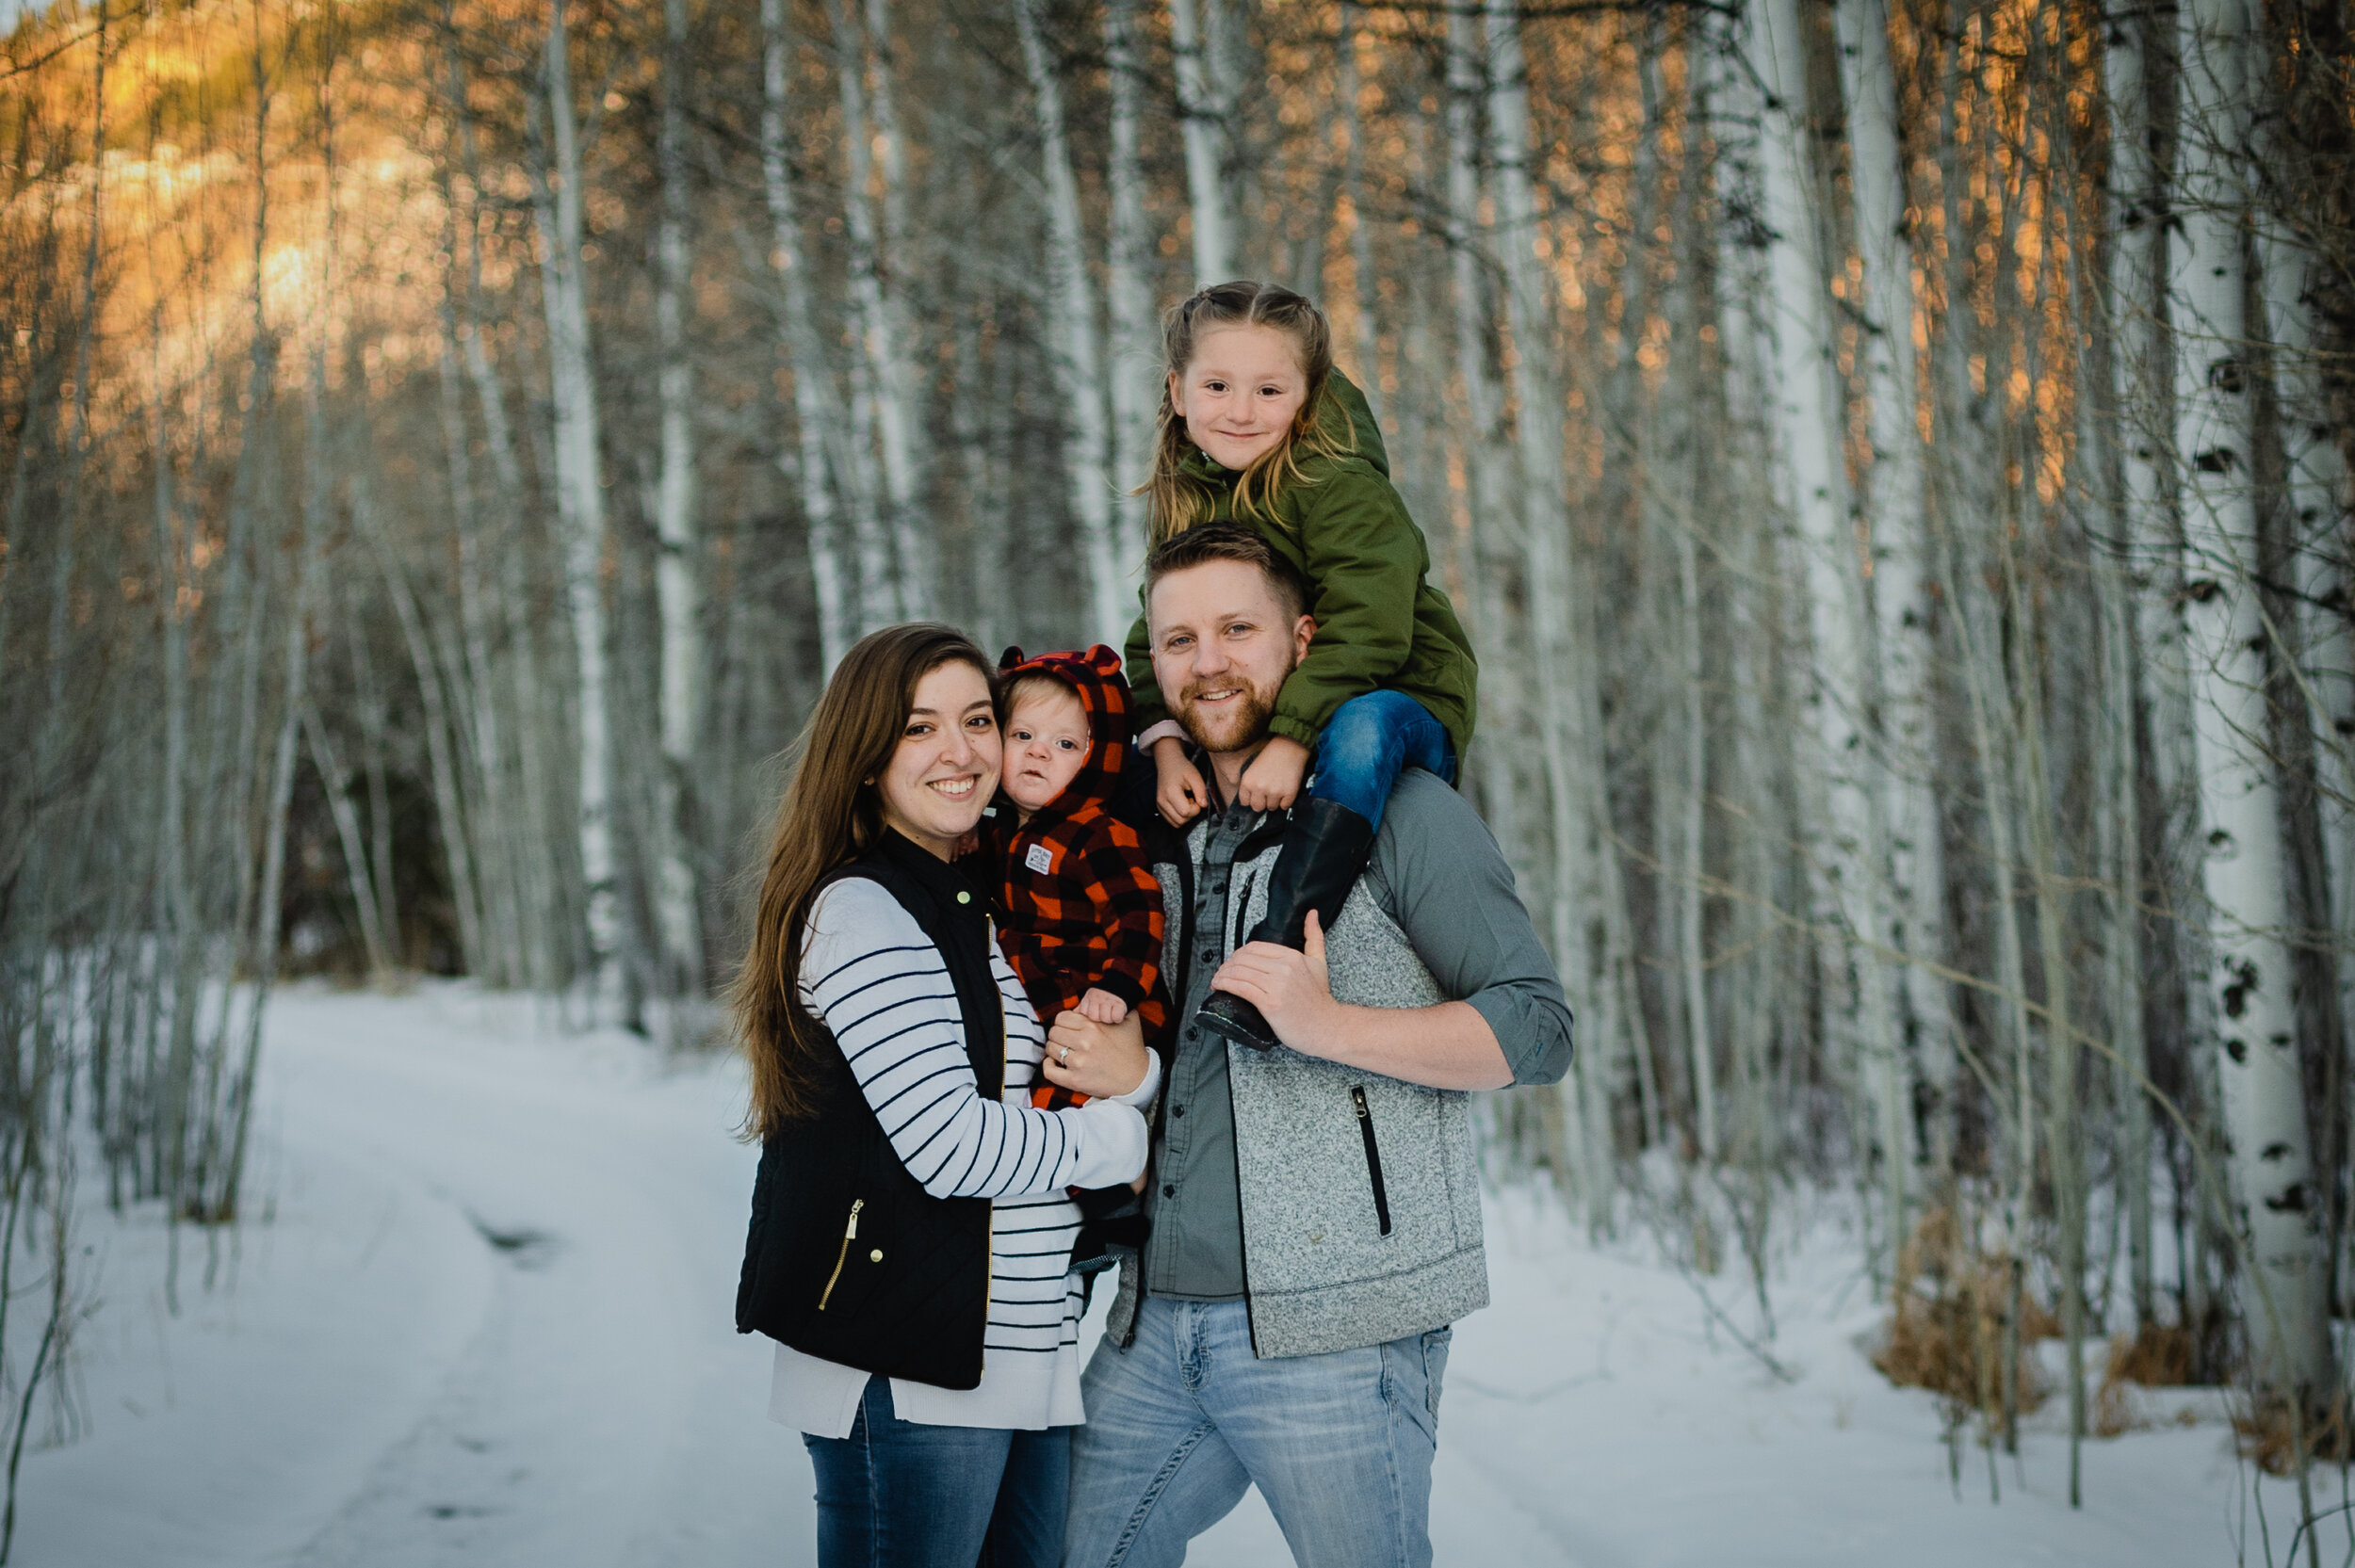
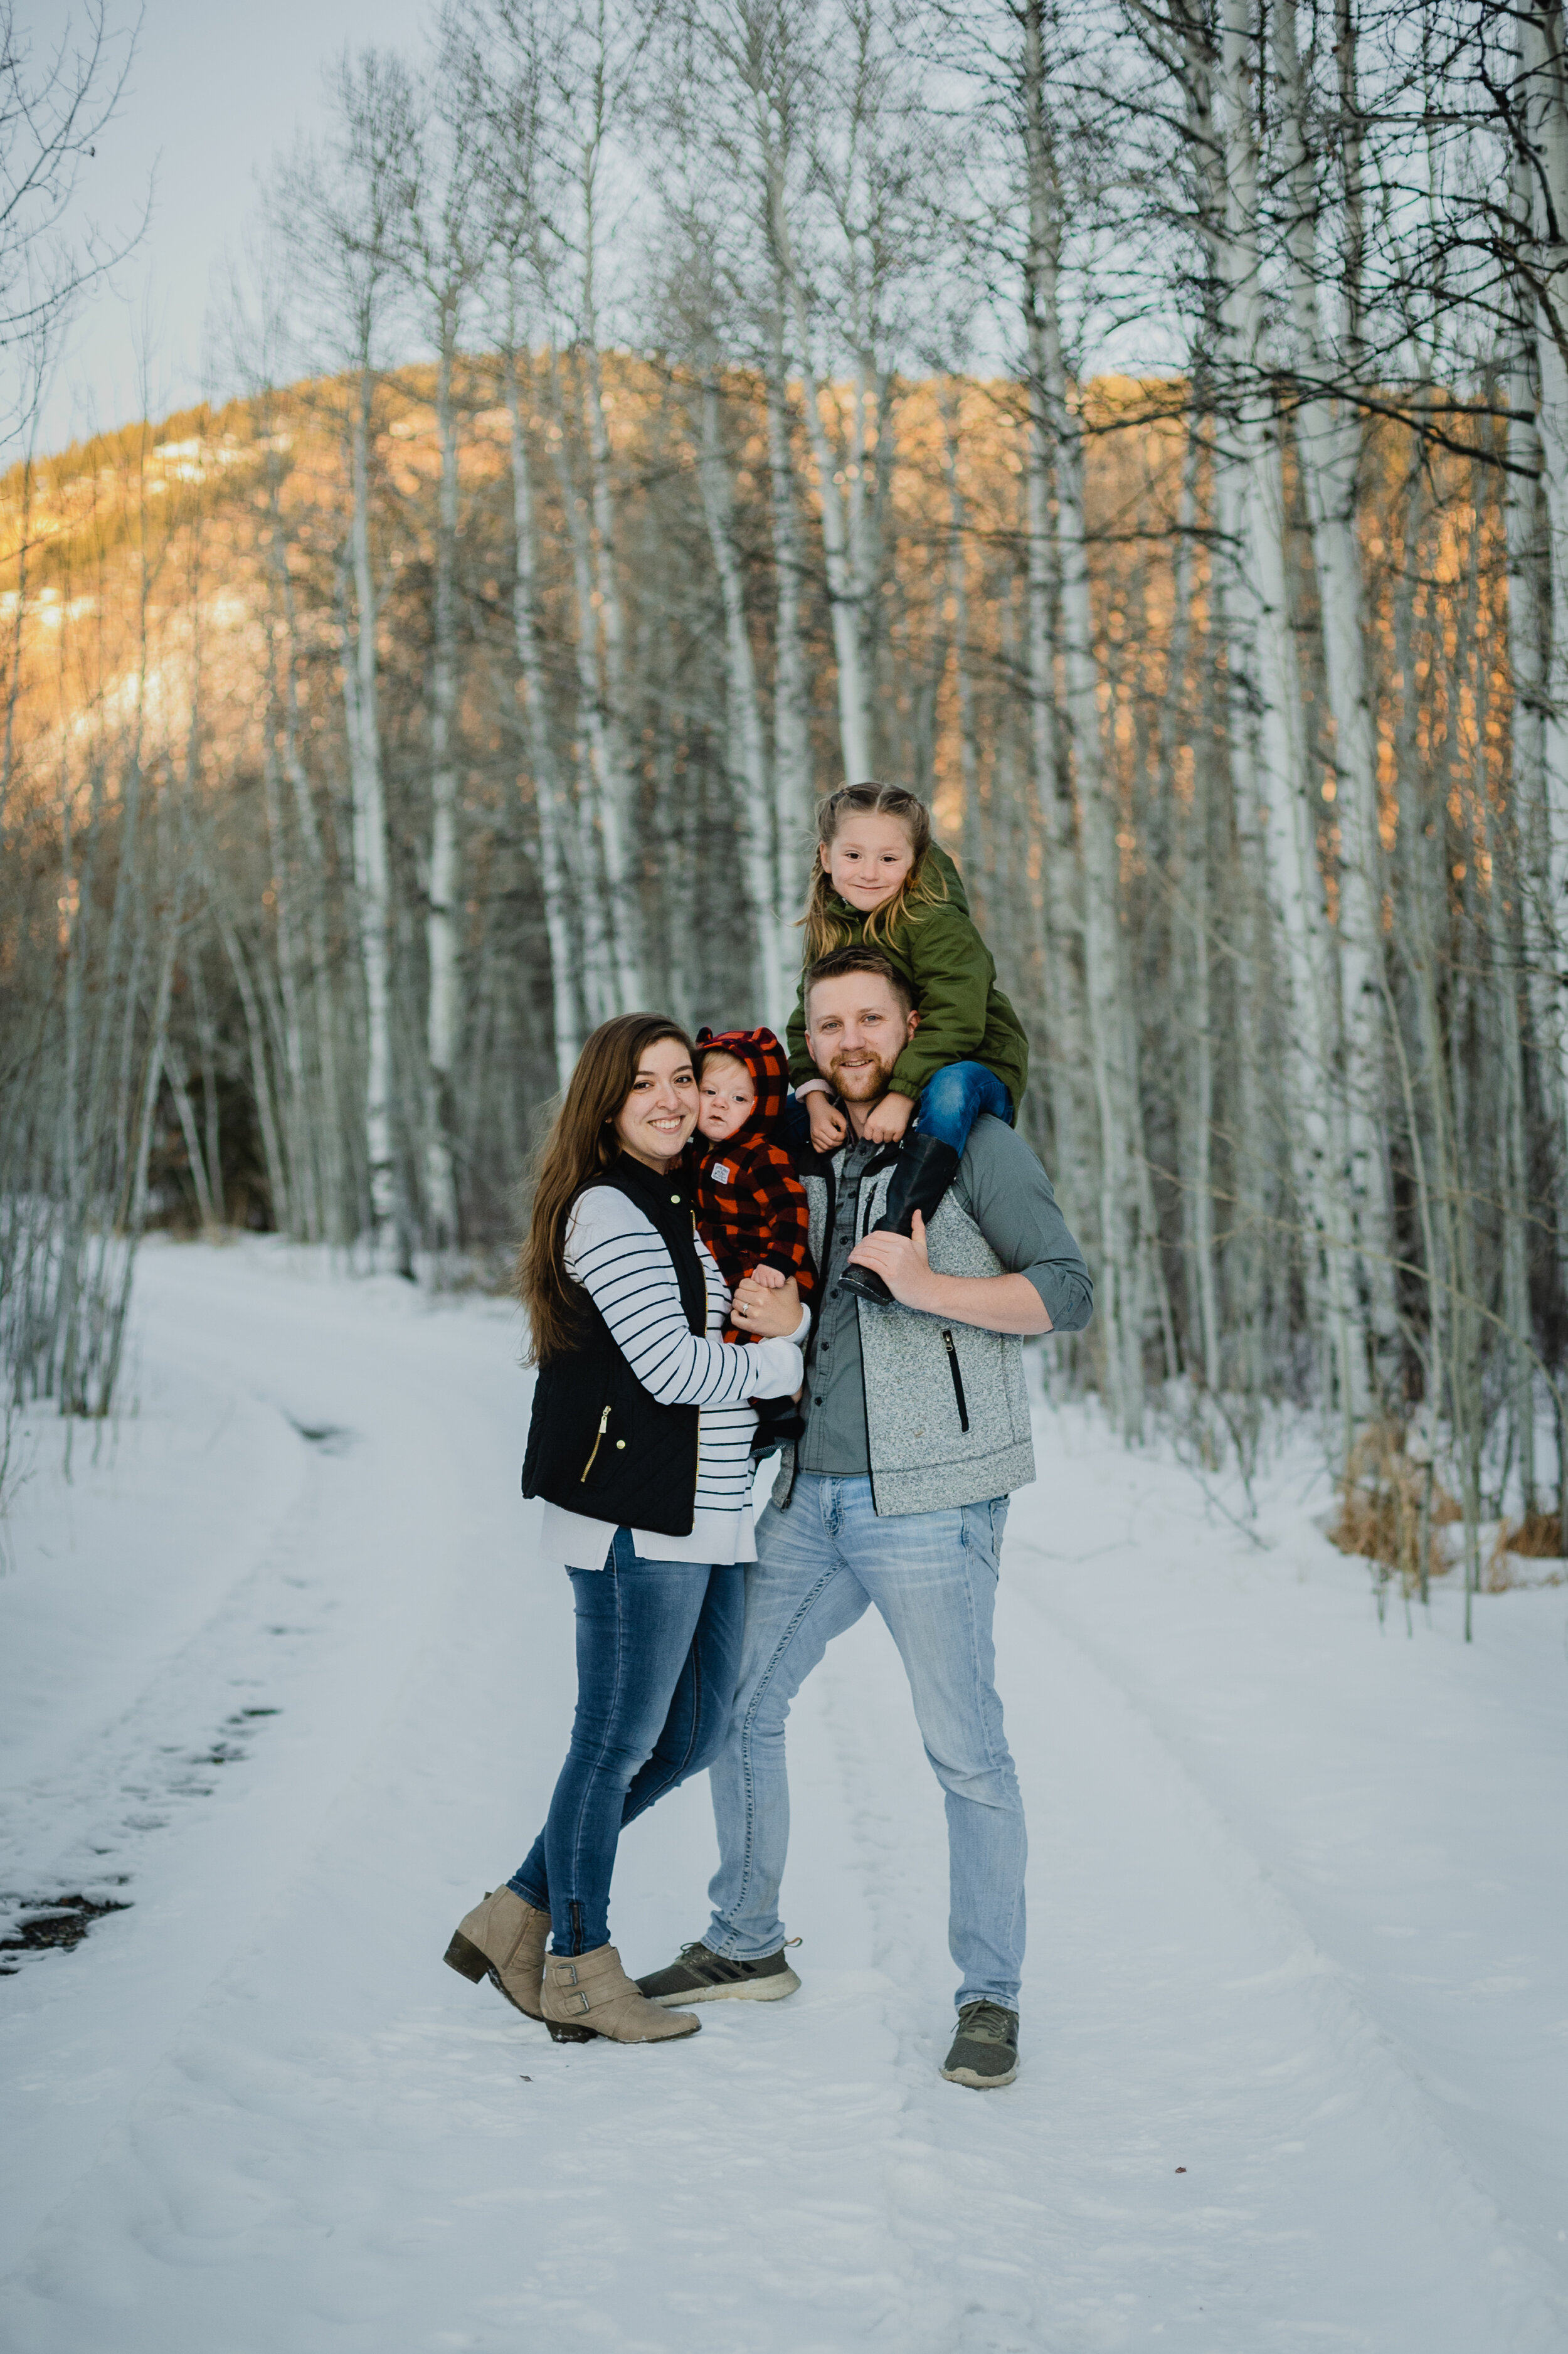
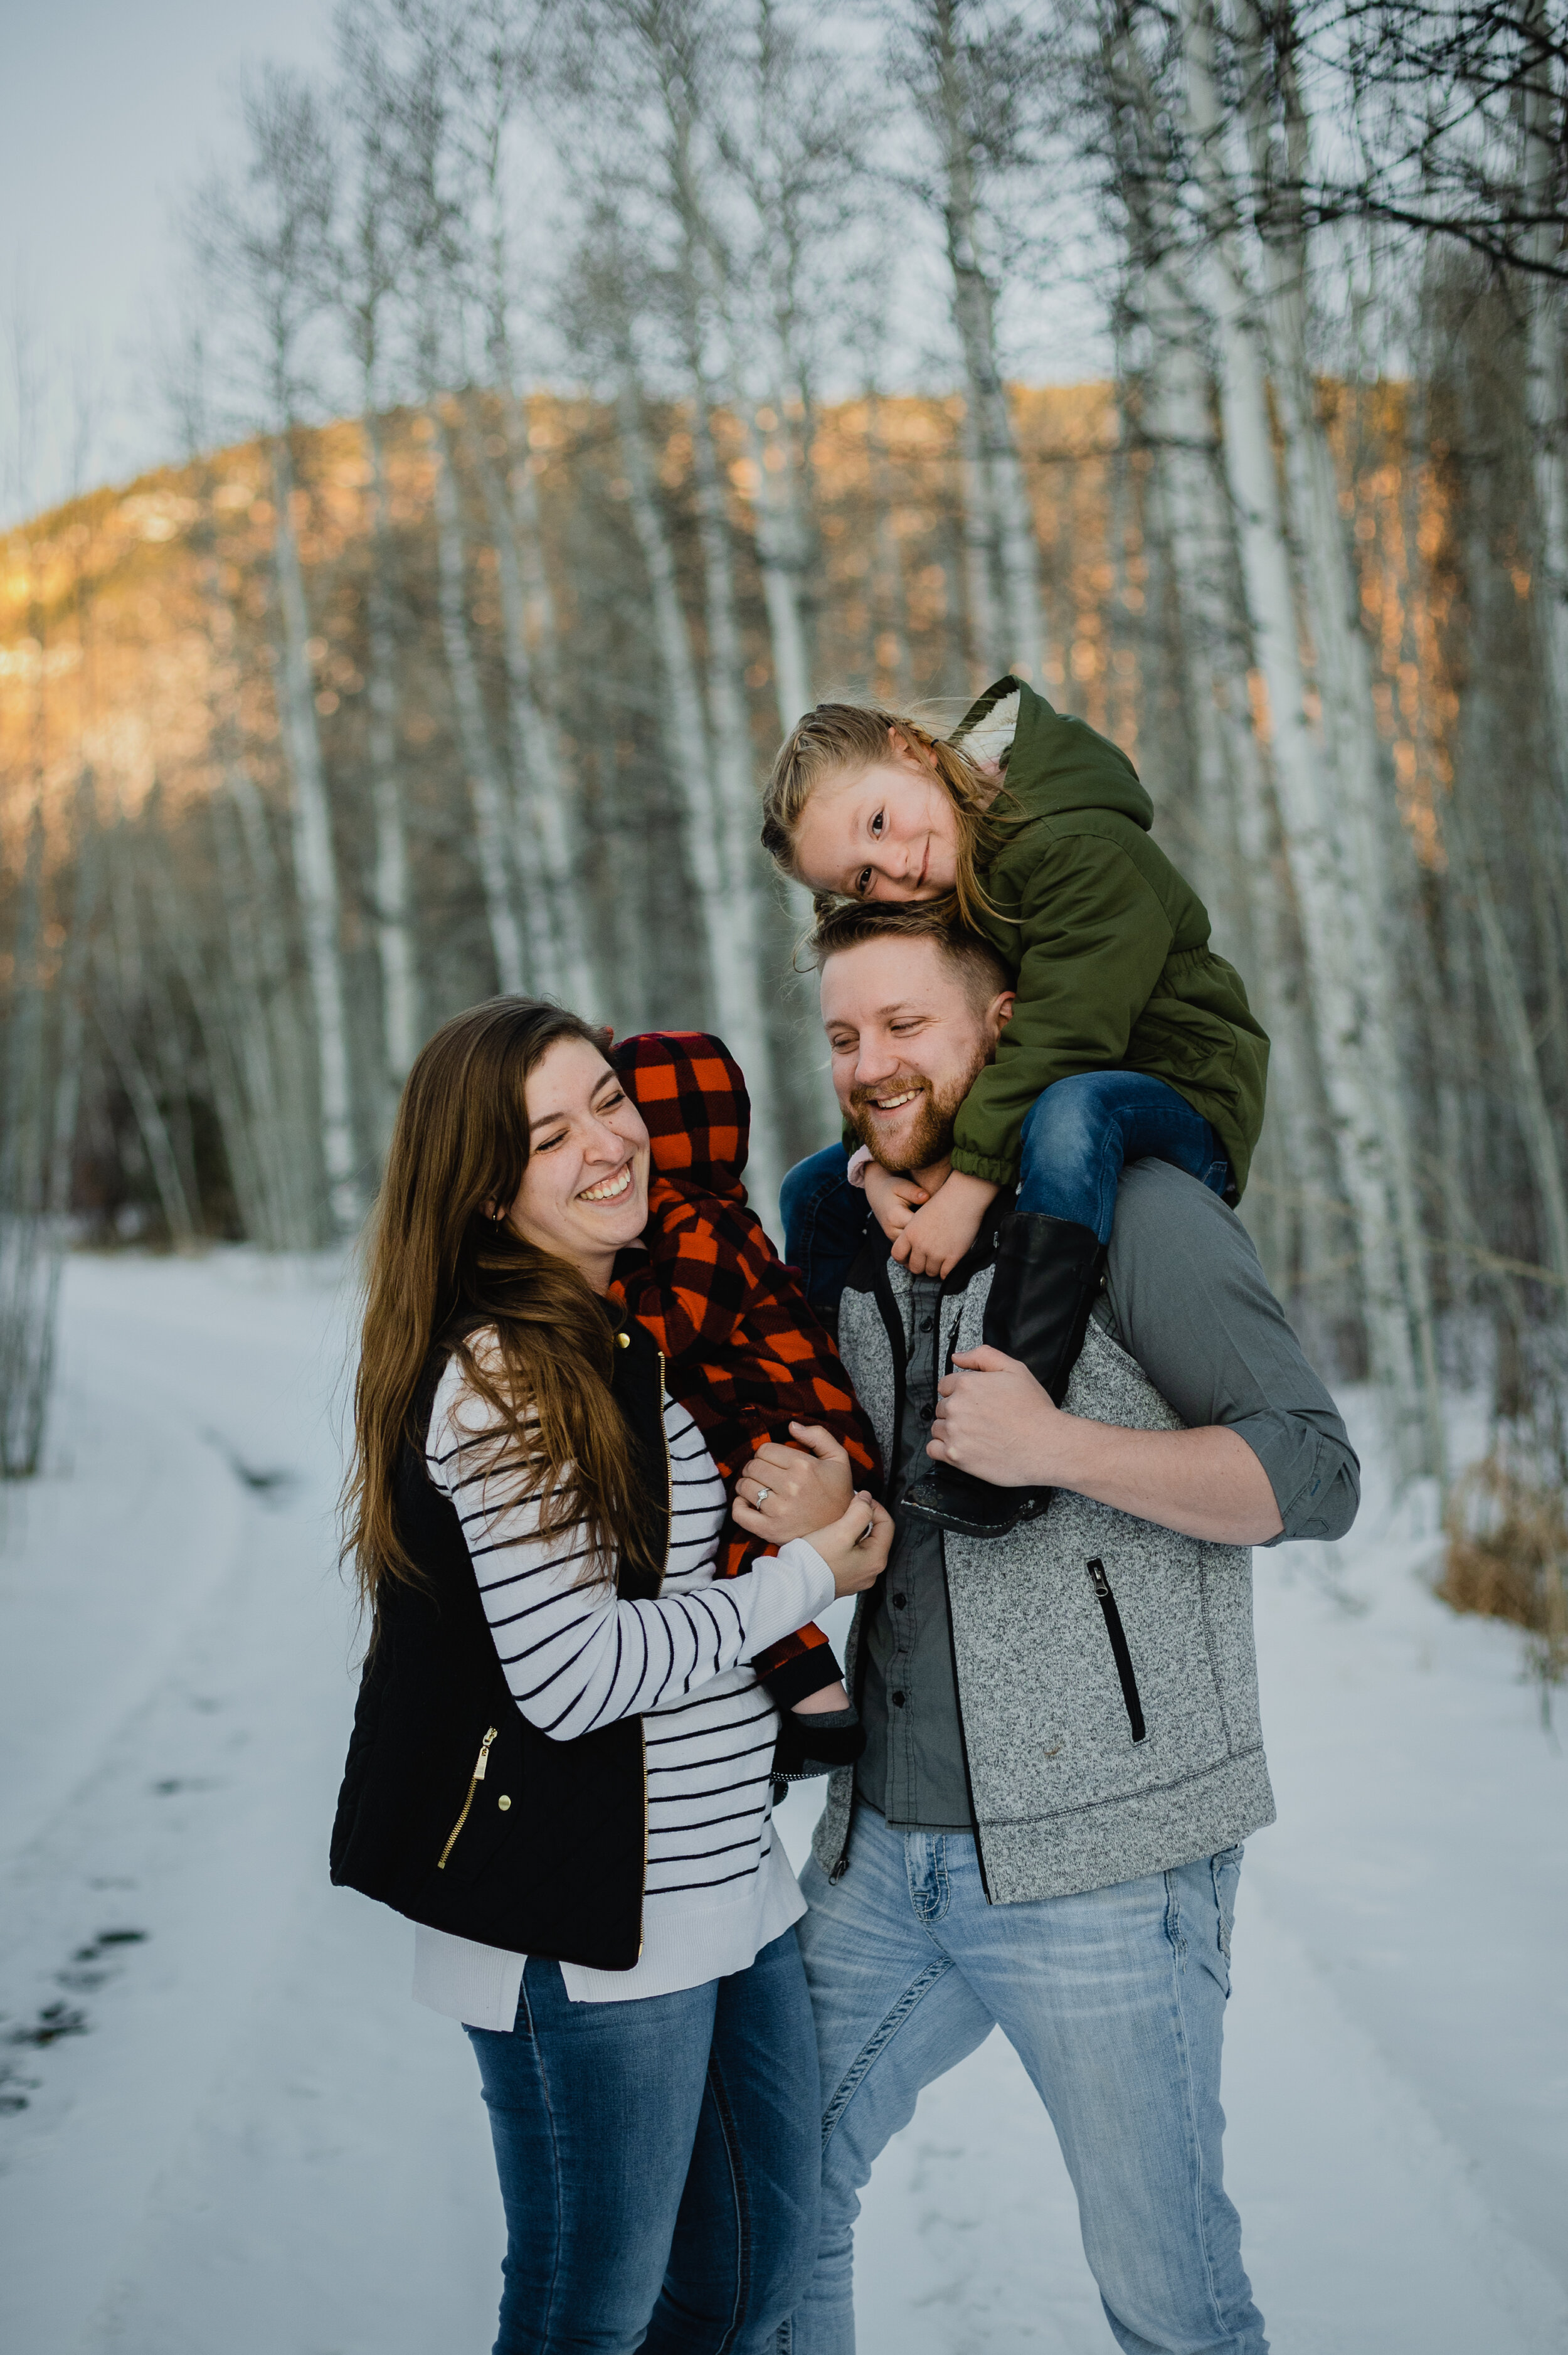
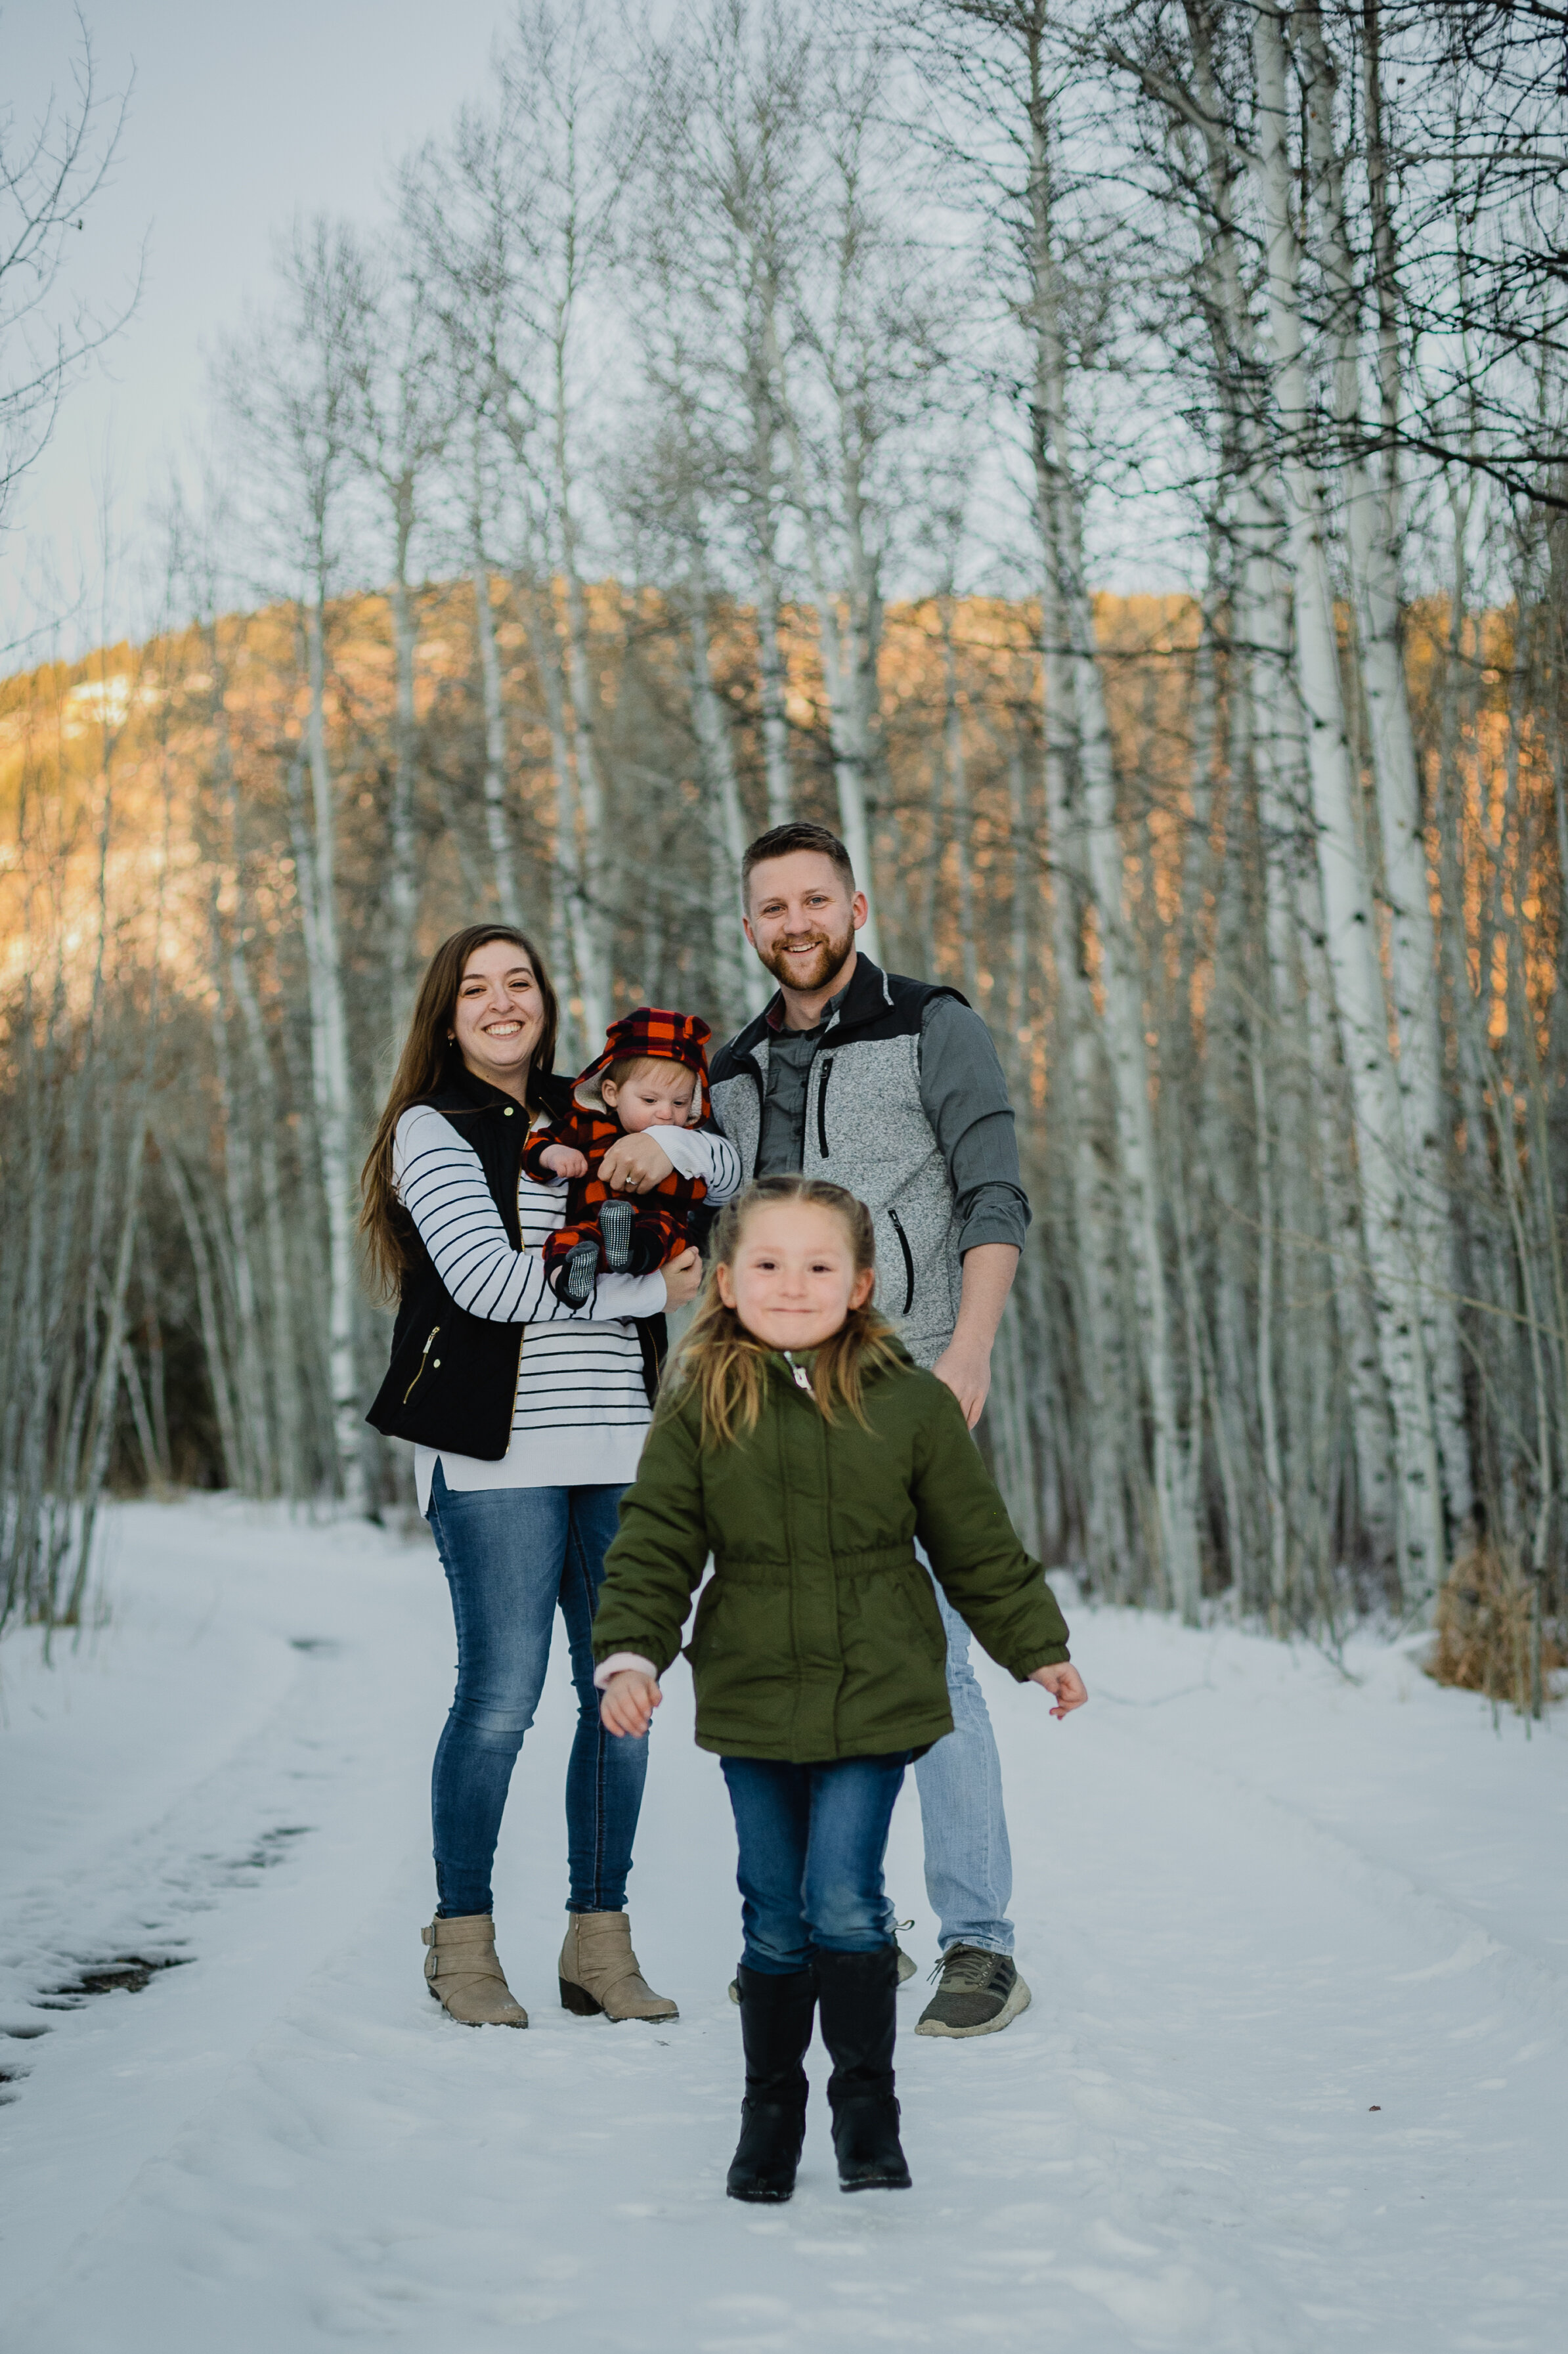
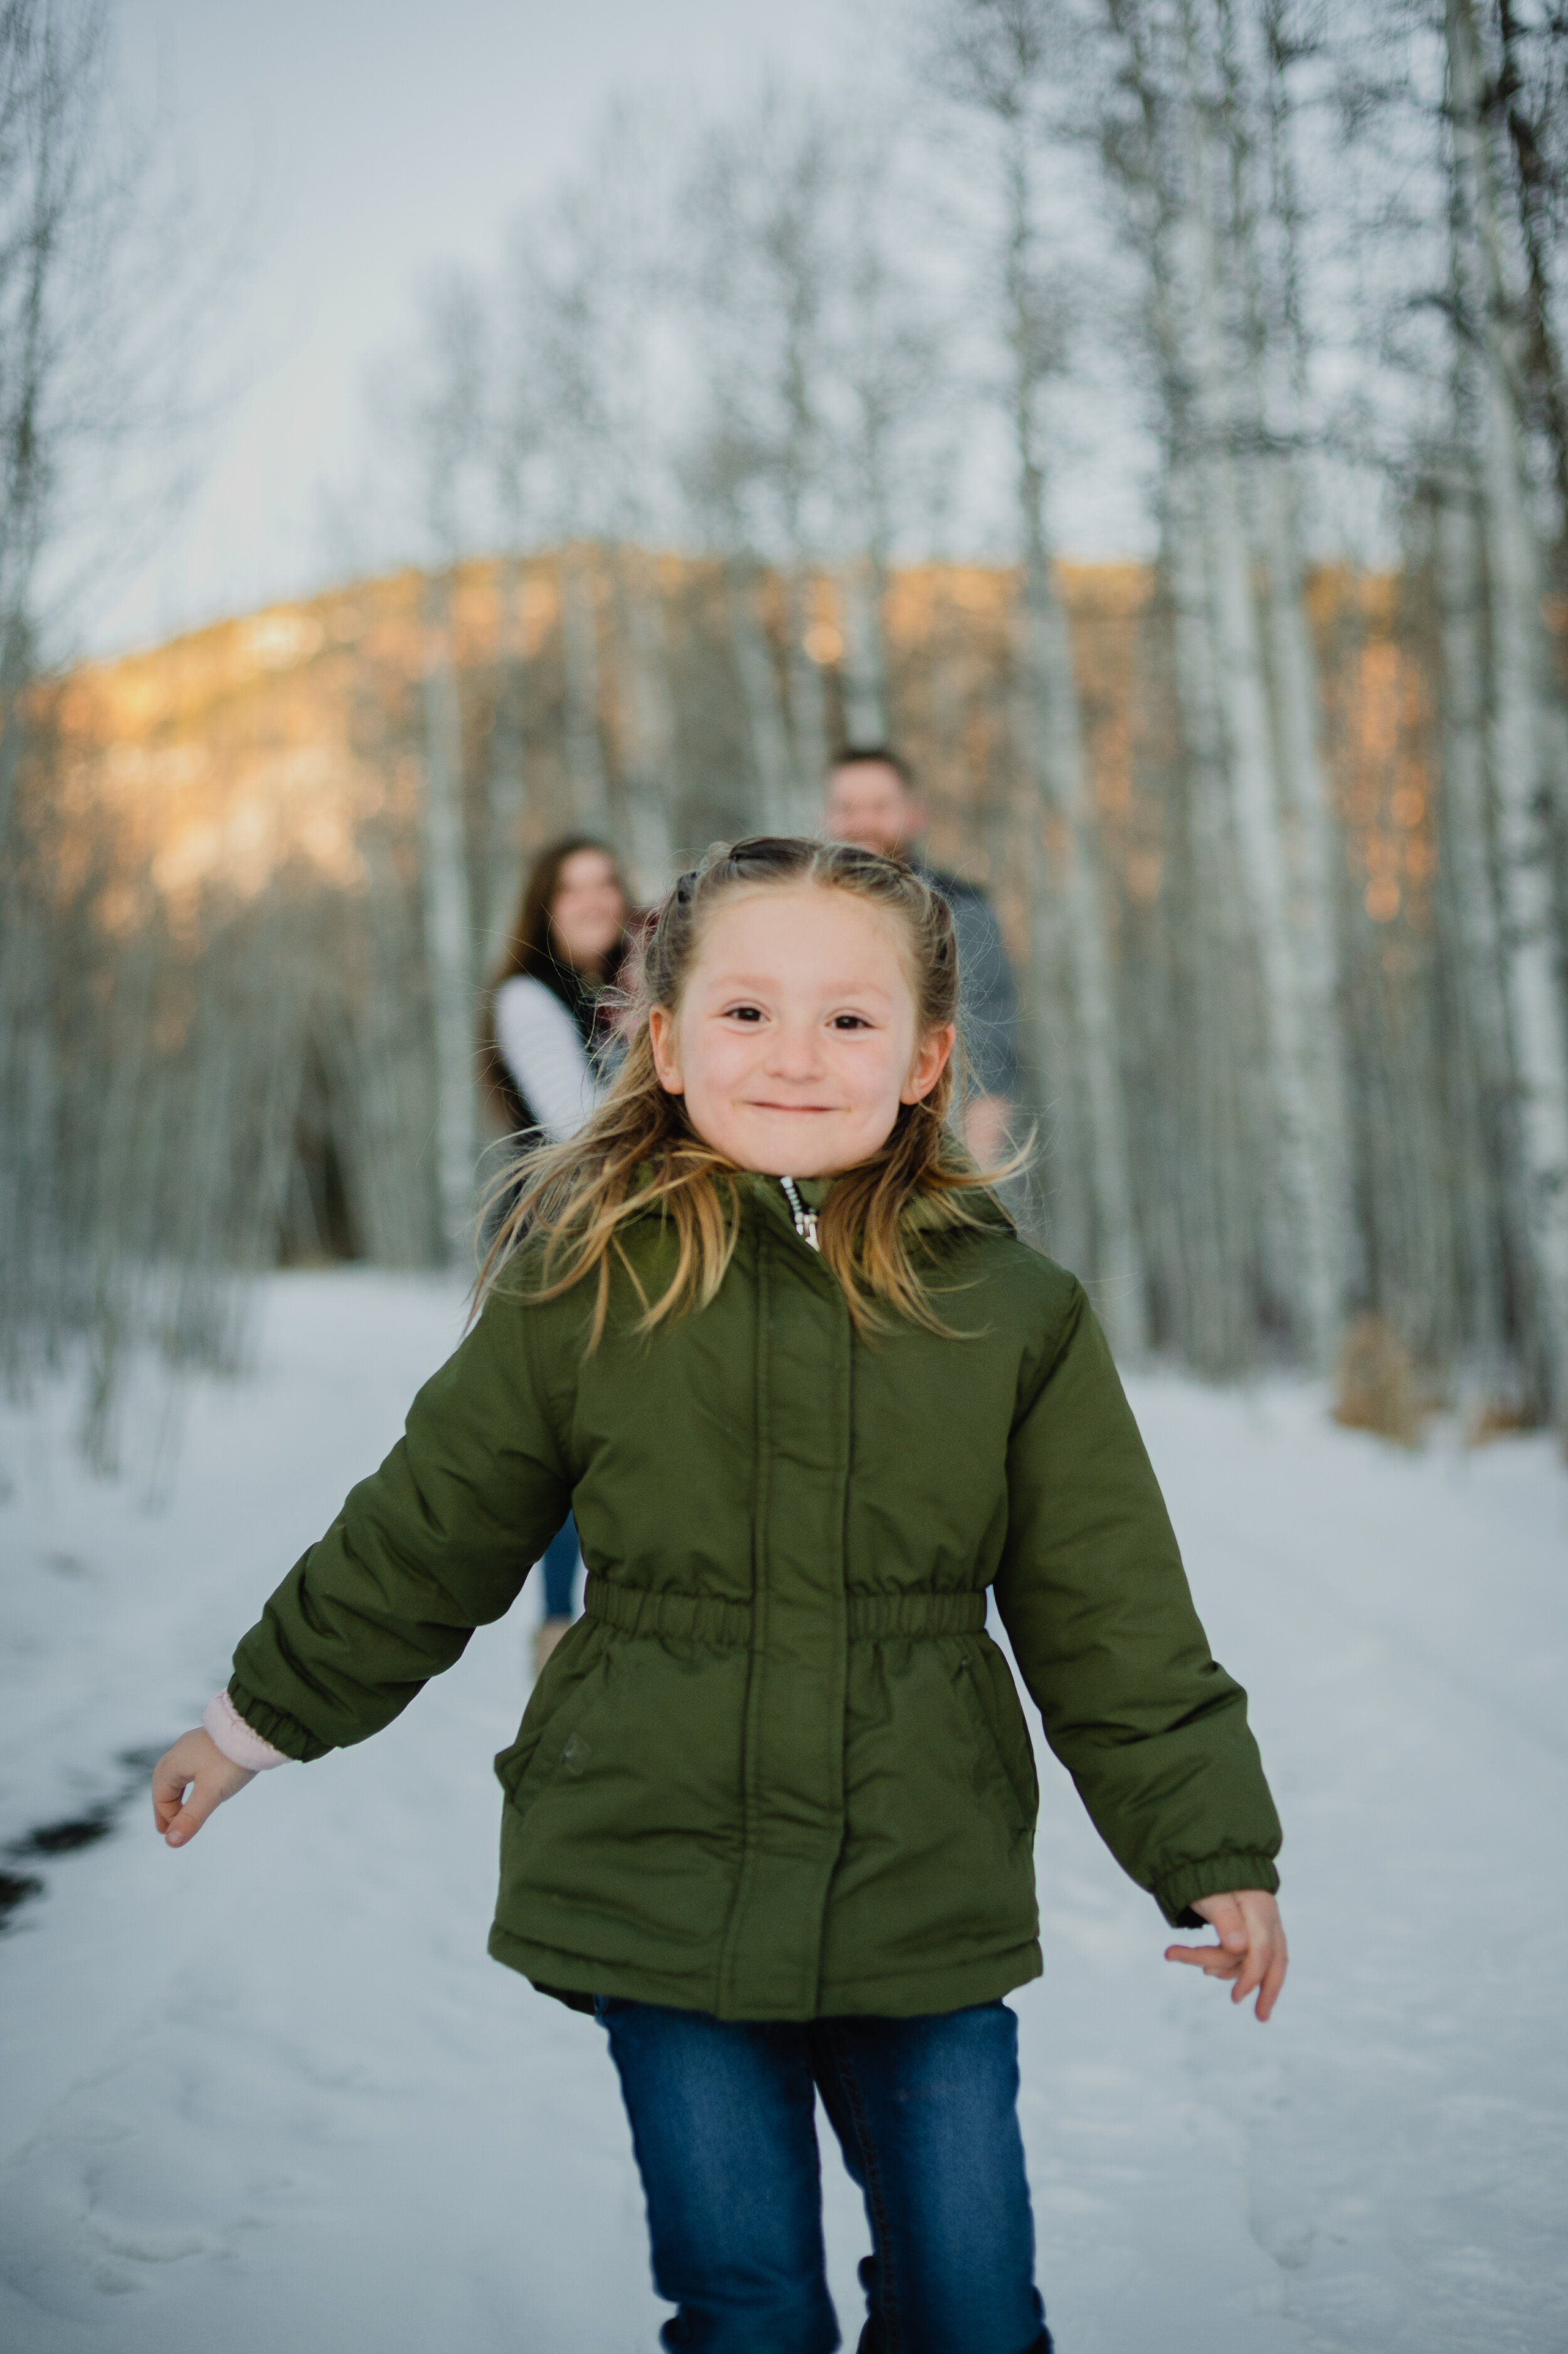
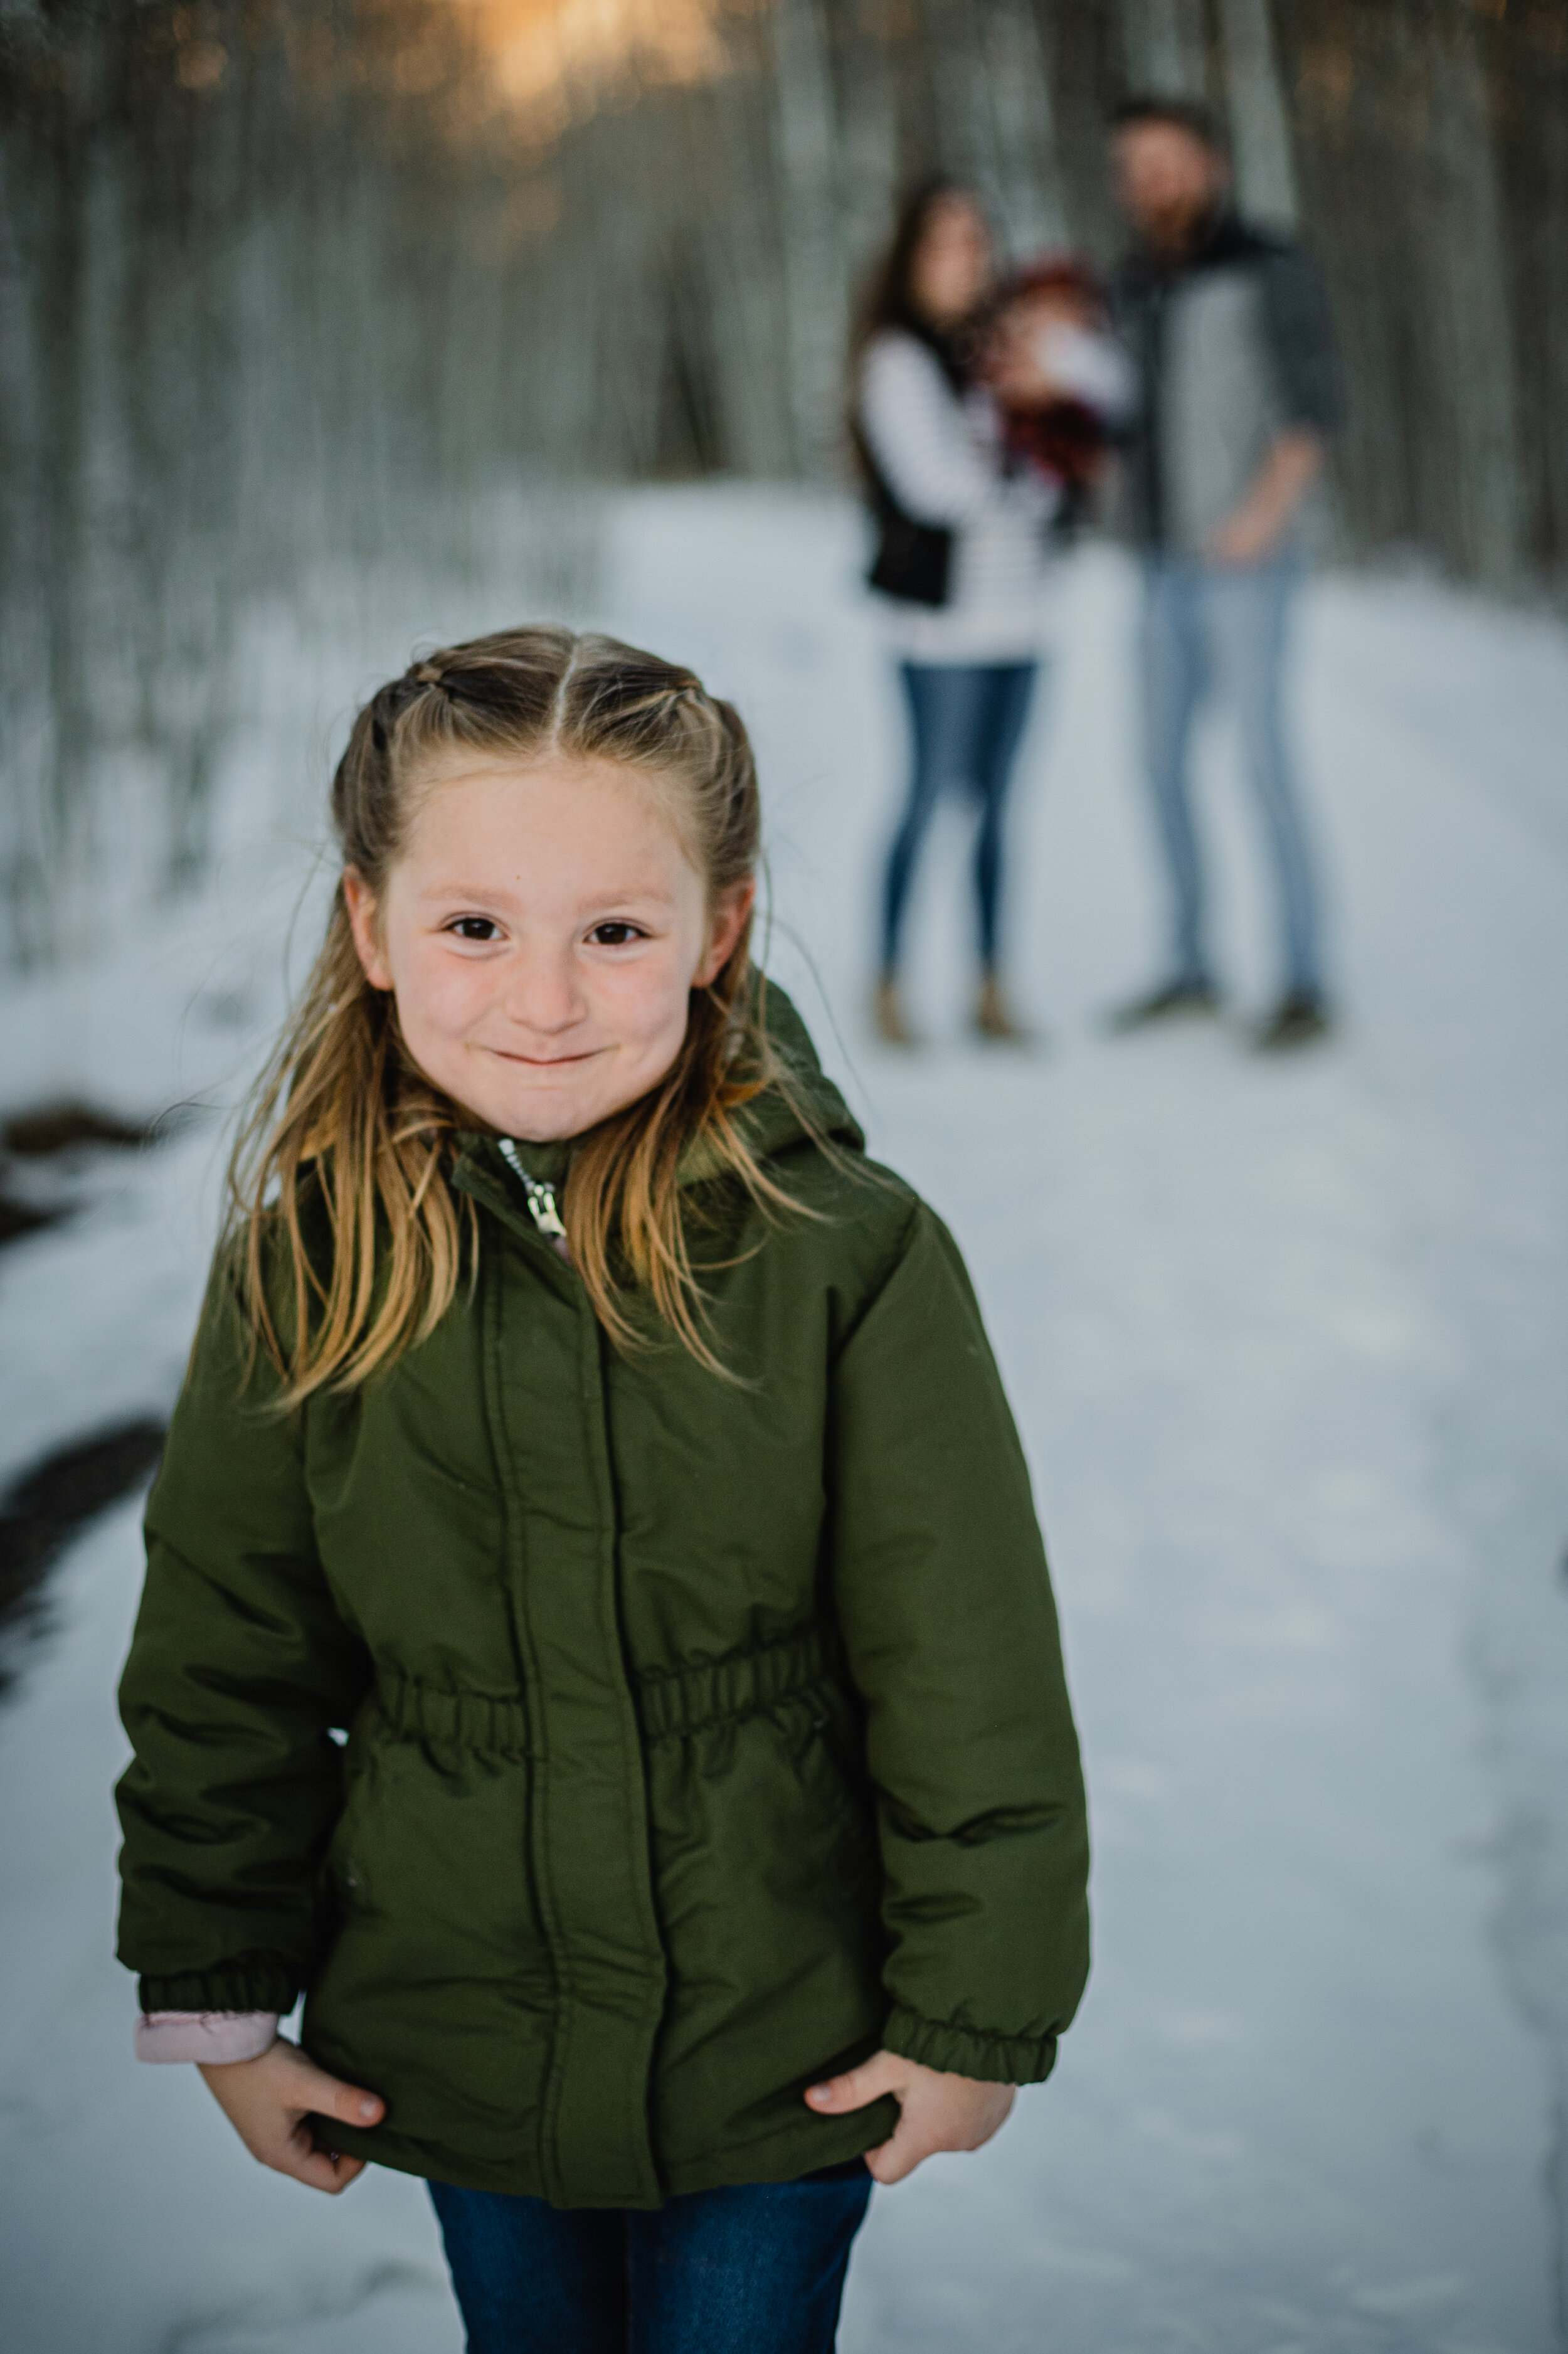
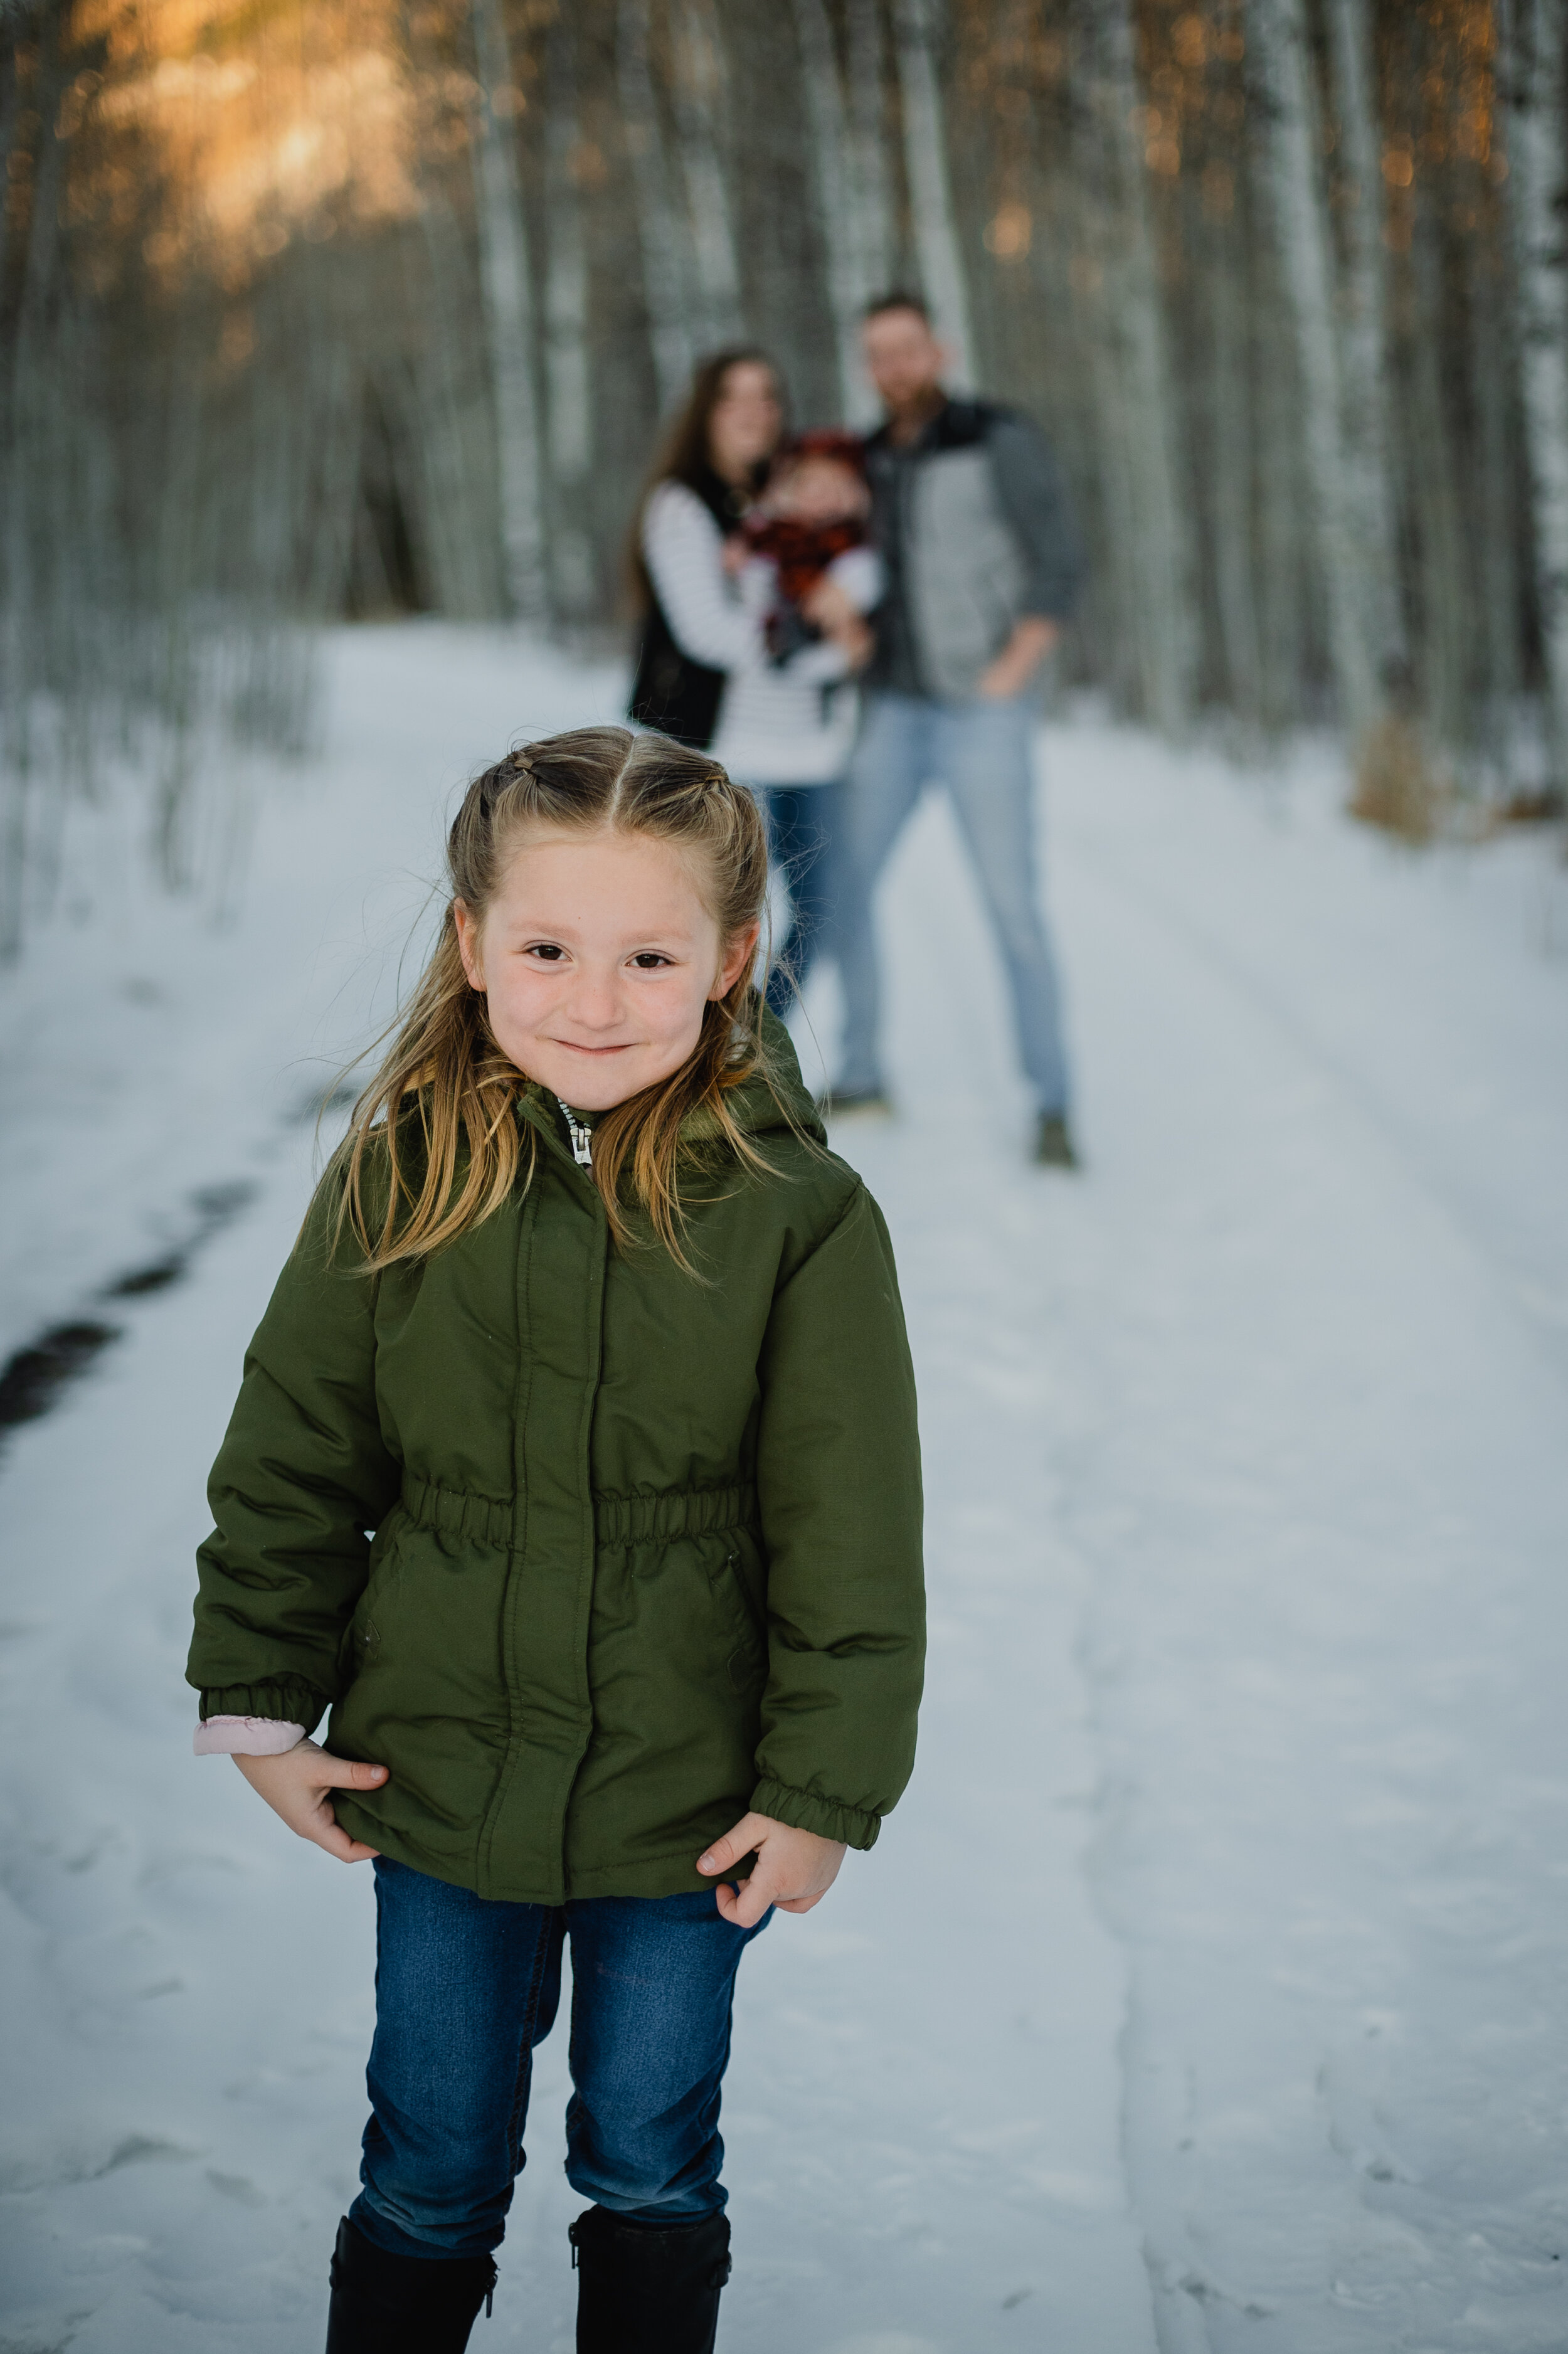
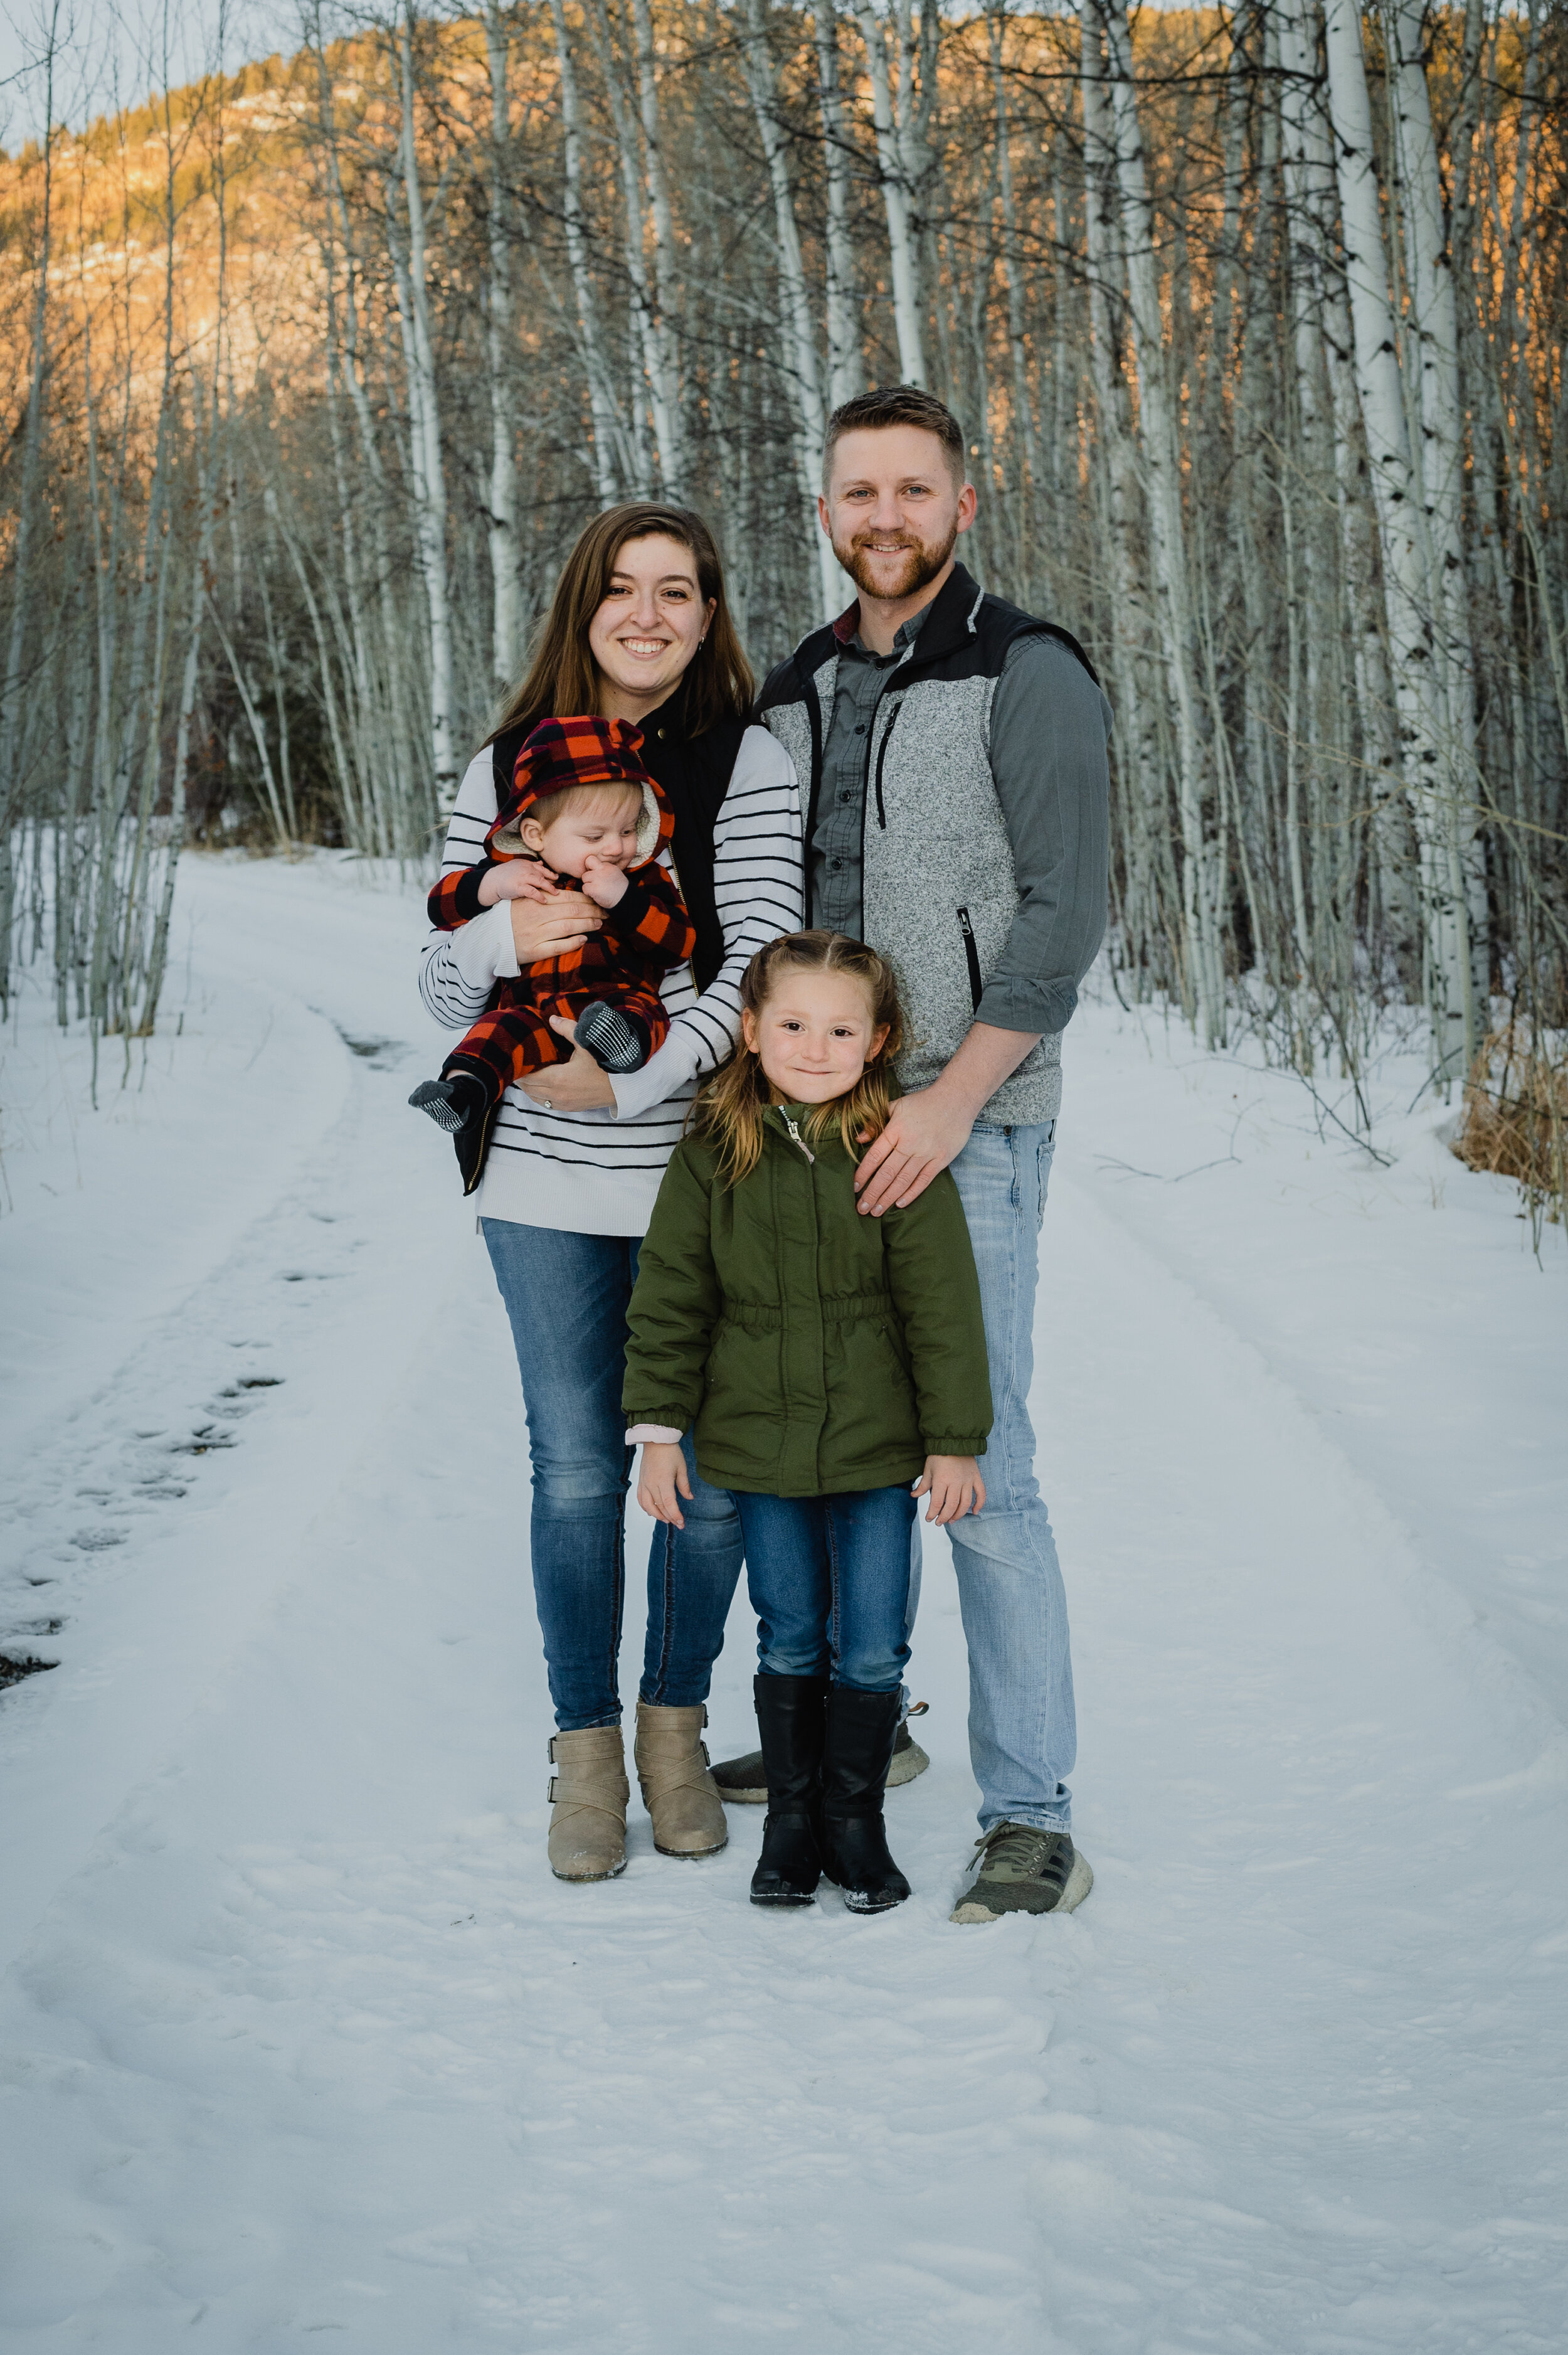
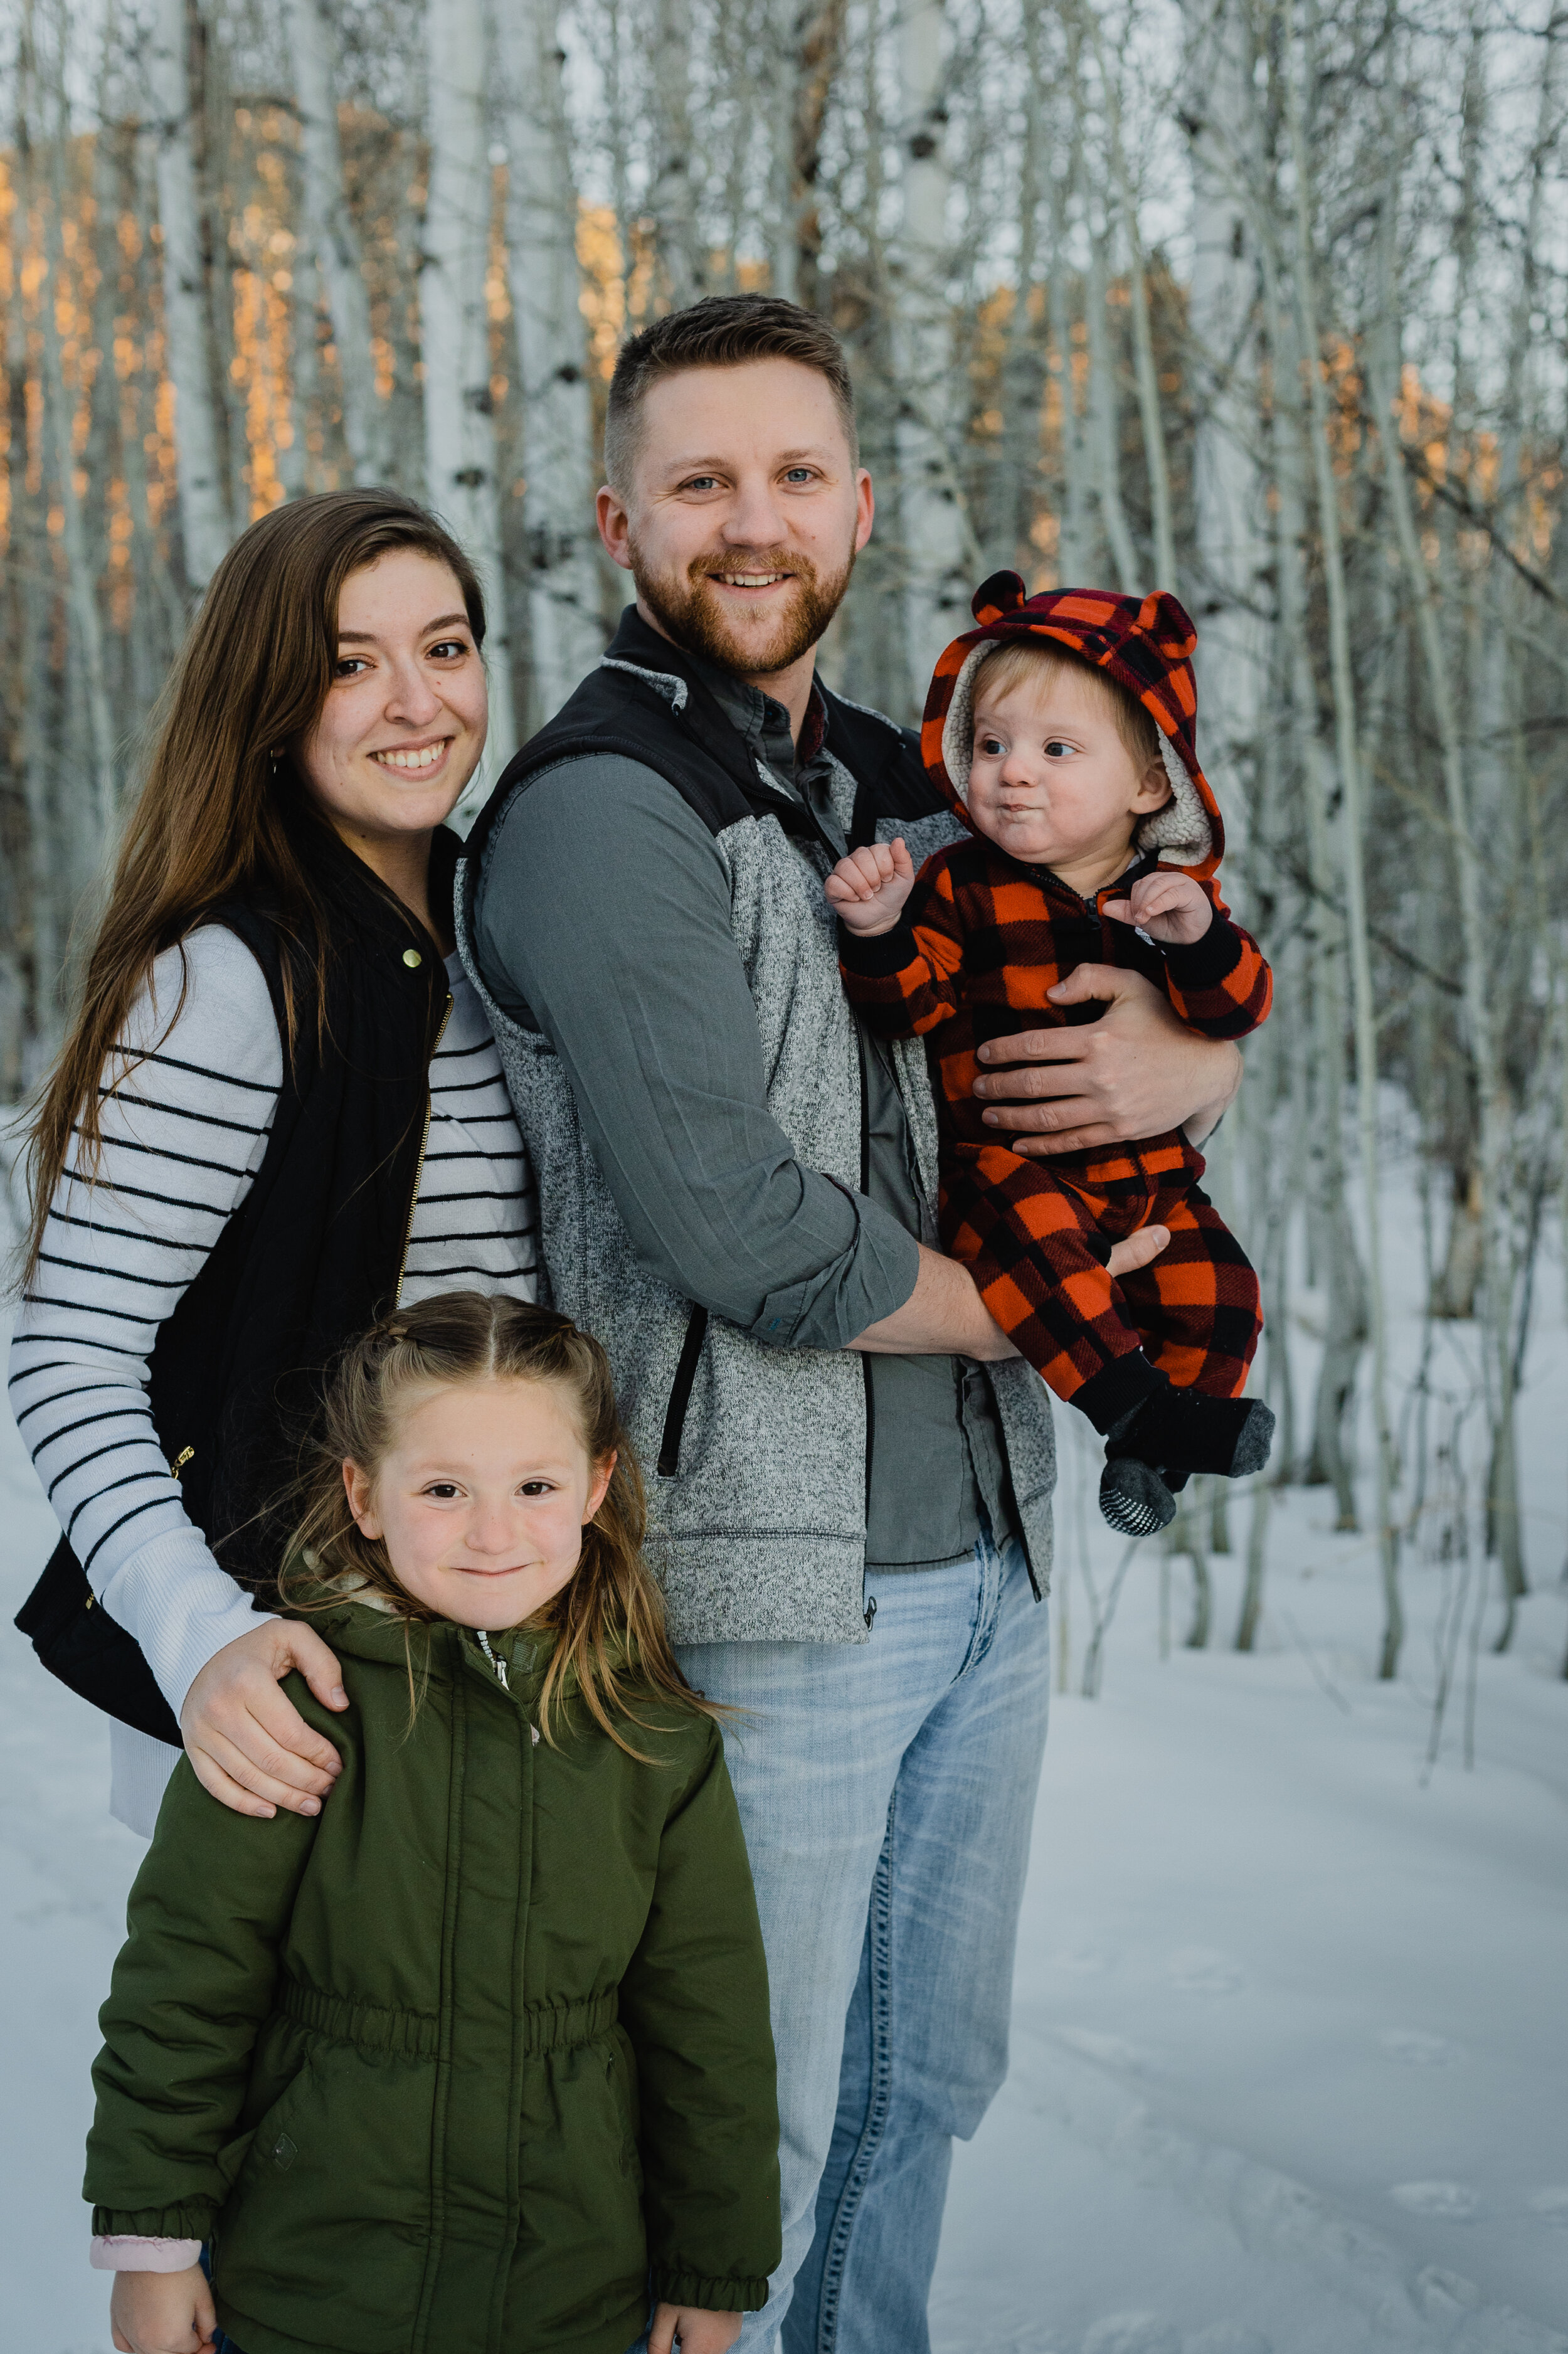
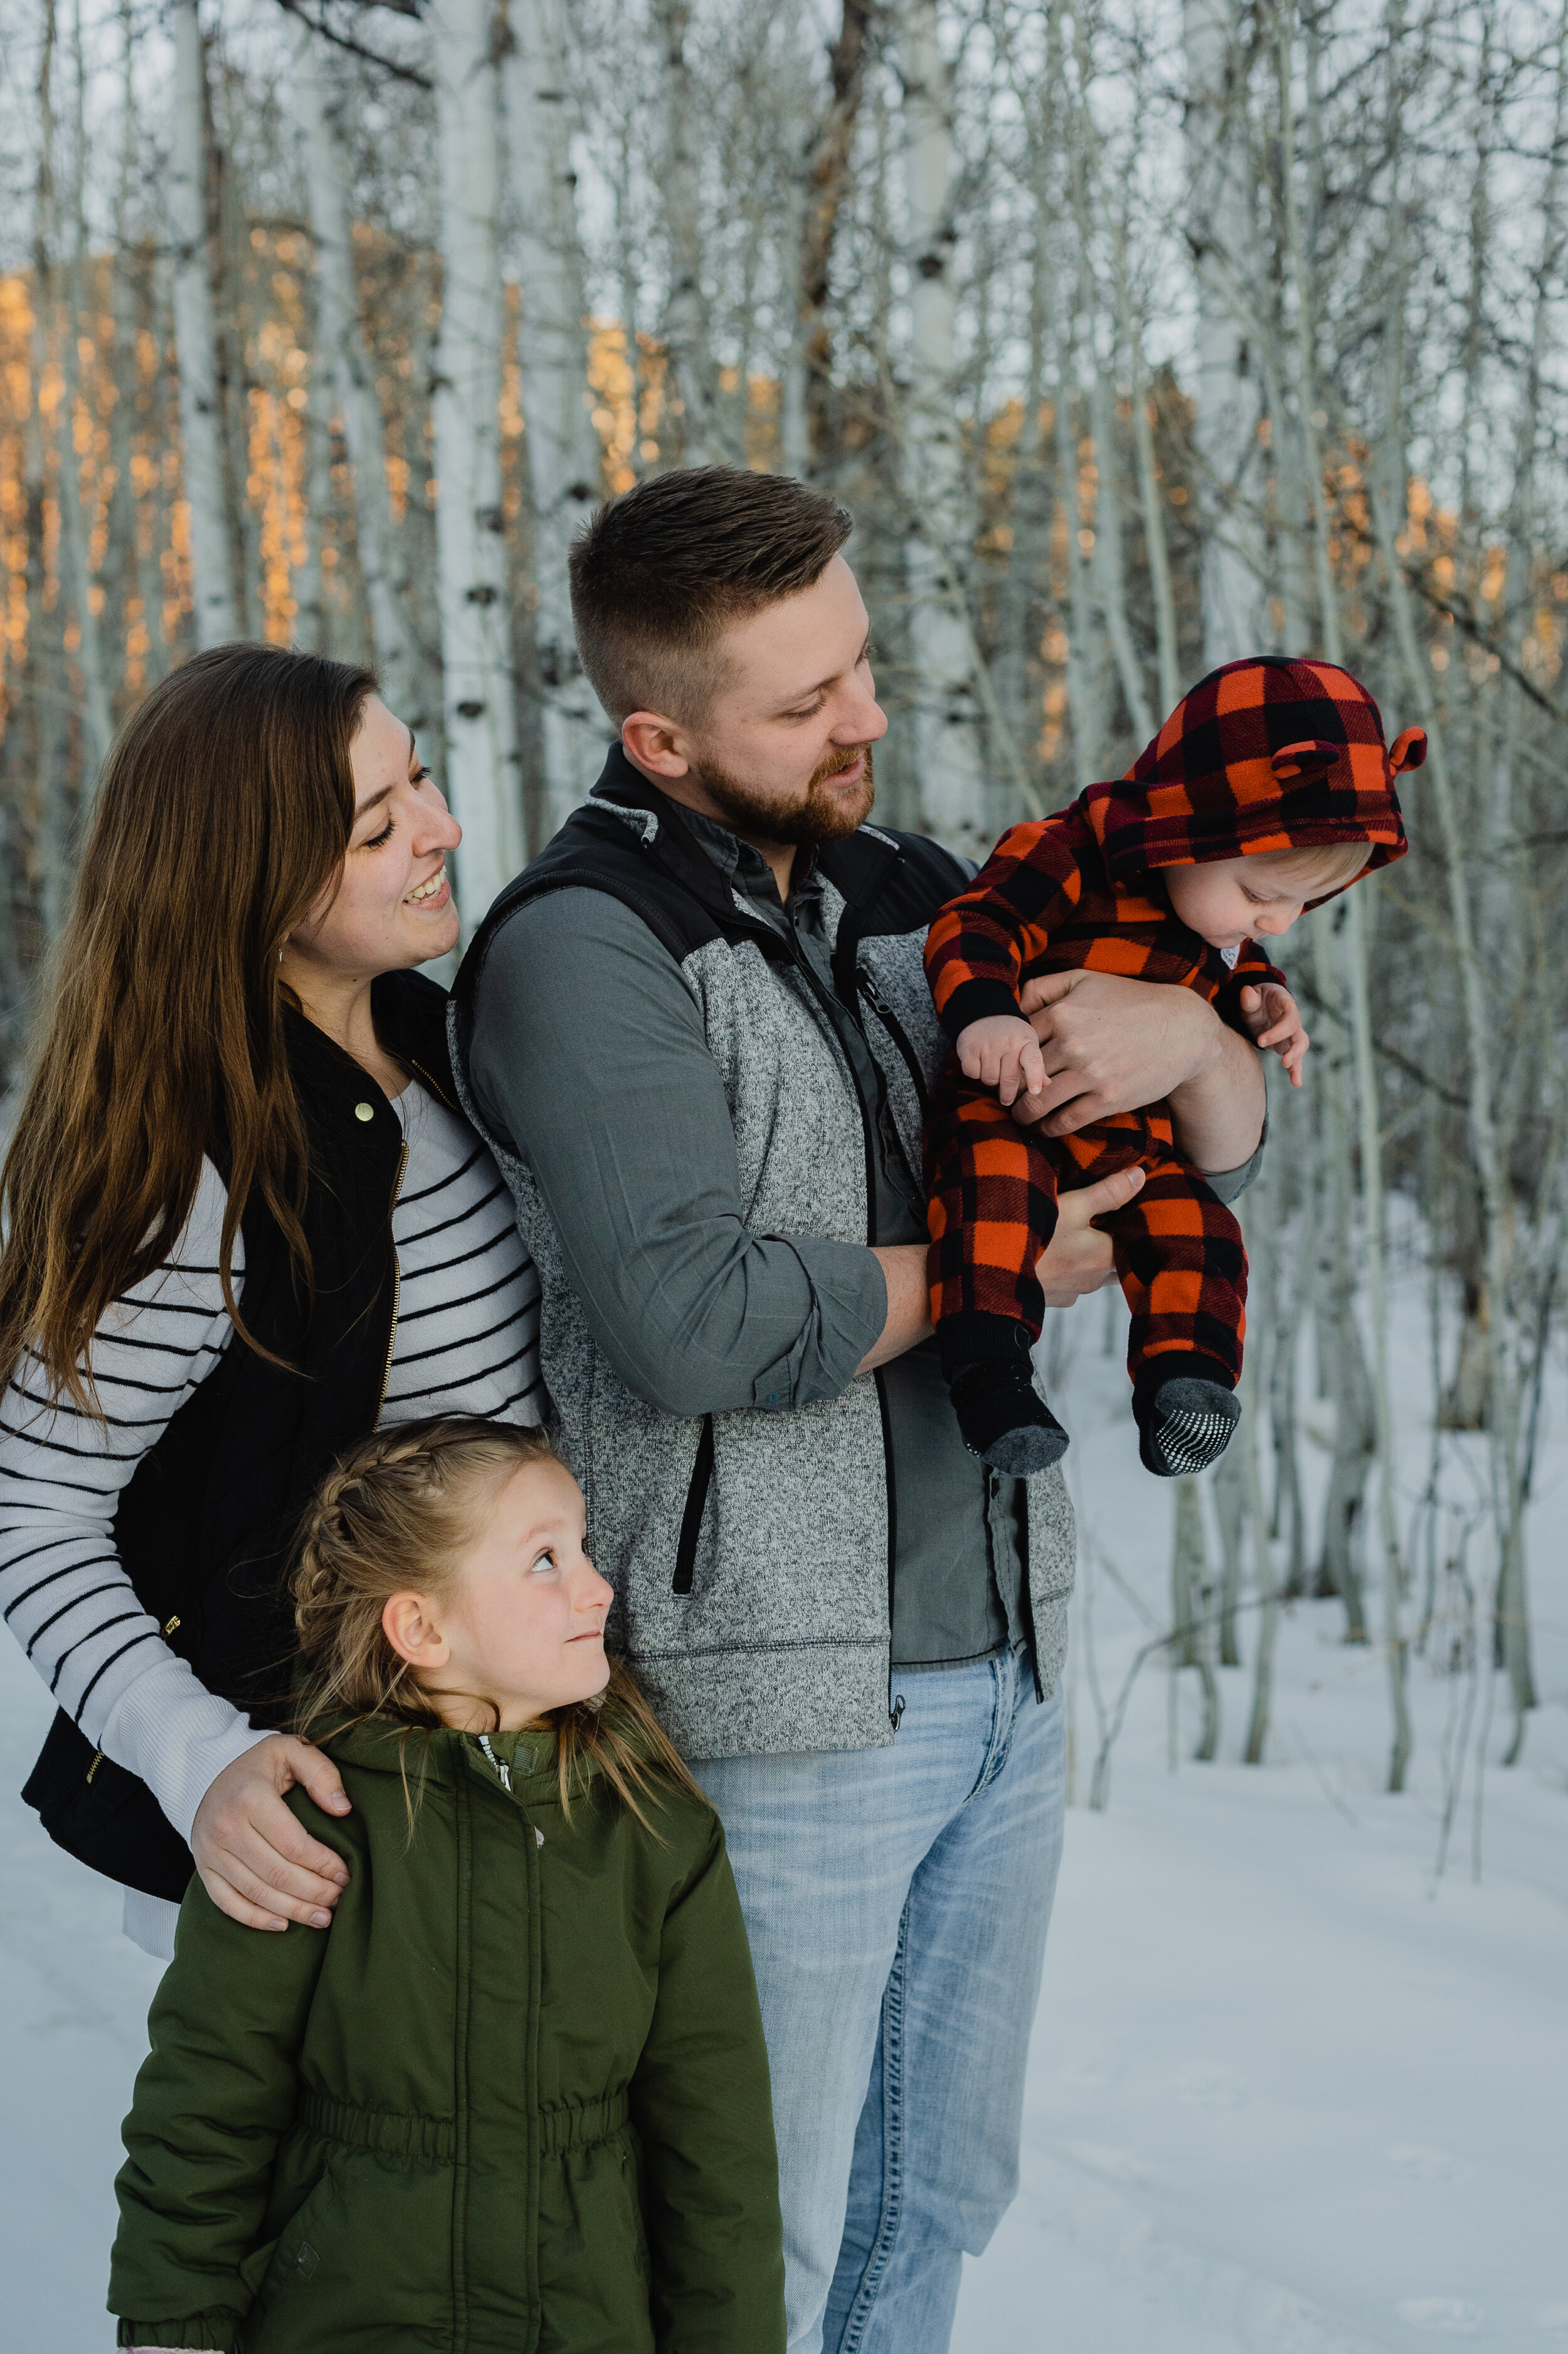
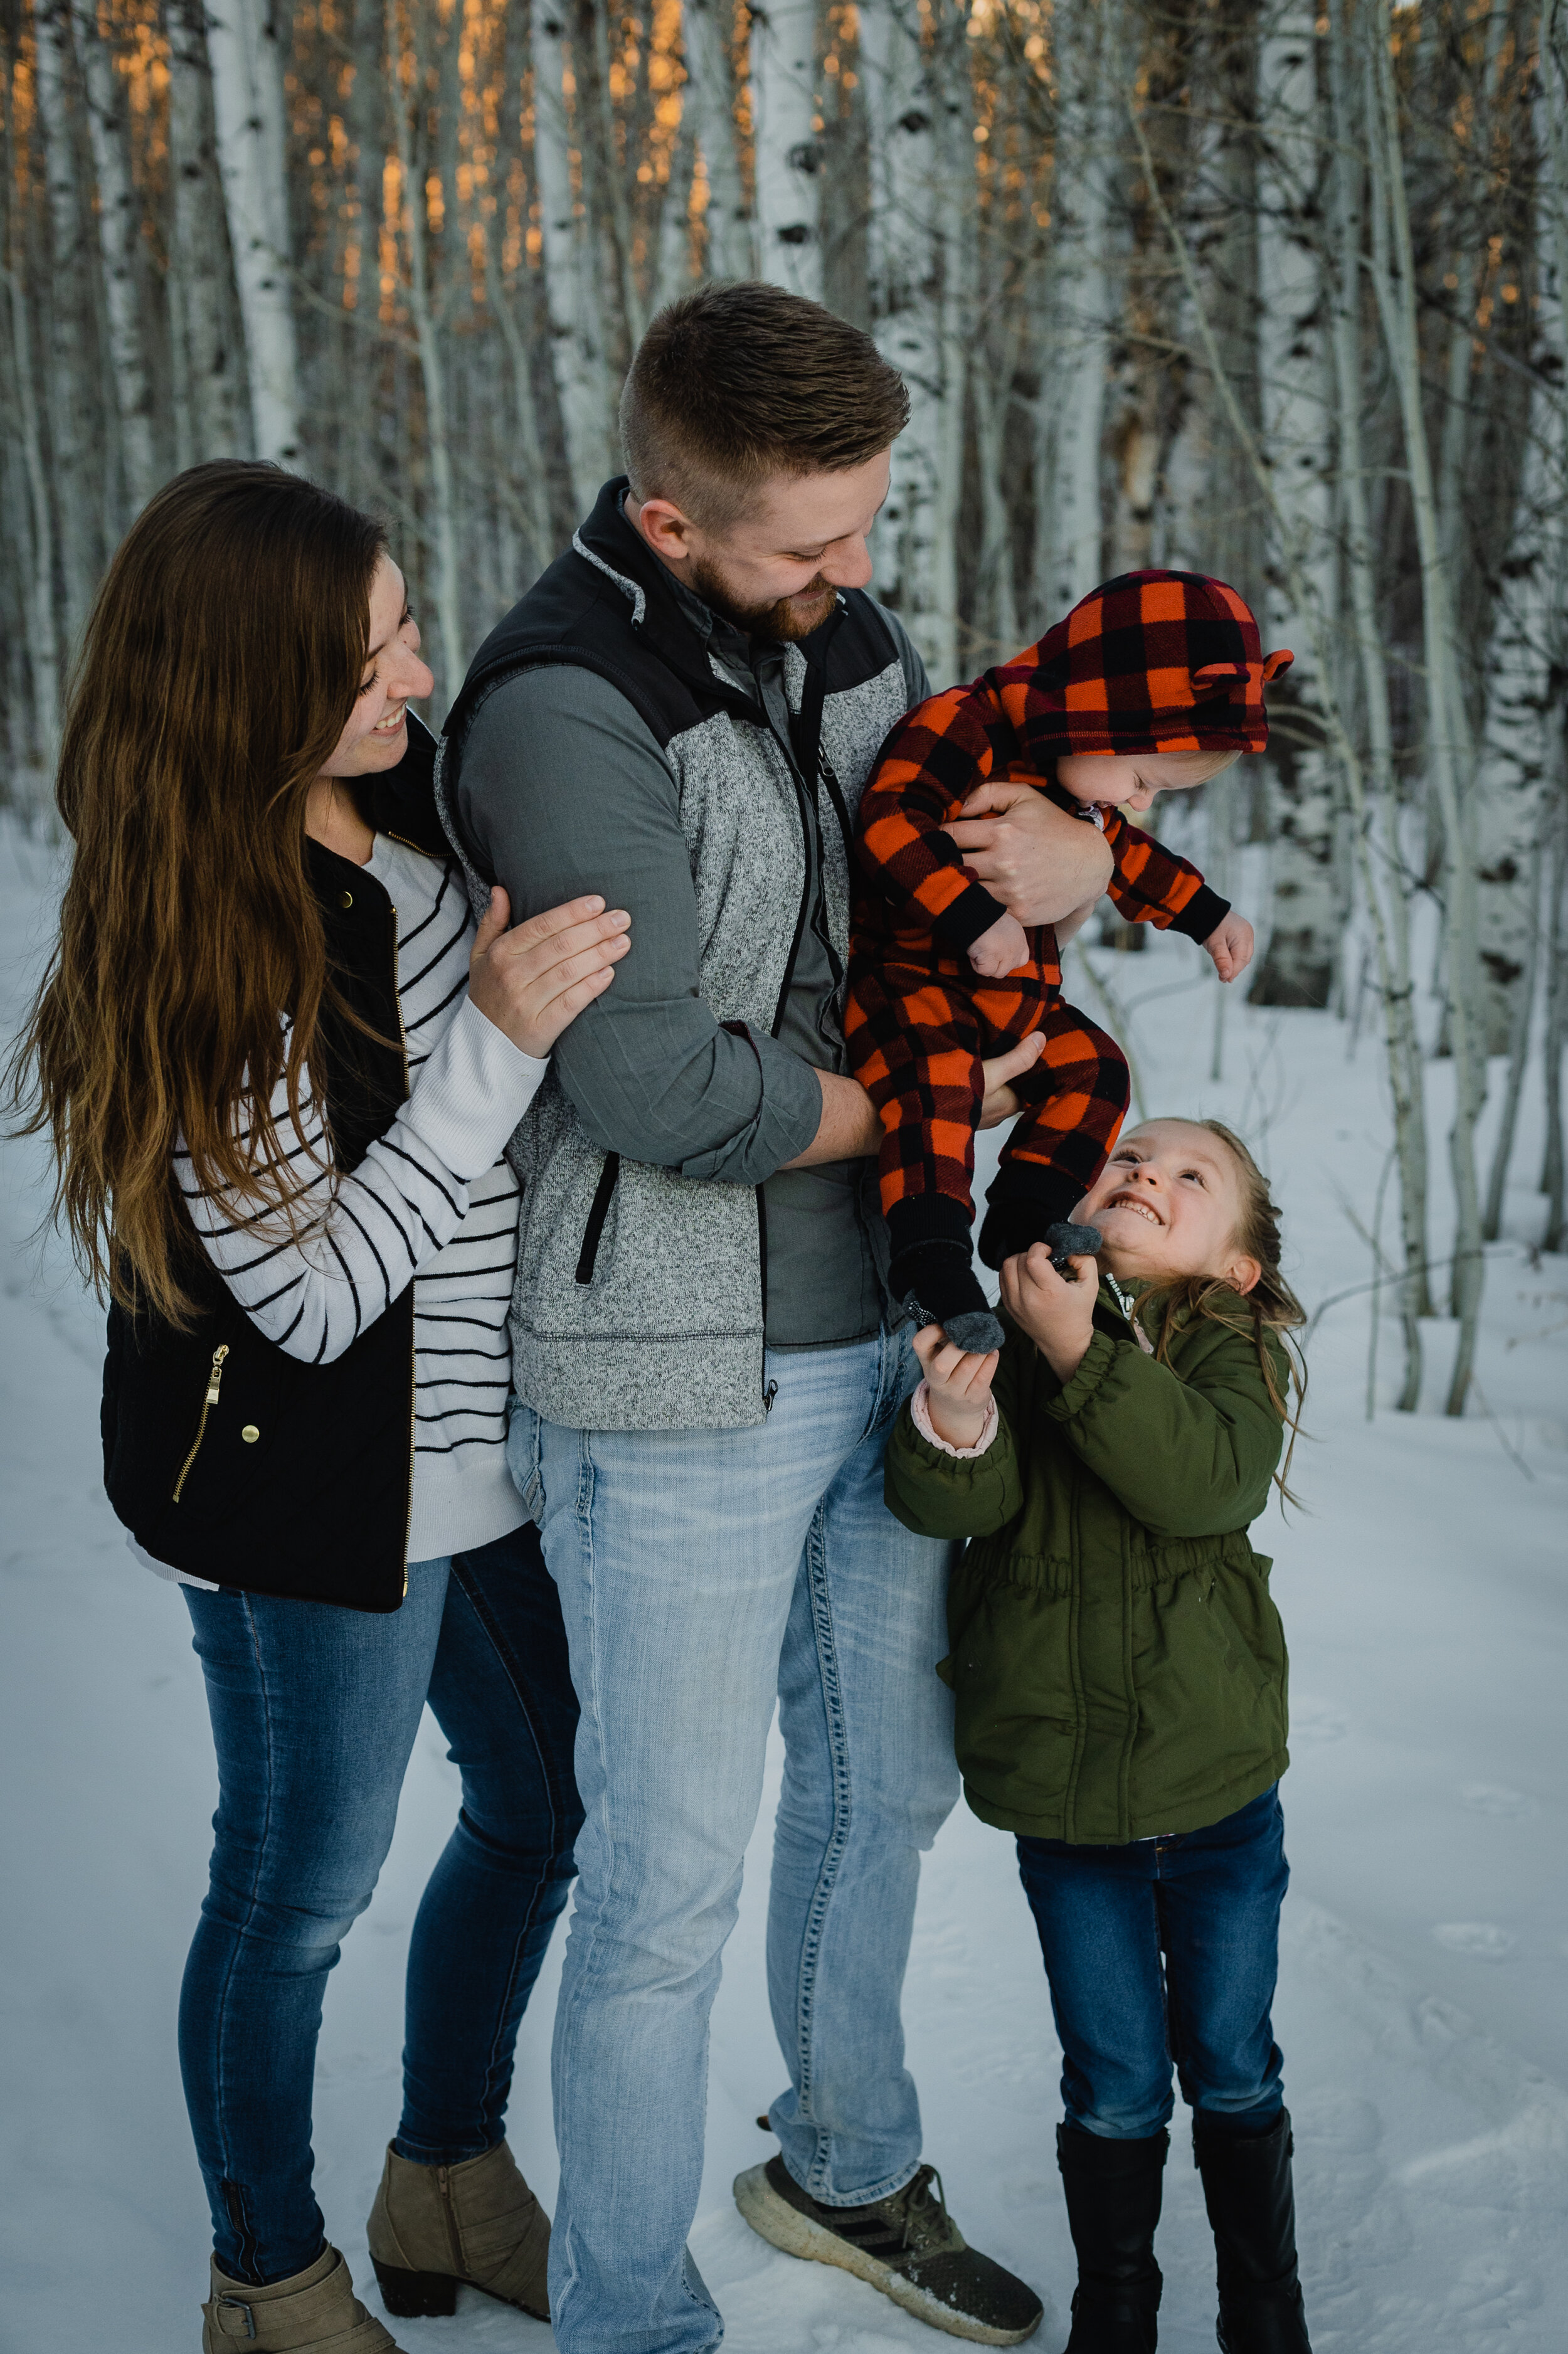
Family Shoot With the Stephensons

Let me just start by saying… this particular shoot had a lot of challenges that I was not expecting. BUT it was so worth it in the end!
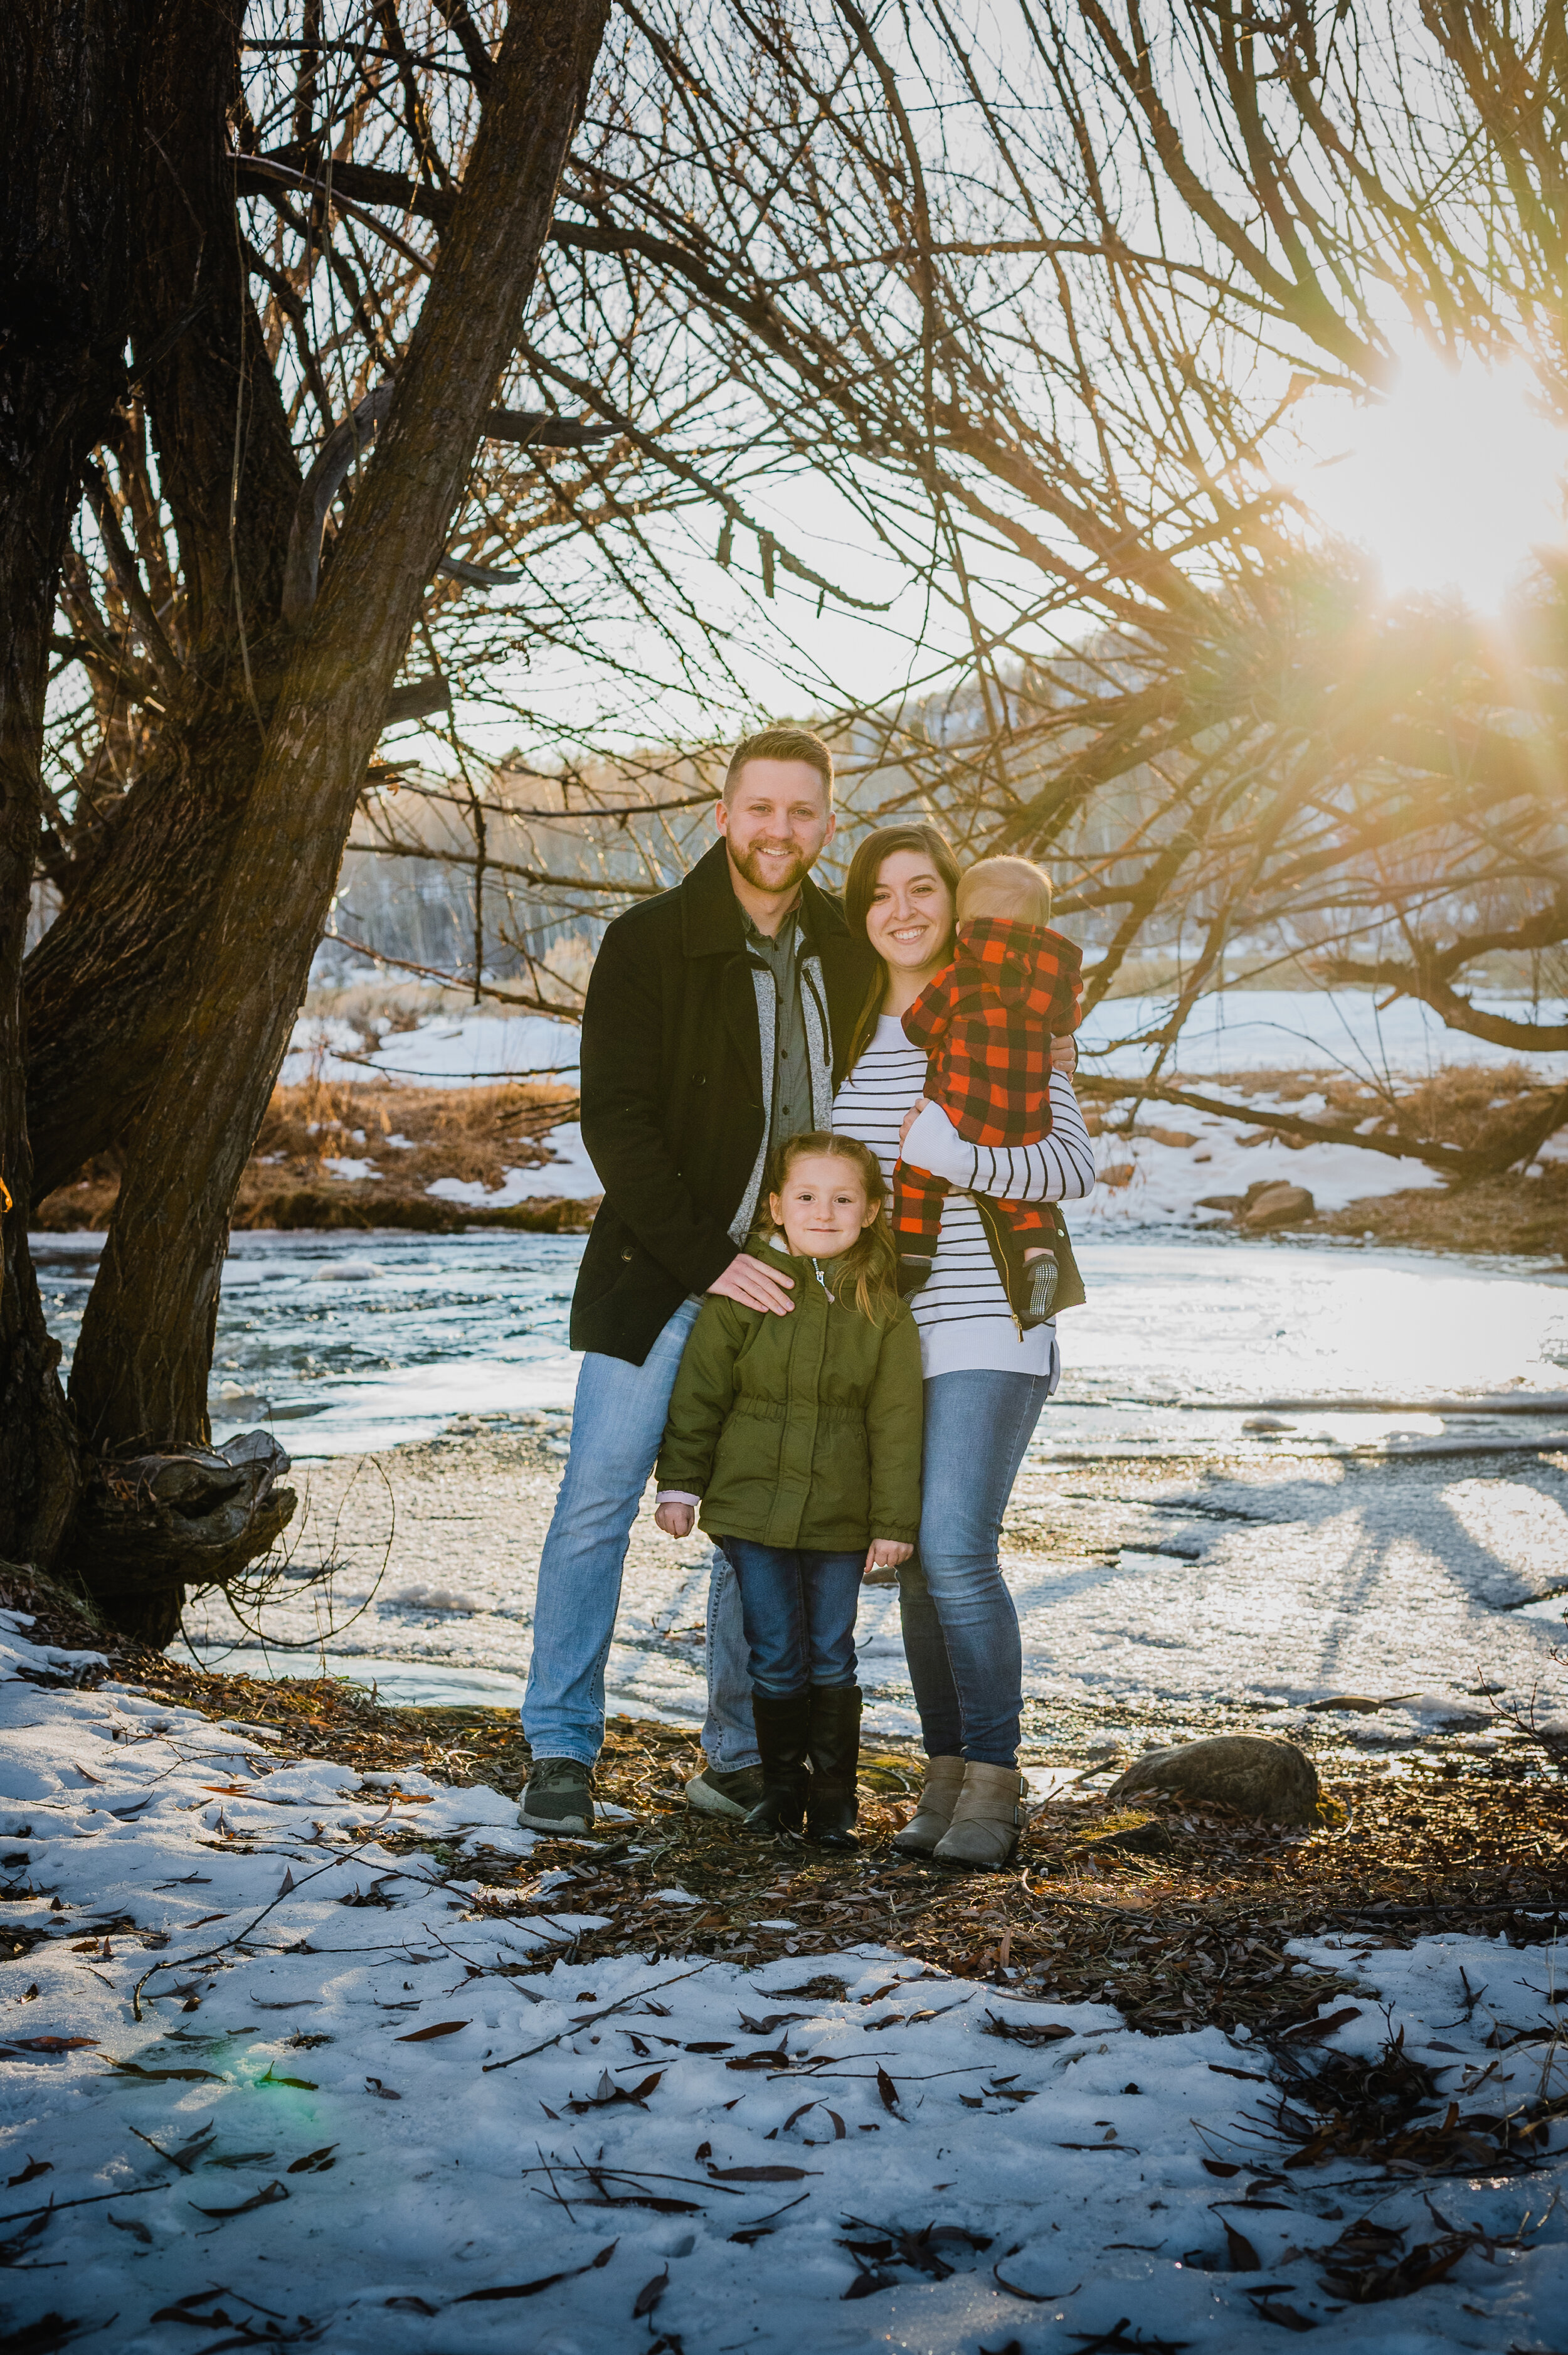
It all started back in October. Ashlee reached out to me to get a family session set up and we got a date set for the beginning of November. A week out, we saw the weather was going to be rainy, but we decided to wait until the day of to see if the weather changed before cancelling the session. Sure enough, day of the shoot had thunder showers and snow. It was a little tricky because I was also traveling 3 hours north toward the Logan, Utah area where the family lives, so I was trying to avoid getting stuck in the snow on the way back to Utah valley. Thats just the nature of scheduling these sessions, though! There are so many factors to take into consideration.
Anyway, so we decided to postpone the shoot by a week. The next weekend came and it turned out a couple family members were sick, and can’t do the shoot that day. We postponed the session for the week before Thanksgiving. Lo and behold, I get sick! Wah-wah. The session gets postponed until after Thanksgiving…
First week of December comes, and it finally happens! So I fill up on gas and head out with an extra hour to spare so I can get there early and get my bearings. We decided on a place called Tony Grove, just about an hour North-East of Logan. Alright, now listen here. I had never been to Tony Grove, neither had my clients, I’ve just seen pictures (and it looked so beautiful!) so I didn’t really have a firm idea of what I was getting myself in to. That was mistake #1.
So, I’m driving up there and it starts to get pretty snowy. It wasn’t much at first, just a patch of snow here and there. I have a Subaru so I wasn’t super concerned. Then, the road narrows and the patches of snow turn into literal glaciers. Okay, not glaciers but there was a lot of ice and snow. At one point it gets so bad, but I was only 10 minutes away from the parking lot so I trudged on. I wasn’t about to let a little ice get in the way of getting some amazing shots. I tried calling anyway to warn my client, but guess what—no service.
Welp, this was bad. I decided to try to keep going. However, my hopes were quickly crushed when I come up on two cars that had gotten stuck in the snow. One guy had been there since 8am! poor guy.
“Alright” I thought, “That’s a sign I should definitely turn back.” I ended up giving my ice scraper thingy to one of the people who got their car stuck (my feeble attempt to help 🤷🏻♀️).
Okay let me explain this situation I was in: everywhere but the road behind me had was super deep, fluffy snow so obviously, I was super nervous to deviate off the road. I couldn’t turn around, so I straight up just drove in reverse for a while. At one point I thought I was in the clear so I tried turning around. Haha, NOPE. It didn’t take a lot to get super stuck.
I got out, and mentally cursing my kindness at giving my ice scraper to someone else, I began to dig out my back tires. Luckily, with a lot of digging, maneuvering, and praying, I got out in 15 minutes. *phew*
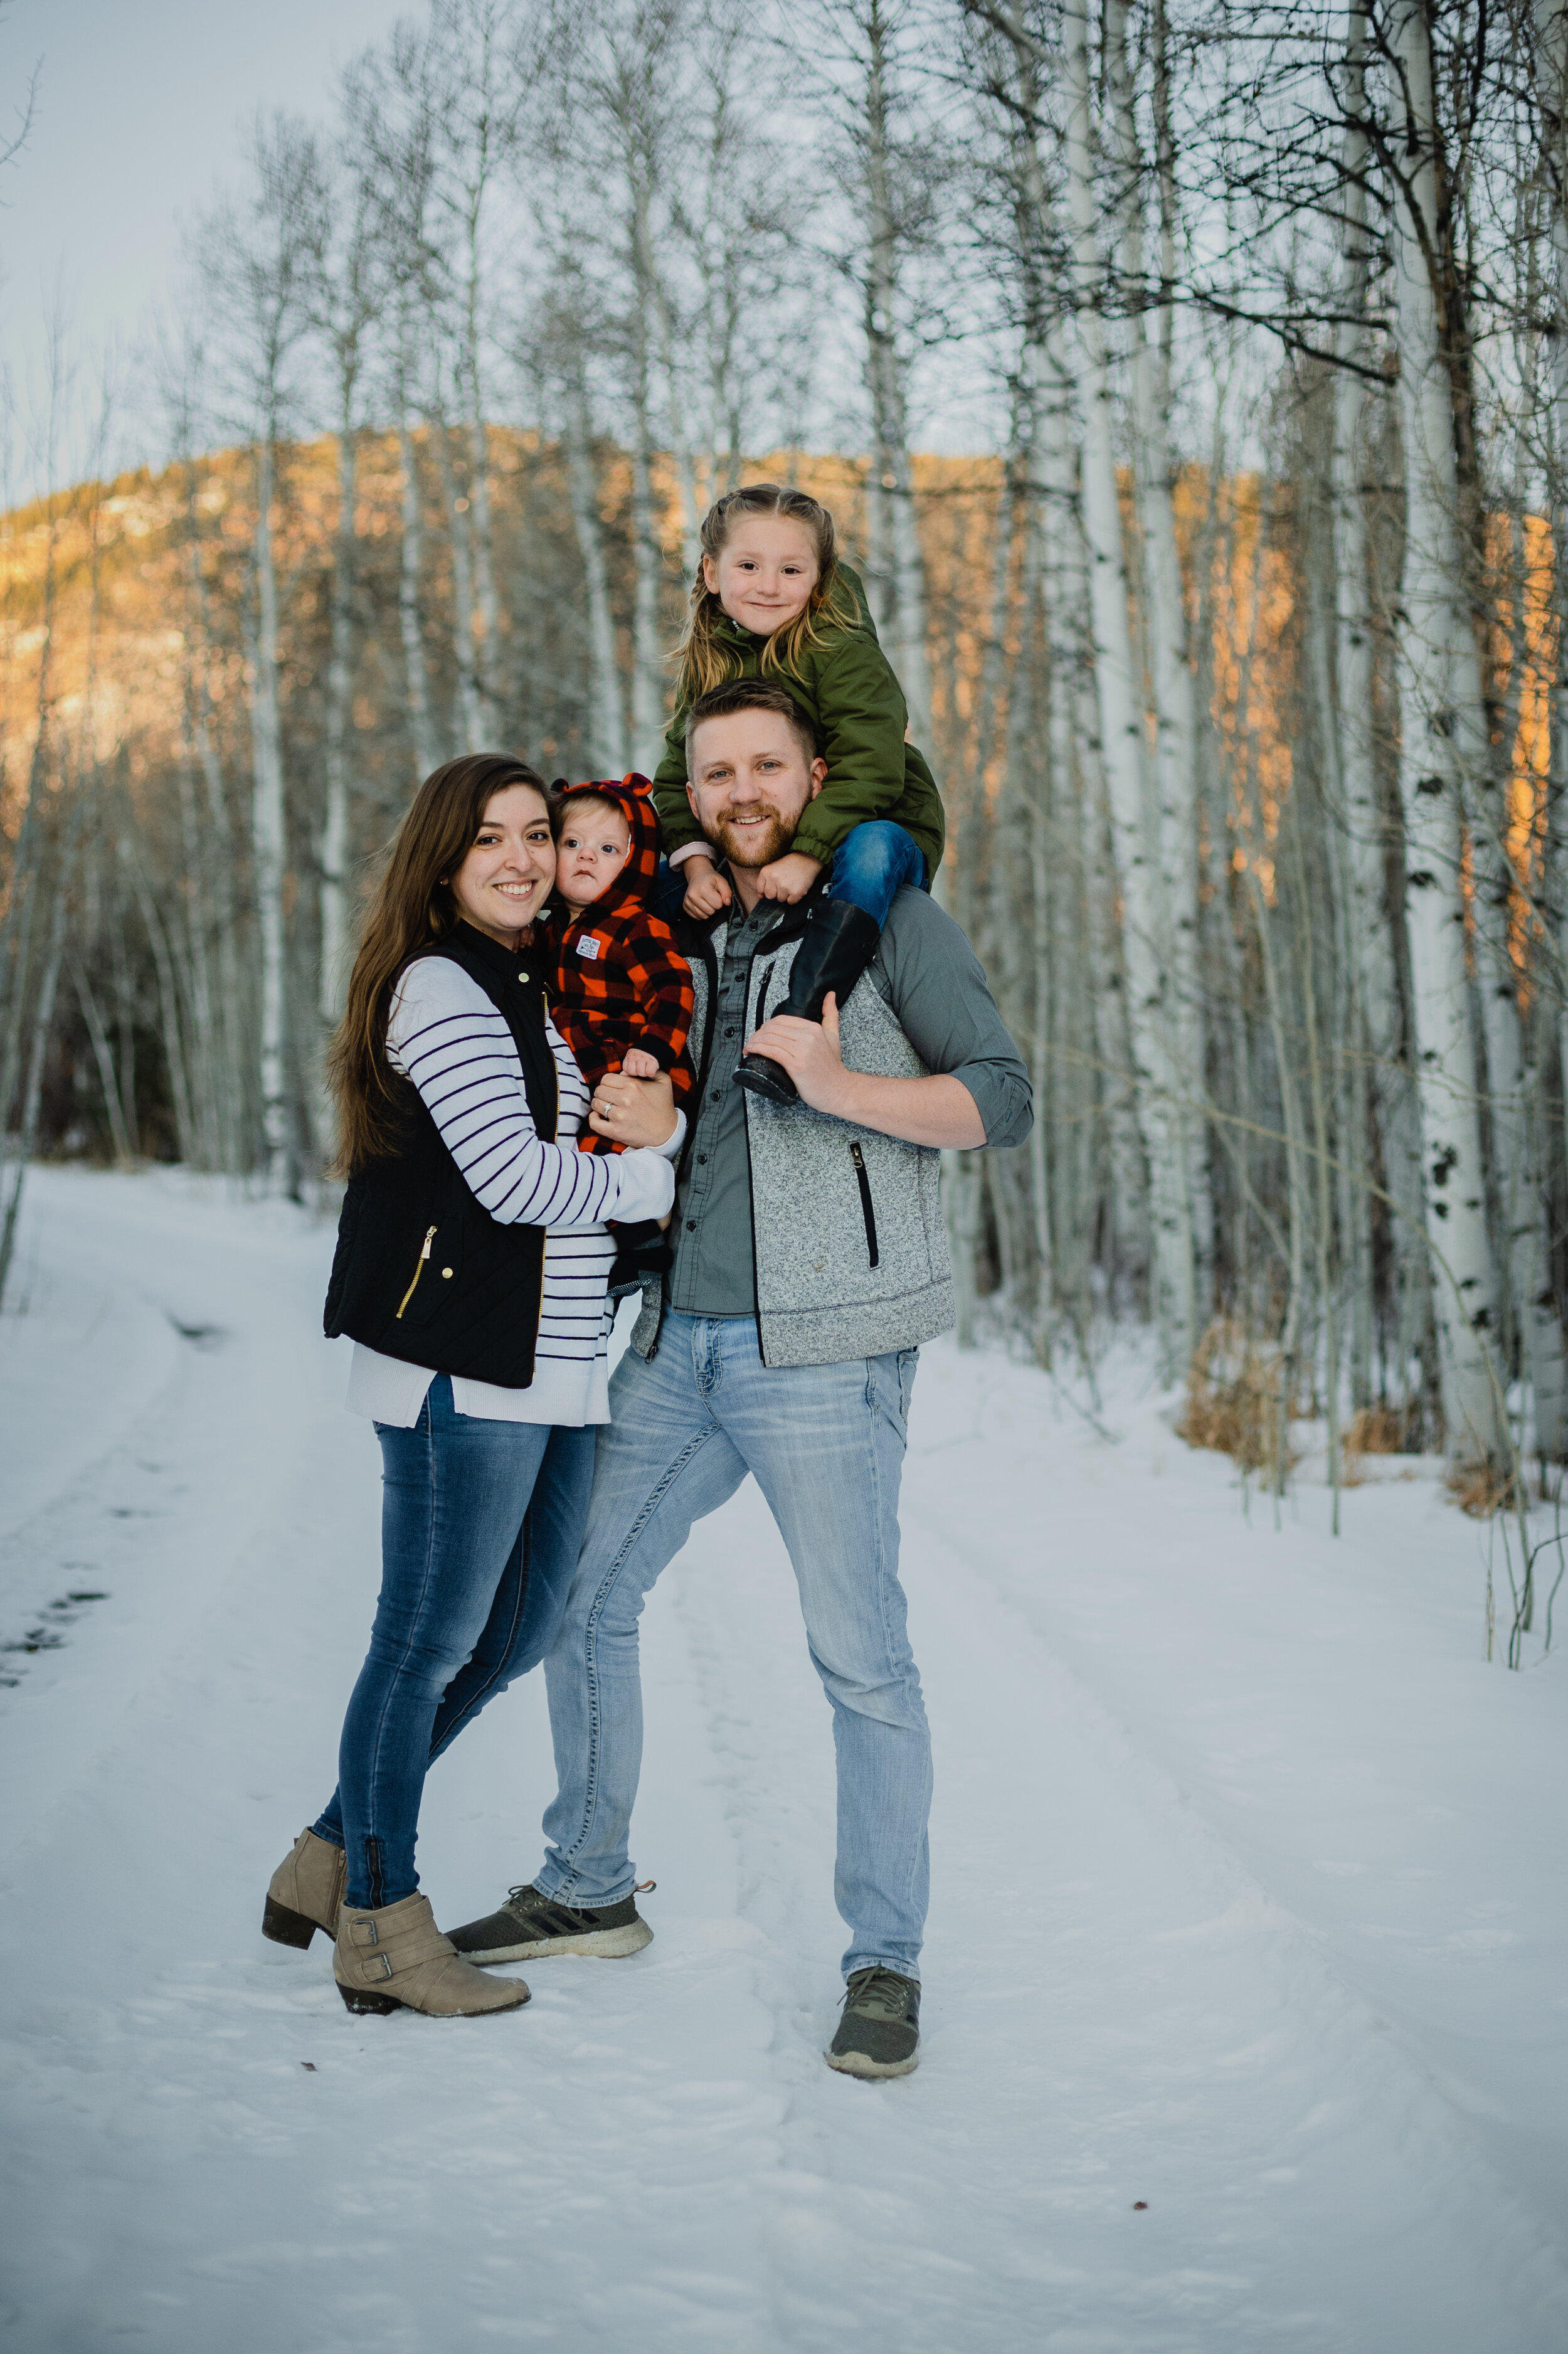
Driving back was far easier than driving up the mountain (thank heaven). I got about 10 minutes down the road when I saw Tanner and Ashlee driving up. After giving them the rundown of everything that had happened up til that point, we decided to go to a field at the base of the mountain for the pictures.
Don’t get me wrong; I was pretty disappointed that we didn’t make it to Tony Grove but this other location we found was DREAMY. Pretty aspen trees, a beautiful little frozen stream, and it had a decent view of the canyon! All things considered, the session turned out great and I was super satisfied with how the pictures turned out. And everyone was safe, so you can’t beat that.
My favorite pictures are the ones on the road with aspen trees on either side. Those, and definitely the ones with the frozen stream with the sun shining through the tree branches. I really wanted to capture how the light was shining on the ice with the shadows of late afternoon stretching toward us. I love the way light can truly transform an image. Okay, DUH, light determines a lot about an image. But manipulating the light in a way that really makes you take a look at the small details is so fascinating to me.
I definitely learned a few things in this process: 1) be flexible and be willing to change things up if necessary and 2) always do a lot of research on a location if you haven’t been there before. Things won’t always work out the way I want them to, but if I keep a good attitude and have an open mind, amazing things can happen!

The 5 Best Prime Lenses for Portrait Photography
First off, let me say how glad that you’re here! This is a topic that I love talking about and I hope you find it enlightening as you decide which lenses to add to your gear. 🤗
Alright, so I lied, a little. We’re actually going to cover not only prime lenses, but also the pros and cons of using a prime vs. a zoom lens. Now, I'm going to make the case that all professional photographers need to use prime lenses with a mix of zoom lenses, but I’ll let you make your own conclusions on which lenses you need! The beauty of photography is that while there are ways to do it wrong, there are so many ways to do it right.
Regardless if you’ll be buying a Canon, Nikon, Sony, Fujifilm, Sigma, etc. these guidelines will apply for all brand types. Now, you’ll want to do a little more research into what specific type of lens you want for your camera (for example, there are many 50mm lenses that have different minimum aperture capabilities. Not all 50mm’s are created equally and some will be more expensive than others.
I bet you’ve been wondering, “Why choose a prime lens over a zoom lens?” Well, I’ll tell ya right now. It all comes down to preference, really. But for me, I prefer prime lenses because they force you to move and look for the best angles. They also push you as a photographer more than zoom lenses do. Now, that being said, there are times (depending on the type of photography that you do) that you will need a zoom lens in order to capture your subject.
Another reason why I prefer prime lenses is because there tends to be less elements in the lens barrel than a zoom lens. With zoom lenses, you’ll have less warping of the image in the final product. This warping can always be fixed in Lightroom, though. Taking pictures with prime lenses will result in crisper, clearer images all across the board.
That being said… Prime lenses can be more expensive. However, there are alternatives that can help with the cost! One being: Sigma lenses. 🙌🏼 Sigma is a great alternative to other name-brand lenses like Canon, Nikon, and Sony. Sigma lenses are sturdy and made from quality material. The only con I have come across is that they’re a little heavier than their name-brand counterparts. Other than that, they are basically the same! Now for me, that really makes it worth the lower cost. I’m sticking with Sigma over Nikon or Canon any day.
Alright, well what do you say we get into a little compare and contrast on our prime lenses? Let’s do it. 😎
24mm - If you’re a landscape photographer, this is a must-have lens. As a wide-angle lens, it’s great for capturing more of the scene in your images. good for portrait photography where you want to include more of the landscape. 24mm lenses also have an amazing capability for low-light and night photography, especially astrology photos. Get some great shots of the Milky Way!
35mm - This lens is another favorite when it comes to not just portrait photography but landscape, street photography, architecture, product, and even macro photography. This lens is considered the beginning of wide-angle lenses, which almost always delivers great images and will show the subject as well as the environment surrounding it, too. It’s a very versatile lens. The 35mm lens is most similar to what you see with your own eyes. Most beginner photographers start out with either this lens or the 50mm.
50mm - the “nifty-fifty,” as many call it. This is a good all around lens that is a favorite for many photographers. There is extensive information about this lens out there on the internet, but I will say that 50mm lenses often have more capability for a wider aperture (a good aperture is f/1.4 for a 50mm lens), making it very ideal for that blurry background and really making your subject pop.
60mm macro (sometimes referred to as micro) - this is a must for more detailed shots of smaller items. Many wedding photographers use this lens to take detail shots of the wedding rings, the bride’s shoes, or other decor on the wedding day.
85mm - Another great portrait lens! The 85mm allows the photographer to take portraits without needing to get too close to the subject. There are all kinds of perks to 85mm lenses: it’s lightweight, the fast speed and wide aperture also make it an ideal lens for events like weddings and couple shoots.
Okay, I know I just spent this whole time trying to sell you on prime lenses, but I have to mention the 70-200mm zoom lens. It’s a great lens that (in my opinion) is going to be necessary for every aspiring professional photographer to have in their arsenal, as it is very versatile. It can be used for a variety of photography types, especially for sports, wildlife, and landscape photography. It can even be used for weddings (you’ll want something that can catch every moment when the bride is walking down the aisle!)
Well folks, there you have it! That was a lot to go through, but I hope you learned a thing or two about what types of lenses to include in your photography gear. If you’re hesitant to purchase one without trying it out first, it is wise to rent a lens or (if they’re kind and trusting) borrow a friend’s lens. Often what happens, is that the first lens you start shooting with ends up being your favorite, since its the one you become comfortable with first. I’ve known a ton of people that LOVE the 35mm and just can’t convert over to the 50mm, some who are die-hard nifty-fifty fans, and others that will always hold the 85mm close to their heart.
In all honesty, you can’t go wrong with any of these lenses! However, my only suggestion about that is to continue to push yourself creatively, and to never be afraid of trying new things. It’s how we improve and keep things interesting, right? I hope you find some lenses that really work for you! Happy capturing!

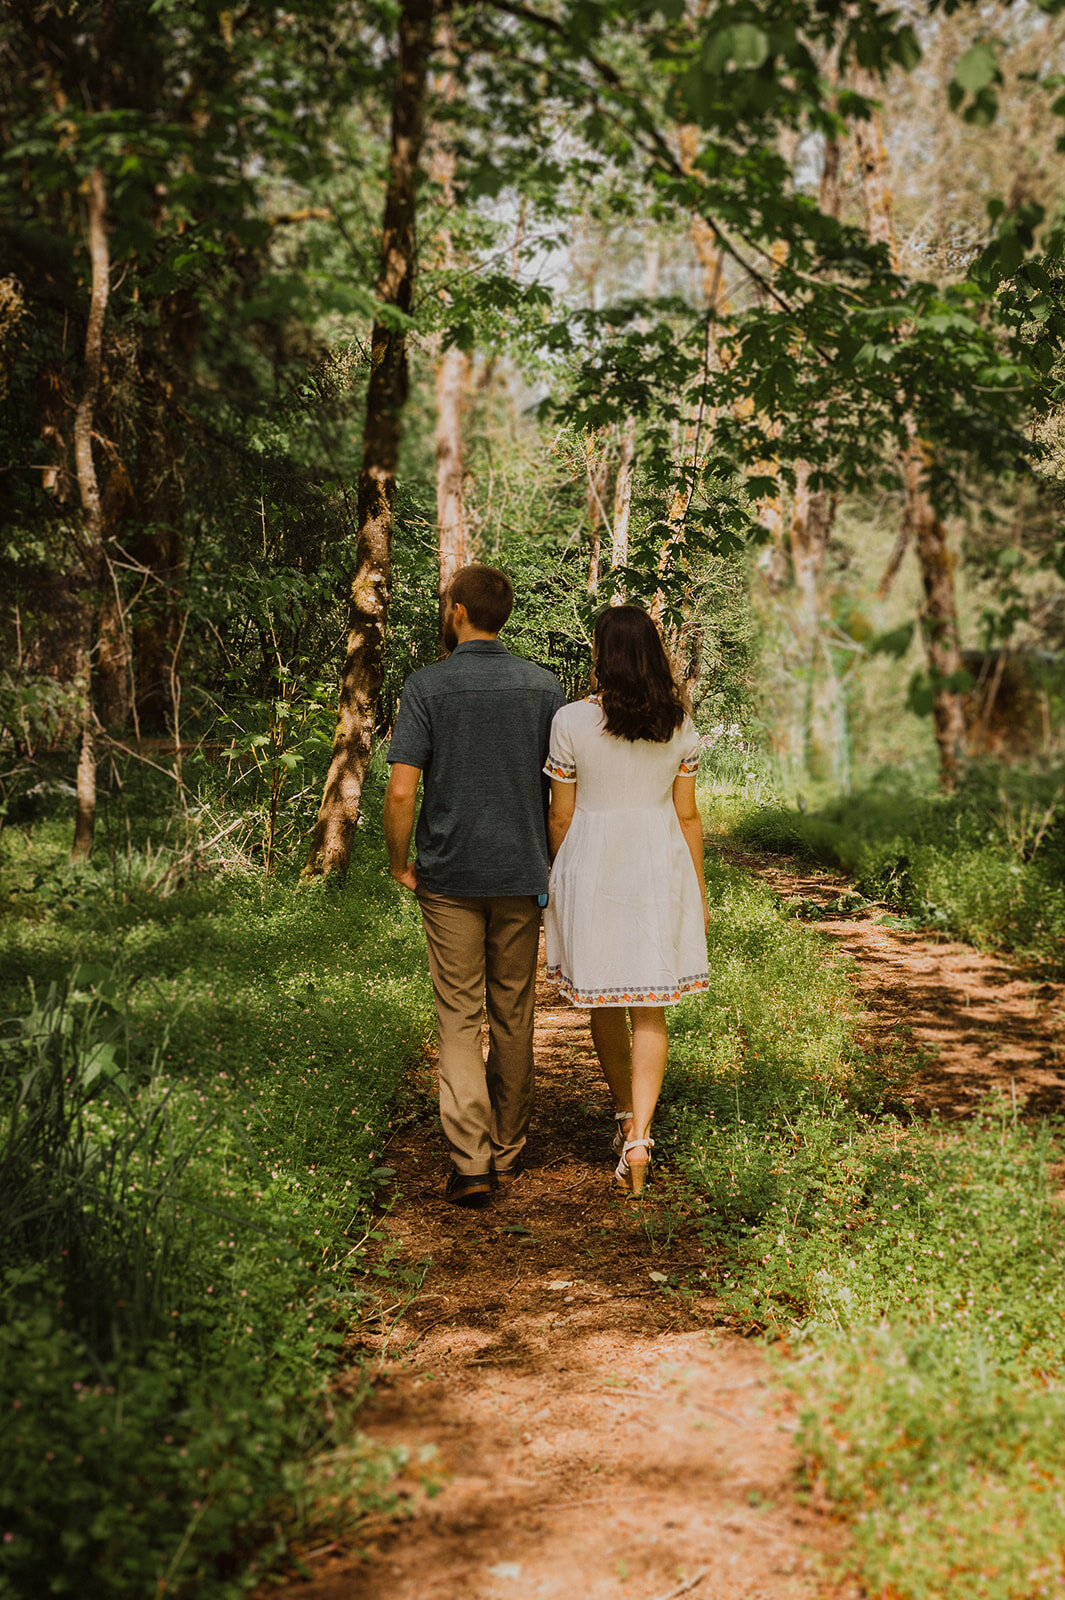
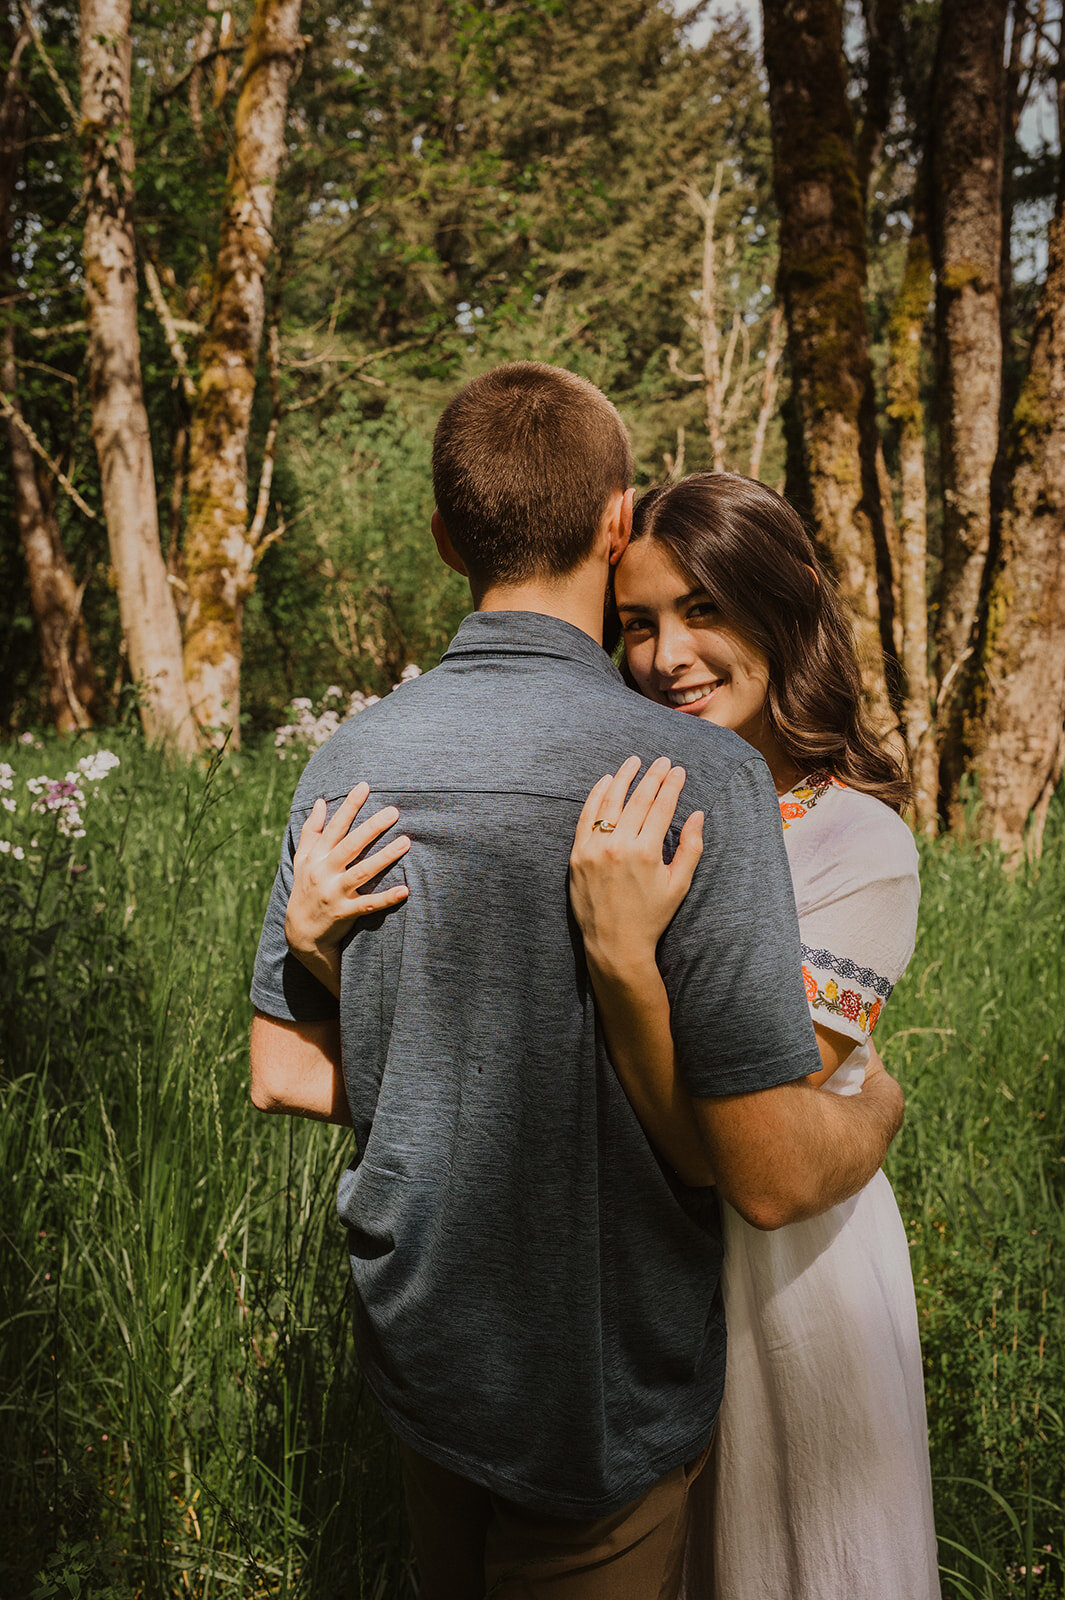
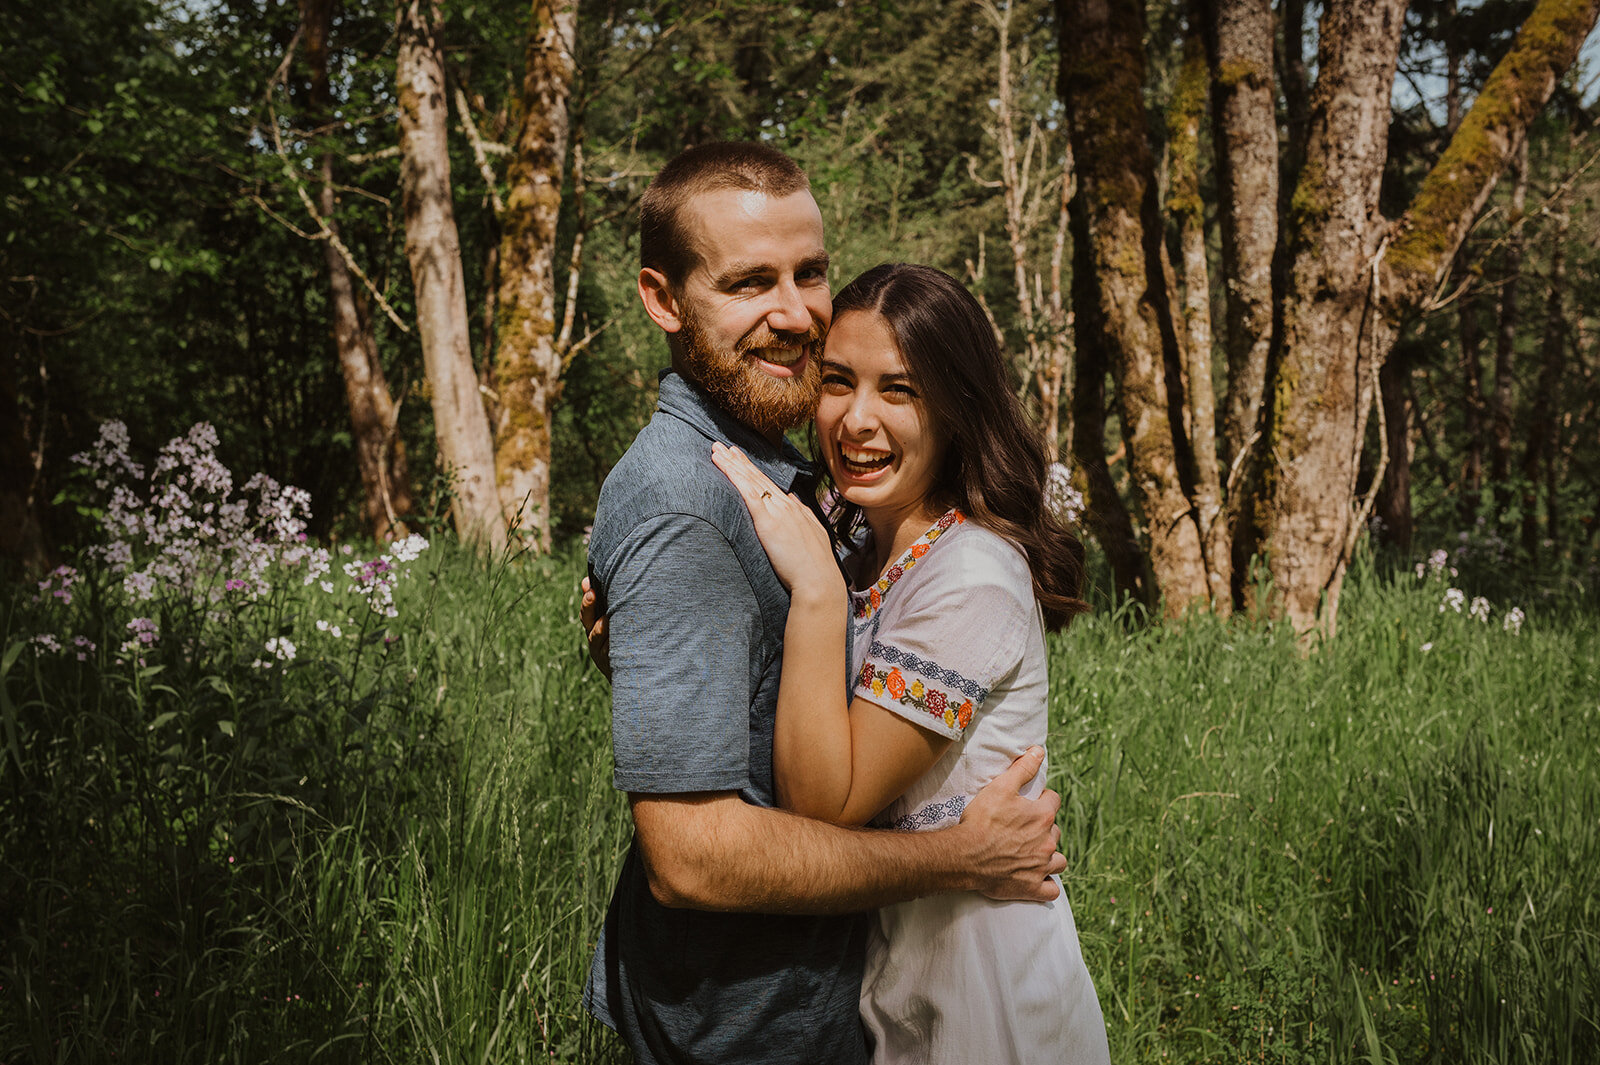
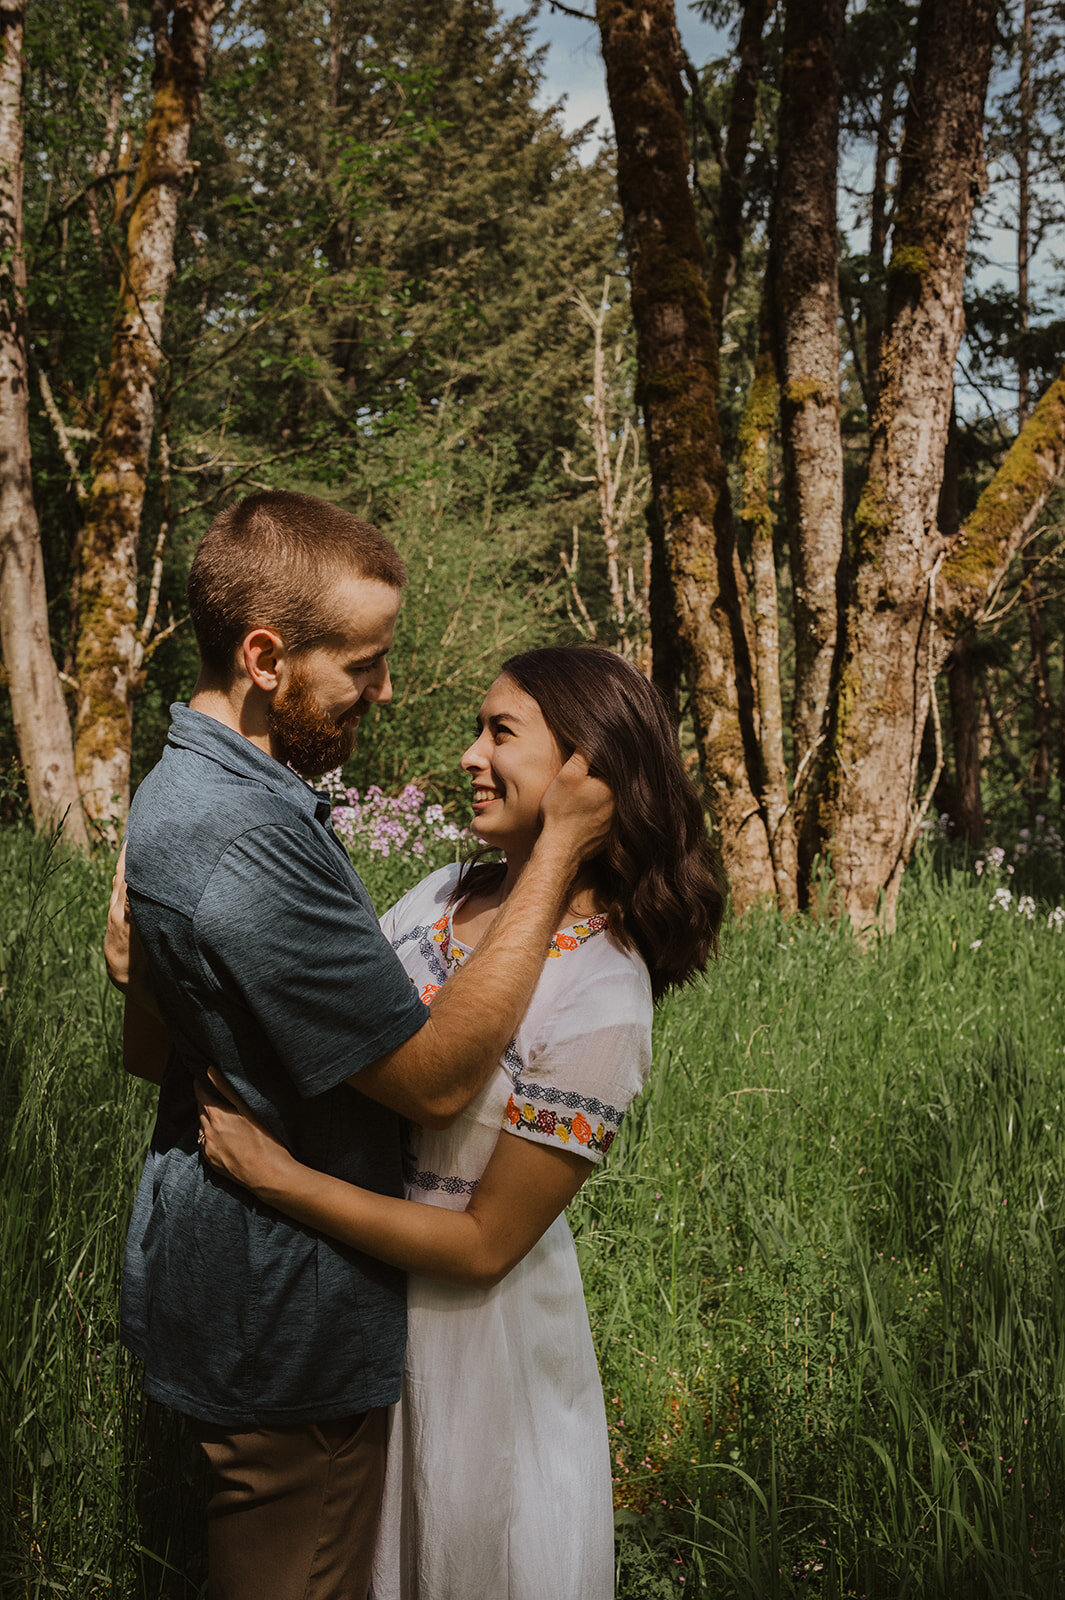
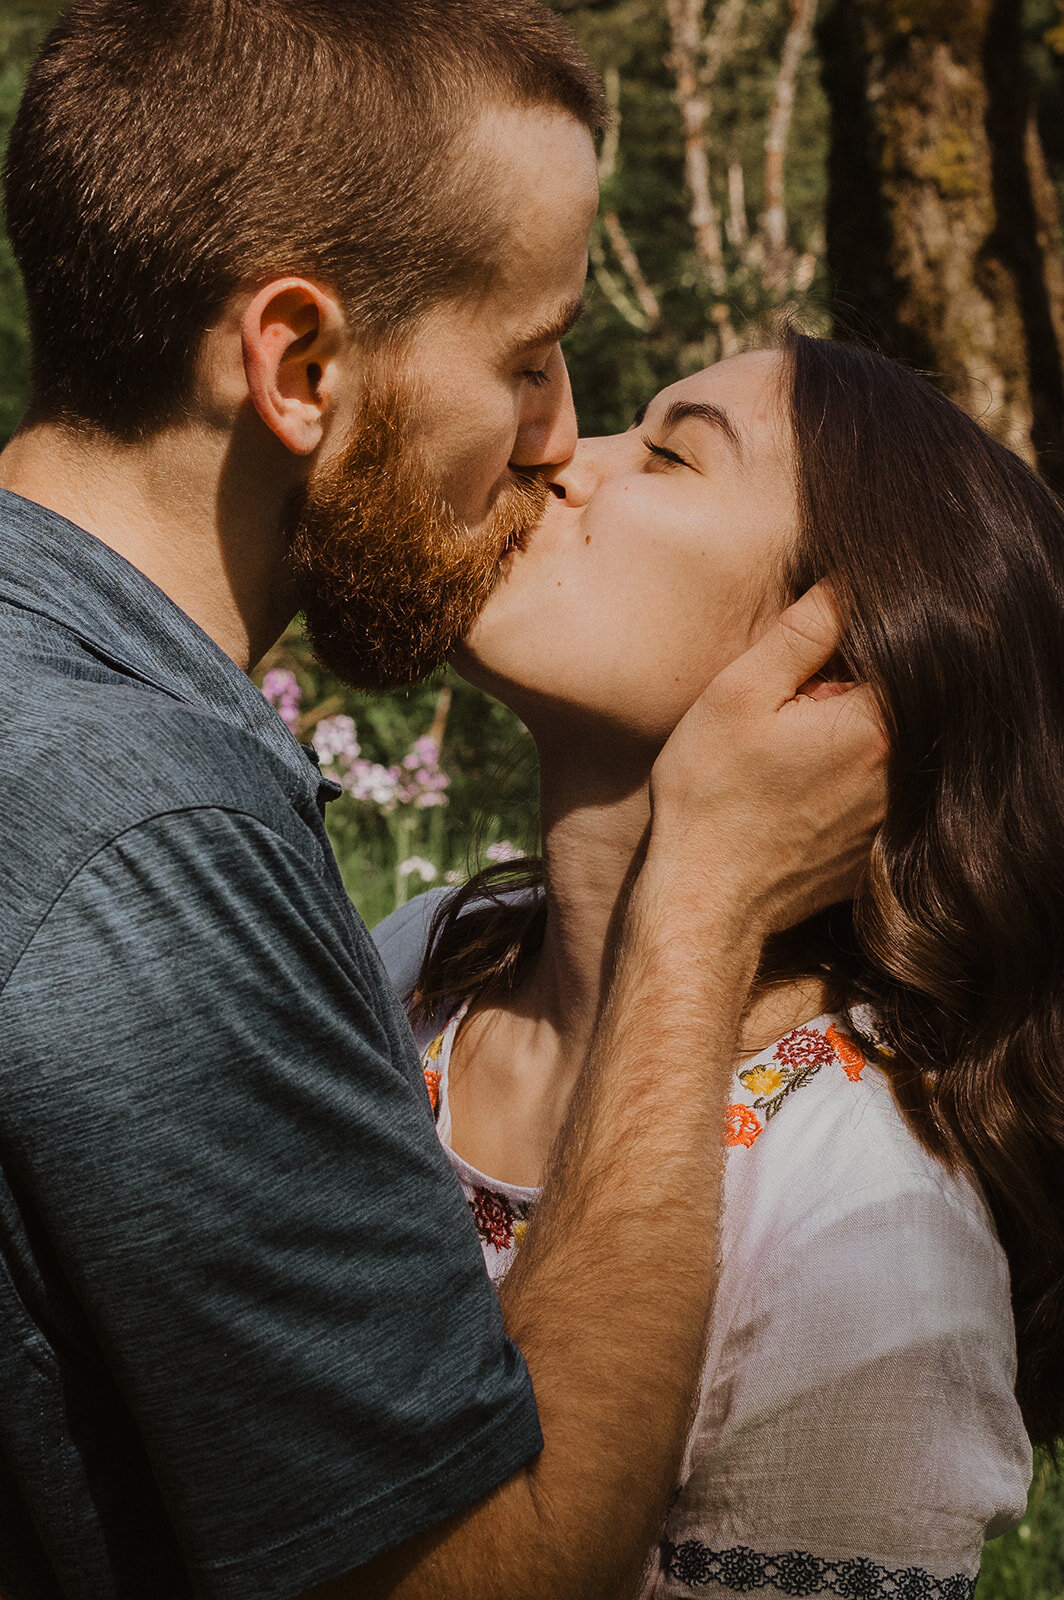
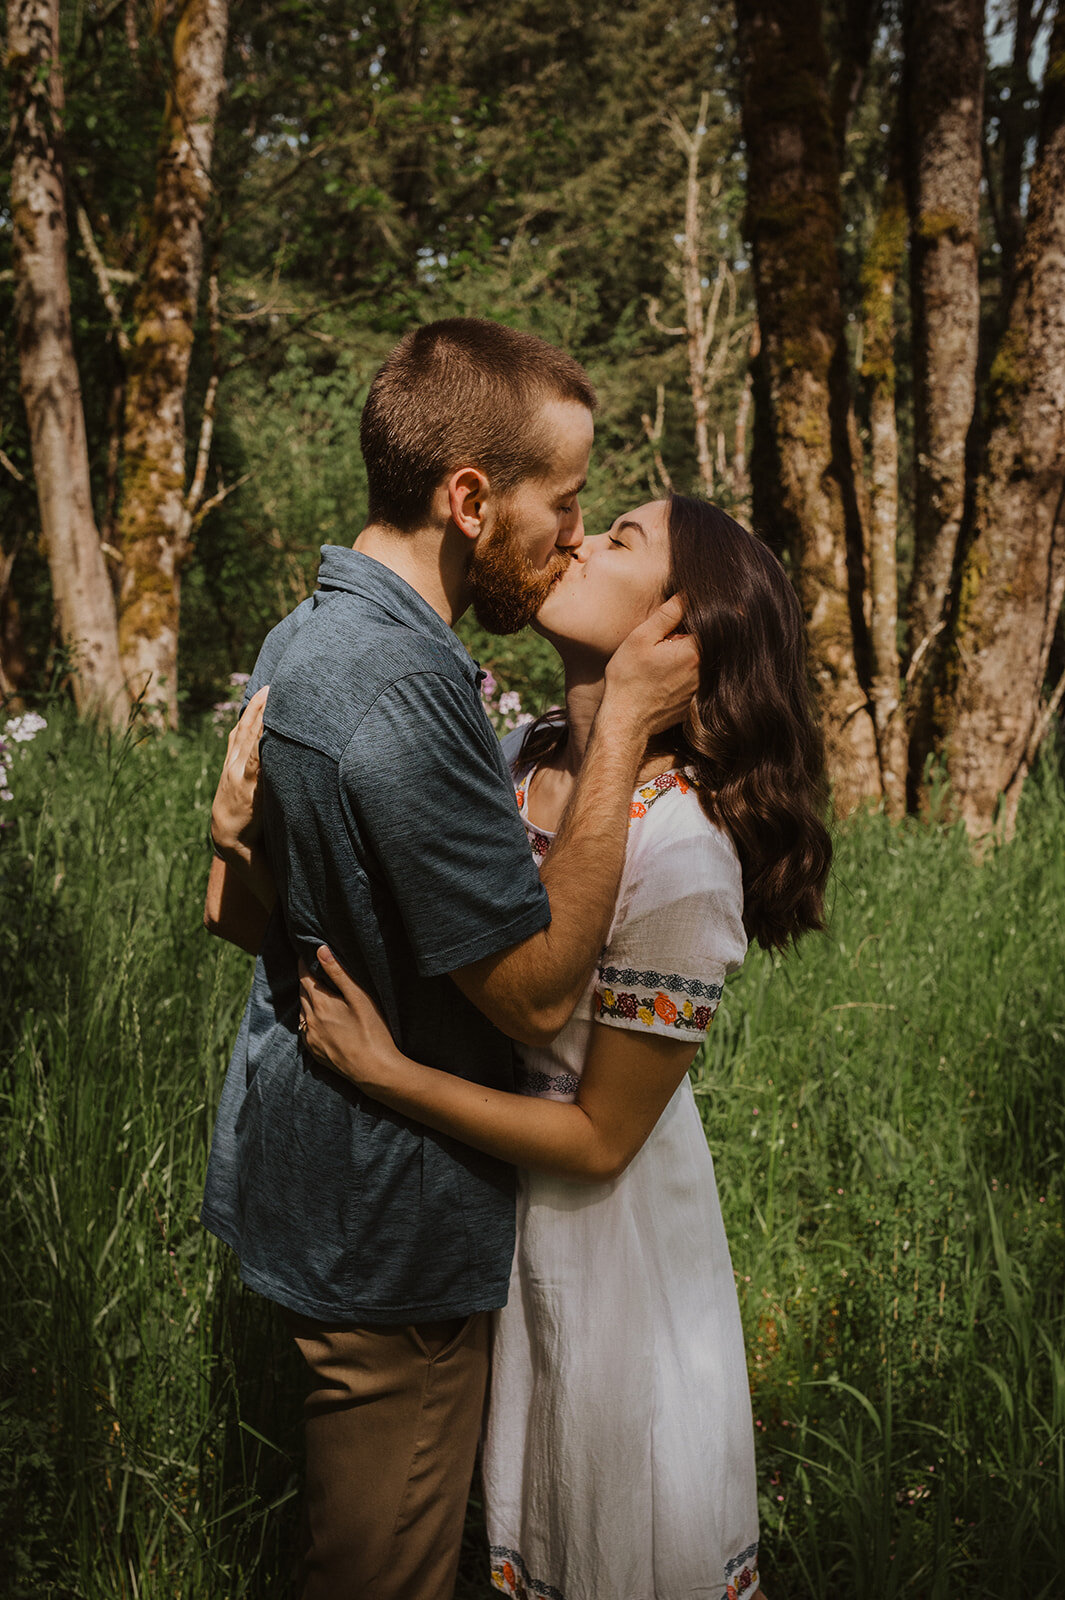
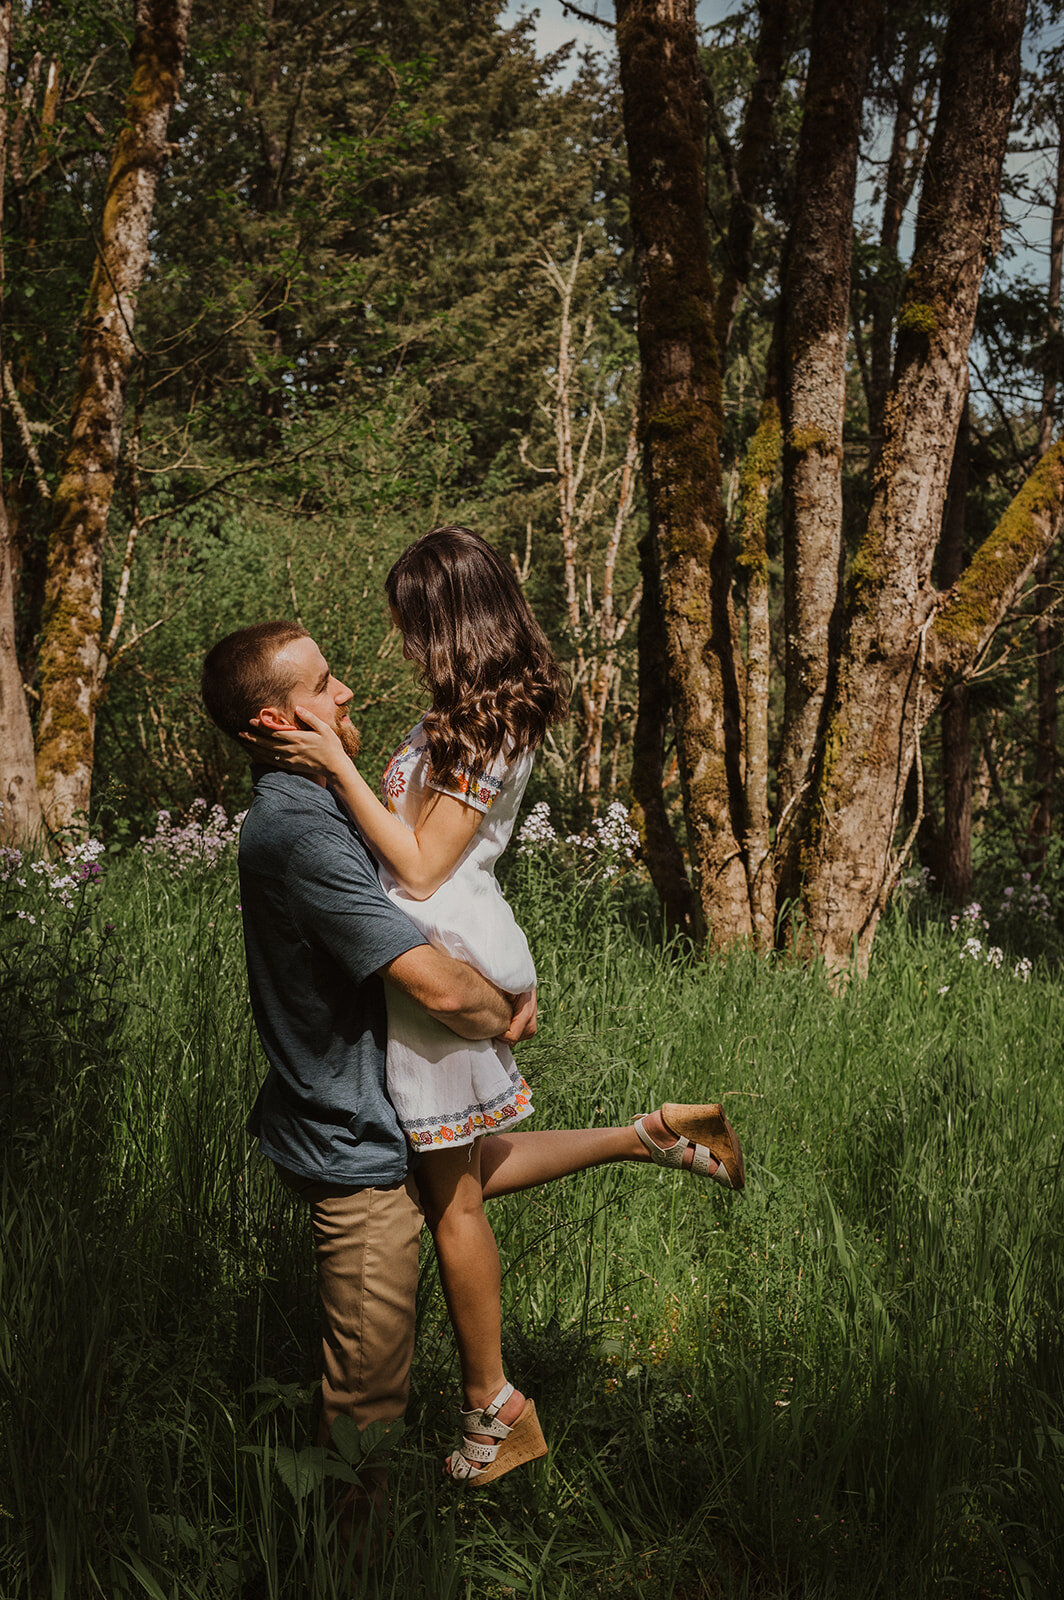
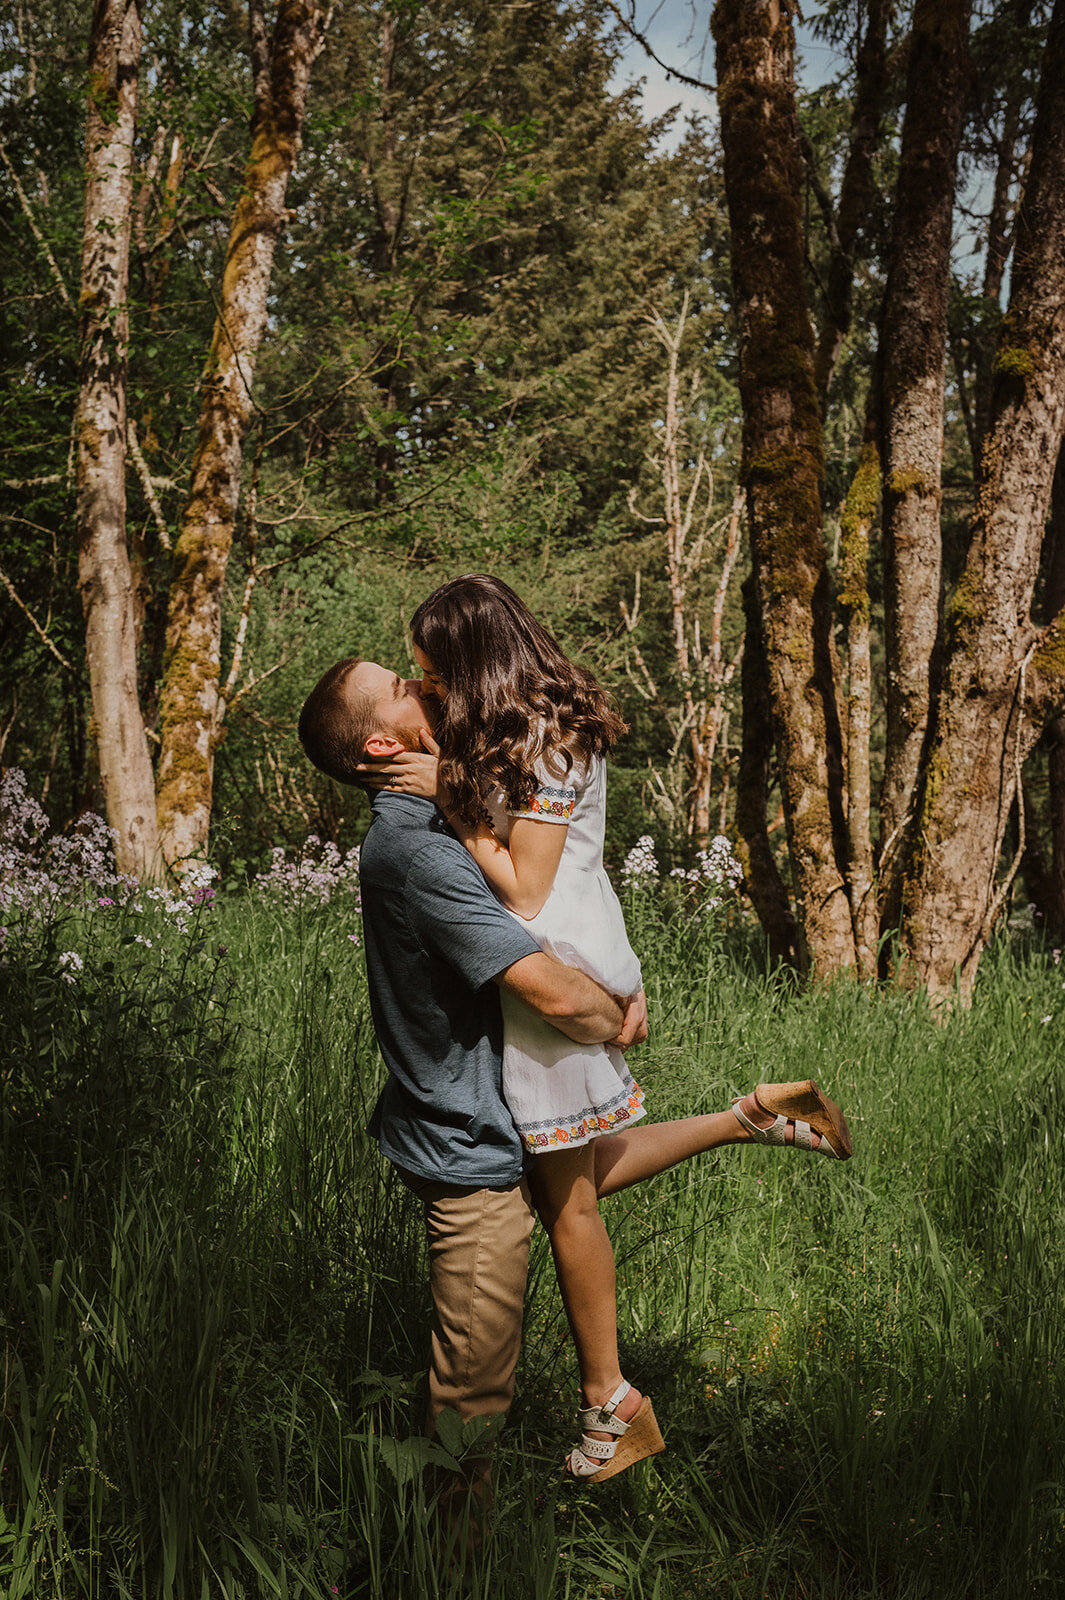
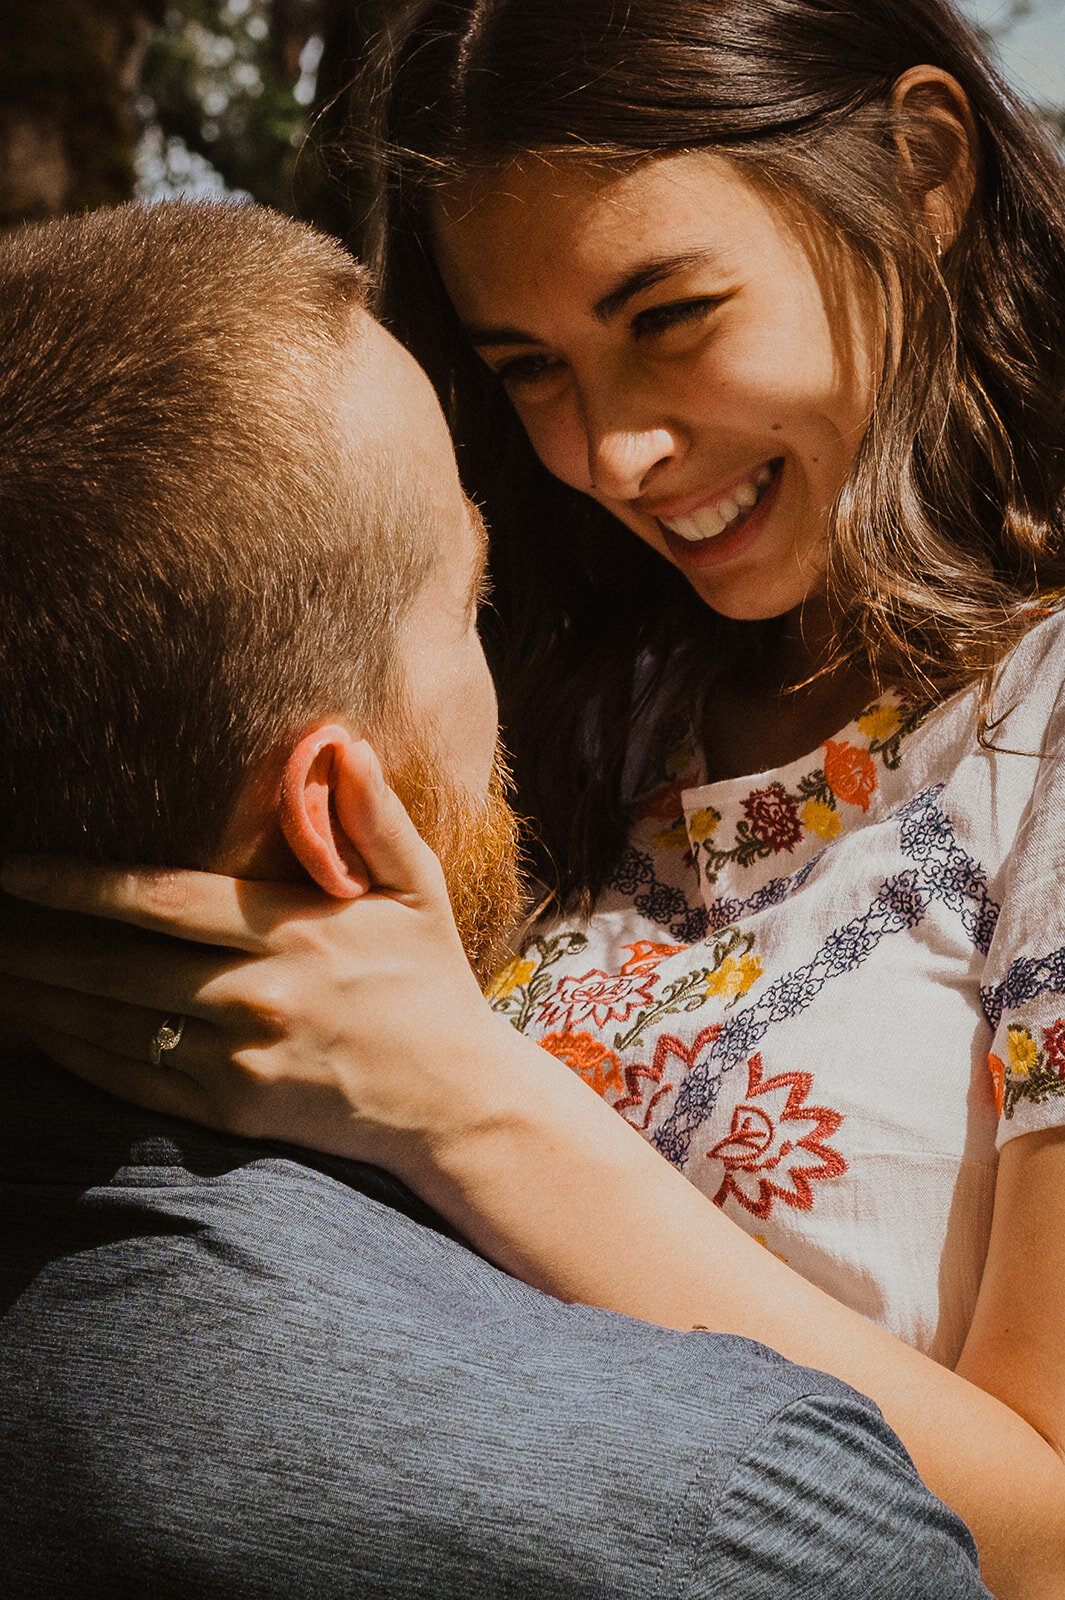
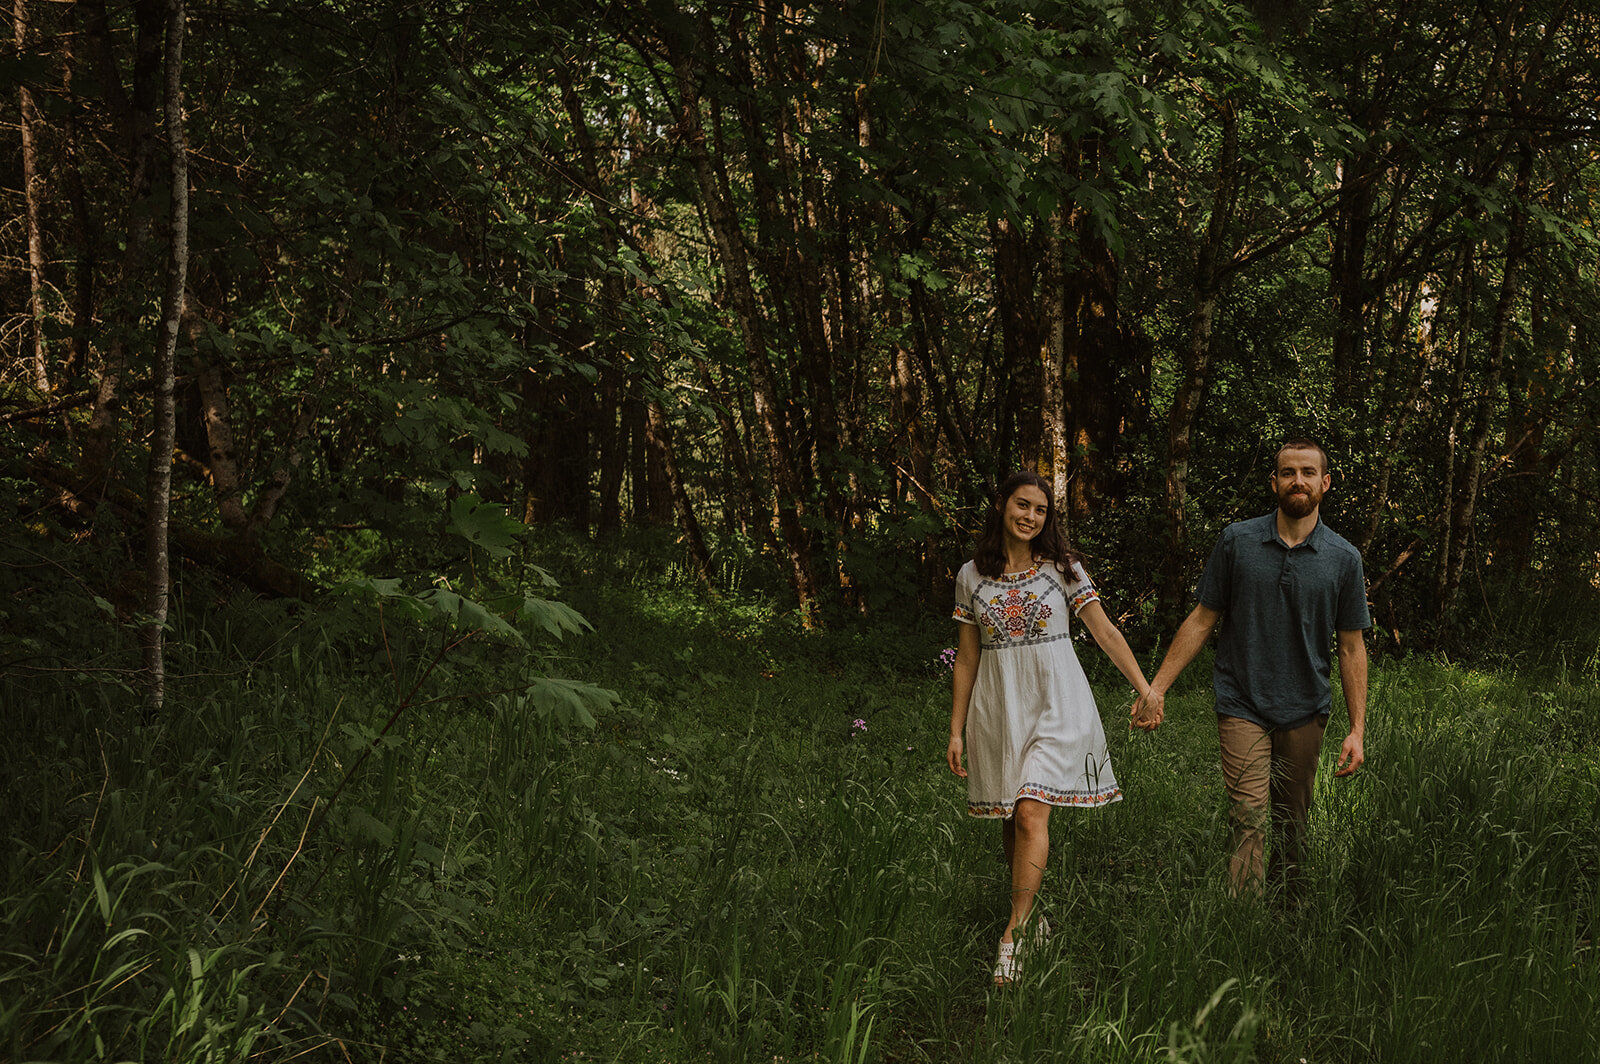
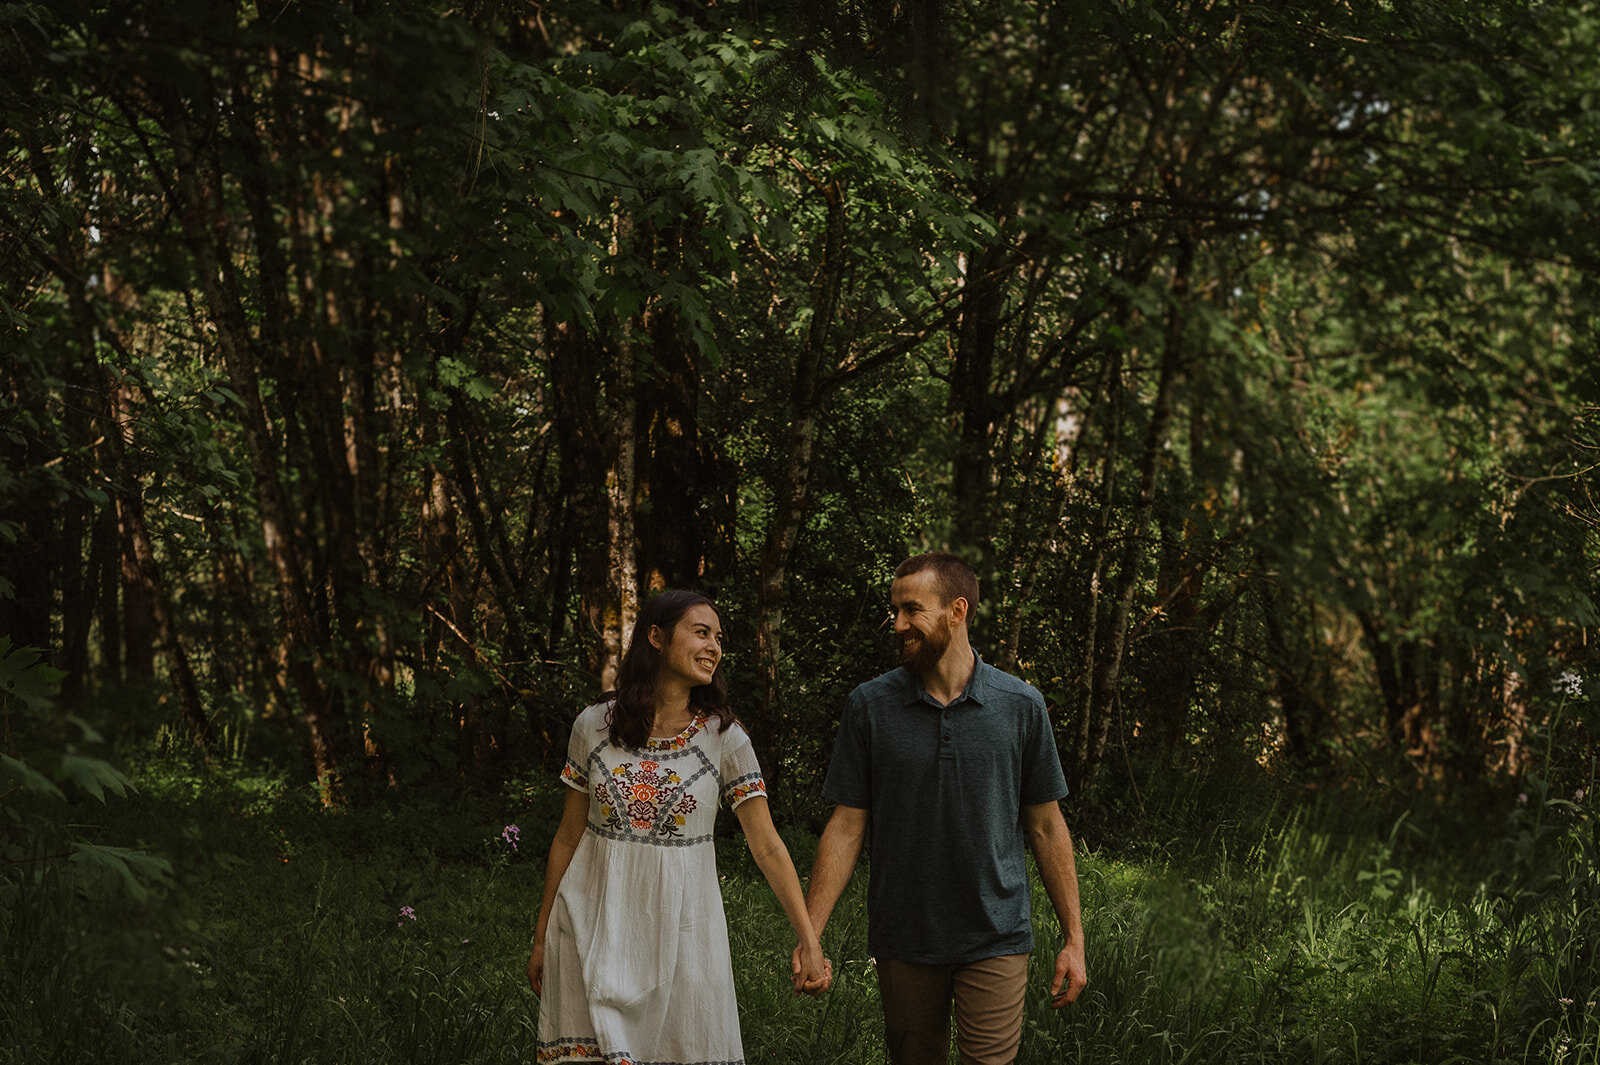
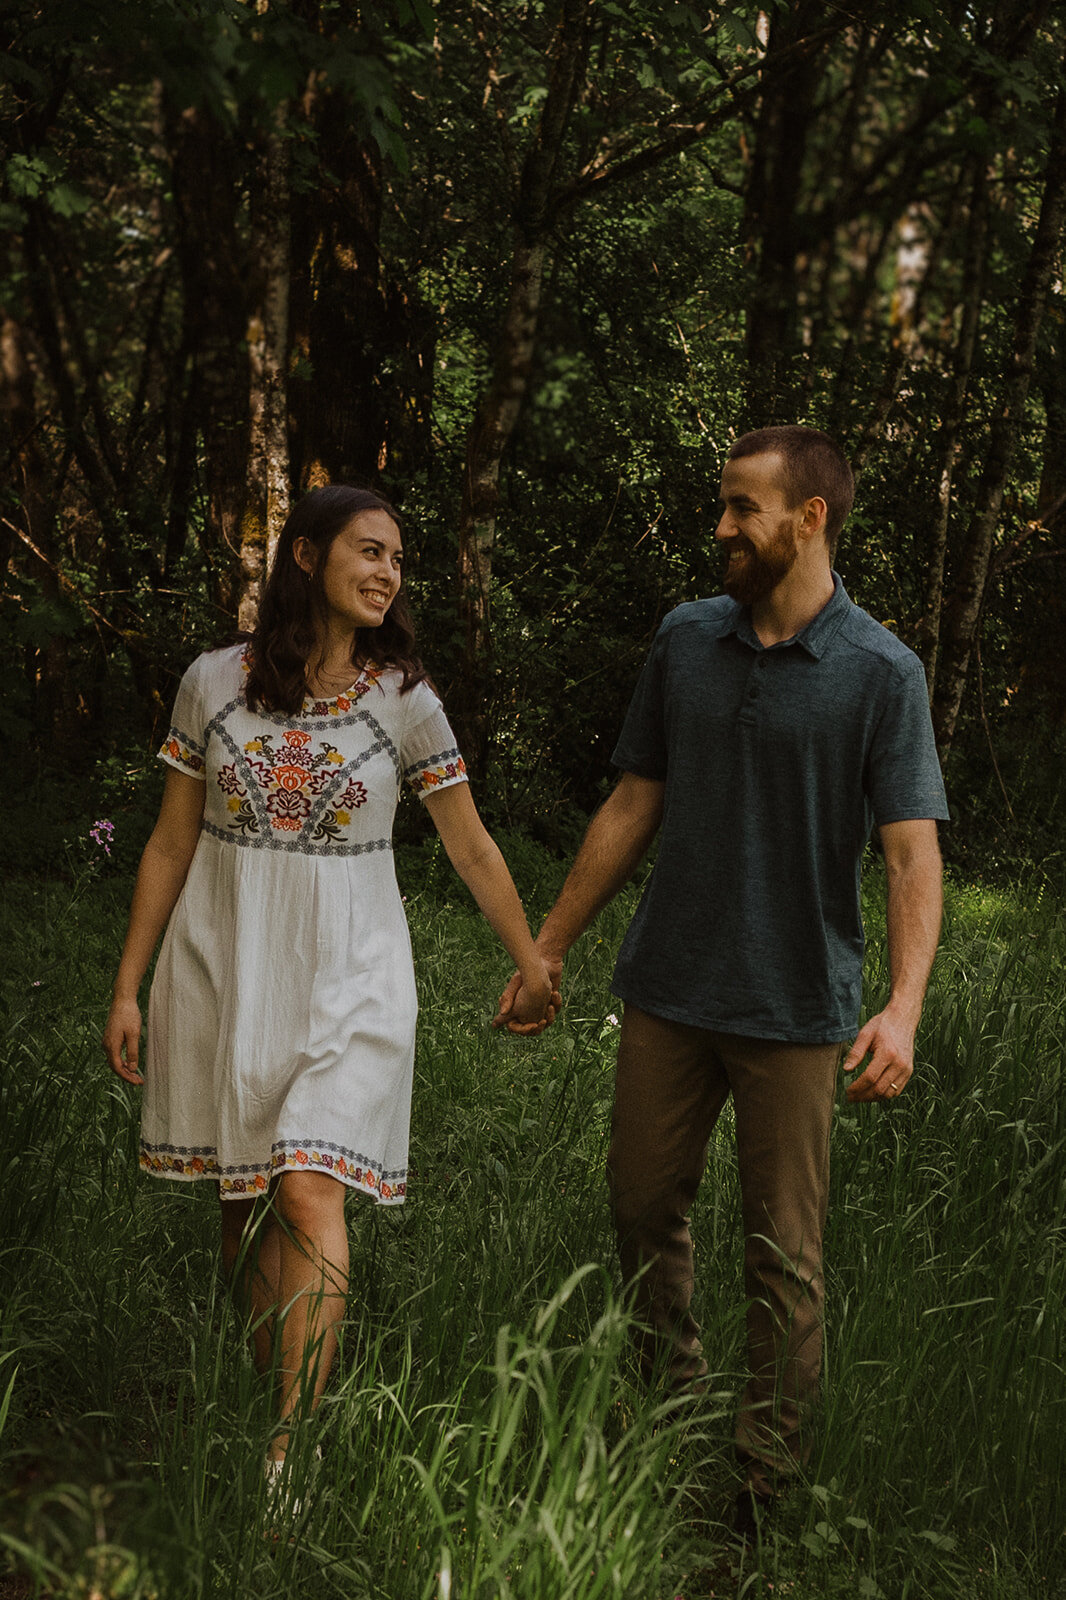
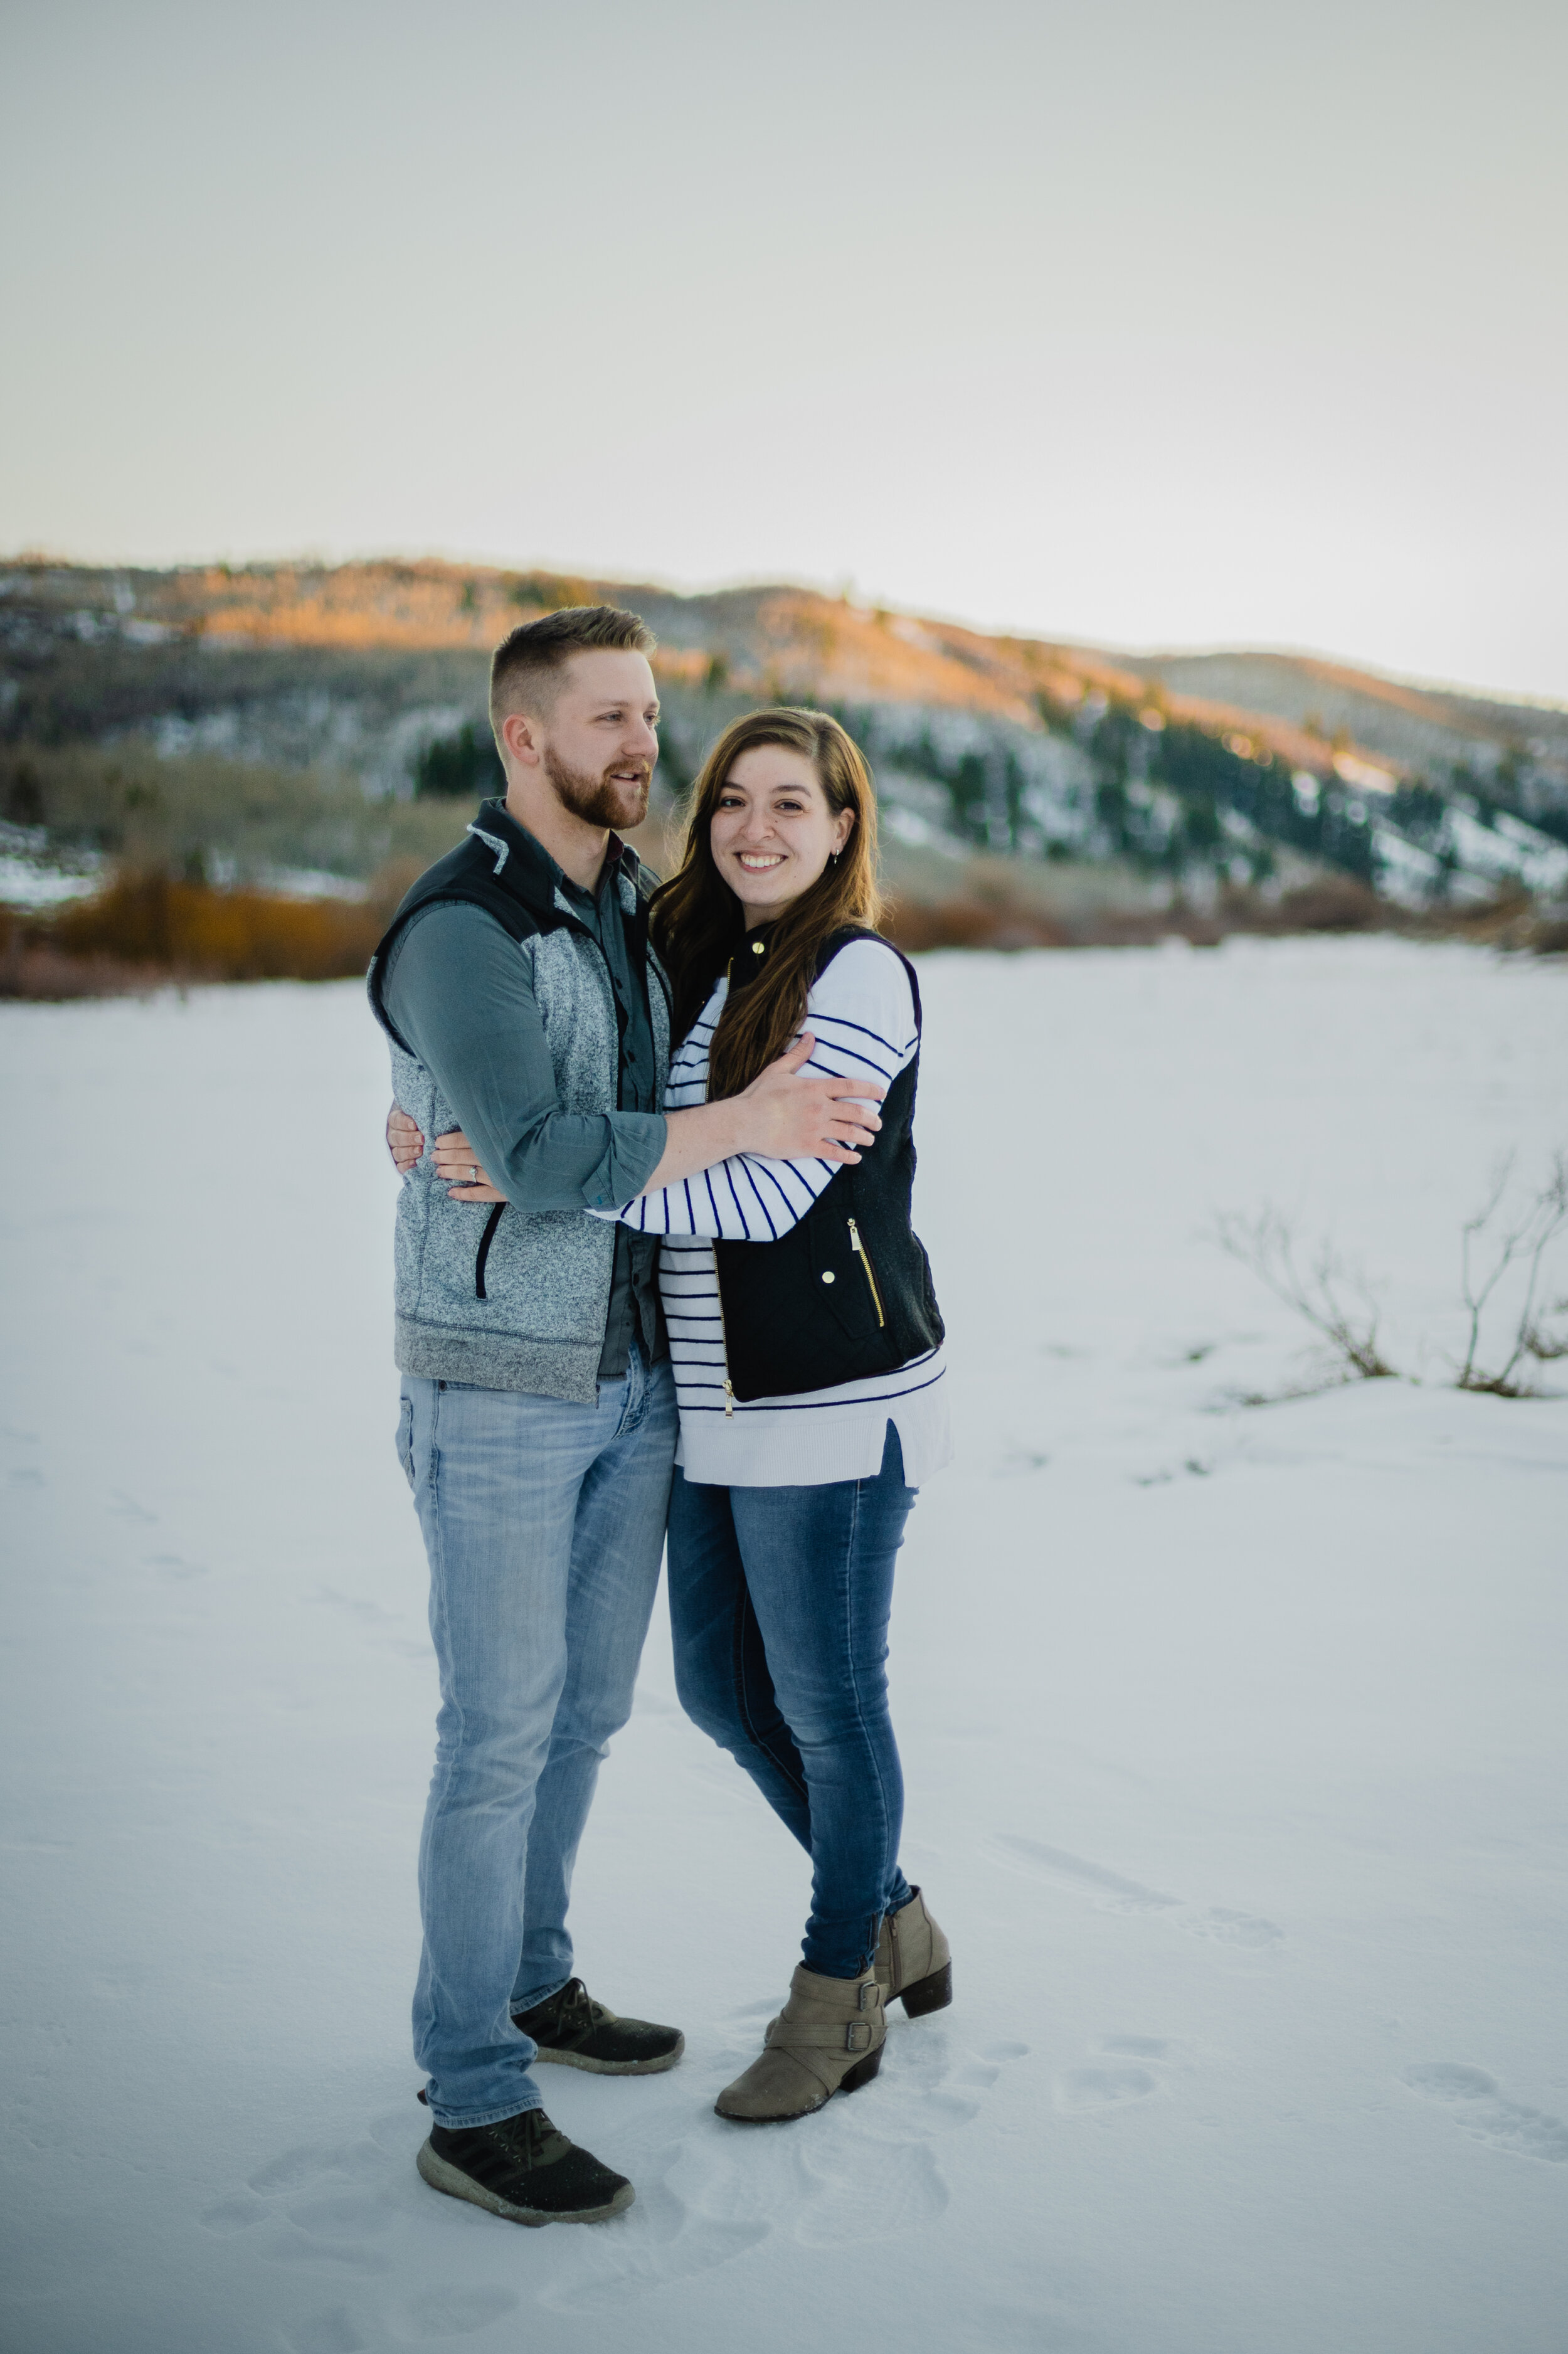
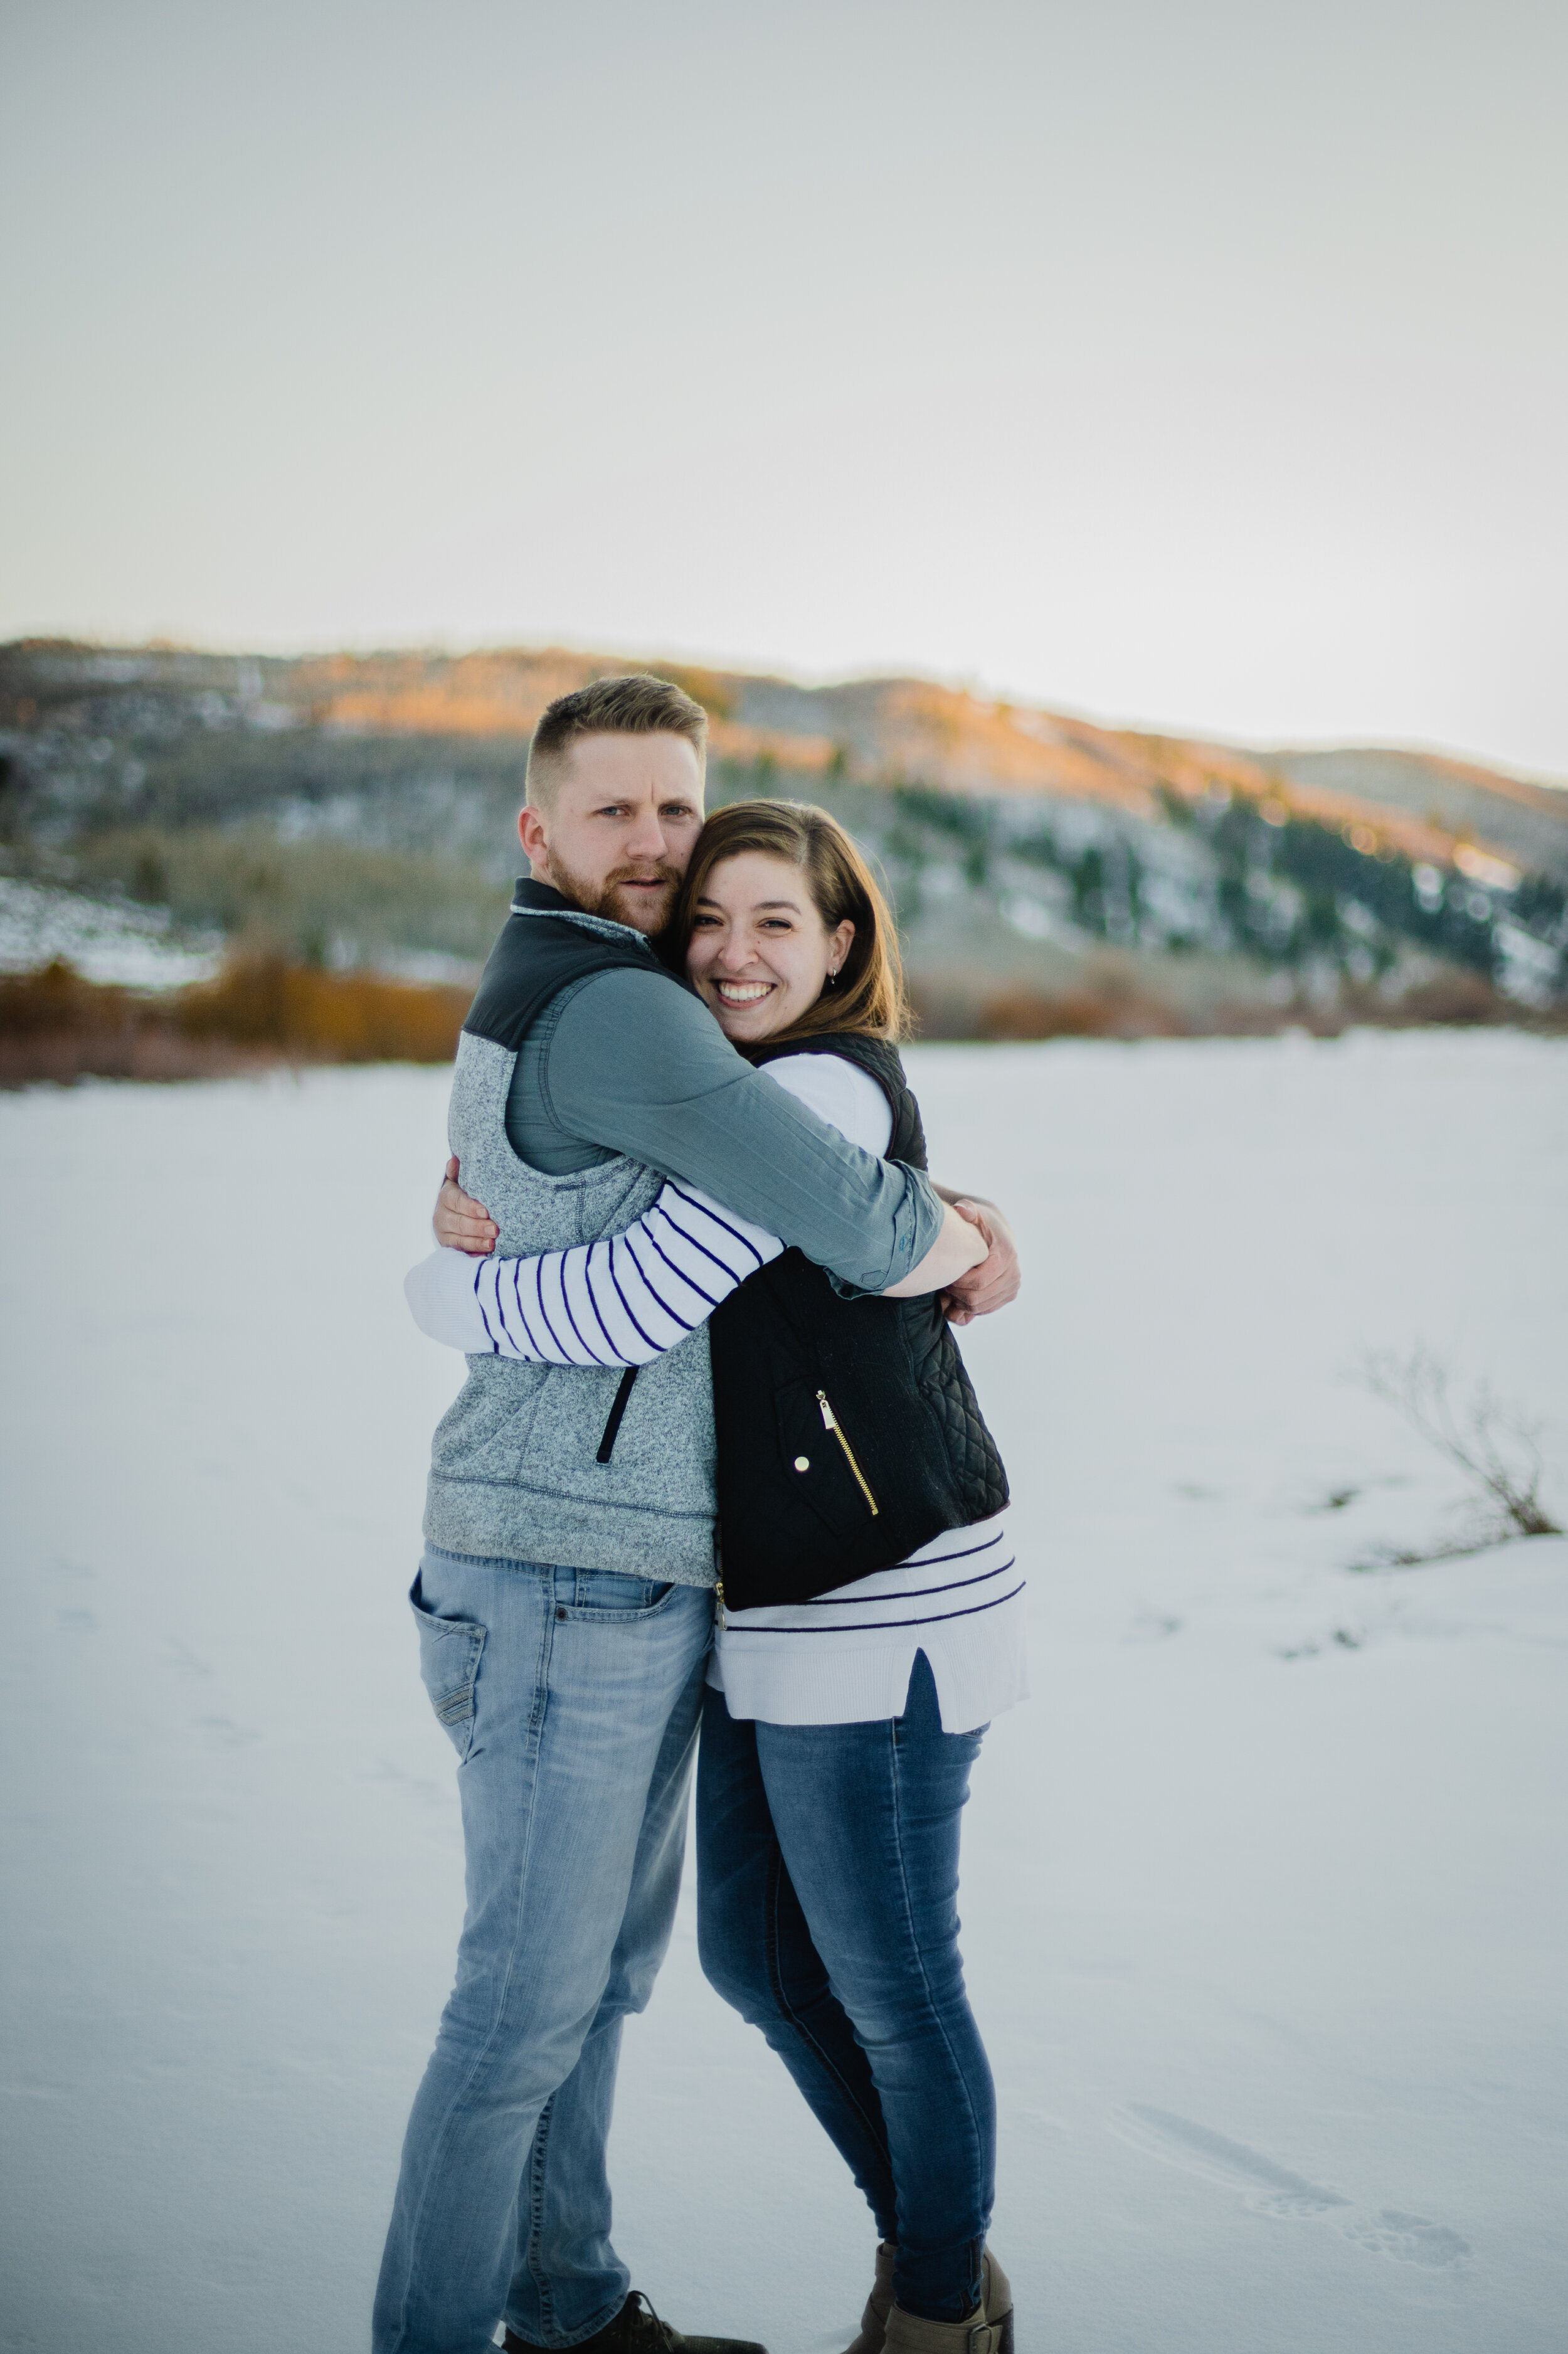
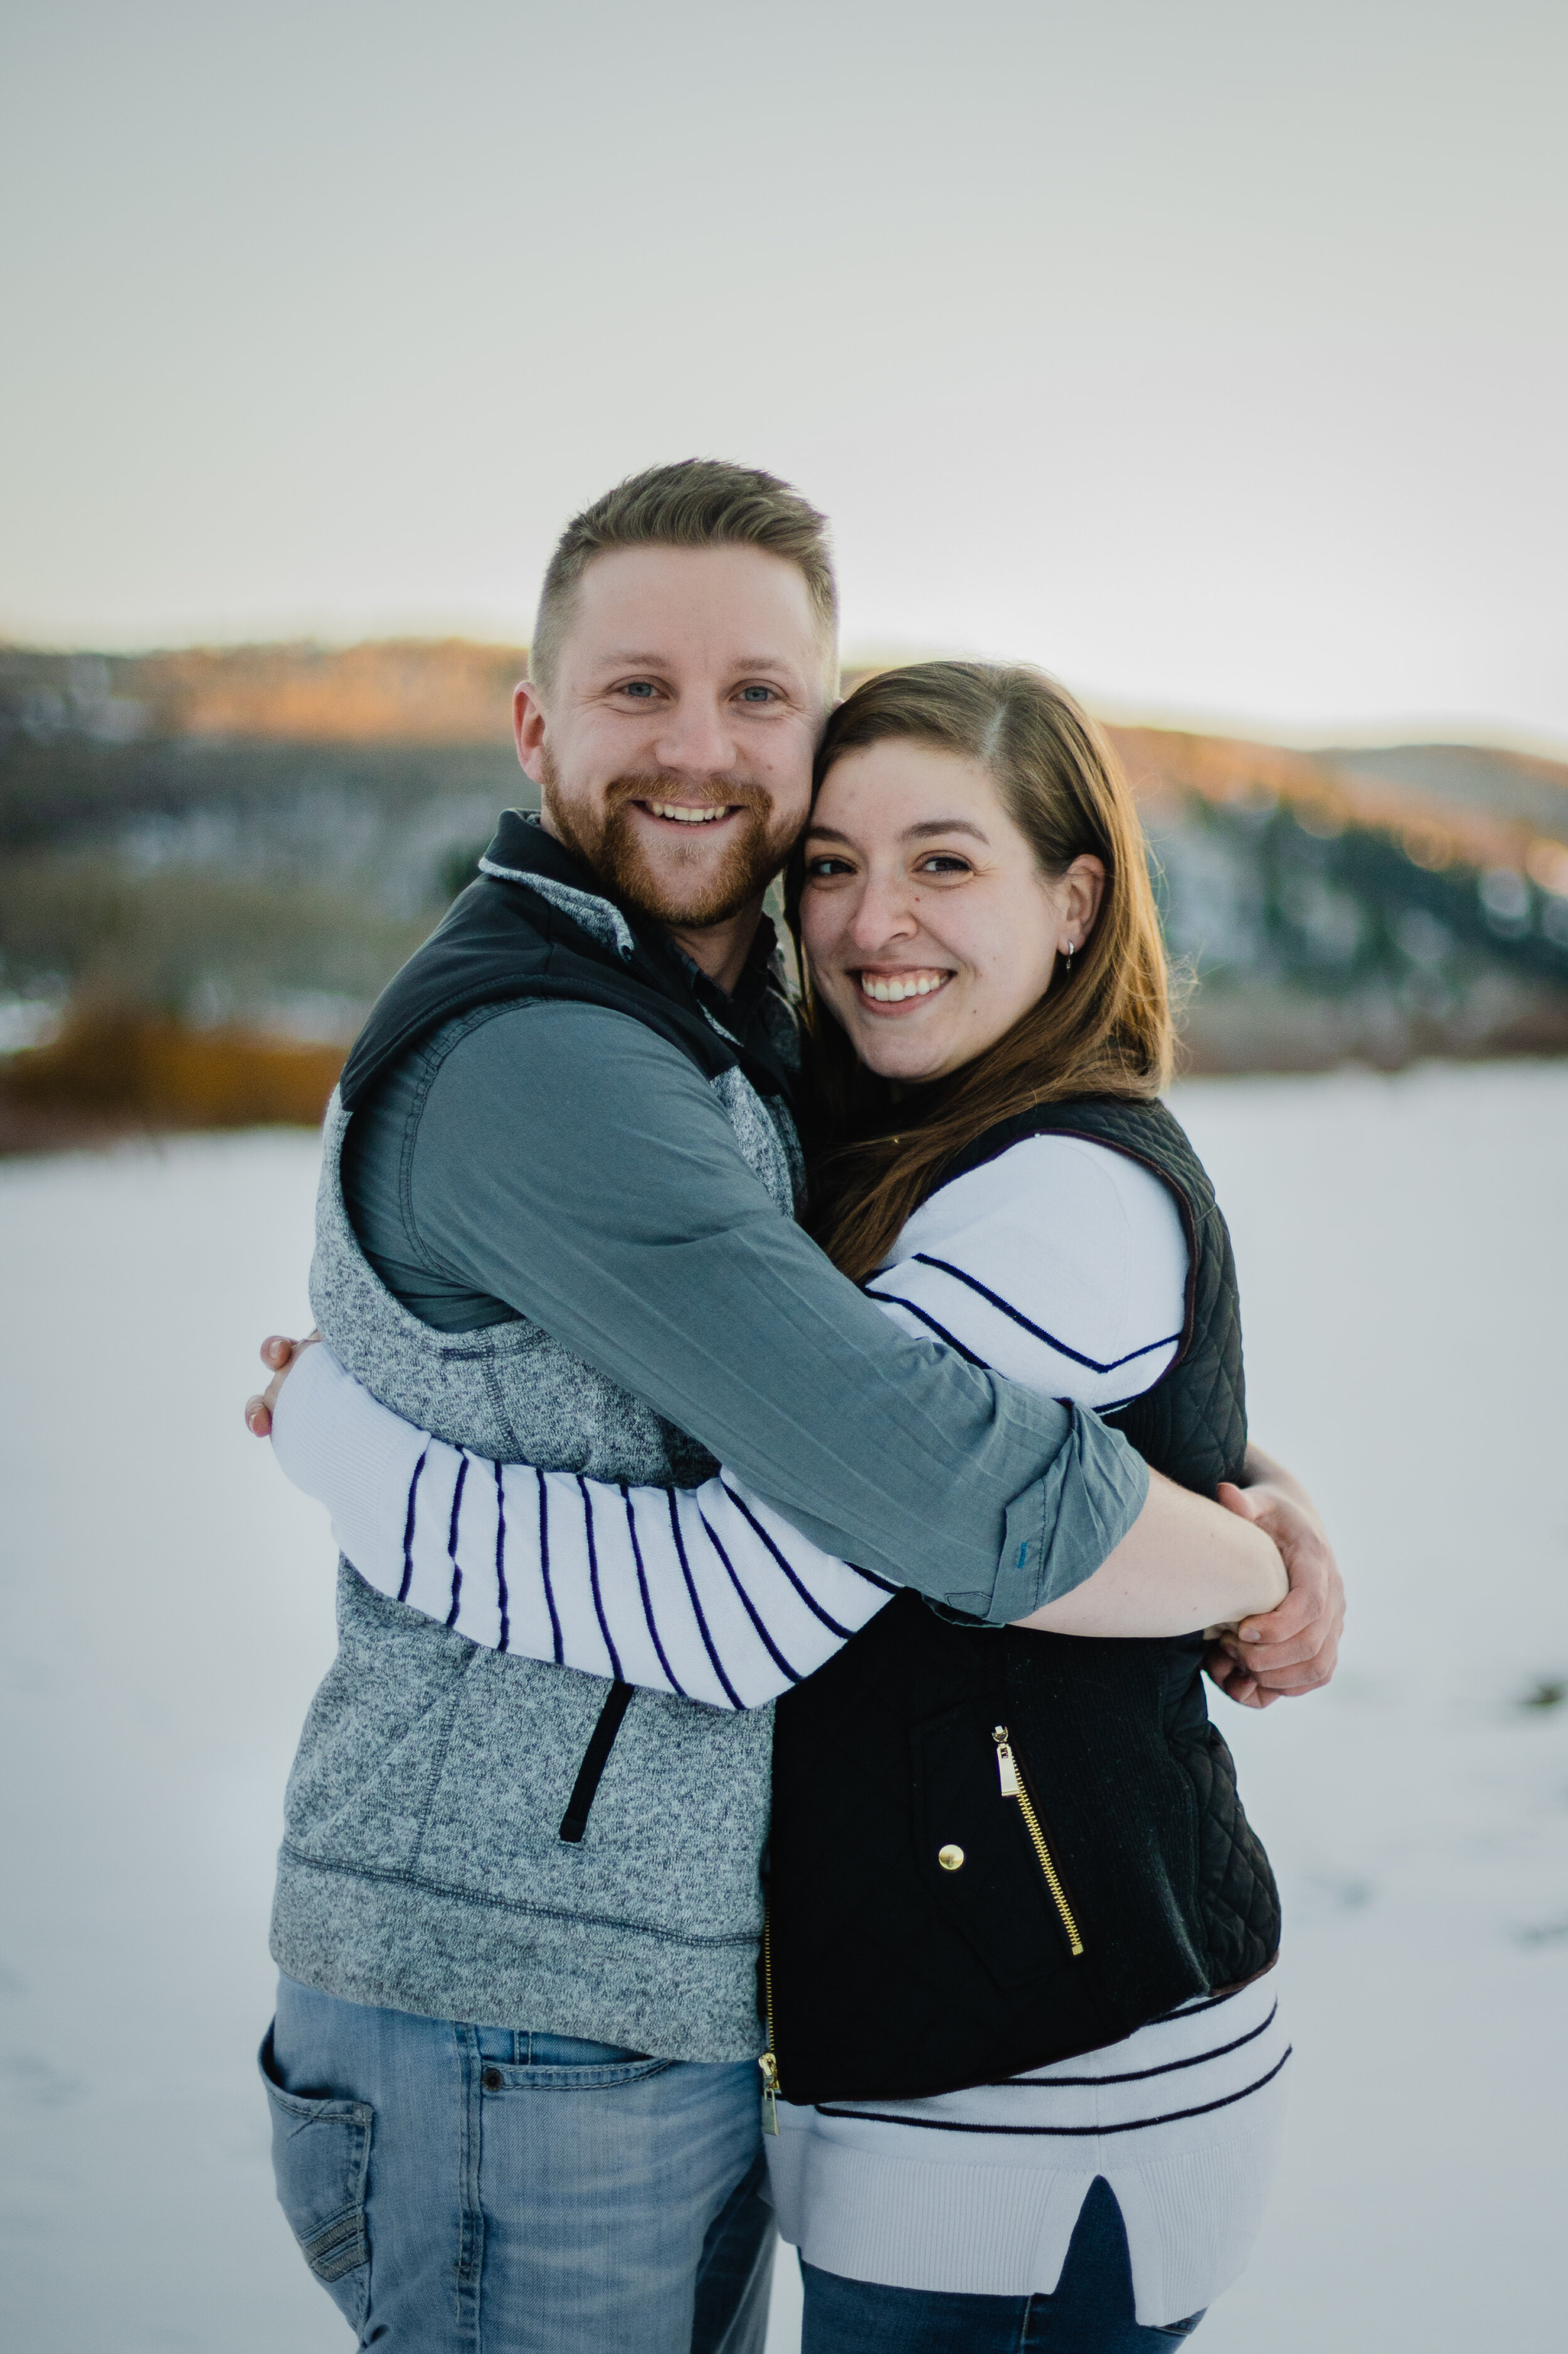
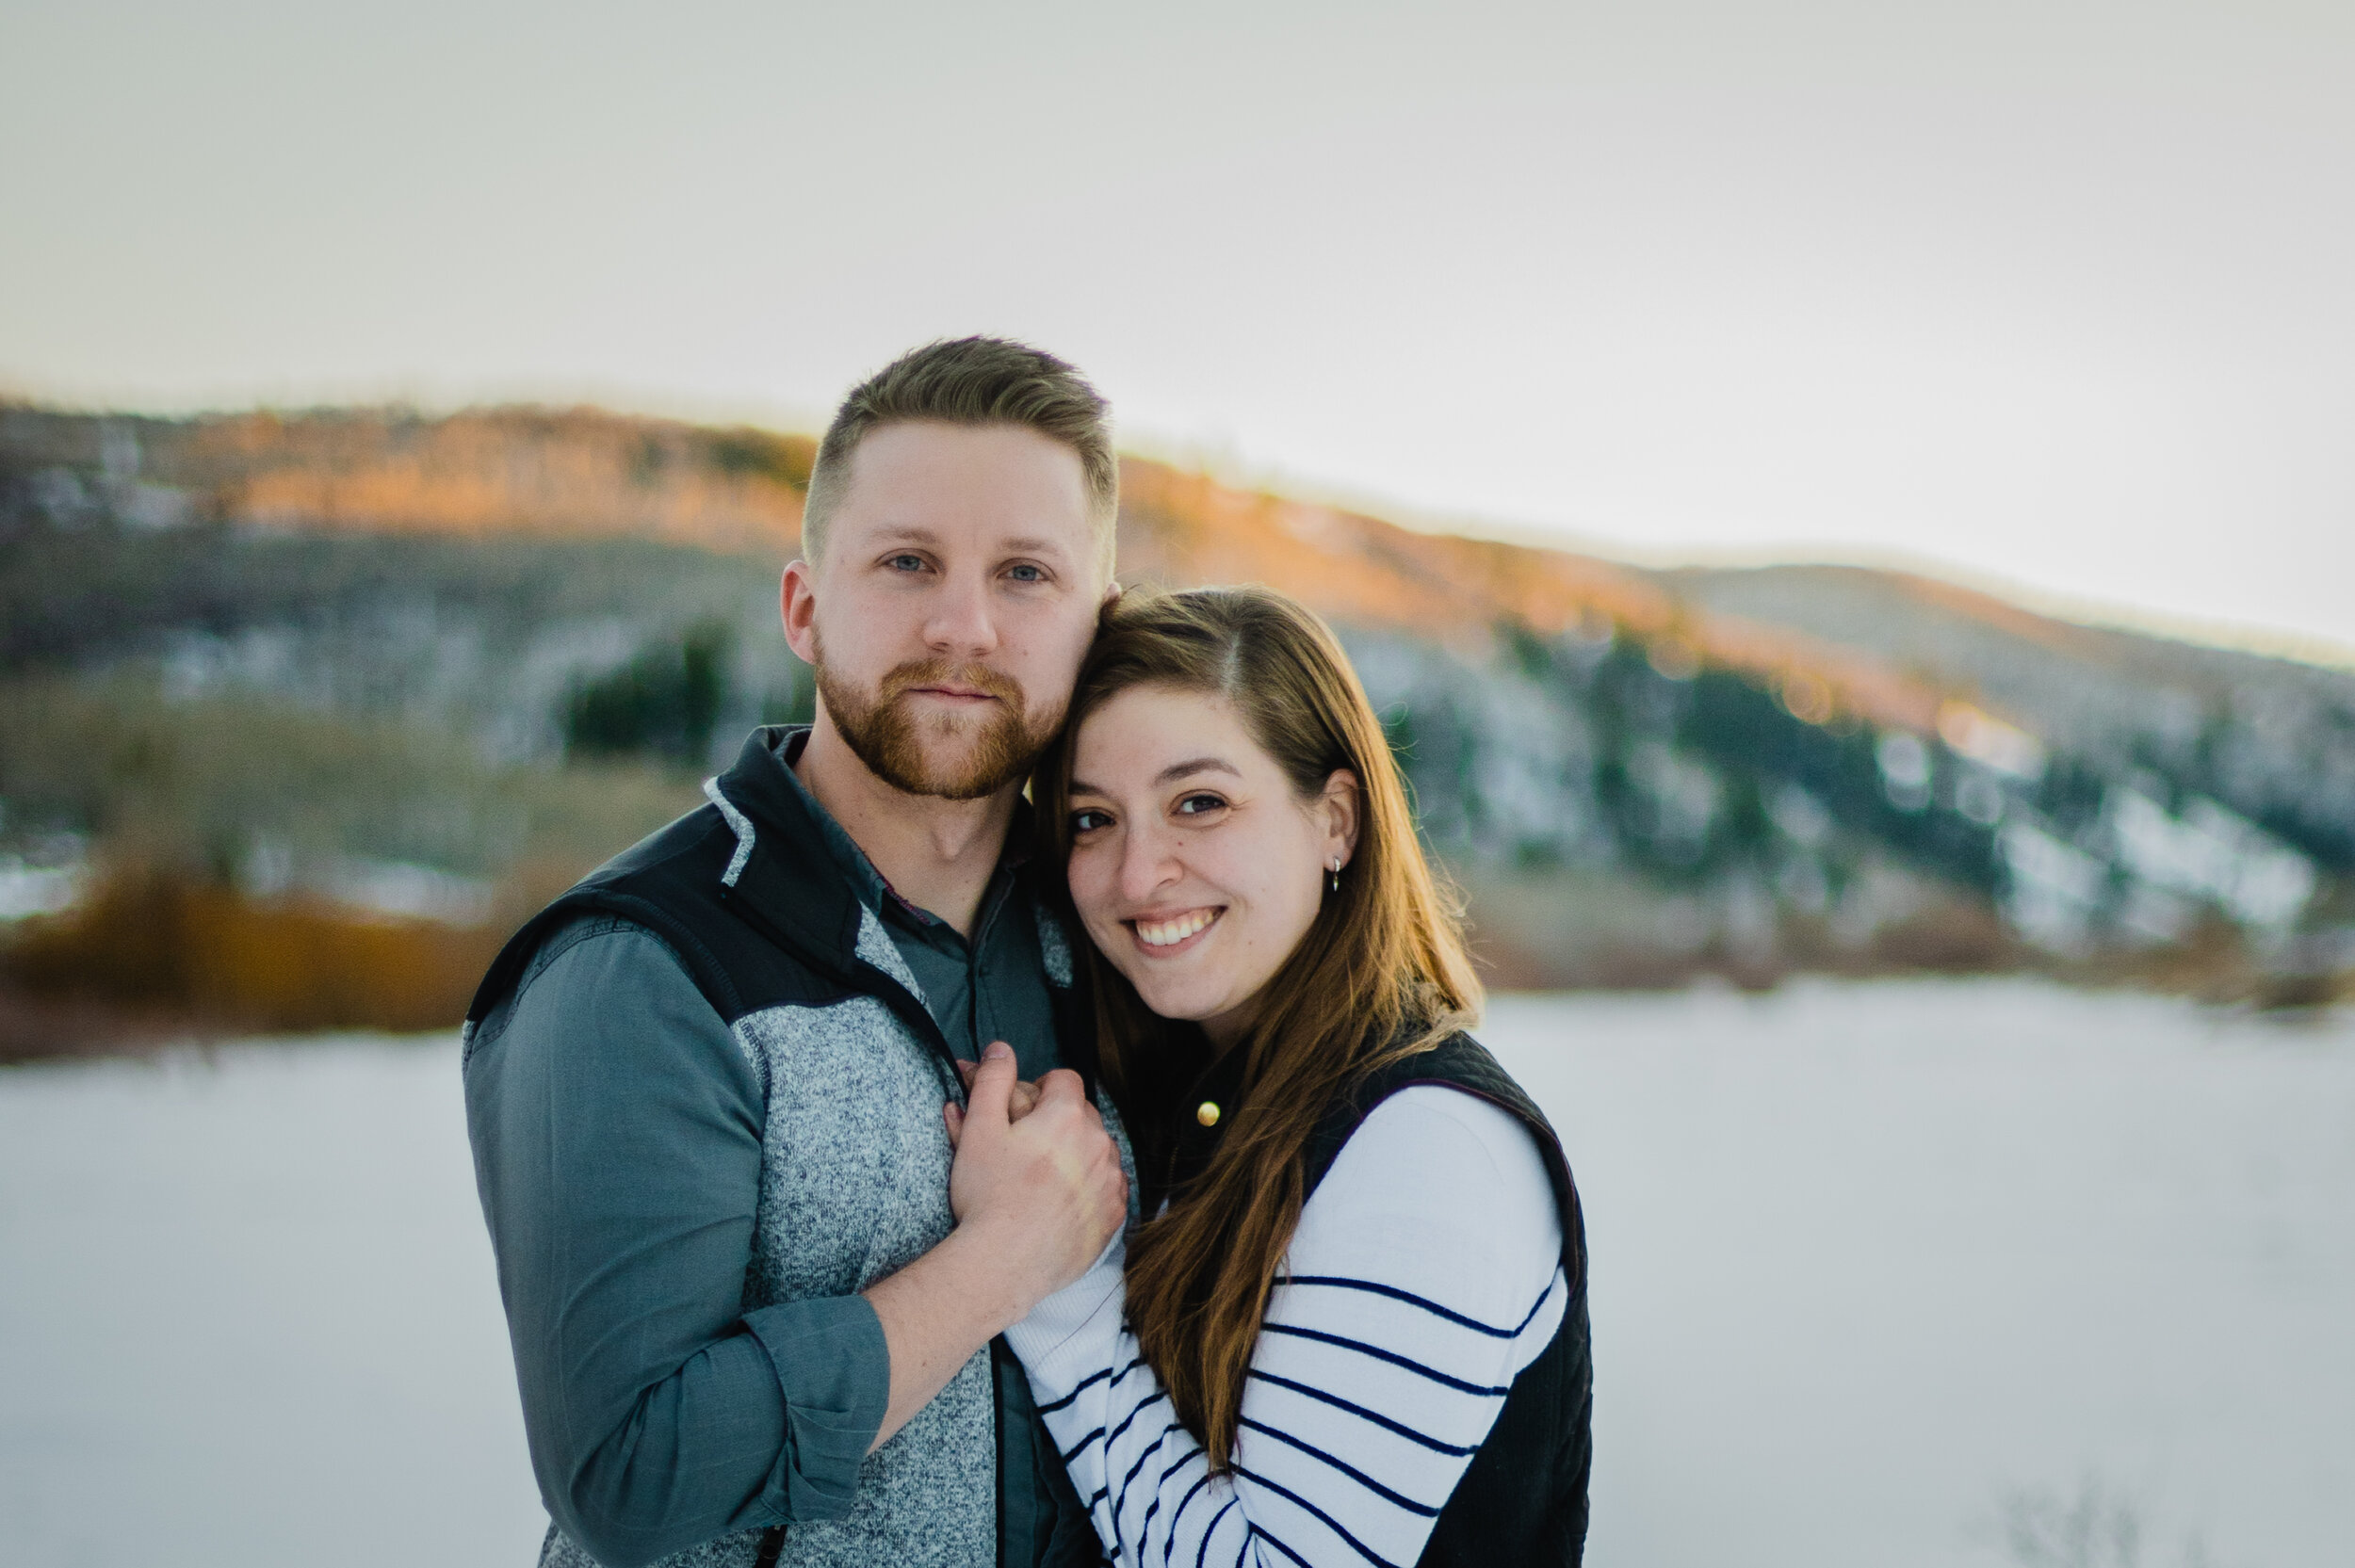
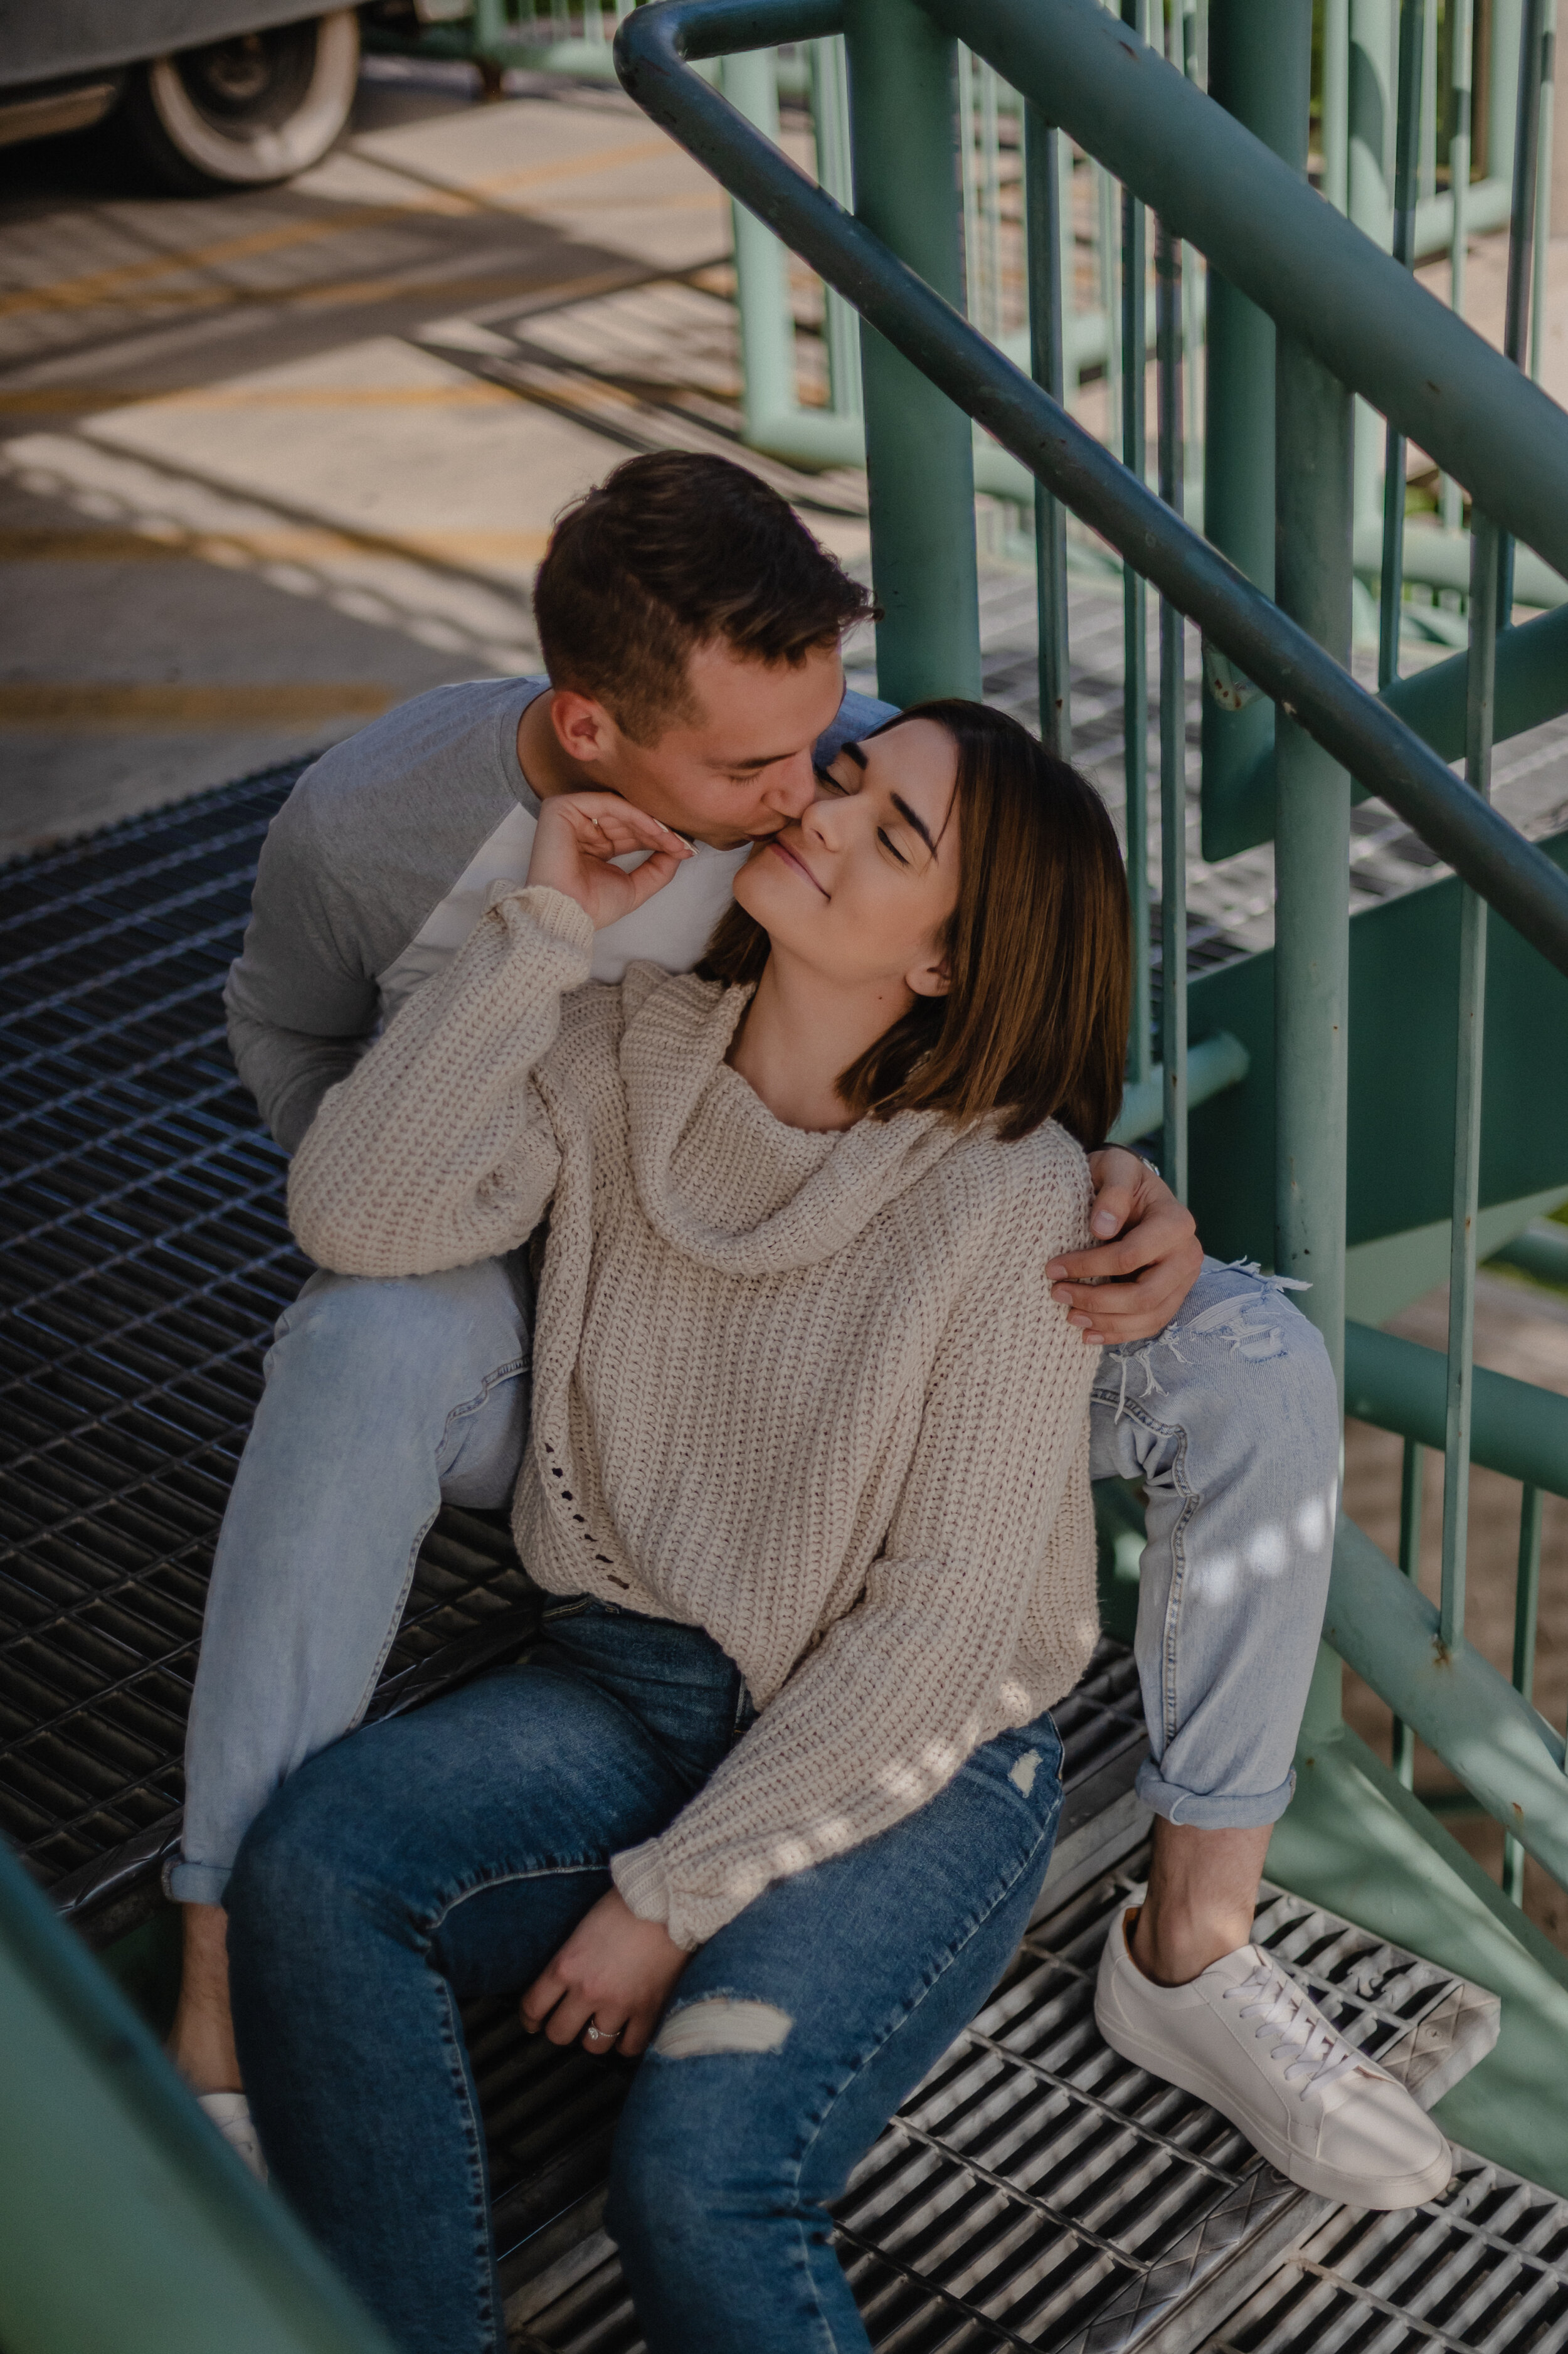
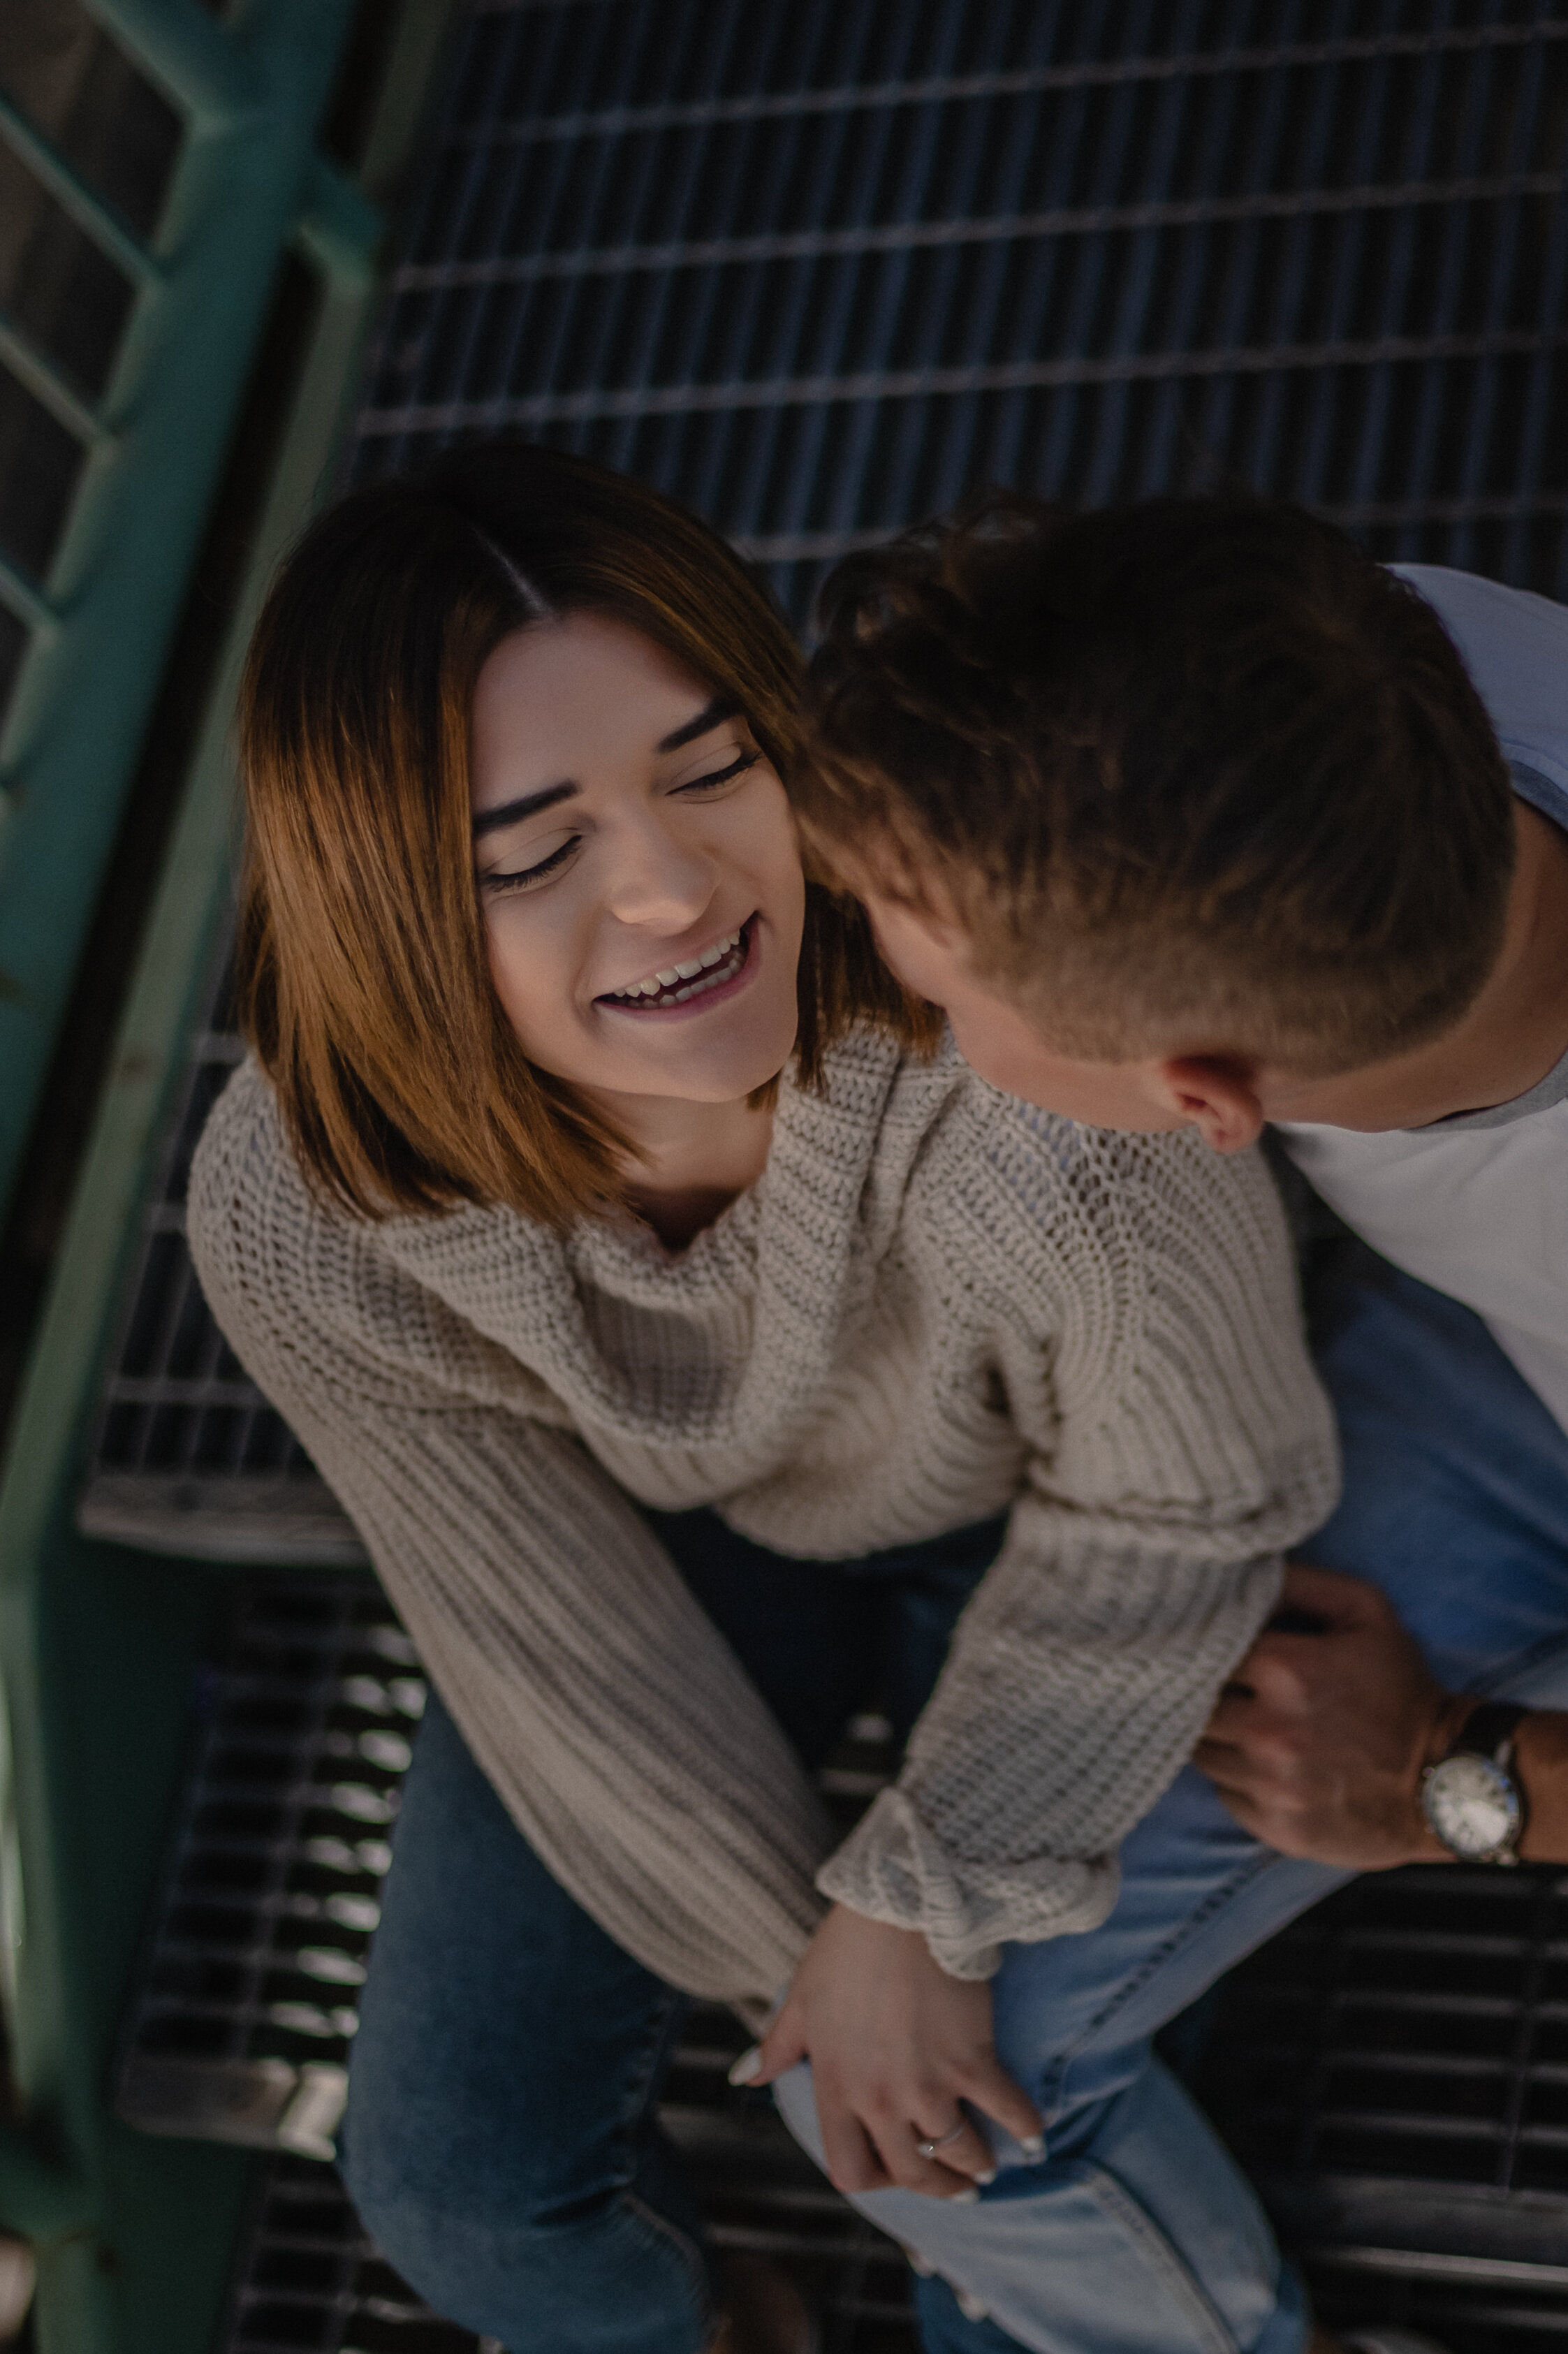
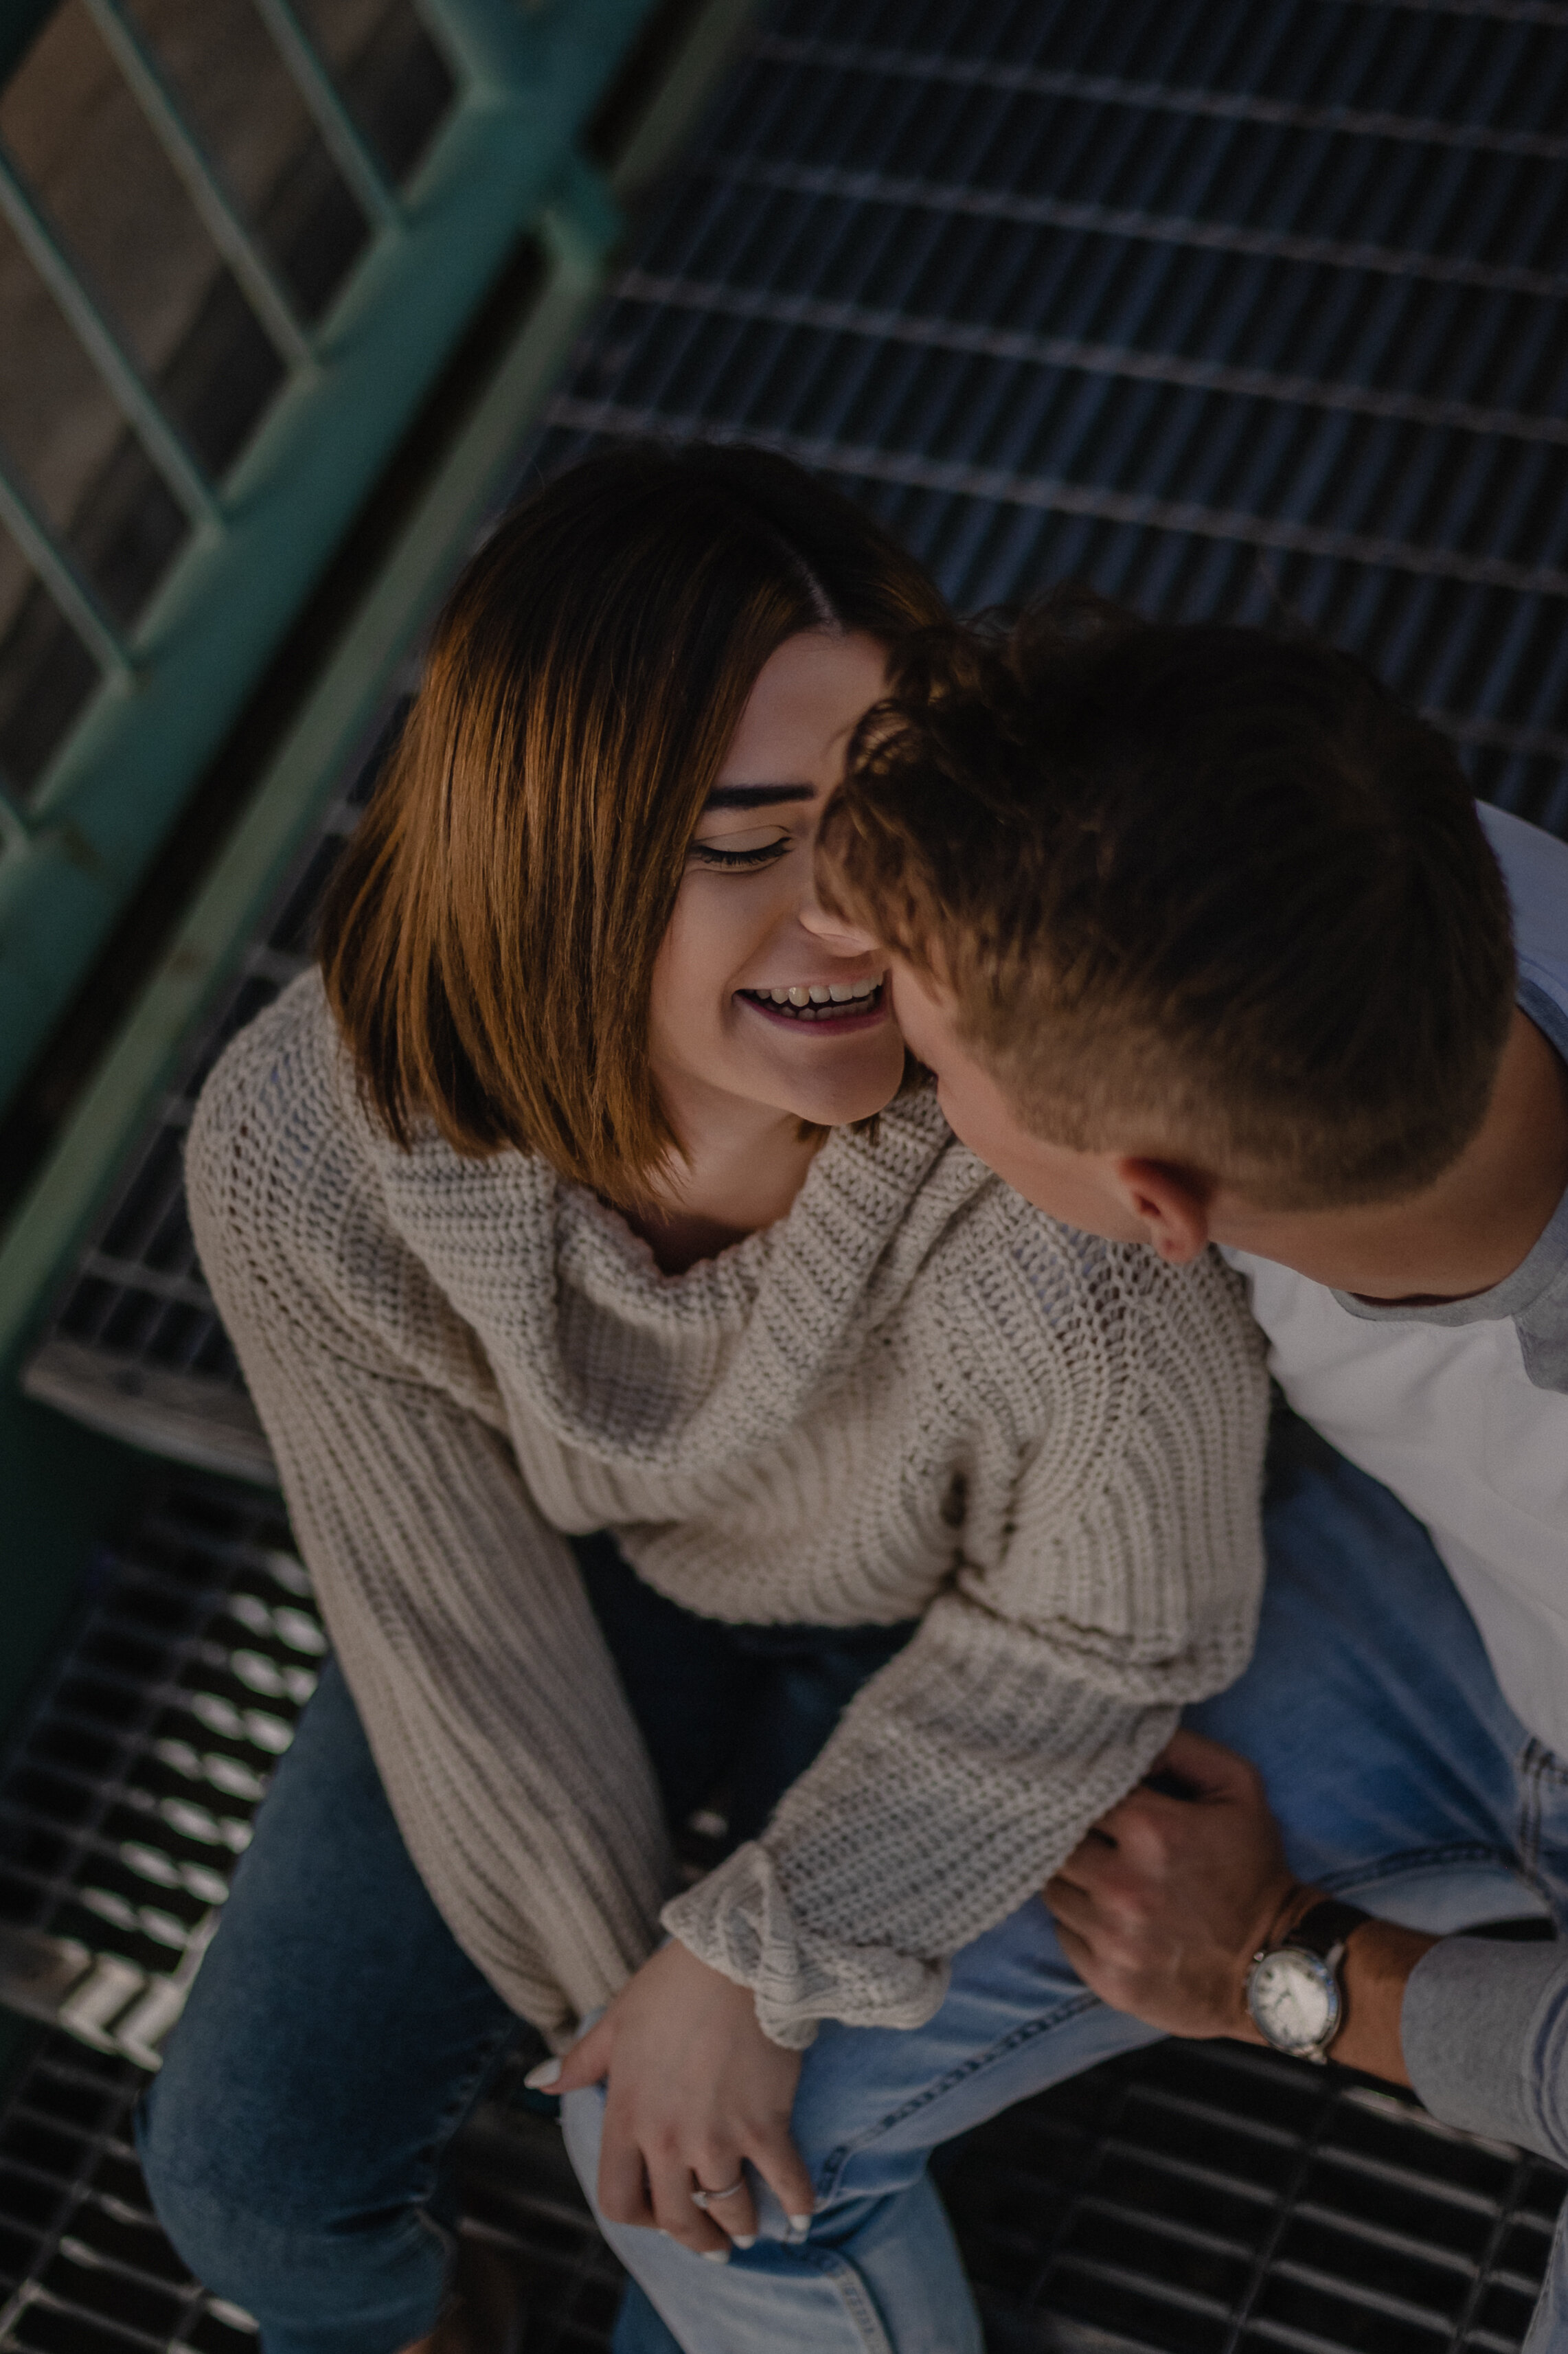
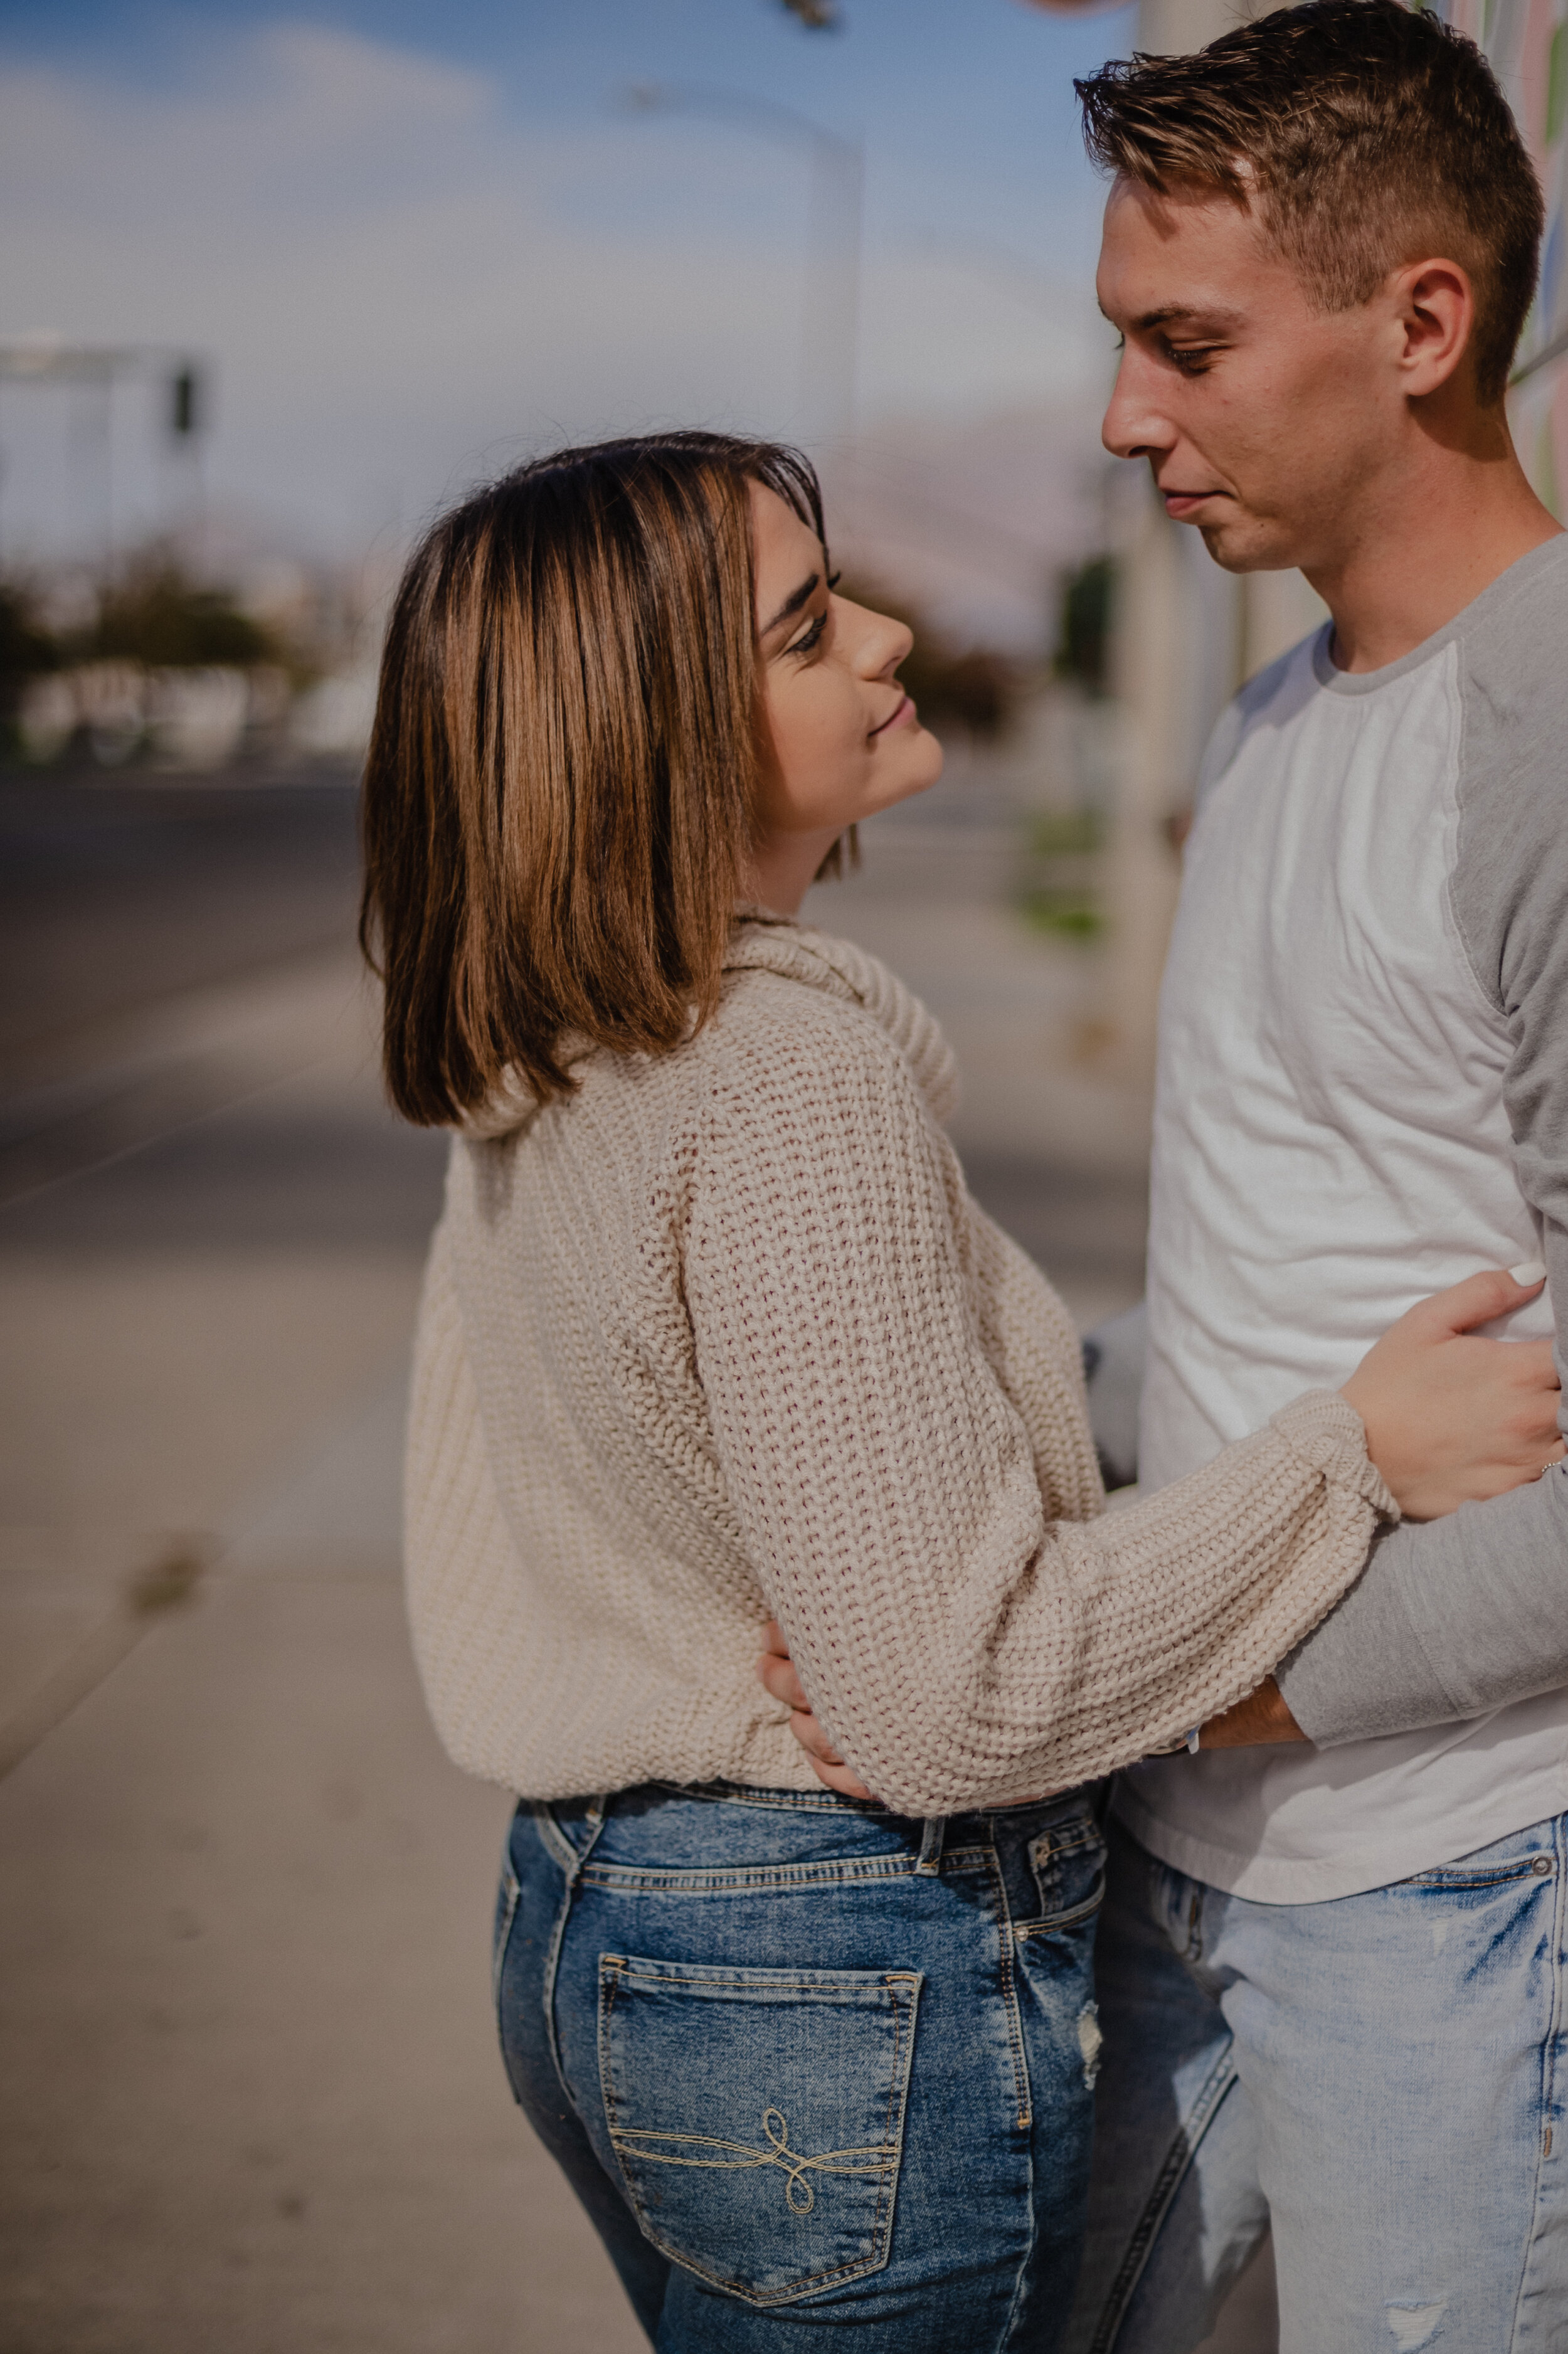
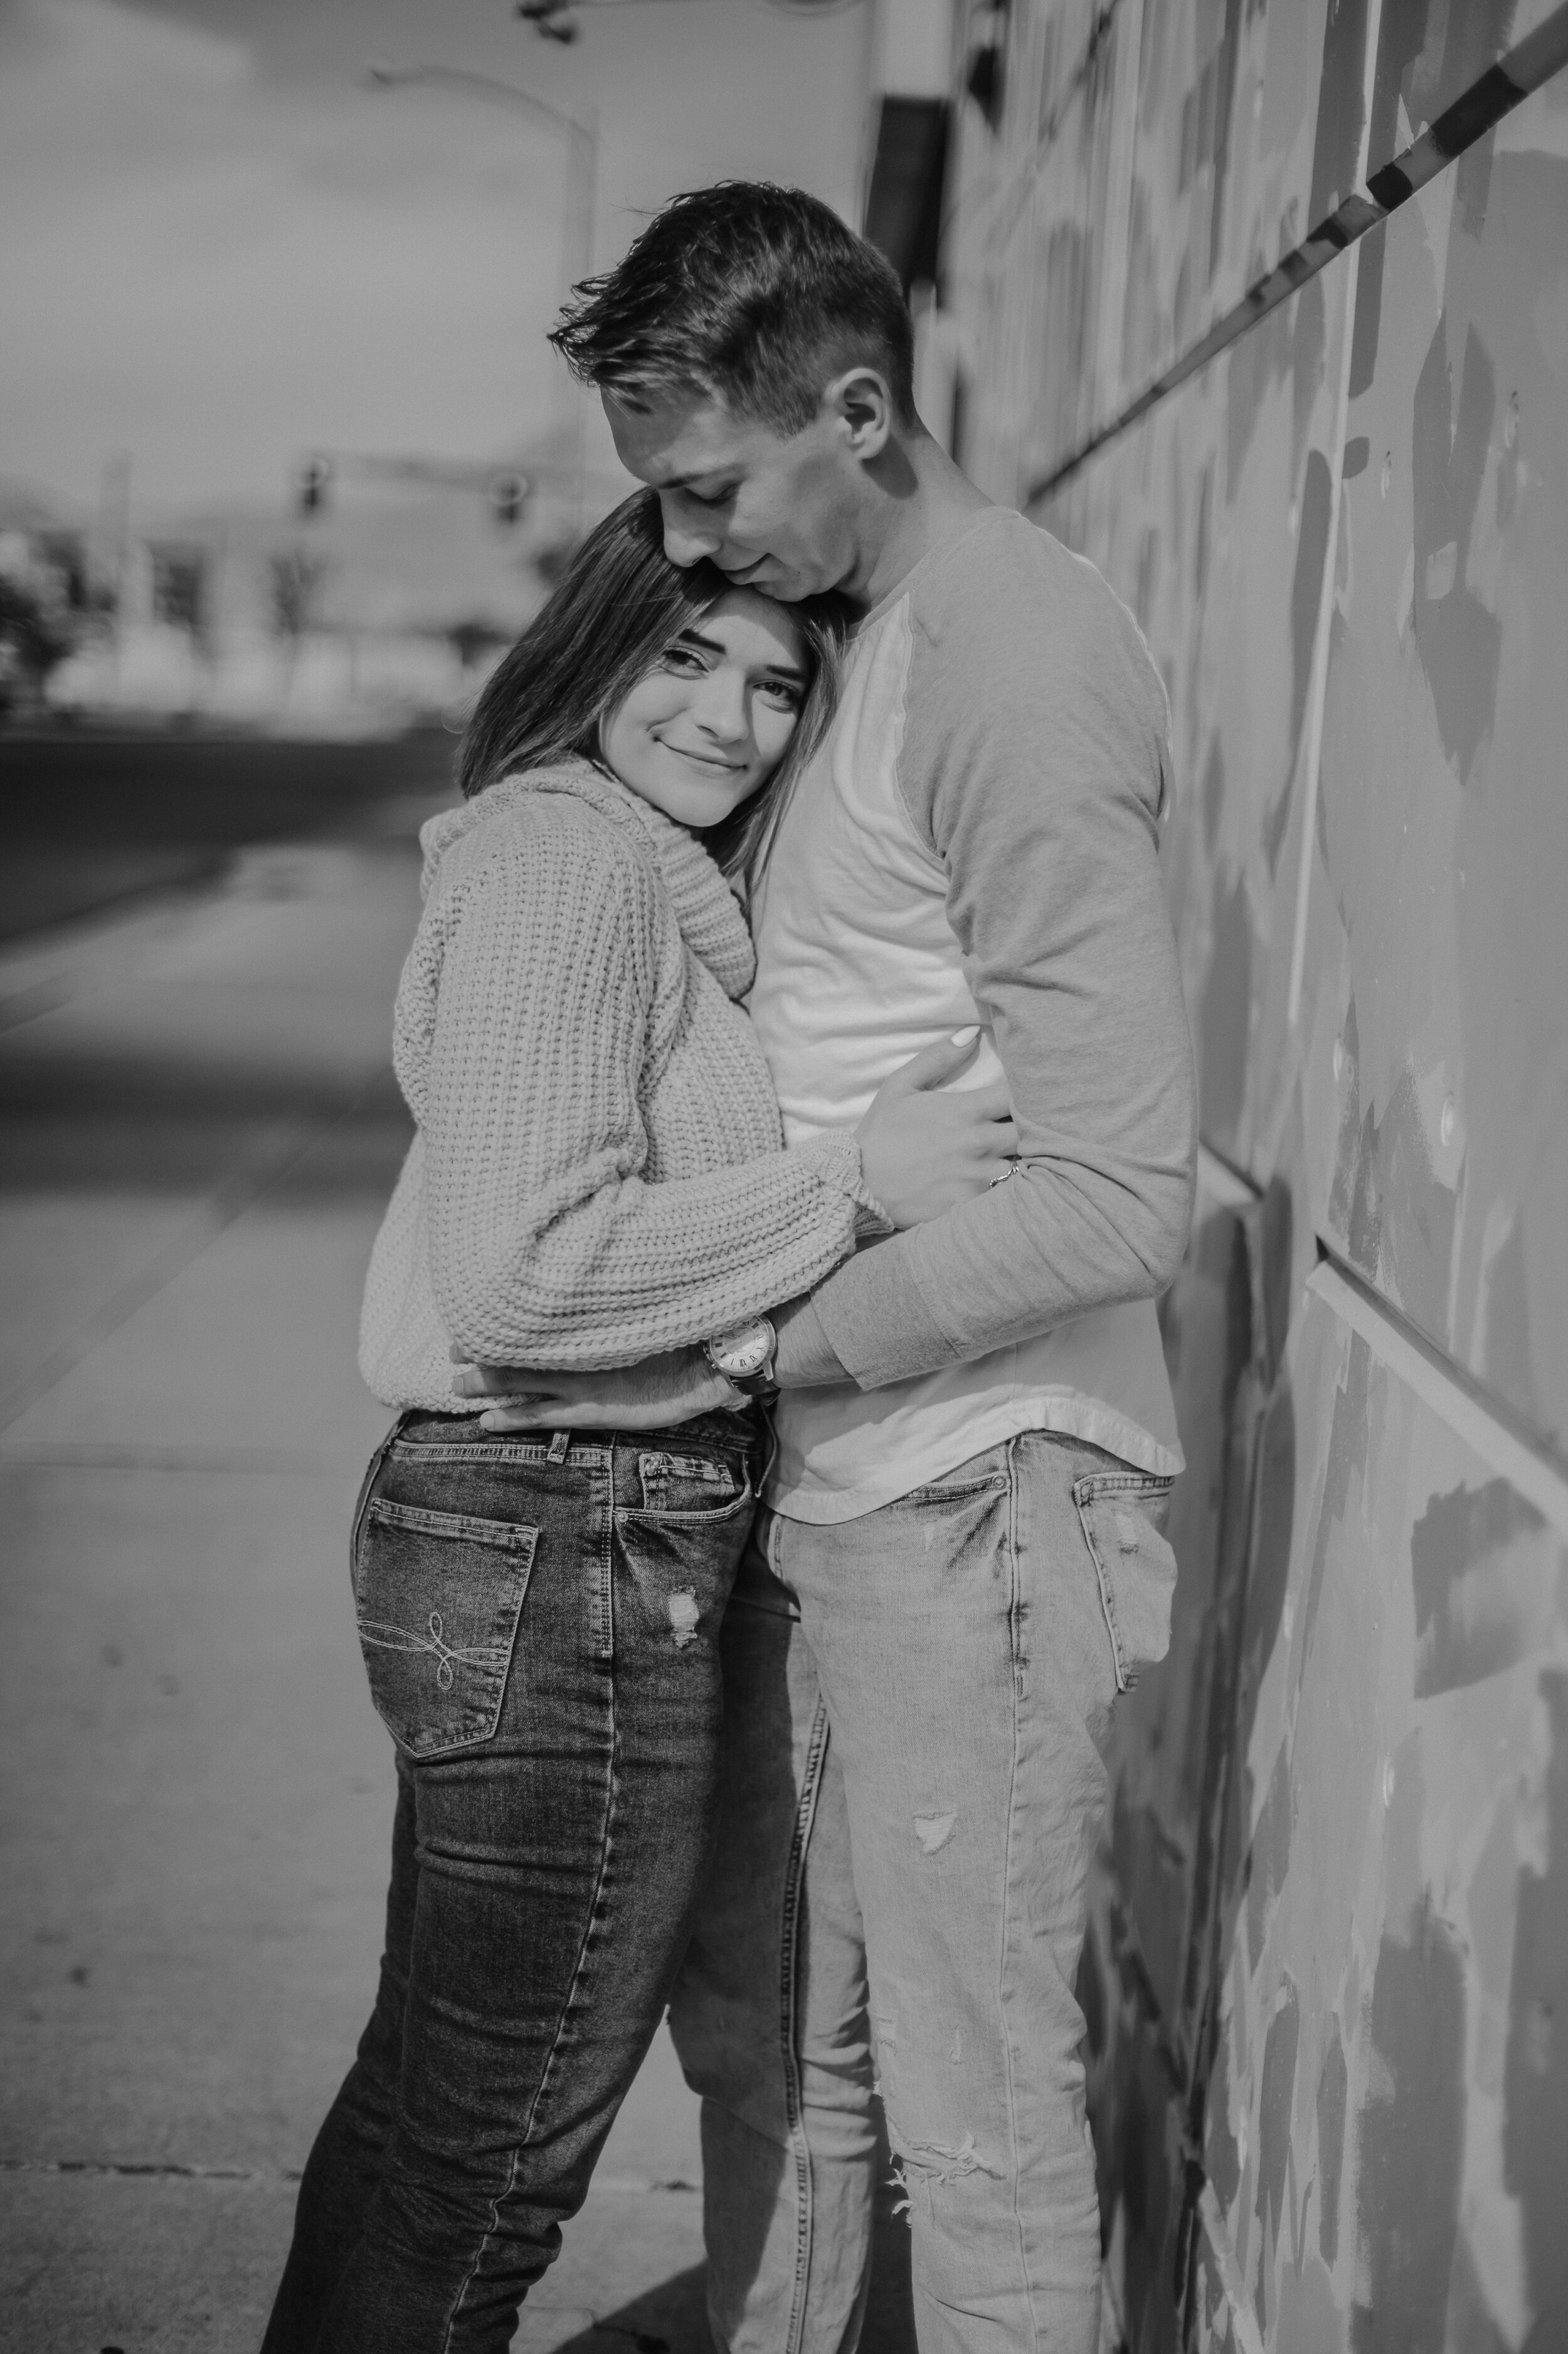
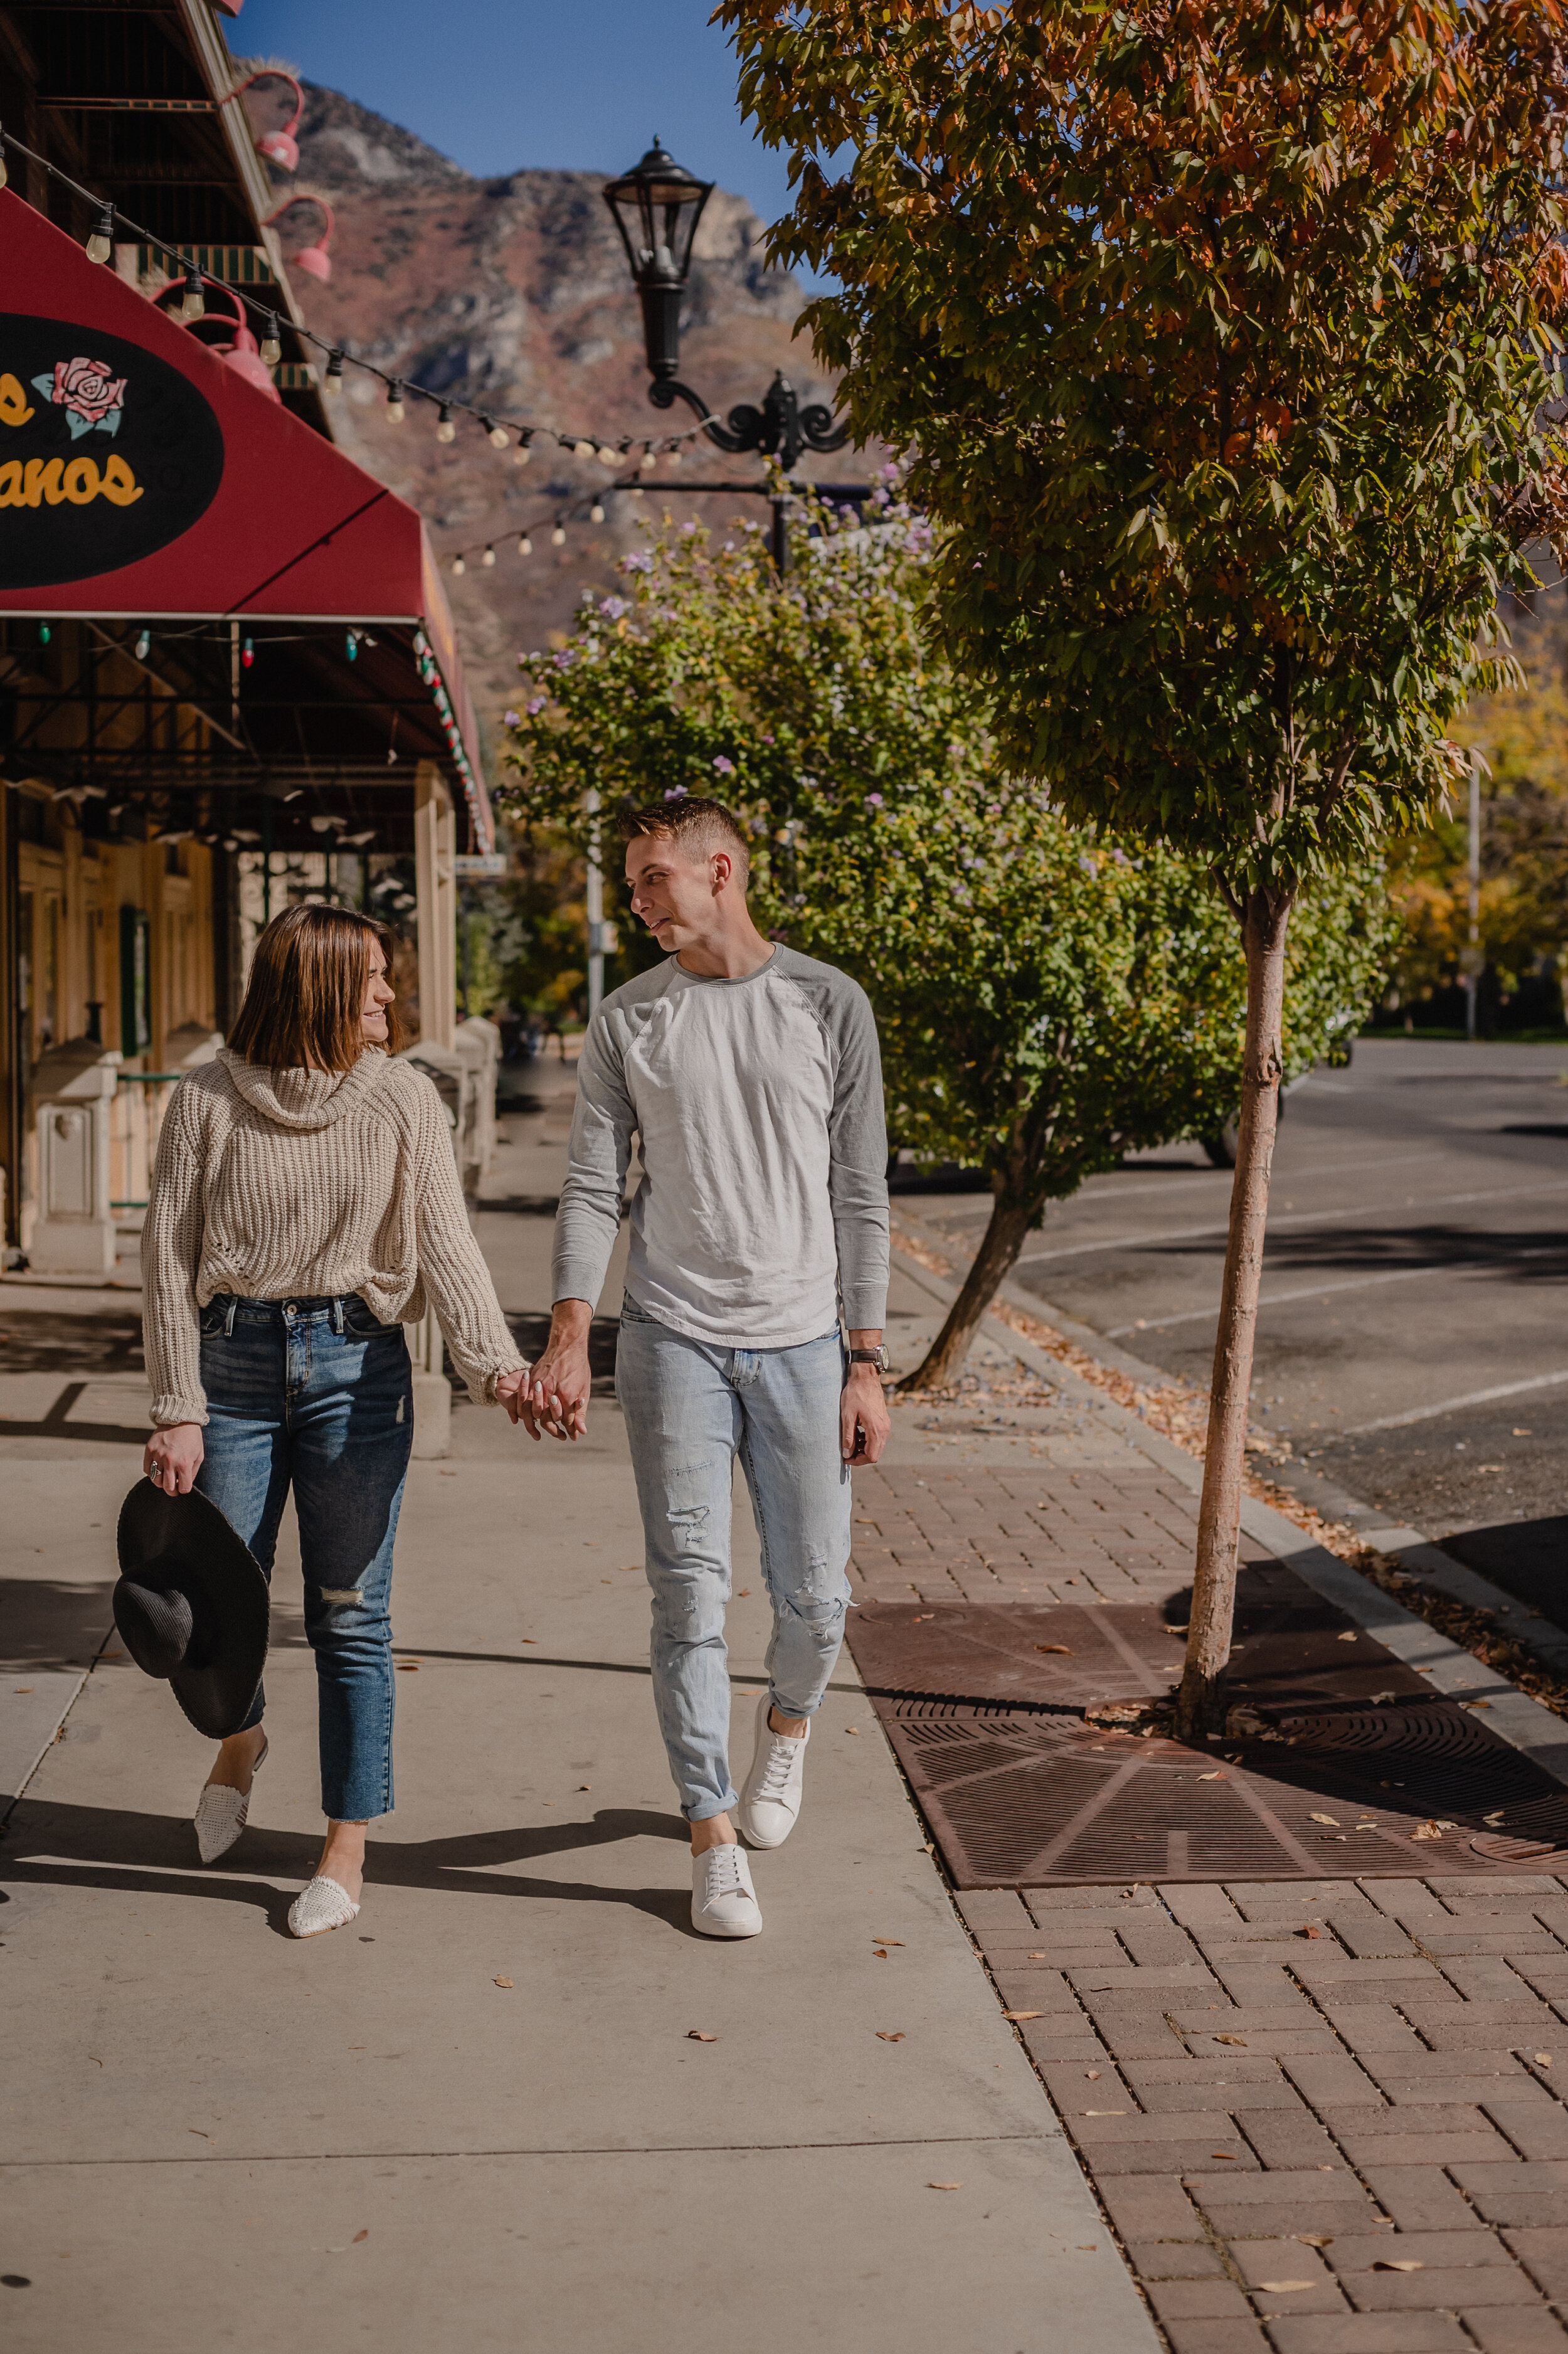
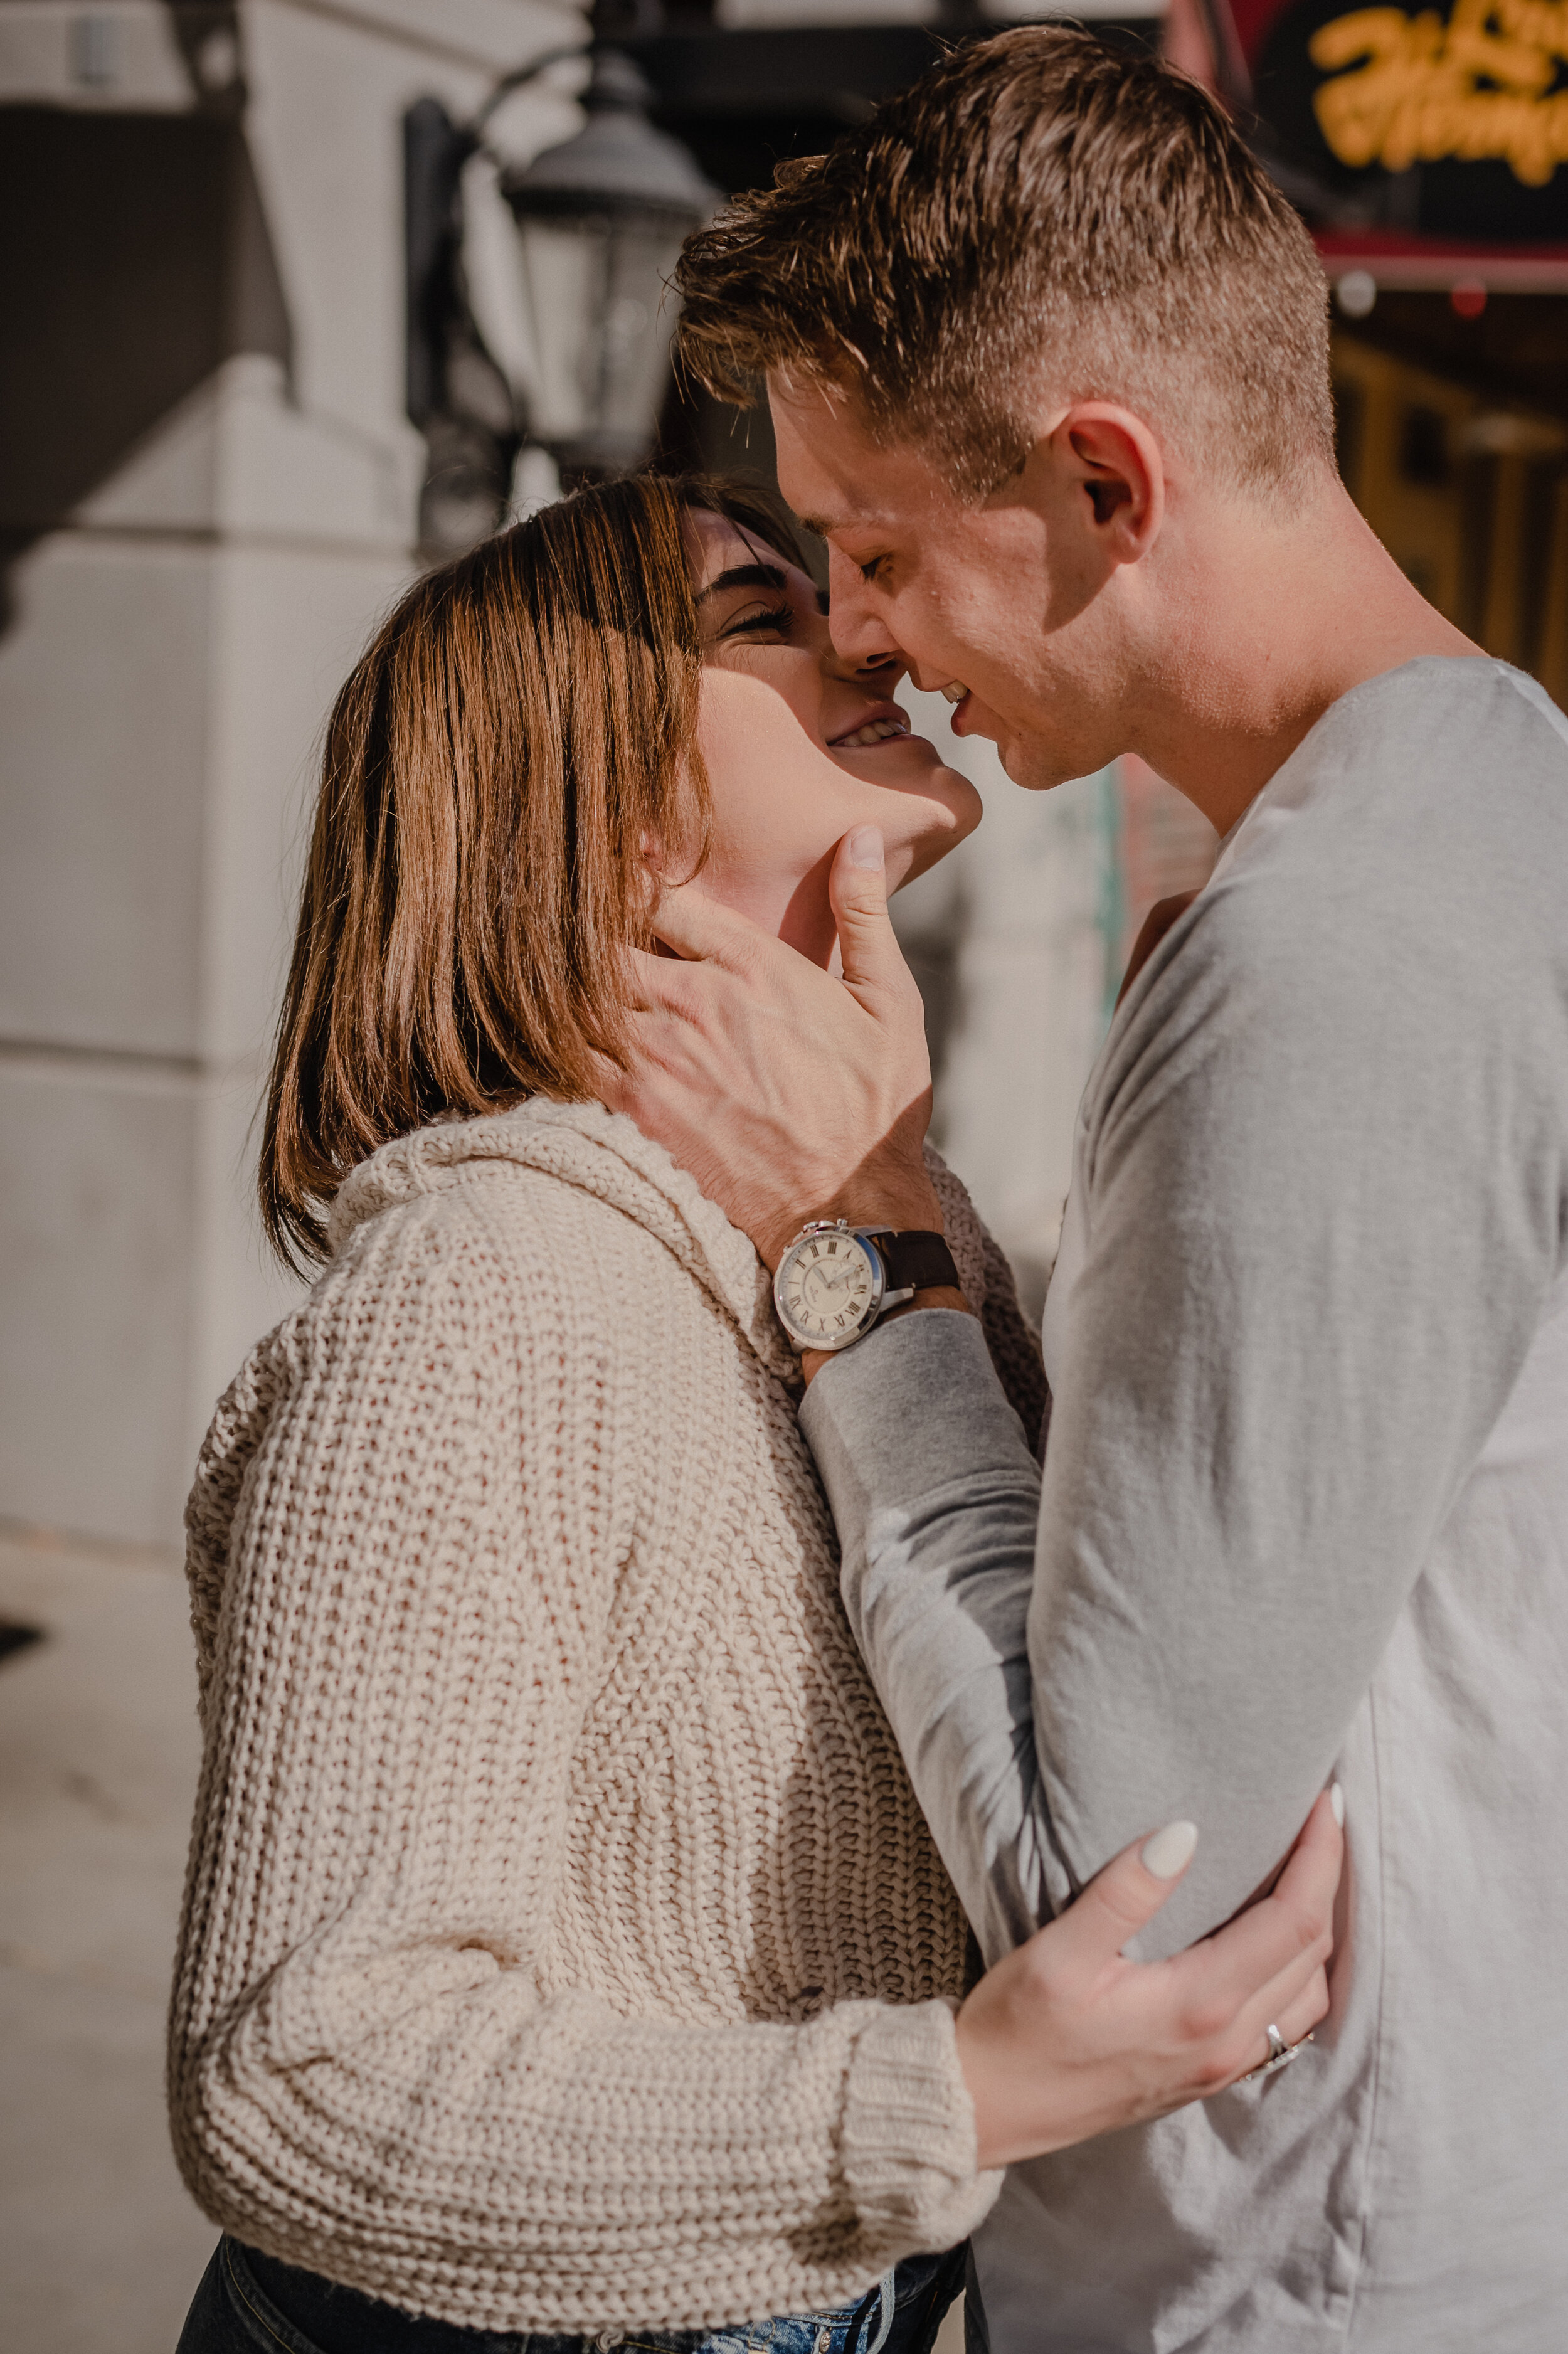
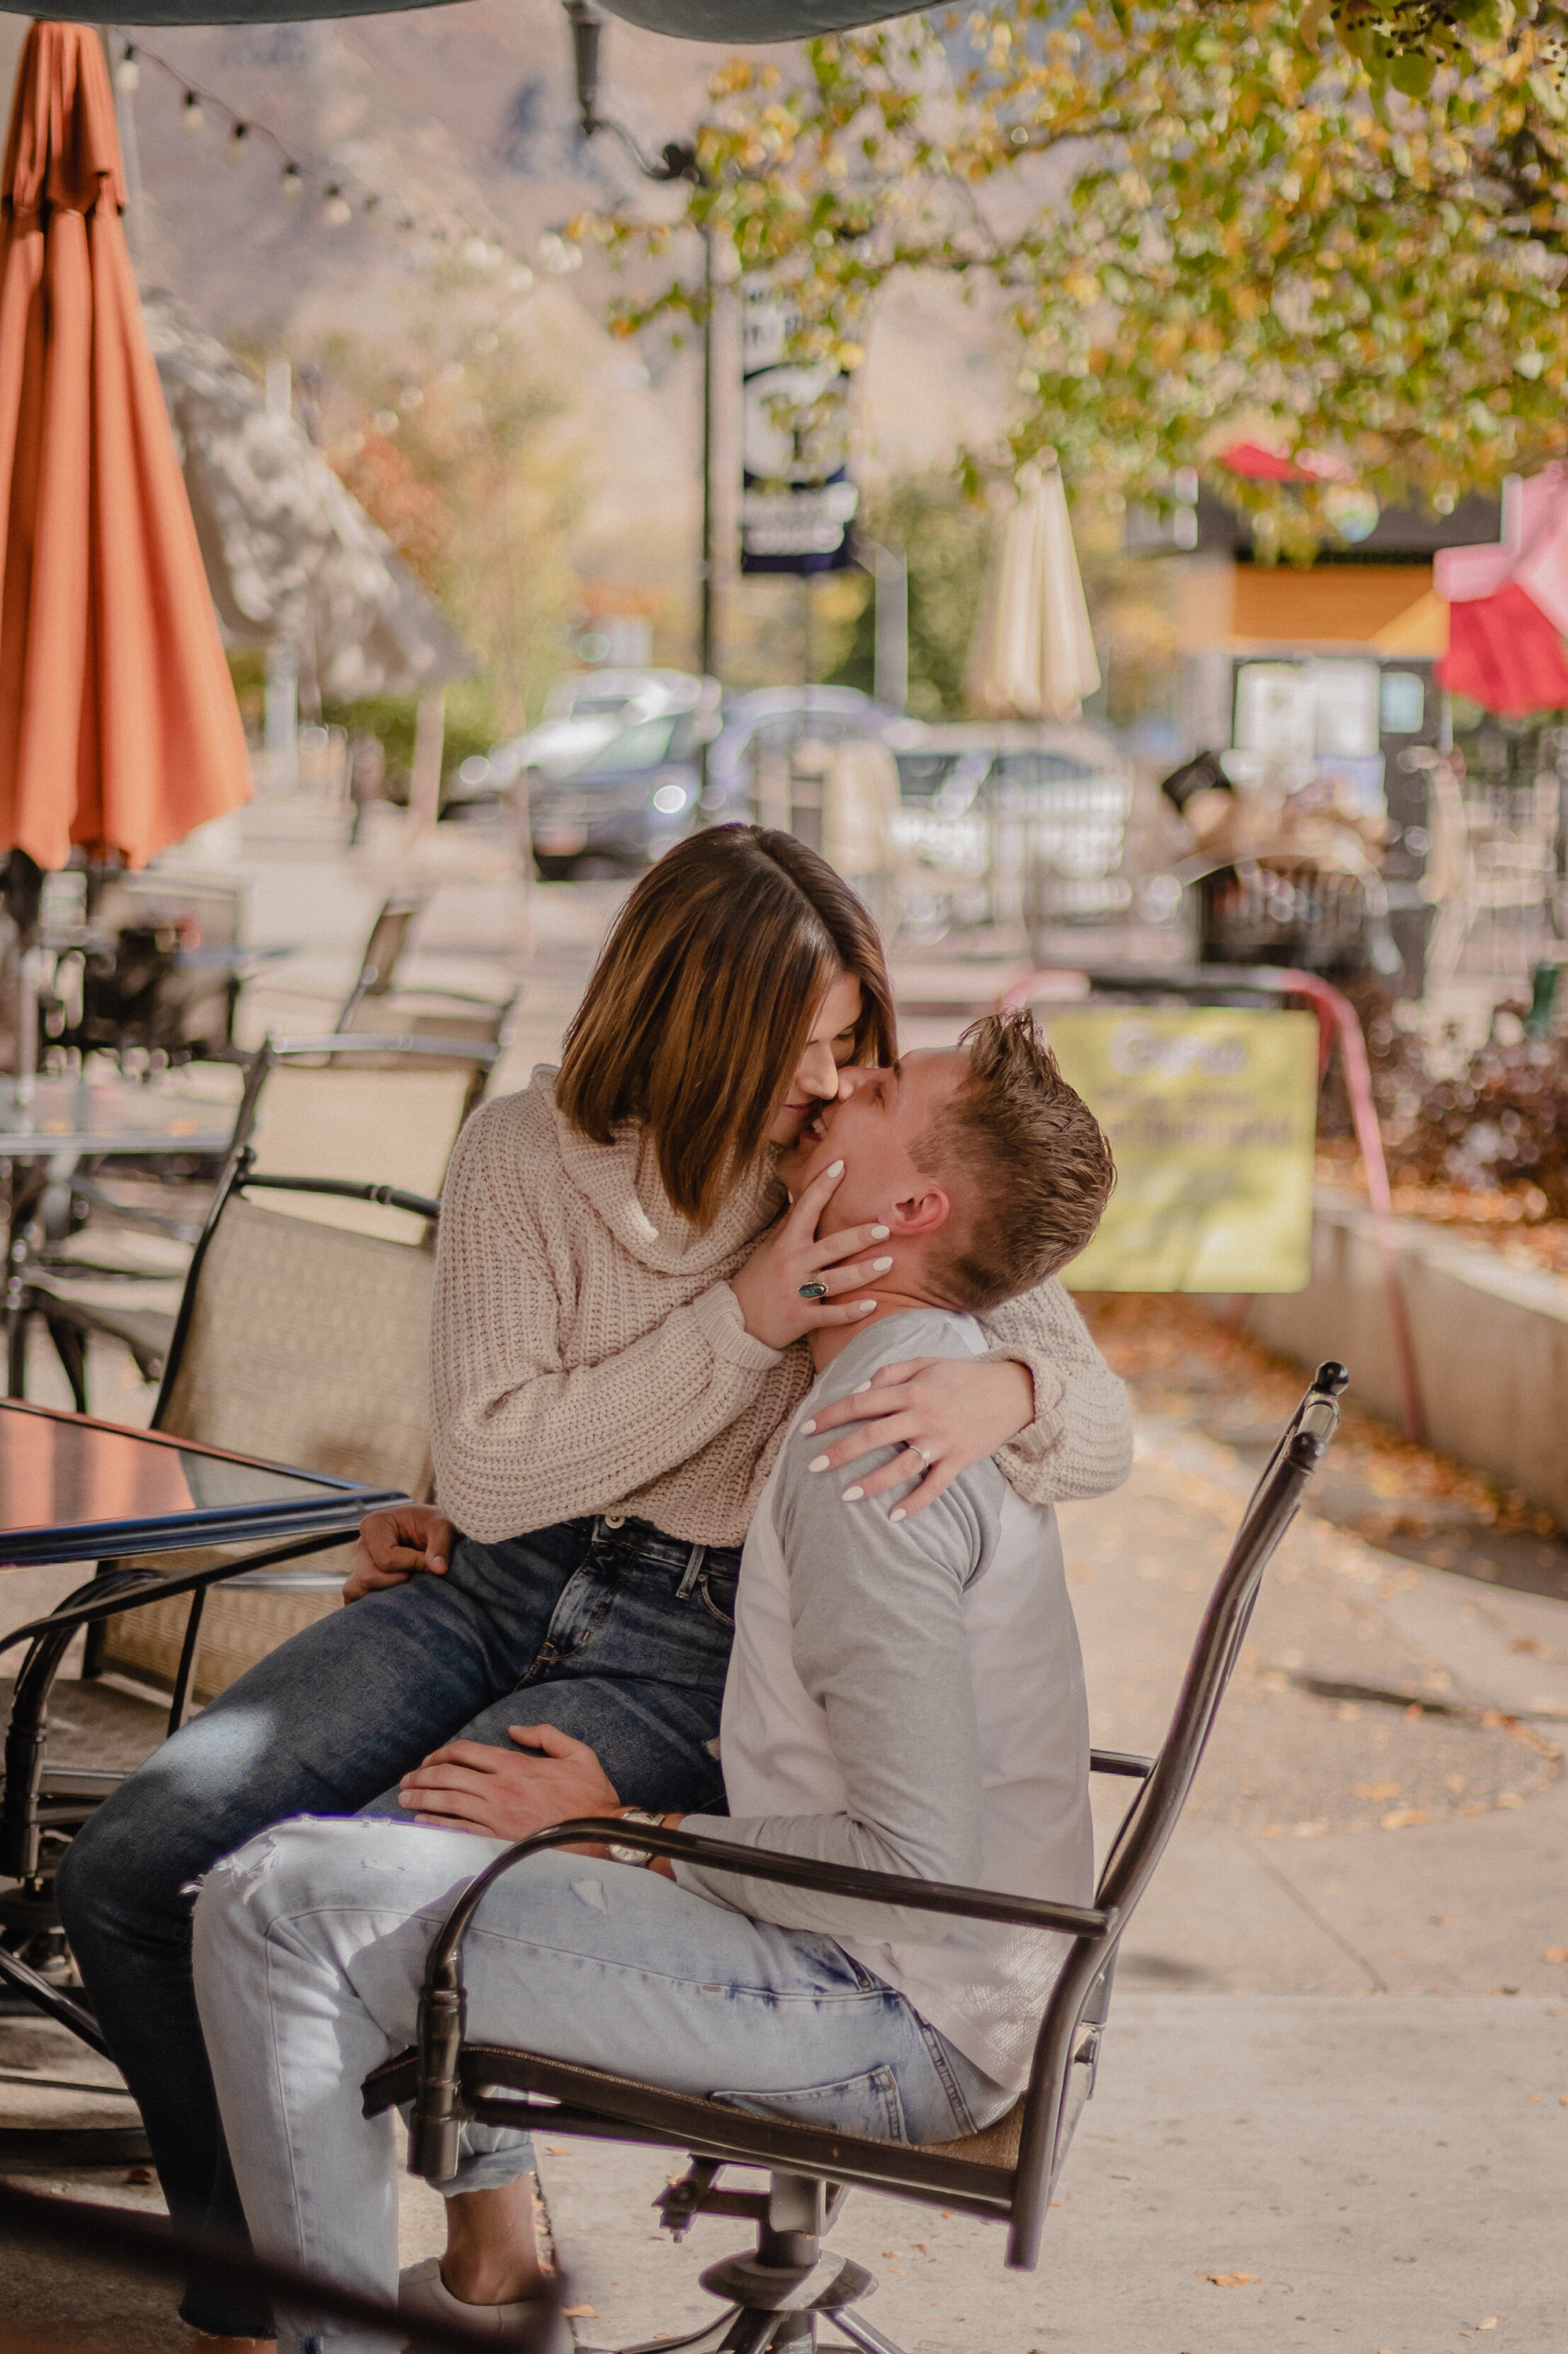
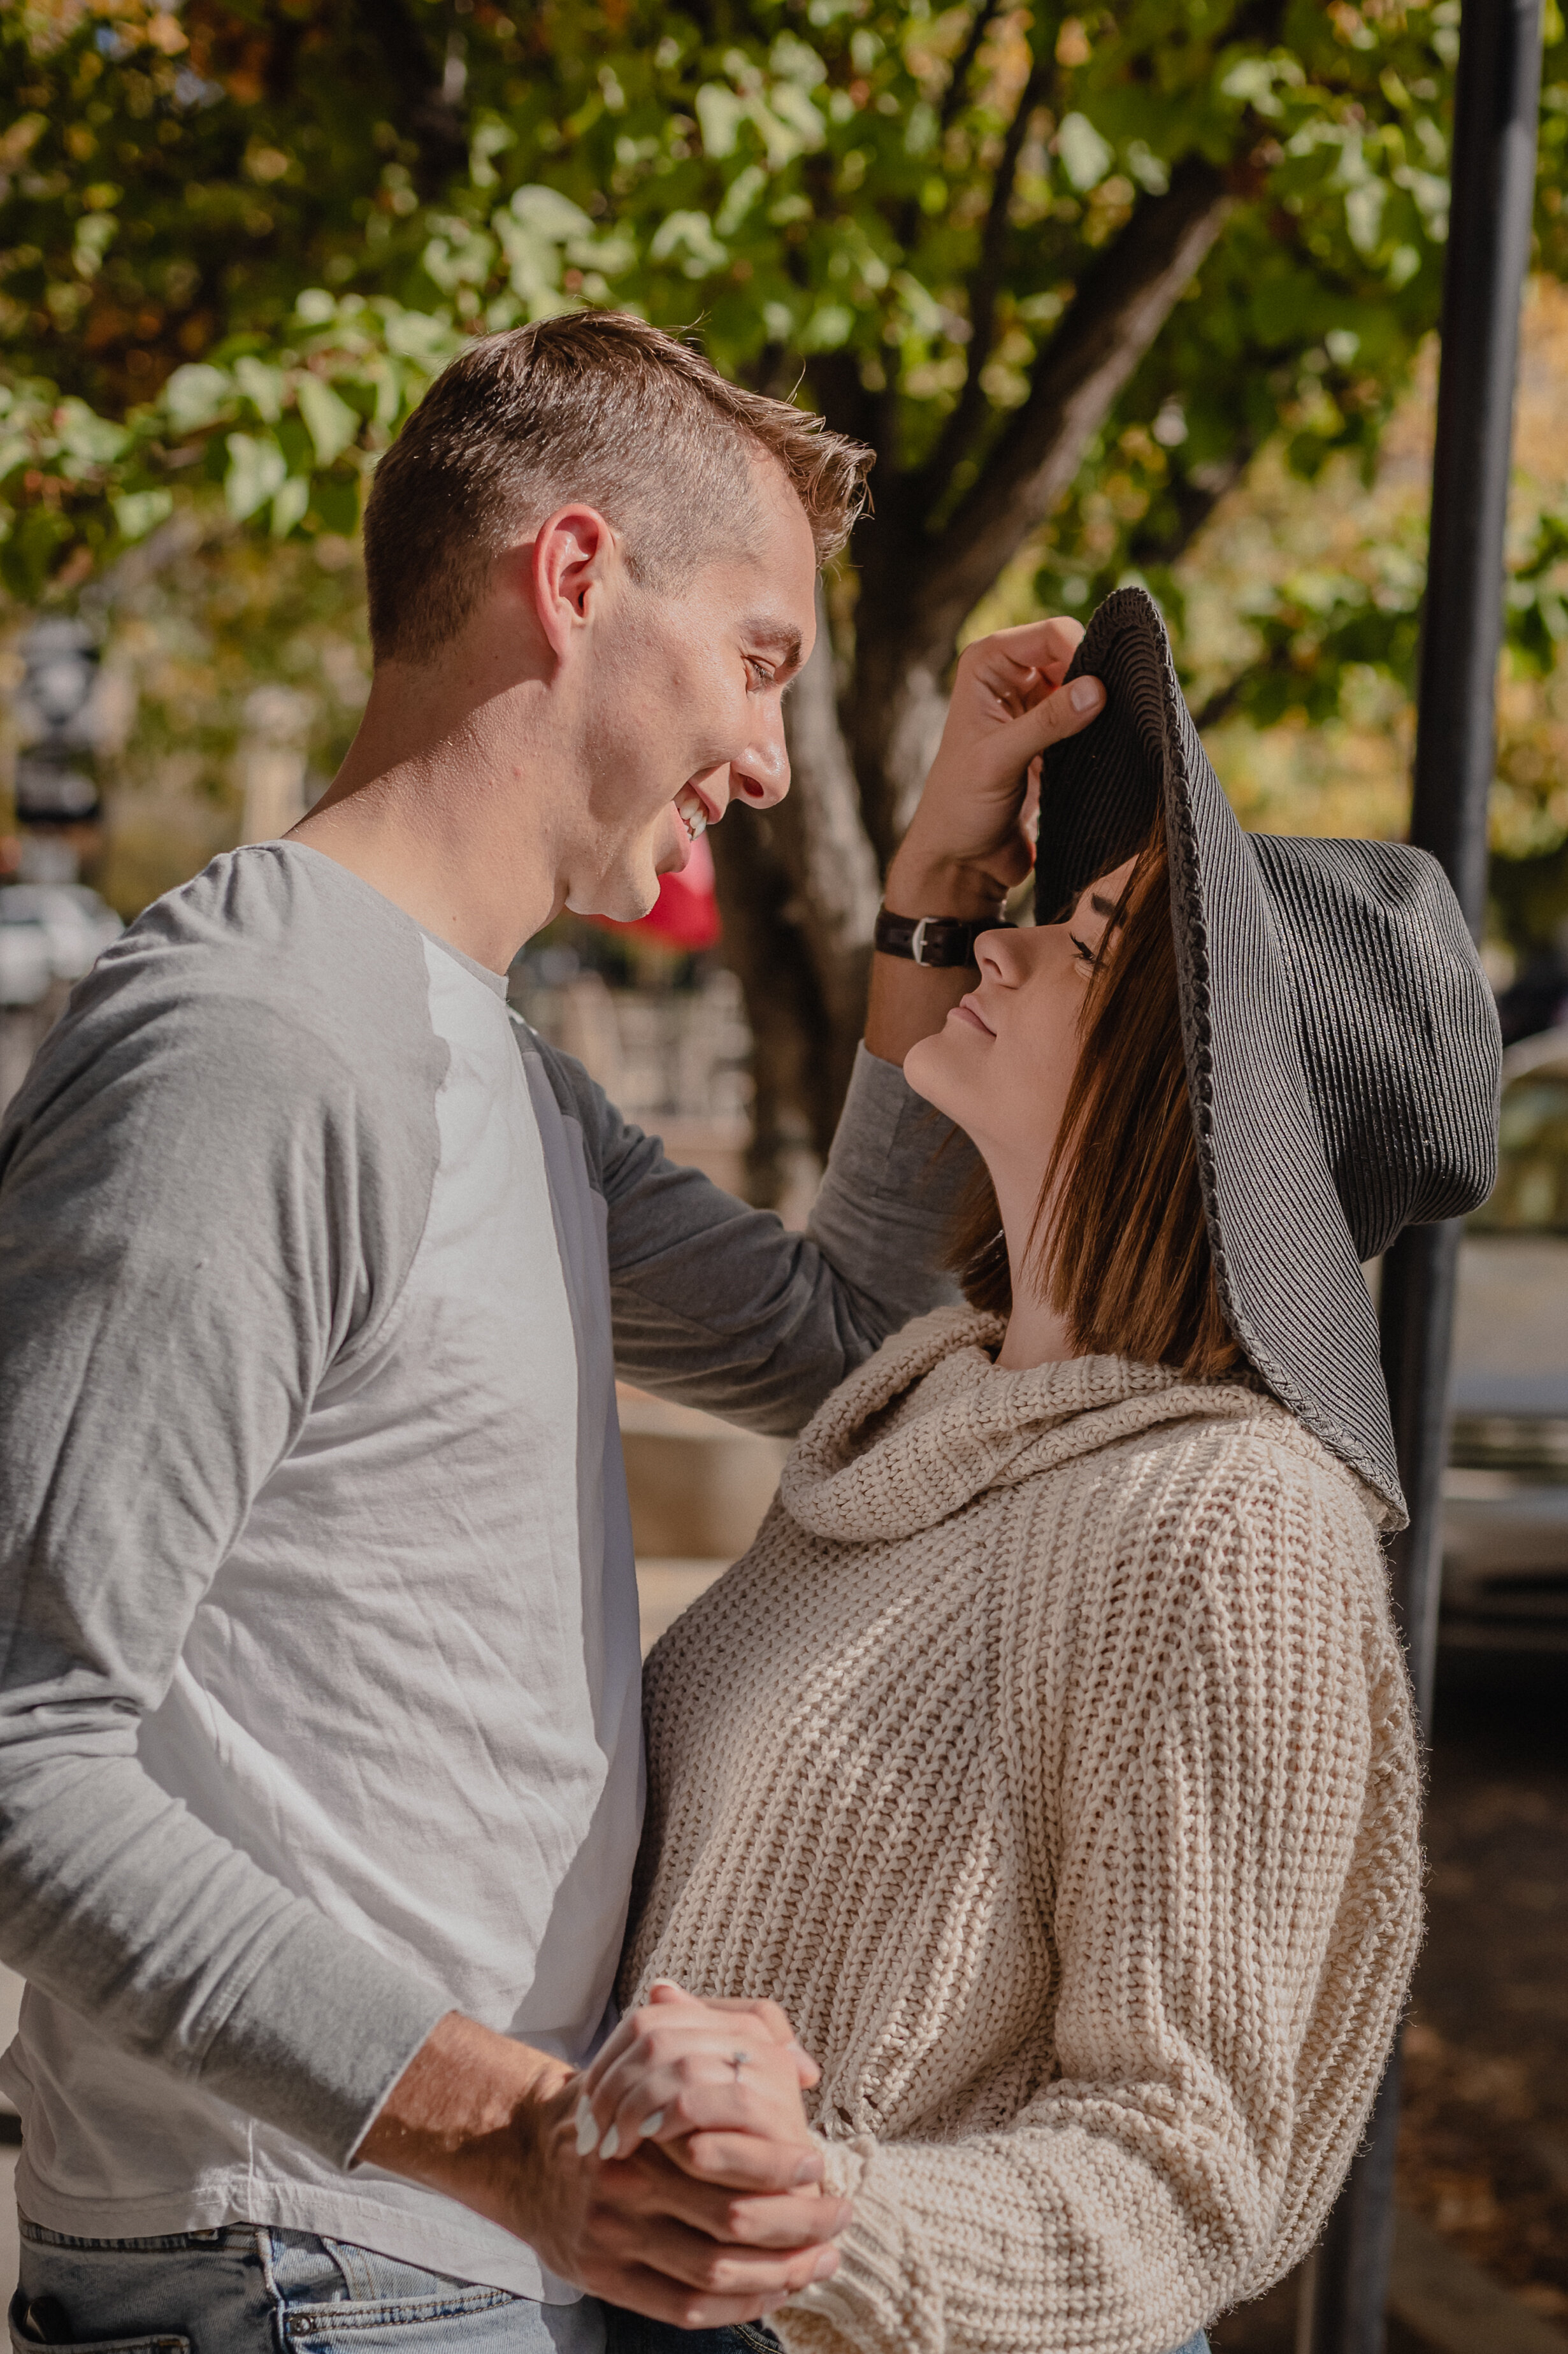
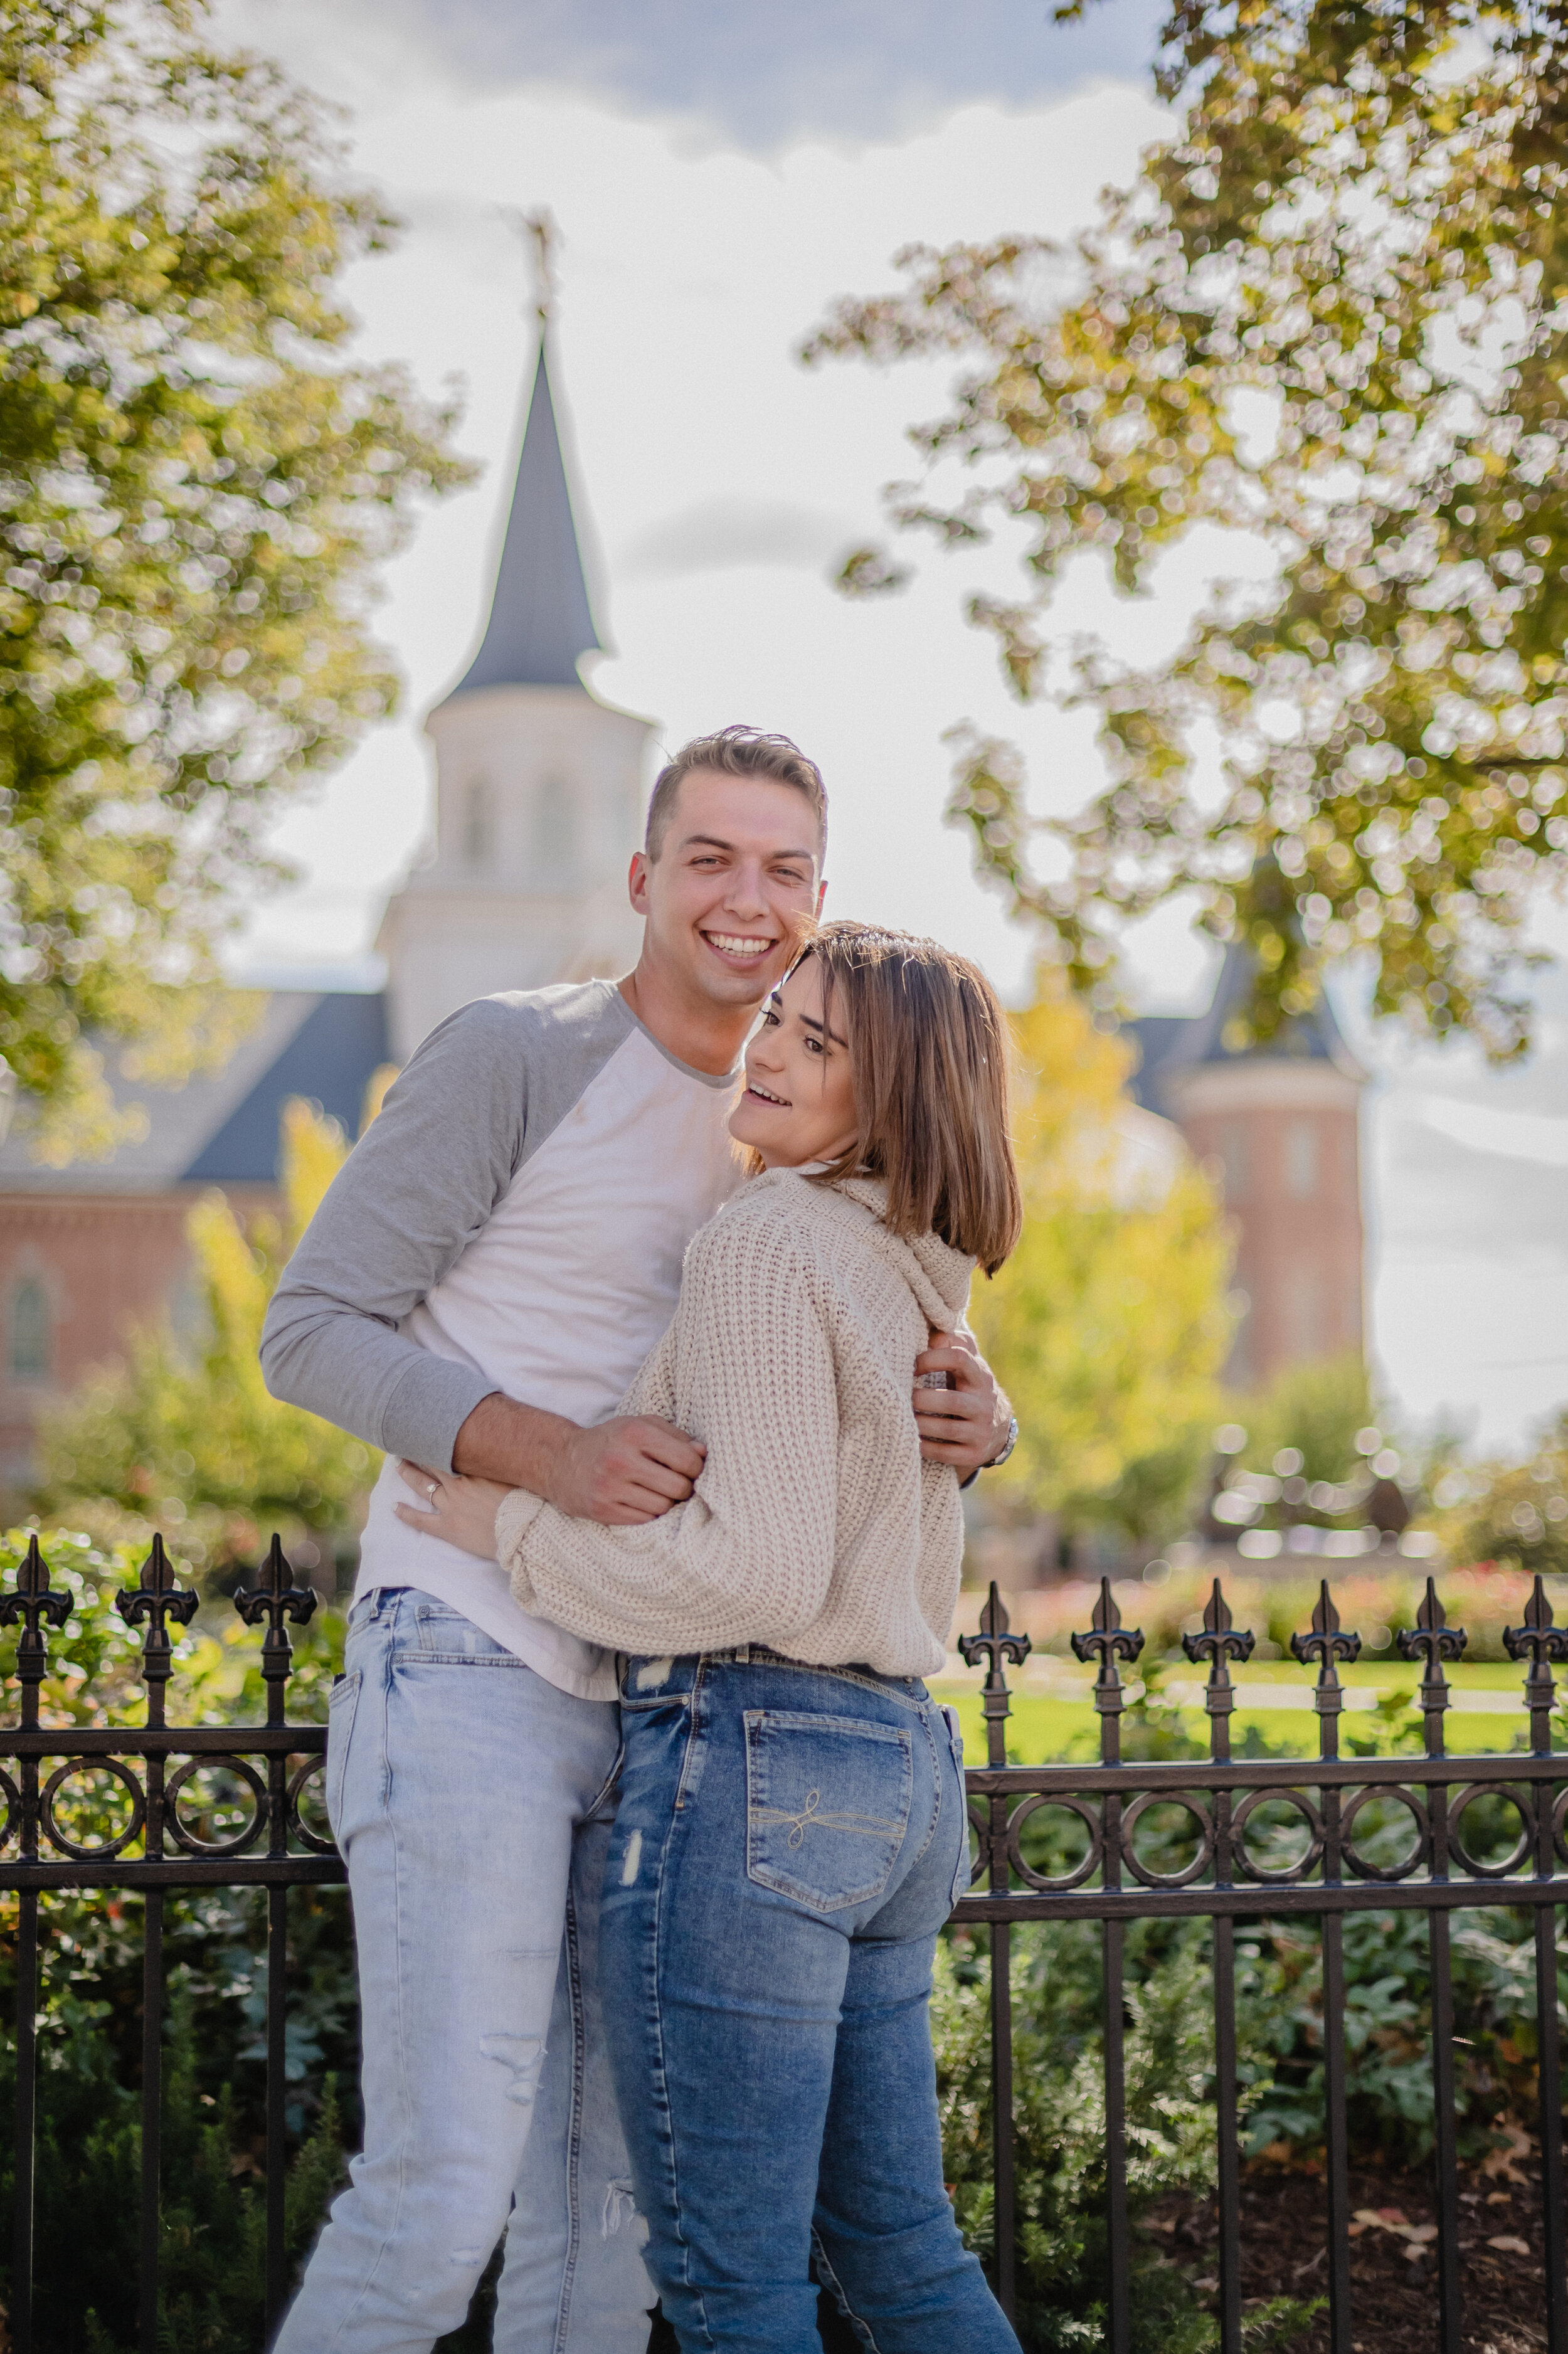
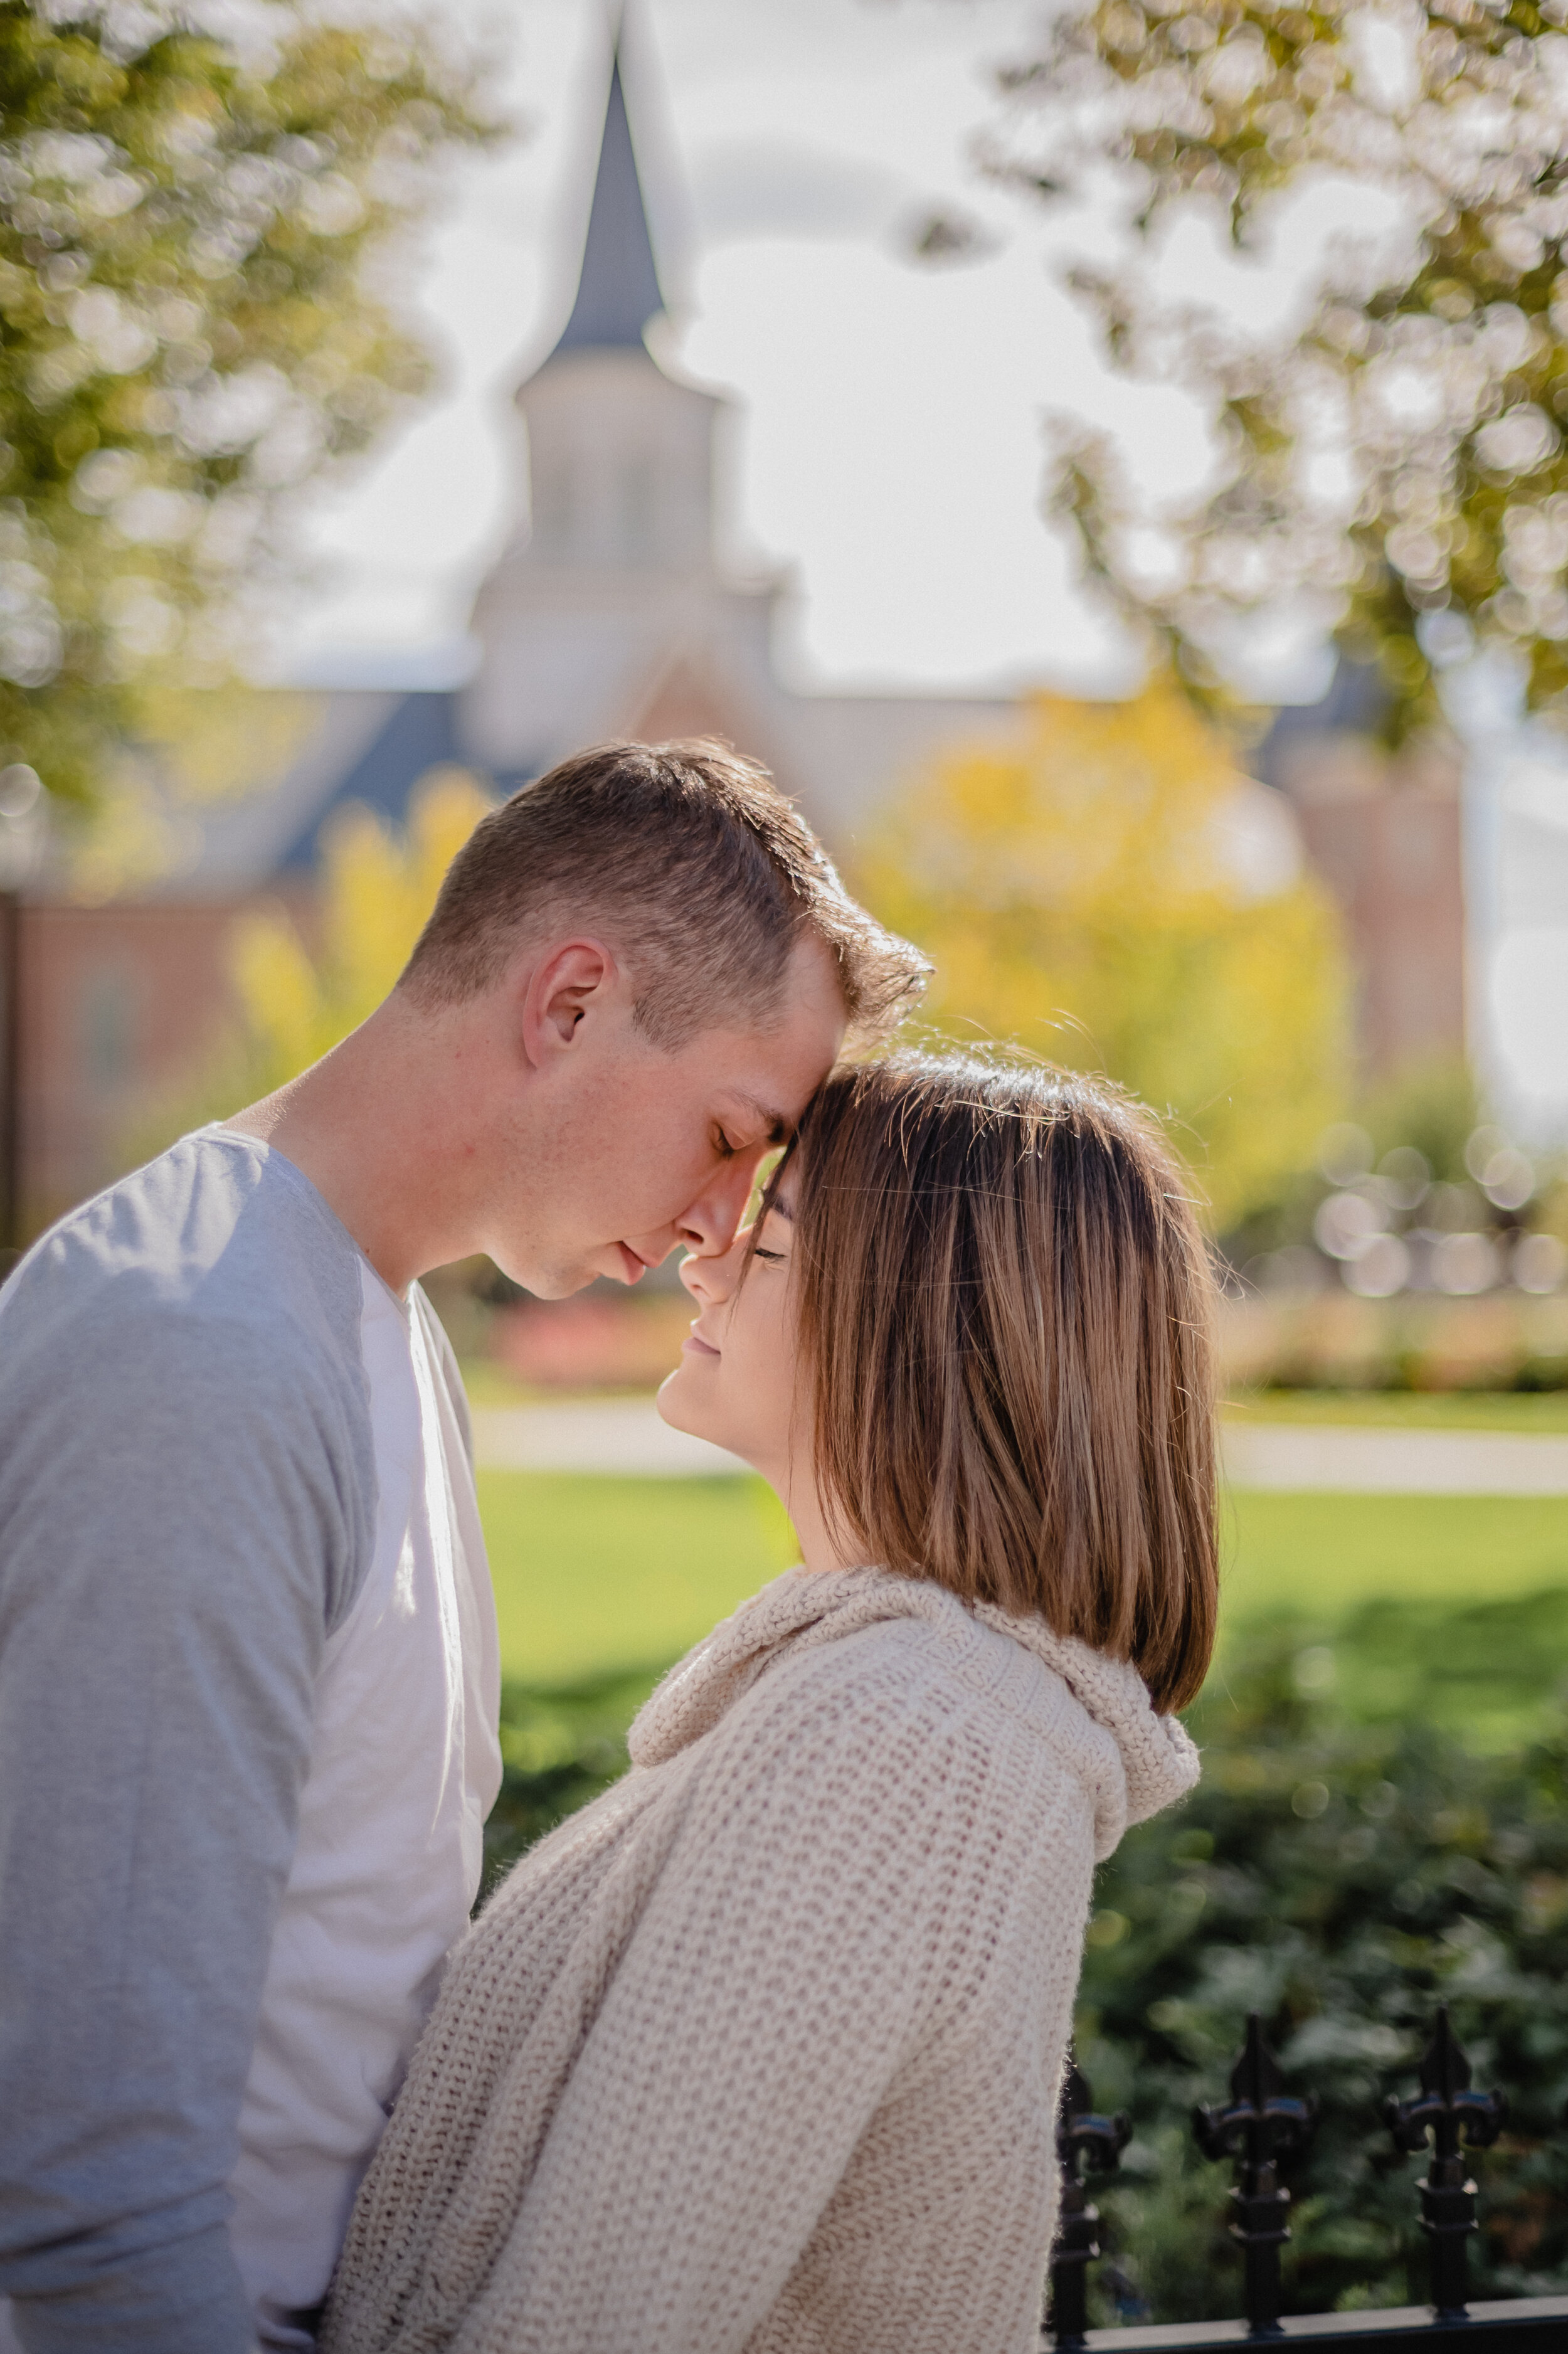
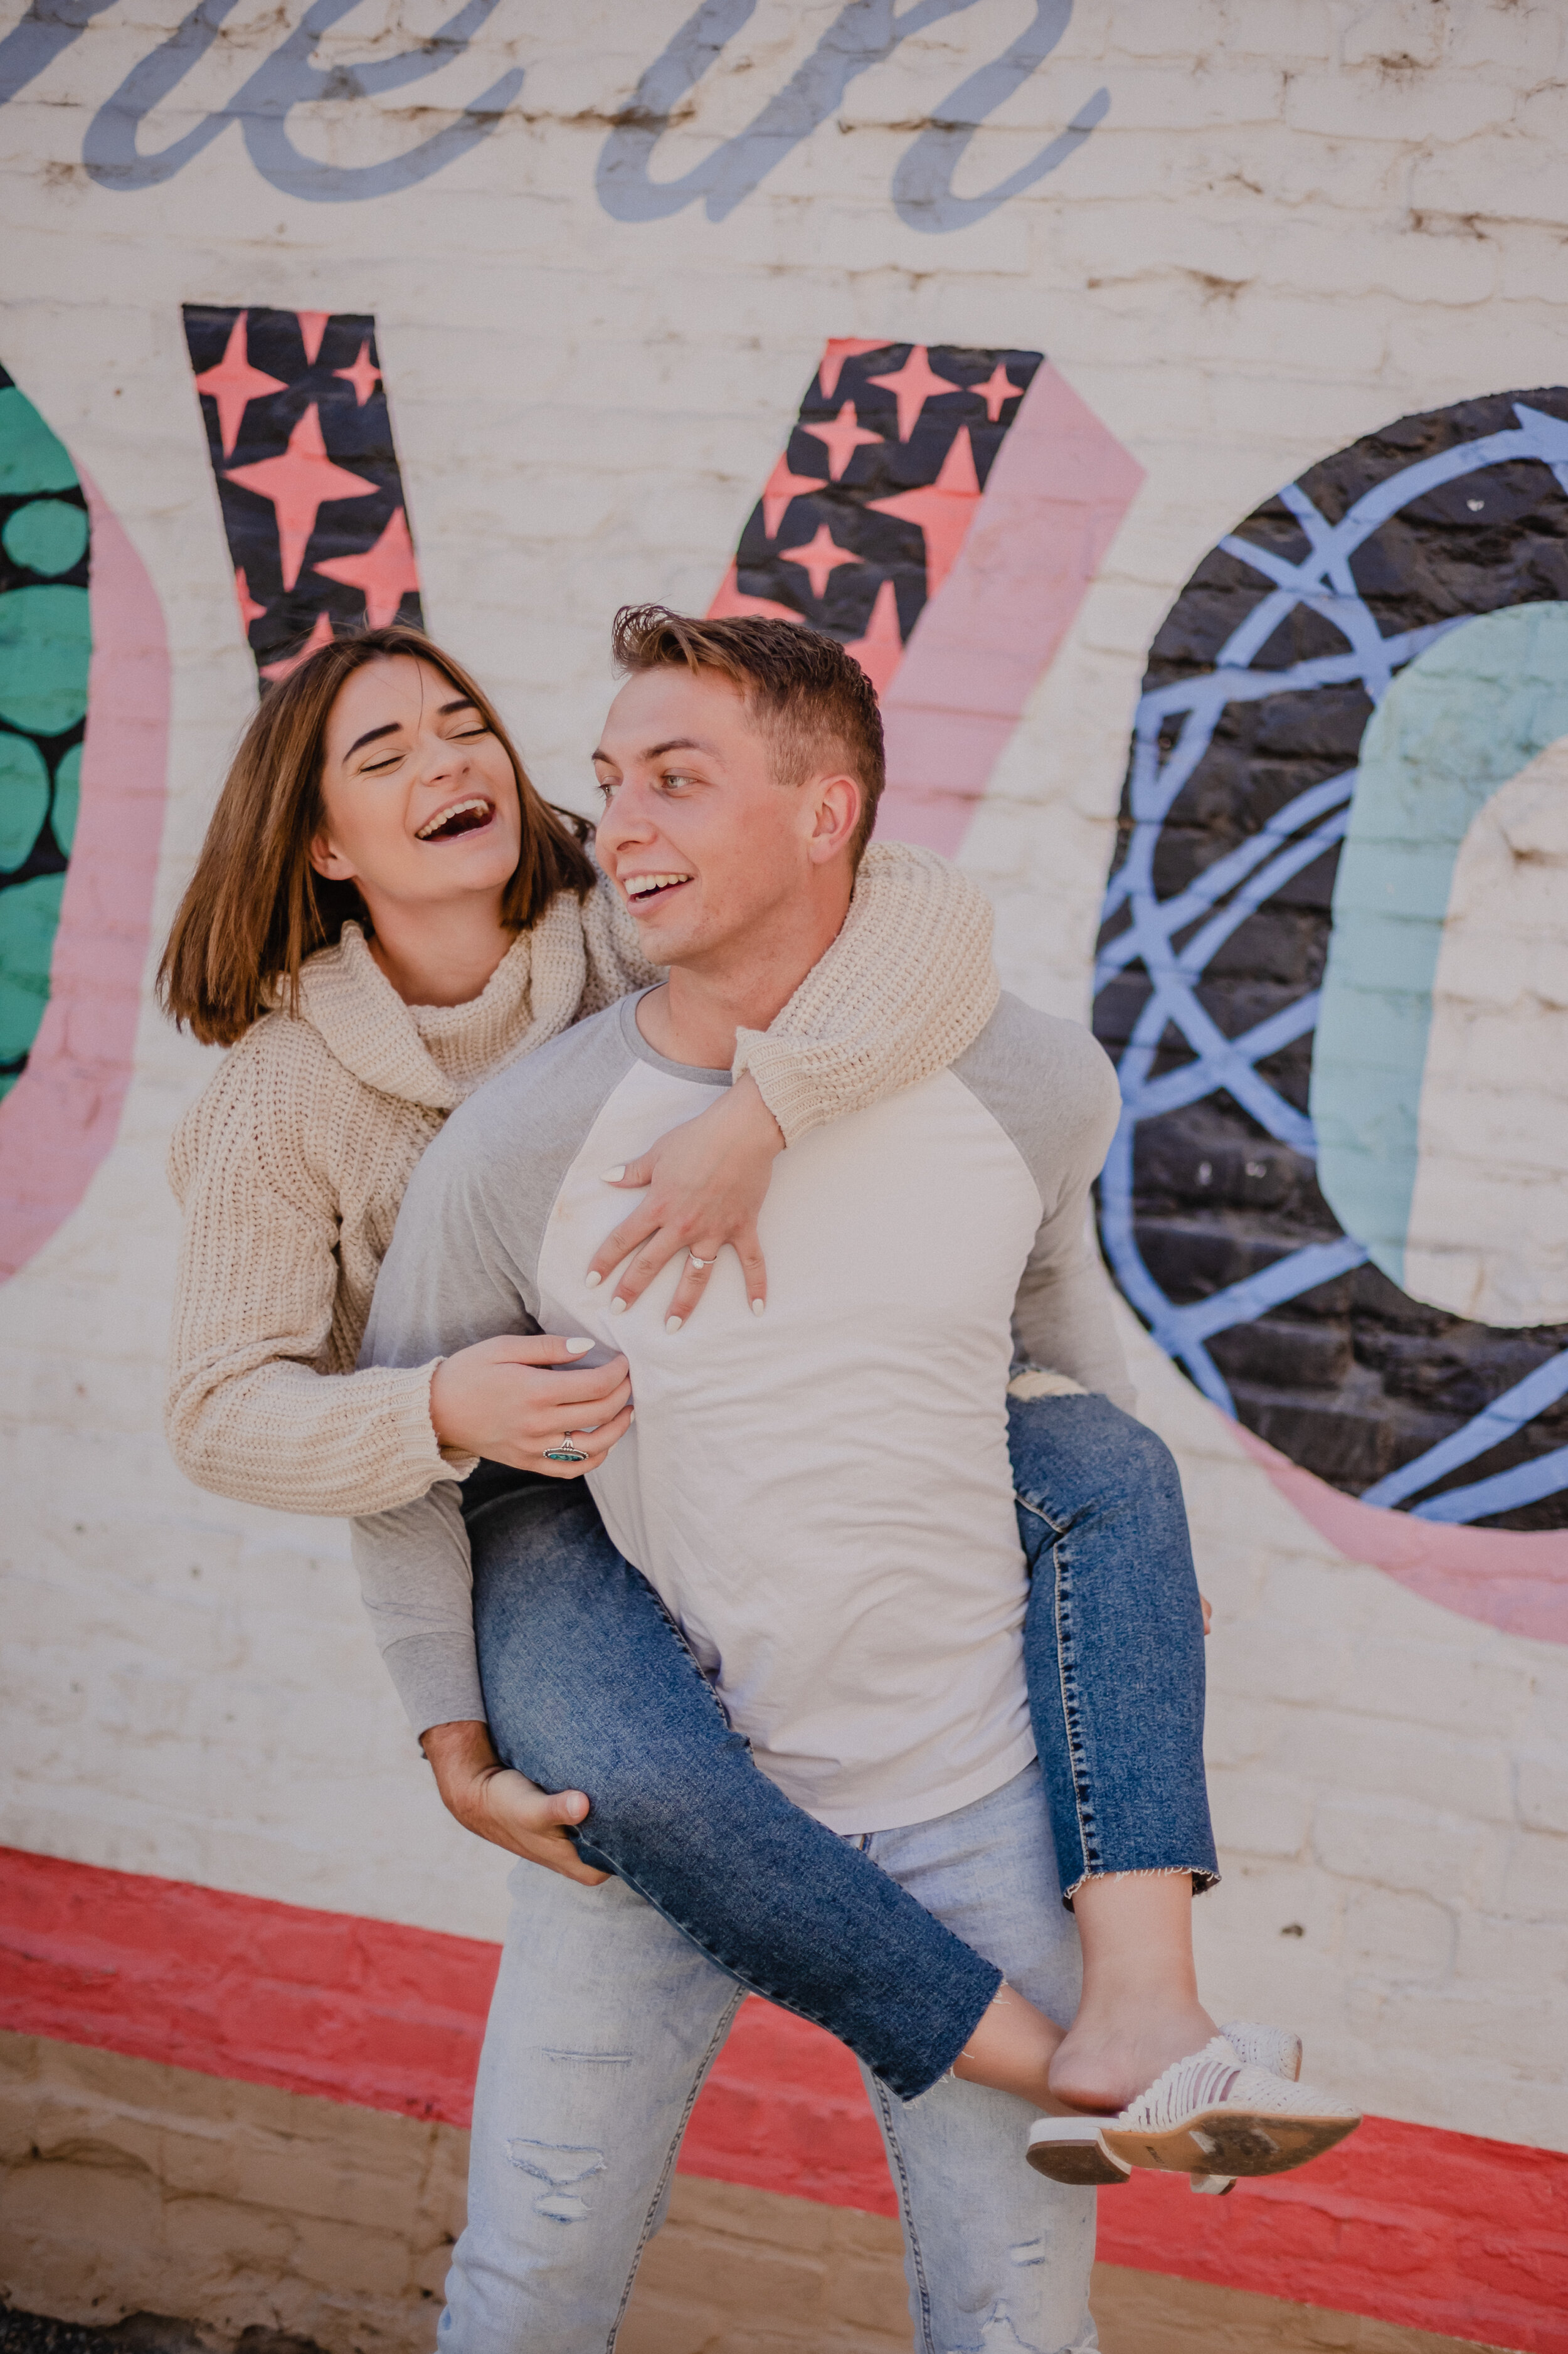
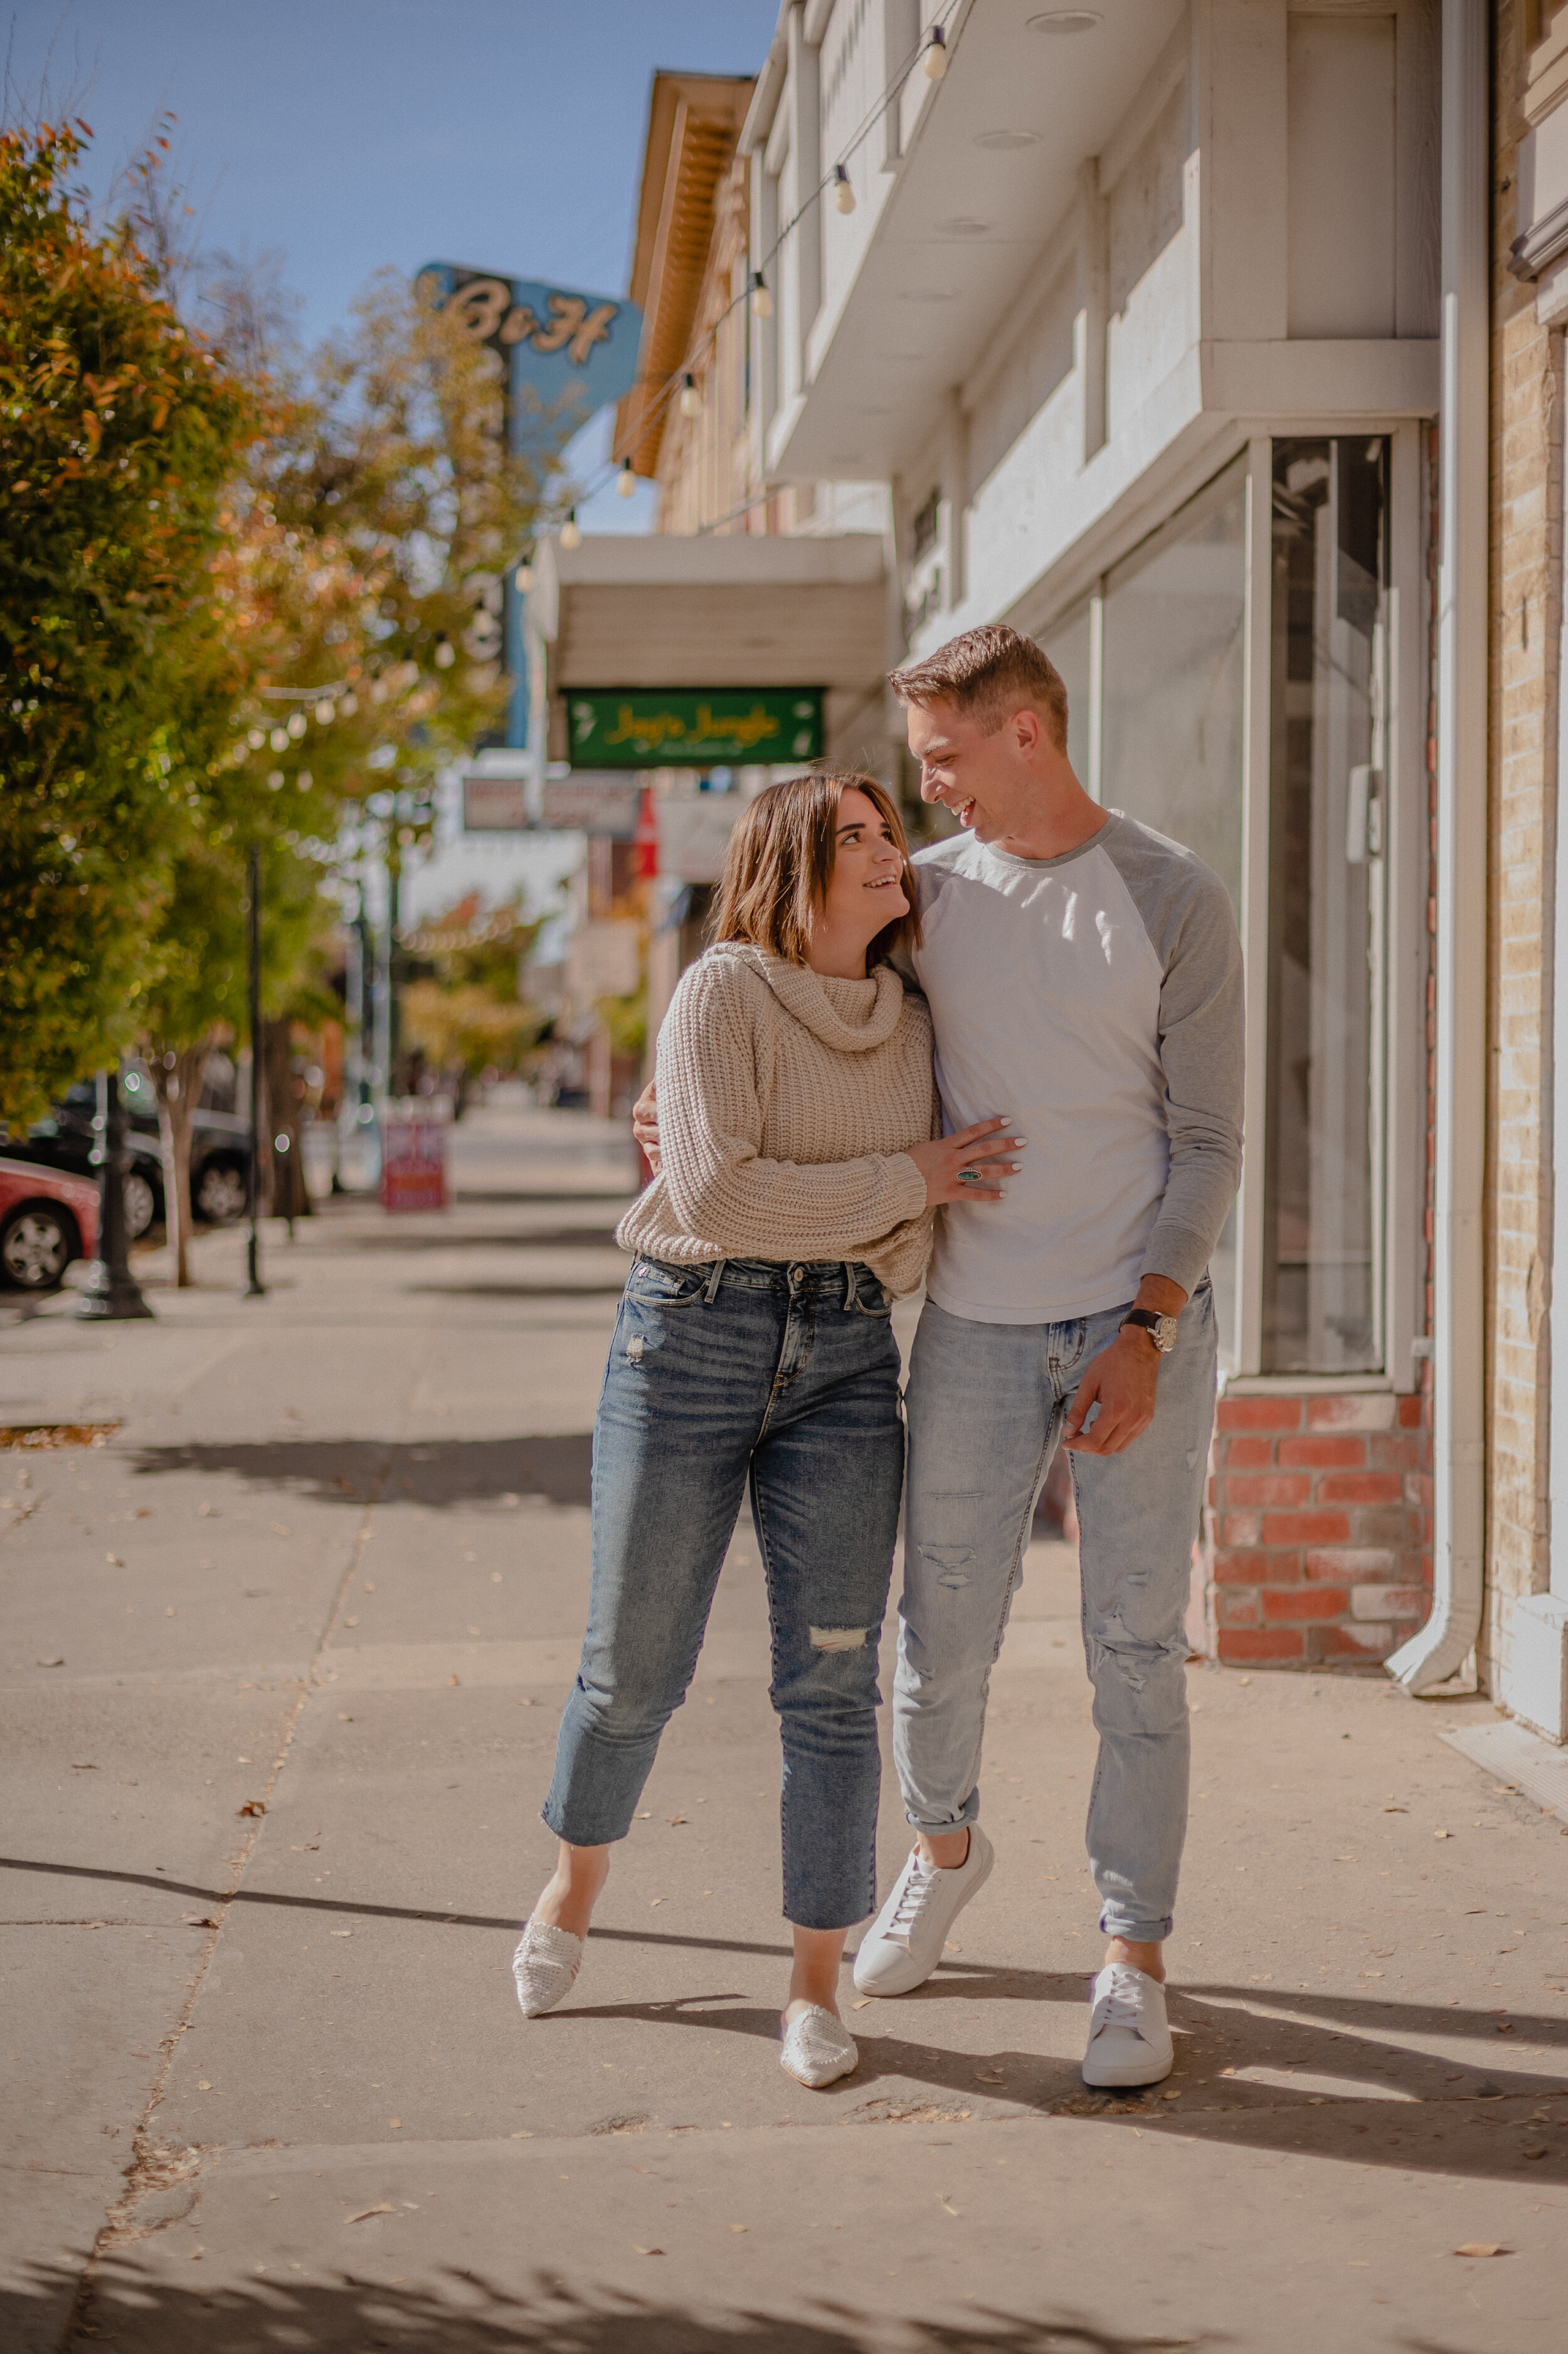
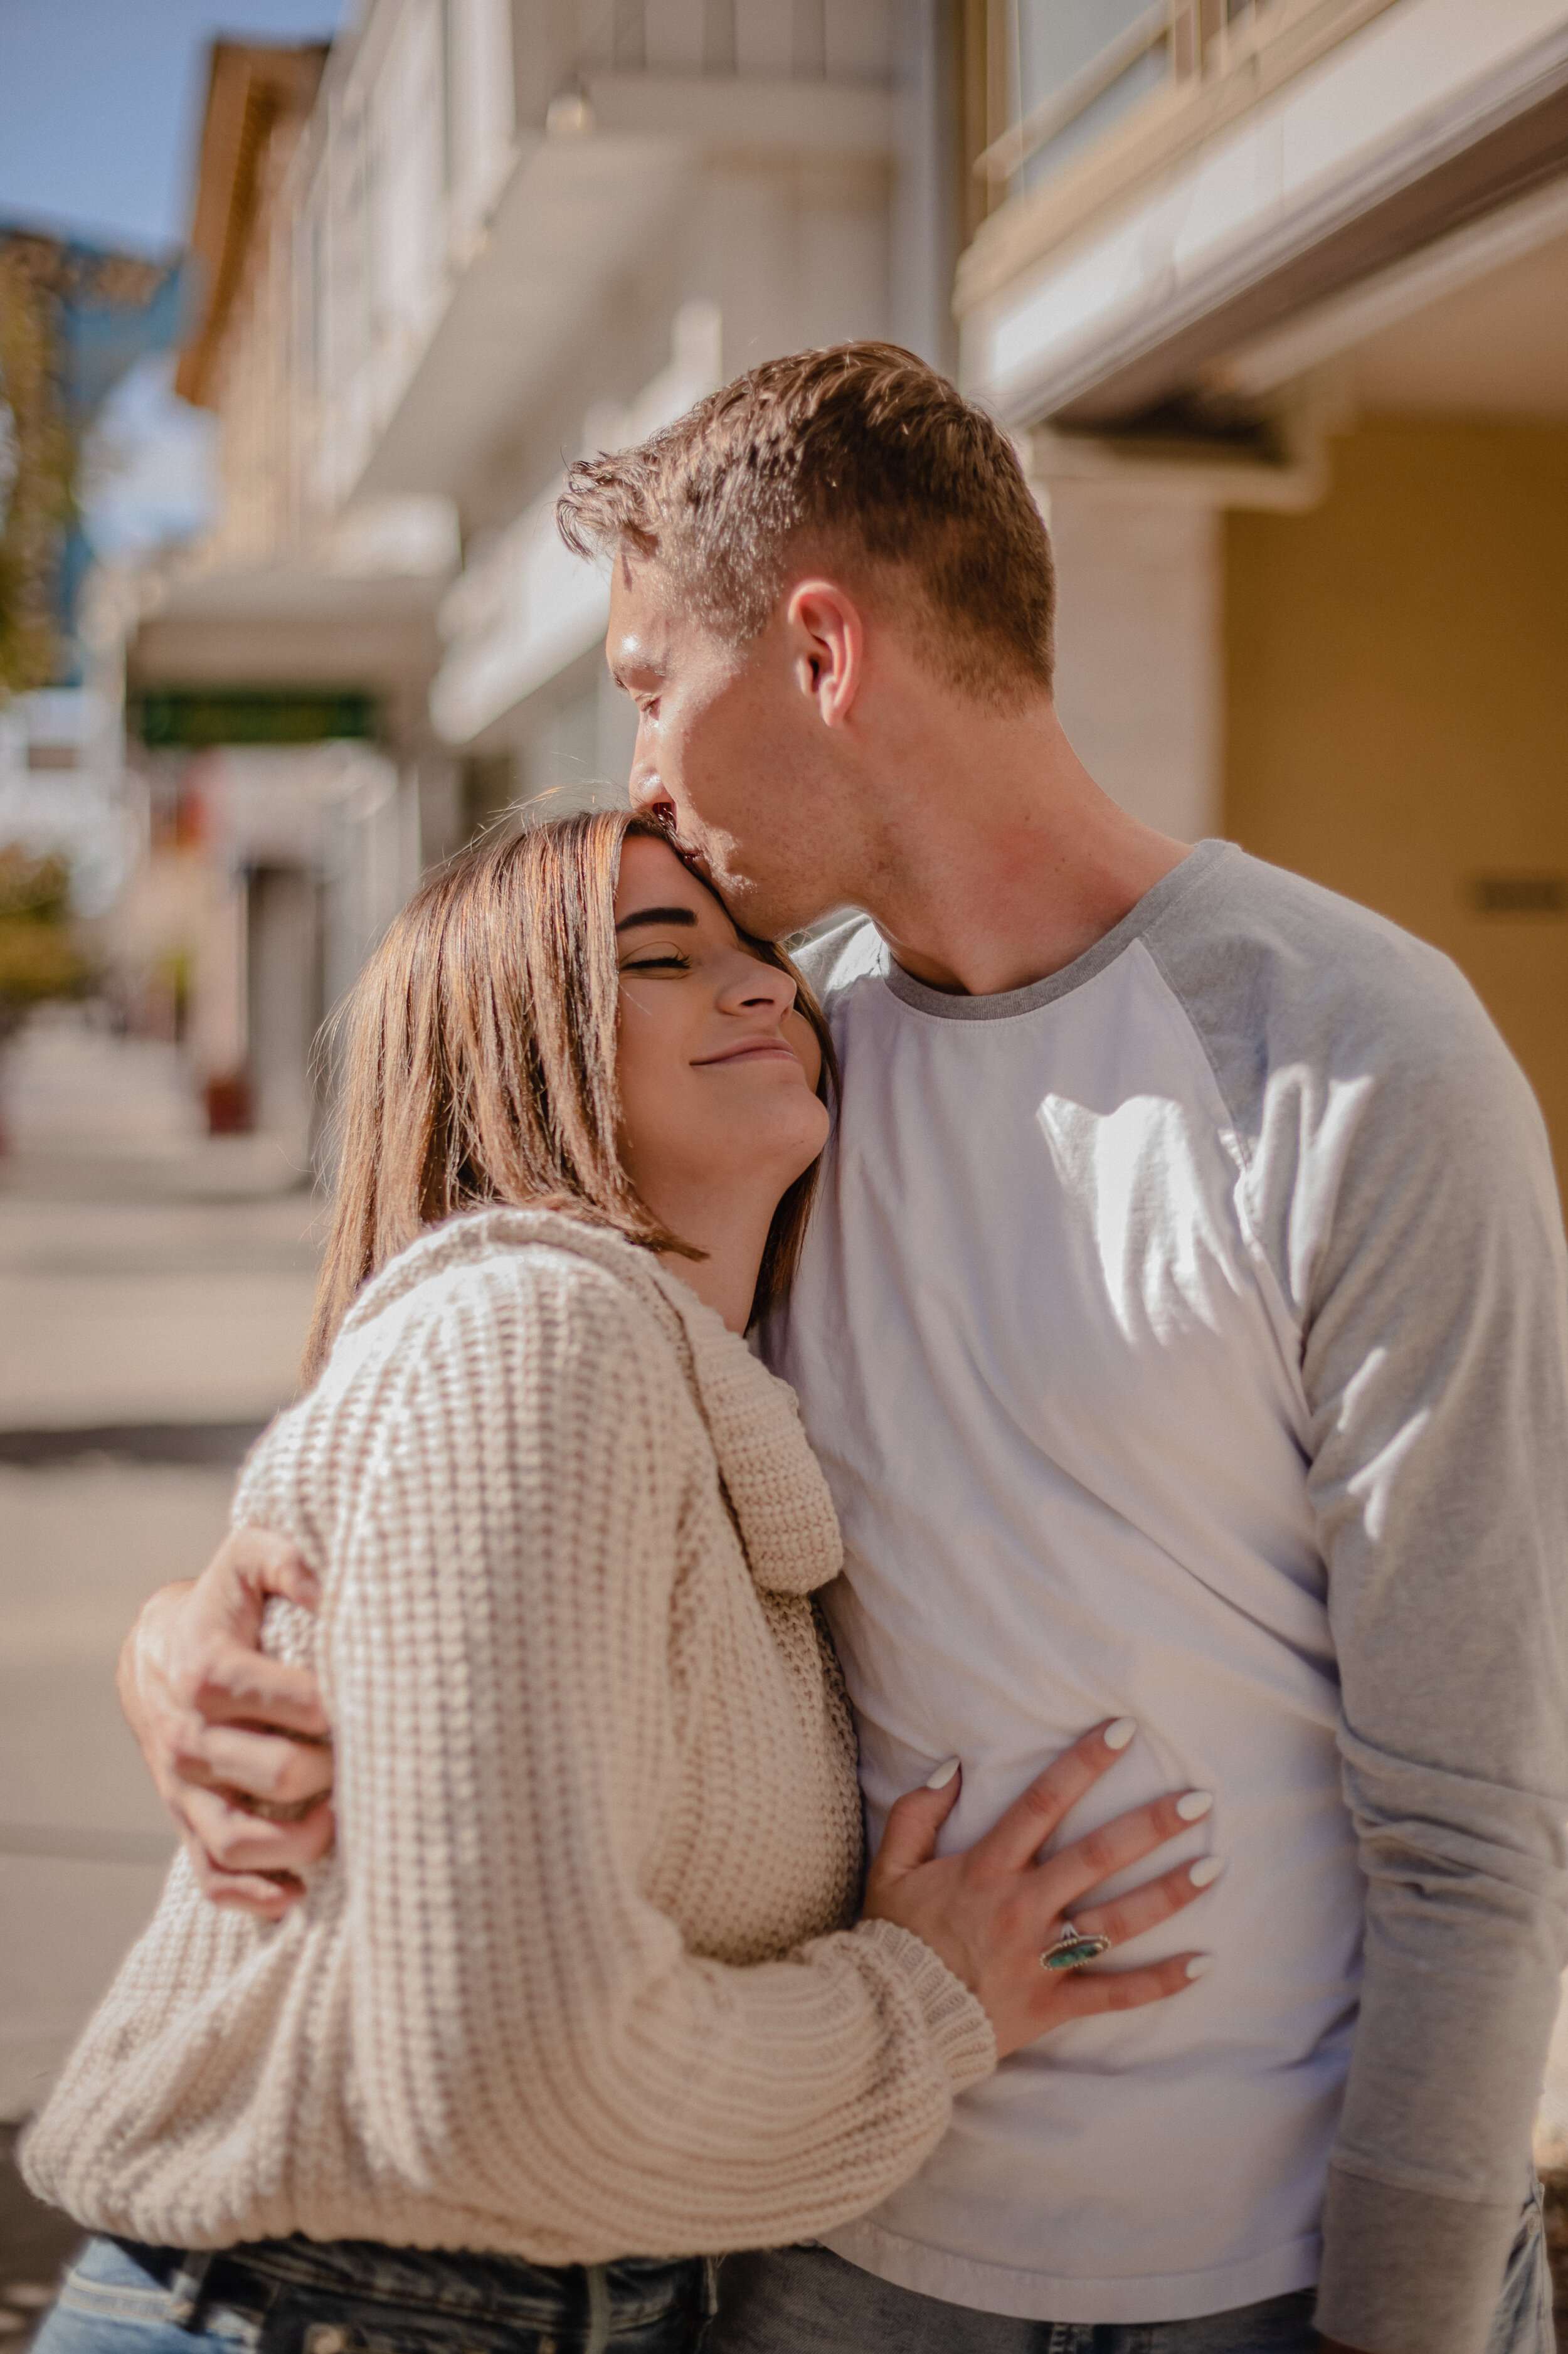
15 Posing Prompts to Help Couples Feel Comfortable and Confident
Couple portraits are all about capturing the love and fun-filled moments that give you a glimpse into what their relationship is like. Sometimes, though, people need a little push in the right direction in order to feel carefree and at ease during the session. The key is to make the couple forget that there’s a camera pointed in their direction. If you can do that, then you’re half-way there!
I’ve created a list of my favorite photography prompts that have been my tried and true methods to get a couple to let loose and have fun.
First and foremost, it’s a grist idea to play some music during the sesh! It really sets the mood and gets your clients to relax. Drop the professionalism! You want your clients to feel like they’re hanging out with a friend (and if you’ve done enough in making them feel prepared for the session, it should be pretty easy and they’ll feel like you’re already best friends!)
Prompts:
With arms around each other, pretend you’re both drunk and have to lean on each other for support and you walk toward me.
Standing back-to-back, clasp hands together and spin around in a circle. Look back at each other every so often.
Have the couple slow dance. Include a few twirls fo fun!
Hug each other as if it’s been a year since you’ve seen them
For the guy: lift and spin your partner around.
Hold hands and run towards me
Give your partner a big bear hug from behind. Add a kiss the cheek for fun!
Kissing game! Kiss your partner like a hood pecker over and over.
Go in for a kiss, but don’t kiss until I say. Hold still for a moment.
Give her a piggyback ride and rock her side-to-side like you’re about to let her fall
Play with each other’s hair
Sit on the floor and get your legs all tangled up!
In your sexiest voice, whisper “chicken nuggets” into your partners ear
Tickle fight!
Sit on his lap and play with his beard/chin
And there you go! These aren’t the only prompts that you can use, obviously! But hopefully this can get you started. What I love most about prompts vs. poses is that each one will be unique to the couple. These prompts are meant to spark your clients personalities and get them to open up, rather than telling someone specifically what to do. The latter often results in wooden, awkward, uninteresting pictures. Prompts really make the photo come alive! Your couples will forget all about the camera and will have fun the whole time with you!
Below are a few pictures of these prompts in action! Hope you enjoy experimenting and creating your own couple prompts 🤗


Best Camera Settings for Golden Hour Photography

If you’re like a lot of other photographers out there, you try to schedule most of your sessions during golden hour. I mean, who doesn’t want that dreamy soft light in their photos?! 🙋🏻♀️
You’ll want to make sure your camera is ready to capture the scene! So, how do you make the most out of that magical golden light? It’s not always easy to get the right camera settings. If you’re new to it, no worries, that’s why I’m here! If you already have experience but just want to pick up a few tips and tricks? I’m ya girl. This post will help you familiarize yourself with the best camera settings and gear to make the most out of the best light of the day.
So… what IS golden hour, anyway? Golden hour refers to the hour directly after sunrise and the hour before sunset. Yep, golden hour doesn’t just happen at sunset! The reason why golden hour is so sought after is because the light is redder and softer that it is during the rest of the day when the sun is directly overhead. Noon-day sun will often cast harsh shadows, and the light is too abrasive. If it happens to be cloudy, you don’t have to worry as much about that, though. Golden hour changes throughout the year as the time the sun sets/rises changes. A quick google search will give you specific time for sun rise and sunset.
The red, soft light is going to be far more flattering than any other light, so it’s a much more ideal time to take pictures. Colors also pop out more and the shadows are longer.
If you’ve read my post on aperture, ISO, and shutter speed, then this will be easy to get the right settings for golden hour! If not, I’ve got that link for you below 👇🏻
https://madelynmargaretphotography.squarespace.com/config/pages/6021bcd7c1e1cc6421ca7d09
Aperture:
Ideally, you’re aperture will be the biggest possible (lowest number=bigger aperture). This will let in more of that soft light and will add that nice creamy bokeh to the background of your pictures. If you happen to want more of the background in focus along with the foreground, then I would keep your aperture at f/8 or higher. Landscape photography generally requires a higher f-stop like f/8-f/22.
Shutter Speed:
Once you’ve selected the optimal aperture for your subject, choose a shutter speed that will eliminate the risk of motion blur. For portraits of families or couples, I wouldn’t go below 1/250. As it gets darker, you will be tempted to slow down the shutter speed so that you can let in more light. That is fine, but know that it will be harder to avoid blurry subjects, especially if there are little kids! A slower shutter speed will often require a tripod.

ISO:
Personally, I don’t like adding a lot of ISO to my photos. It adds too much noise and grain that I find distracting. That being said, try to keep your ISO as low as possible. Anywhere from 100 to 200 ISO should work during golden hour. If you’re shooting right when the sun is rising or setting, obviously it’s going to be a lot darker than if you shoot a little later in golden hour. A higher ISO would be required during these early/late golden hour shots.
White Balance:
Ya’ll are shooting in RAW, right? Good, because shooting in RAW vs. JPEG will optimize the amount of data in the image, which is SUPER important in post-production. You’ll be able to manipulate color and light much more effectively, and the settings you add to the photo will look more realistic. Essentially, RAW images hold a lot more data so that later on, you have more to work with. That being said, you will still want to make sure you have the right white balance setting while shooting. You can always fix it in Lightroom (as long as its a RAW image) but it’s much easier to just manually adjust it to the tones that are there in front of your camera. Leaving it to “auto white balance” will often result in more blue-toned photos, which kind of defeats the purpose of shooting at golden hour.
Capturing golden hour the way you want won’t happen overnight. Like any type of photography, it takes time, experience, trial, and error to get it down. It’s always a good idea to look at golden hour photographs that you admire, and pick out reasons why it’s great. Try mimicking those techniques—you’ll find yourself creating your own as well!
Let me know if you have any other questions about golden hour photography—I’m happy to help!


8 Dreamy Photography Locations in Utah
Bryce Canyon
Bryce Canyon has those classic Utah red rock hoodoo formations. It’s impossible not to get great pictures from this canyon! Keep I mind that there is a fee of $30 per vehicle, so it might be a good idea to travel in the same car as your client.
The section of Bryce Canyon known as The Amphitheater is probably the most iconic, since it has the most concentrated amount of hoodoos than anywhere else in the canyon. The Amphitheater is definitely the most popular photo spots in the park!
Some other spots include the end of Scenic Drive at Rainbow Point. All the scenic overlooks are on the east side. If you continue on to Scenic Drive you’ll end up at The Amphitheater. You’ll definitely catch some spectacular viewpoints on the way!
2. Provo Canyon
Provo Canyon has SO MANY great spots: it you want a spot that is easily accessible, there are plenty of parks with parking: Vivian Park, Big Springs Park, South Fork Park, Centerville Park, Rock Canyon Park… the list never ends! One of my favorite spots is Squaw Peak. You get a great view of the canyon, and there’s even a cool wood fence on one side of the parking lot if you’re looking for a little prop.
The canyon extends from Orem to Heber City. Since this canyon sits at a lower elevation that some other canyons, this location is best when shooting in the summer and fall. Hikes and drives are typically mild so it’s perfect for a quick getaway!
3. Moab
Another quintessential Utah location with the classic red rocks! This is much like Bryce Canyon, but the landscape will possibly require a wider millimeter lens in order to capture the vast arches and other unique rock formations. Arches National Park is a very popular location in Moab for bridals and engagements. If you’re wanting to get pictures in some arches, you’re going to have to hike a little. However, if you’re looking for something with a little easier access, there are areas where you can get out on the side the road and get some great shots of the canyon!
Some other great locations in Moab include Canyonlands National Park, Southwest, Bull Canyon Overlook, and Copper Ridge. There are fees to enter these parks: Arches, for example, is $10-25 per vehicle.
4. Antelope Island State Park
Located in the southeast side of the Great Salt Lake near Salt Lake and Davis Counties, this island is great for a wide-open backdrop with few-to-none trees. Because there are so little trees to give away the season of the year, its a great spot for late fall, winter, and early spring sessions! The drive takes about 1 1/2 hours coming from either Provo or Salt Lake City.
The sunsets here are breathtaking, and it’s not hard to find a great spot without a lot of hiking. This is an amazing location since you can get a variety of backdrops with your clients: by the water, in an open field, even hand-in-hand, on the road!
5. Salt Flats
One of my all-time favorite locations! Located in Bonneville, Utah, The Salt Flats is a 1 1/2 hour drive north of Salt Lake, and is easily accessible via a rest stop. Admission is free, and you can even drive your car onto the Flats. Although, I would avoid driving on them when it’s wet as the salt will stick to your tires and could damage your car. During the winter season (November-May) the Flats are often flooded. But please, don’t let this deter you! The puddles of water create a perfect mirror of the mountains and sky. You’ll think you’ve left earth and traveled to another planet.
The Salt Flats is one of those locations where you can always get great pictures. The best is when it’s partly cloudy and the sun peaks through at golden hour. Because this location has a wide-open backdrop, the sky naturally becomes a big part of the photograph. Regardless of how the sky looks, the unique flooring of the Salt Flats is captivating!
For those of you who are early birds, the sunrise can be spectacular here. It is worth the pictures, for sure! Sunsets are a more realistic option for those who’s day starts at 4pm ✋🏻
6. Little Sahara Sand Dunes
Located in Juab County, Utah, Little Sahara Sand Dunes recreation area has a whopping 60,000 acres of open desert. Little Sahara is unique because not only does it have rolling dunes throughout the vast acreage, but you’ll see bits and bobs of trees and brush scattered around the landscape that will add some nice variety to your pictures! Unlike the rest of Utah, the scenery doesn’t change too drastically with the seasons, which makes it a great spot for year-round photography! (Bonus—its only about an hour south of Provo!)
Since this location has allllll the sand, I would recommend going barefoot! No one likes getting sand in their shoes anyway, right? I don’t even want to think about trying to wear high-heels in the sand—no thanks. If you do end up going barefoot, I would keep an eye out for little sticks and whatnot that might be under the sand’s surface.
You’ll definitely want o make sure you meet up with your client before getting to the sand dunes, as there won’t be any service there. Gas and food are also a fair distance away, so plan accordingly!
7. American Fork Canyon
American Fork and Alpine Loop is one of the staple locations in Utah! If you happen to take a drive down Alpine Loop in early October, be prepared to see A TON of other people taking pictures. Don’t let this deter you, though! It is well worth it to schedule a session here, I guarantee you will not be disappointed with the many Aspen trees. Heart eyes for days 😍 (If you want to avoid the crowds, try scheduling the session during a weekday).
American Fork Canyon has great locations like Alpine Loop, Cascade Springs, and Tibble Fork Reservoir. Not only does it have great foliage in the fall, but they’re great locations in the spring and summer too! Be aware that during the winter when it snows, these roads are closed and/or are somewhat difficult to get to due to the snow. There is am entrance fee of $6 per car, and cell service is super spotty past the mouth of the canyon. I would suggest meeting up with your client in a place where you have service before heading up the canyon.
8. Big Cottonwood Canyon
This is a hot spot if you’re wanting some wintery photos! Jordan Pines Campground and the surrounding areas are full of picturesque evergreens covered in snow—can’t get much better than that! The snow usually lasts from December to March, so if you want those dreamy wintery photos look no further than Big Cottonwood Canyon.
Parking is easy, and you don’t have to look too far to find a good field with those tall pine trees in the background.
Not only is Big Cottonwood Canyon magical in the winter, but it’s just as beautiful during the summer also! Lake Mary in particular is great for all types of sessions: family, engagement, bridals, you name it! Just keep in mind there is a 2.6 round trip mile hike which starts at Brighton Ski Resort, and the trail has a steep include. If you are up for the hike, be sure to bring insect repellant (for when you get to the lake) and good hiking shoes as some parts of the trail can get a little slick. I wouldn’t wait to go when it’s late August, let’s just put it that way. The landscape is absolutely amazing, though, I will say that.
If you don’t make it to the lake, there are plenty of great spots along the start of the trail that aren’t as hard to get to.
And there you have it! 8 great locations. Honestly, there are about a dozen and a half more locations around Utah that aren’t listed here that are probably just as amazing. These 8 places have a soft spot in my heart 💙
What are your top 8 locations?

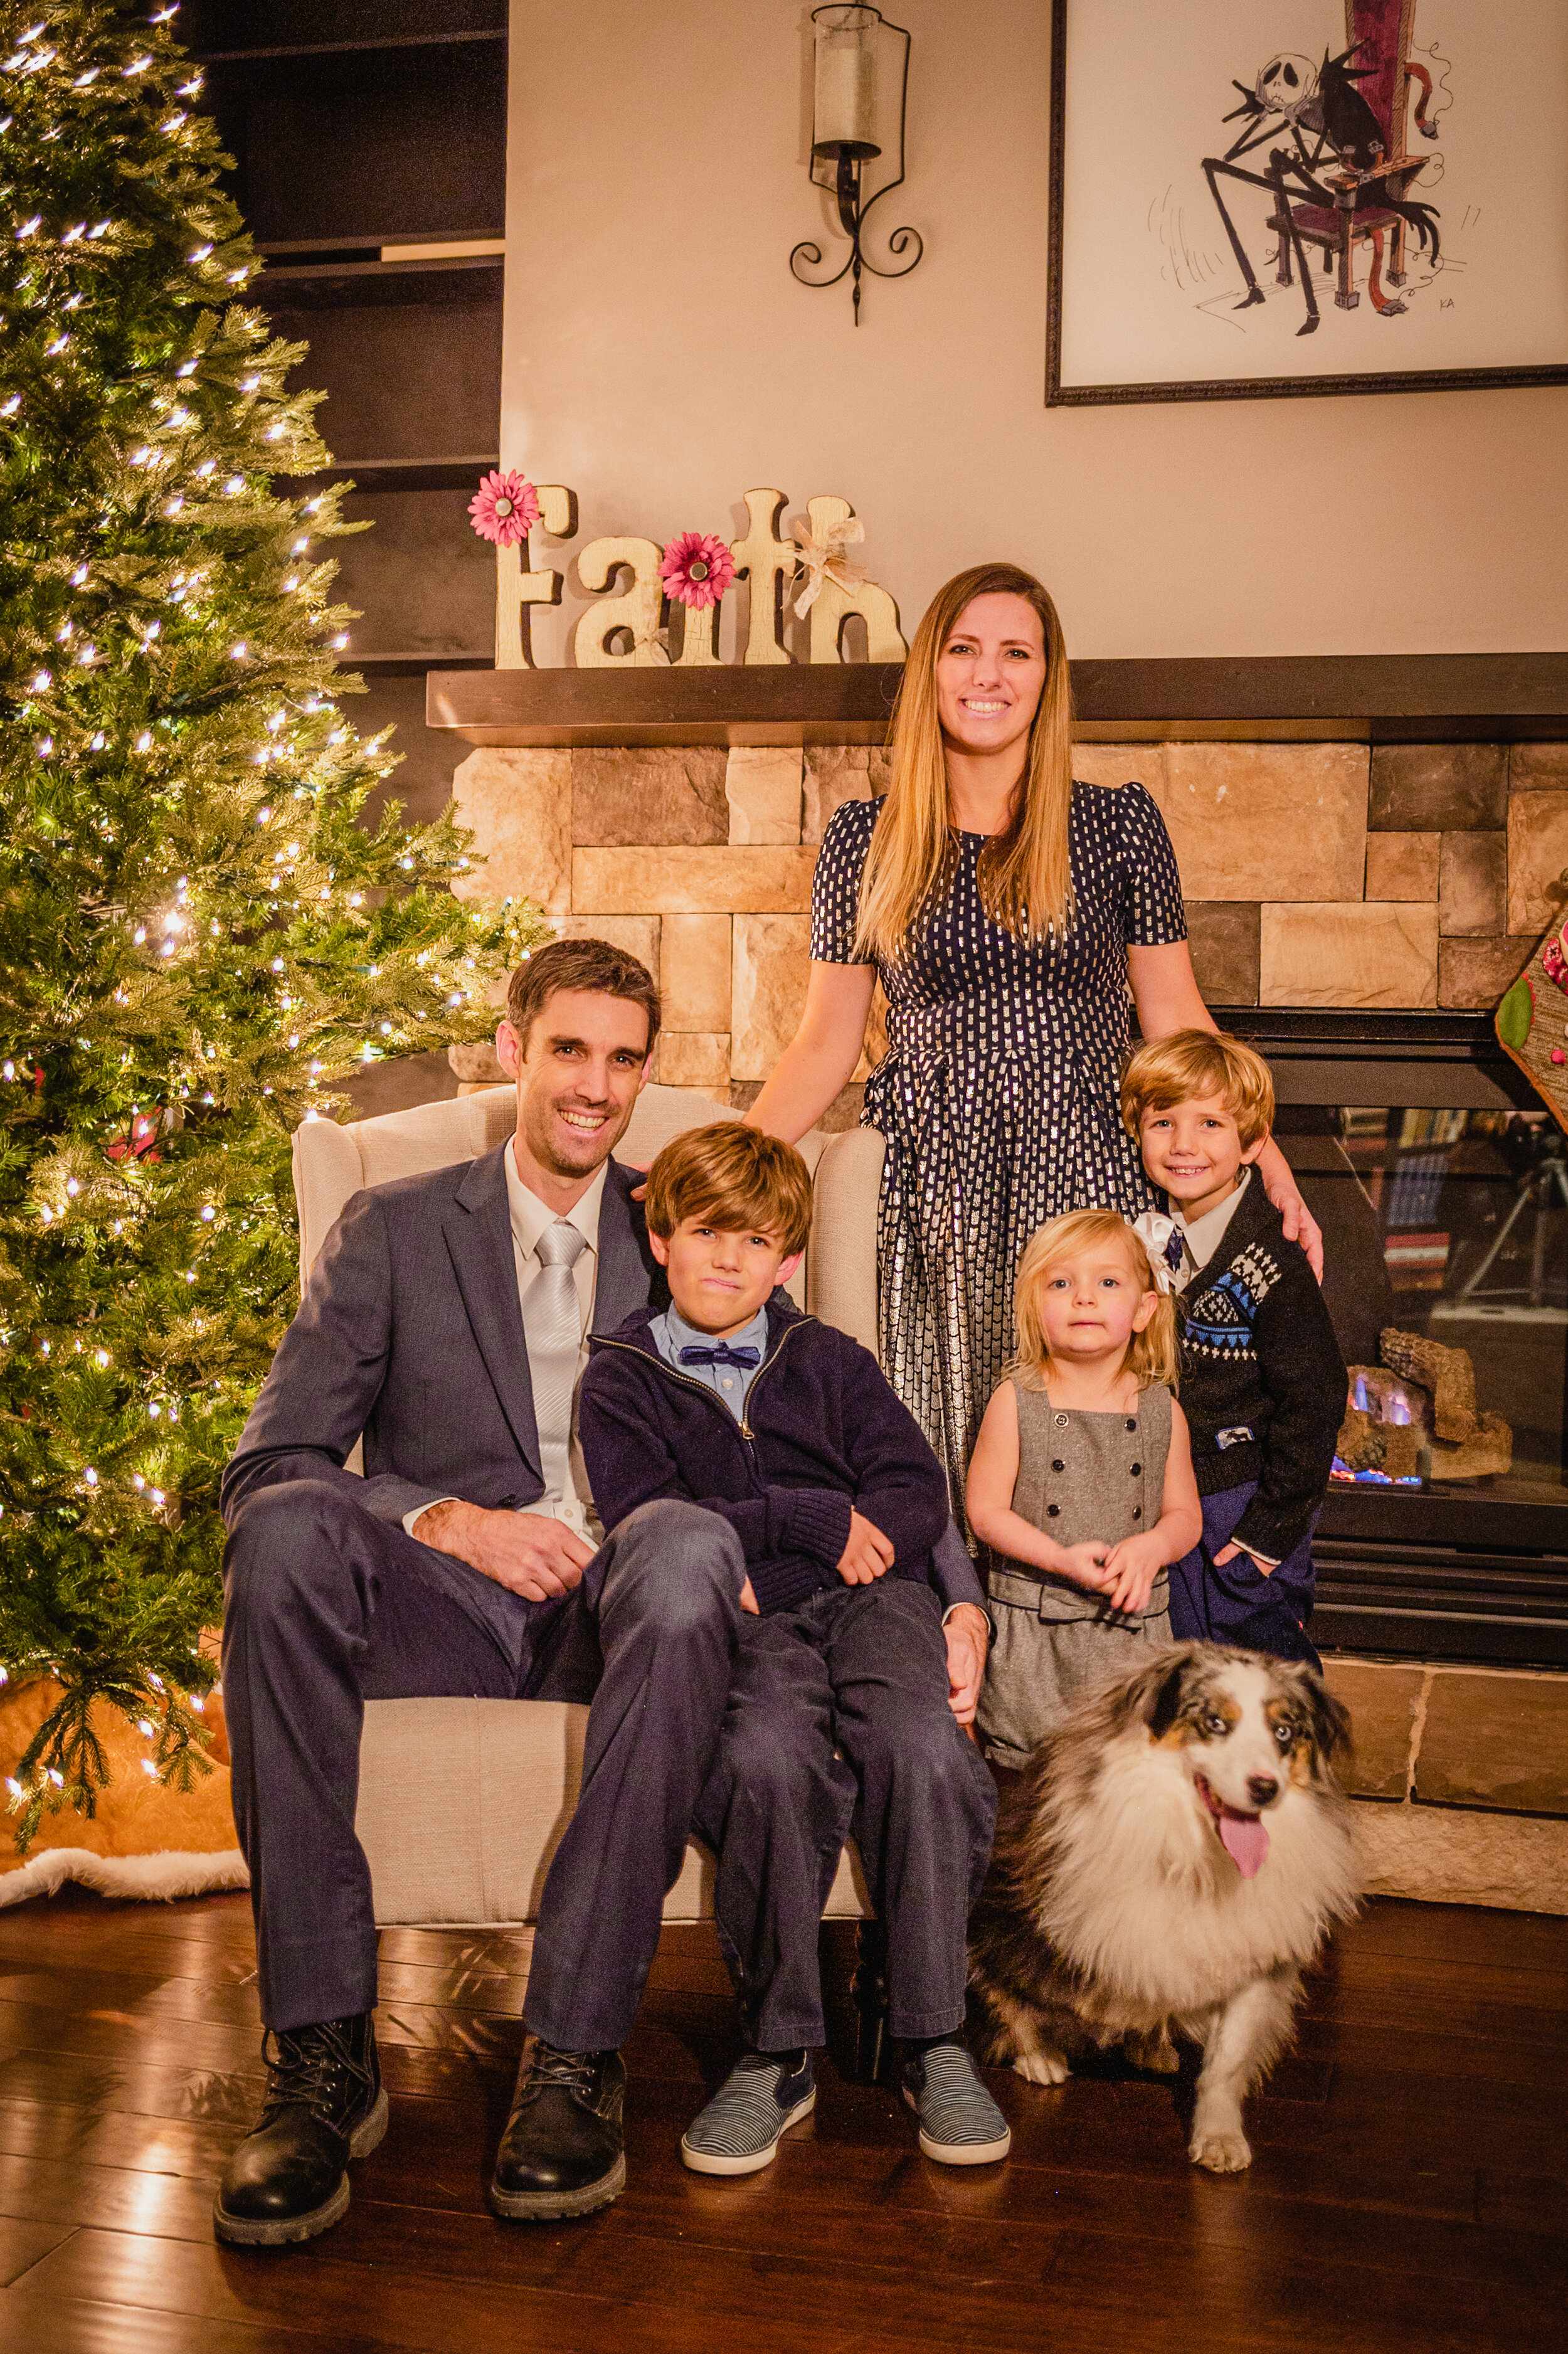
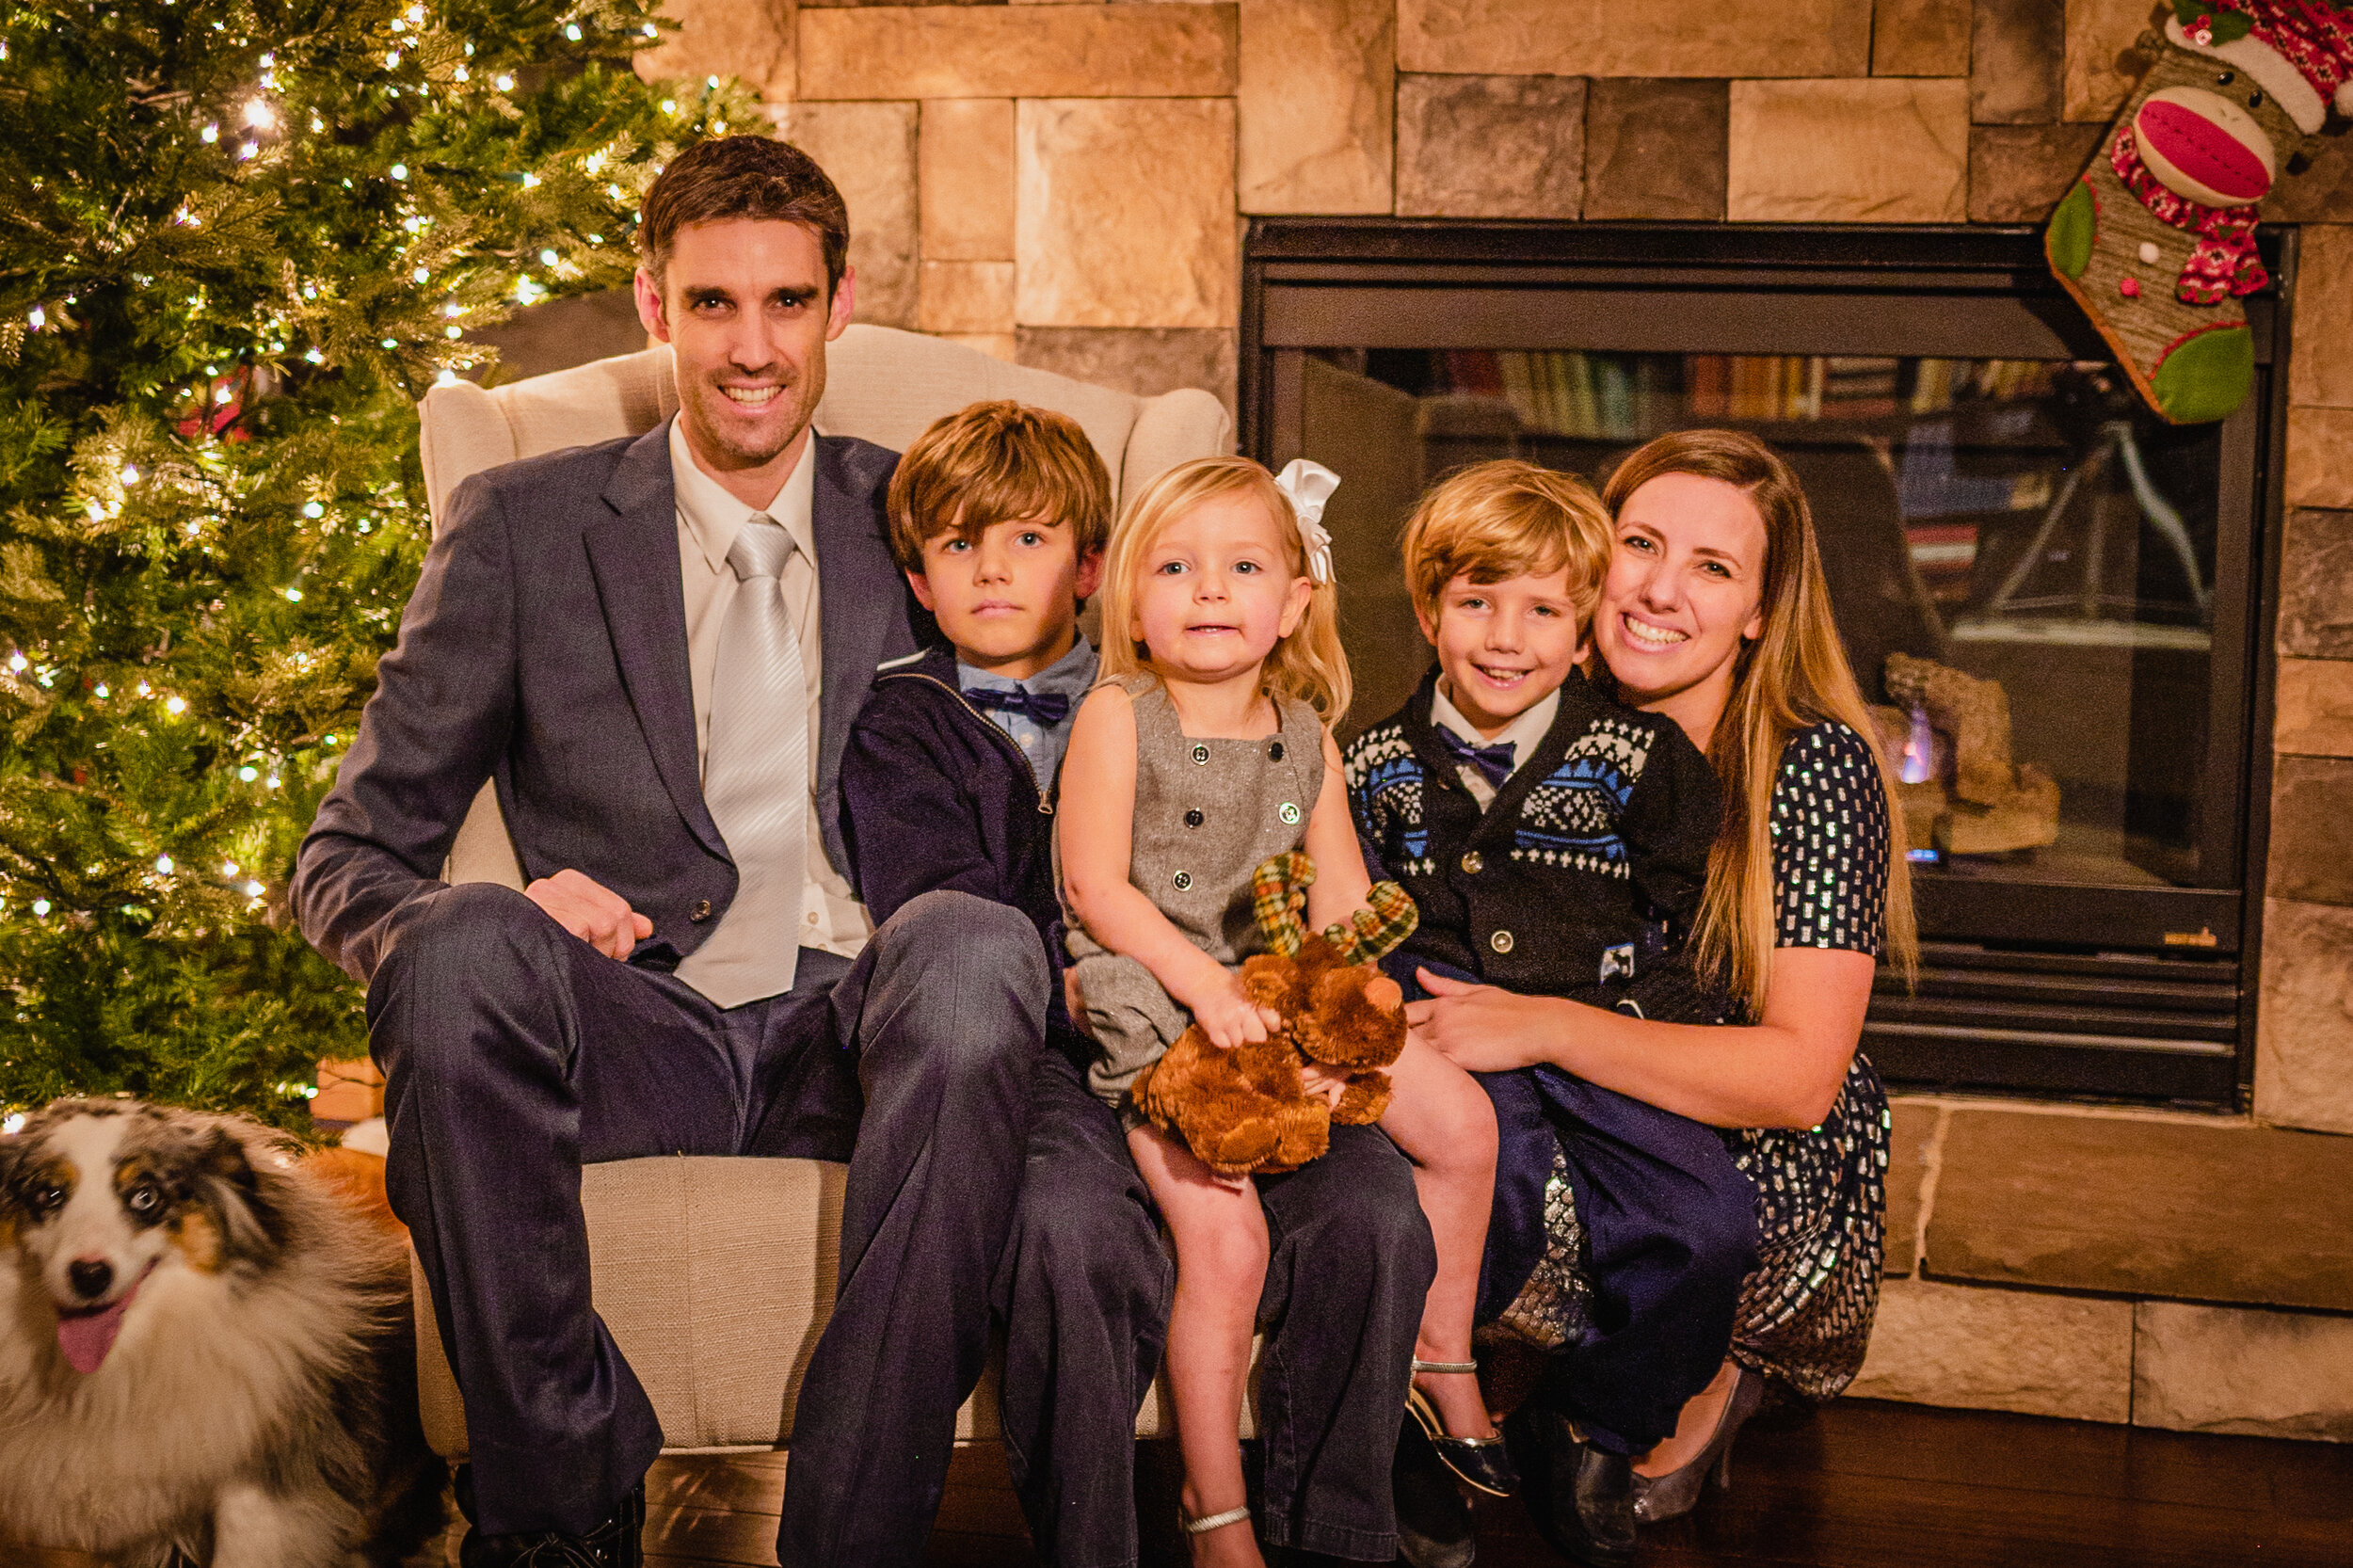
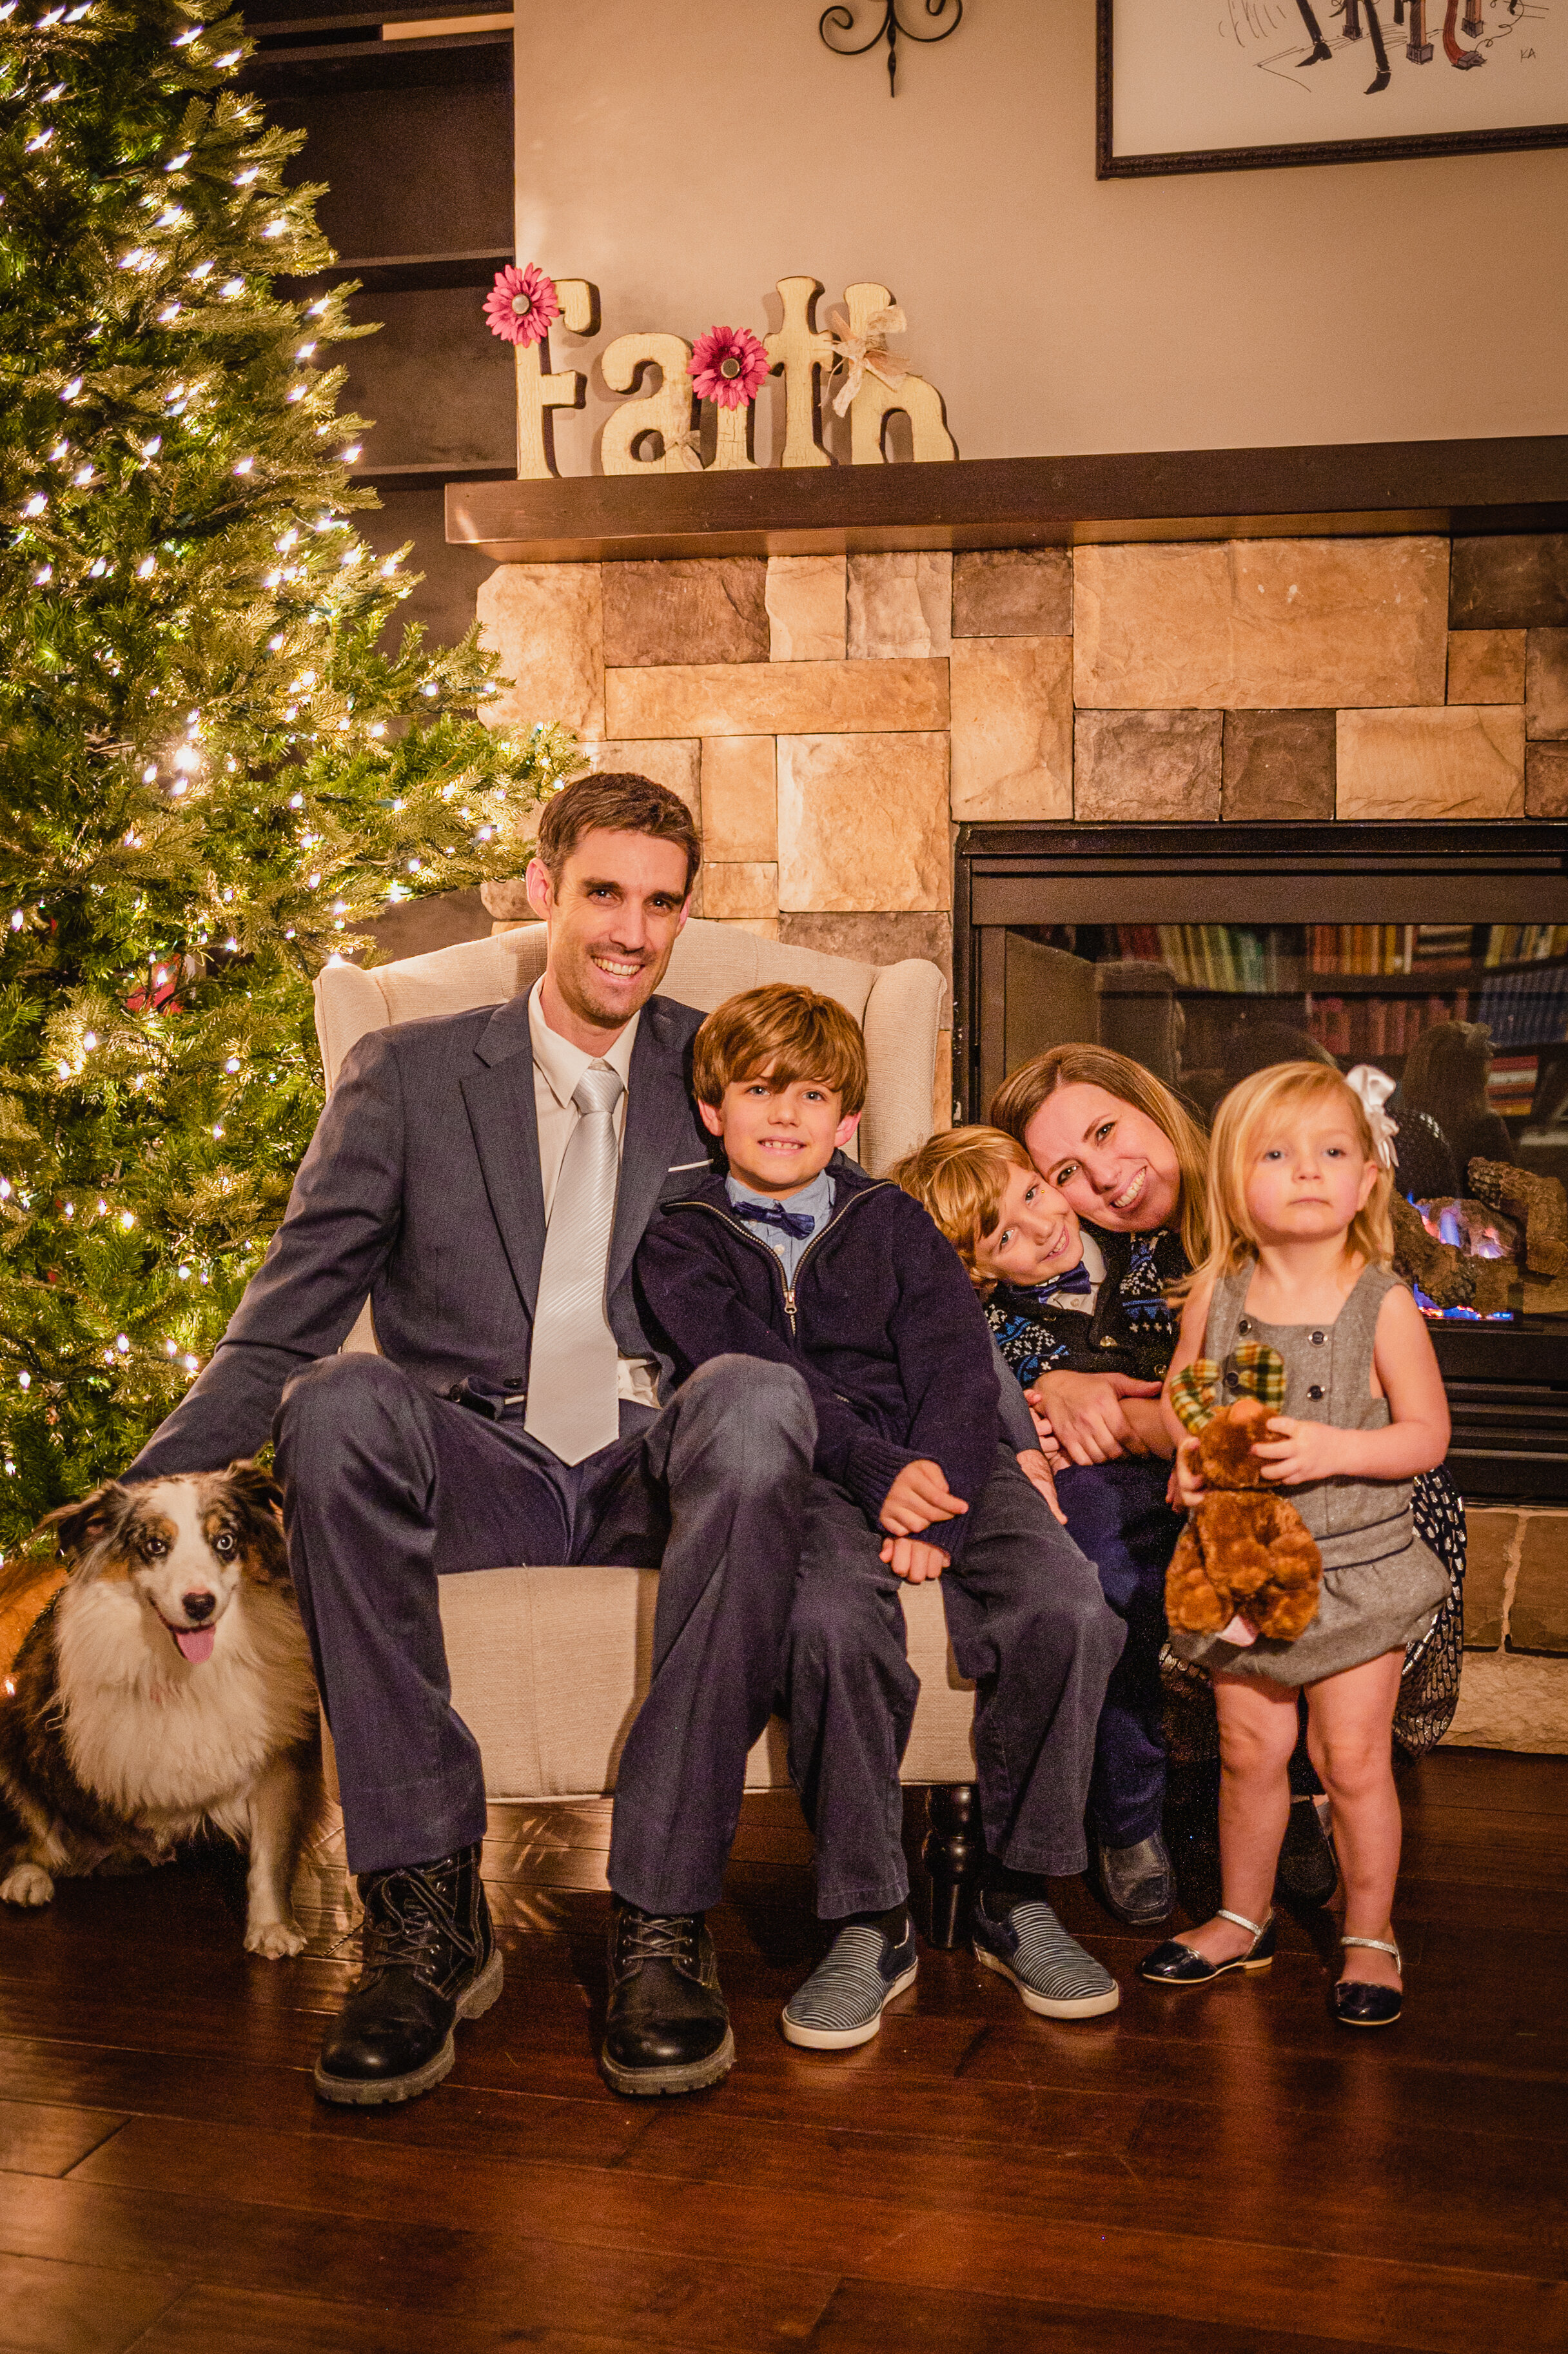
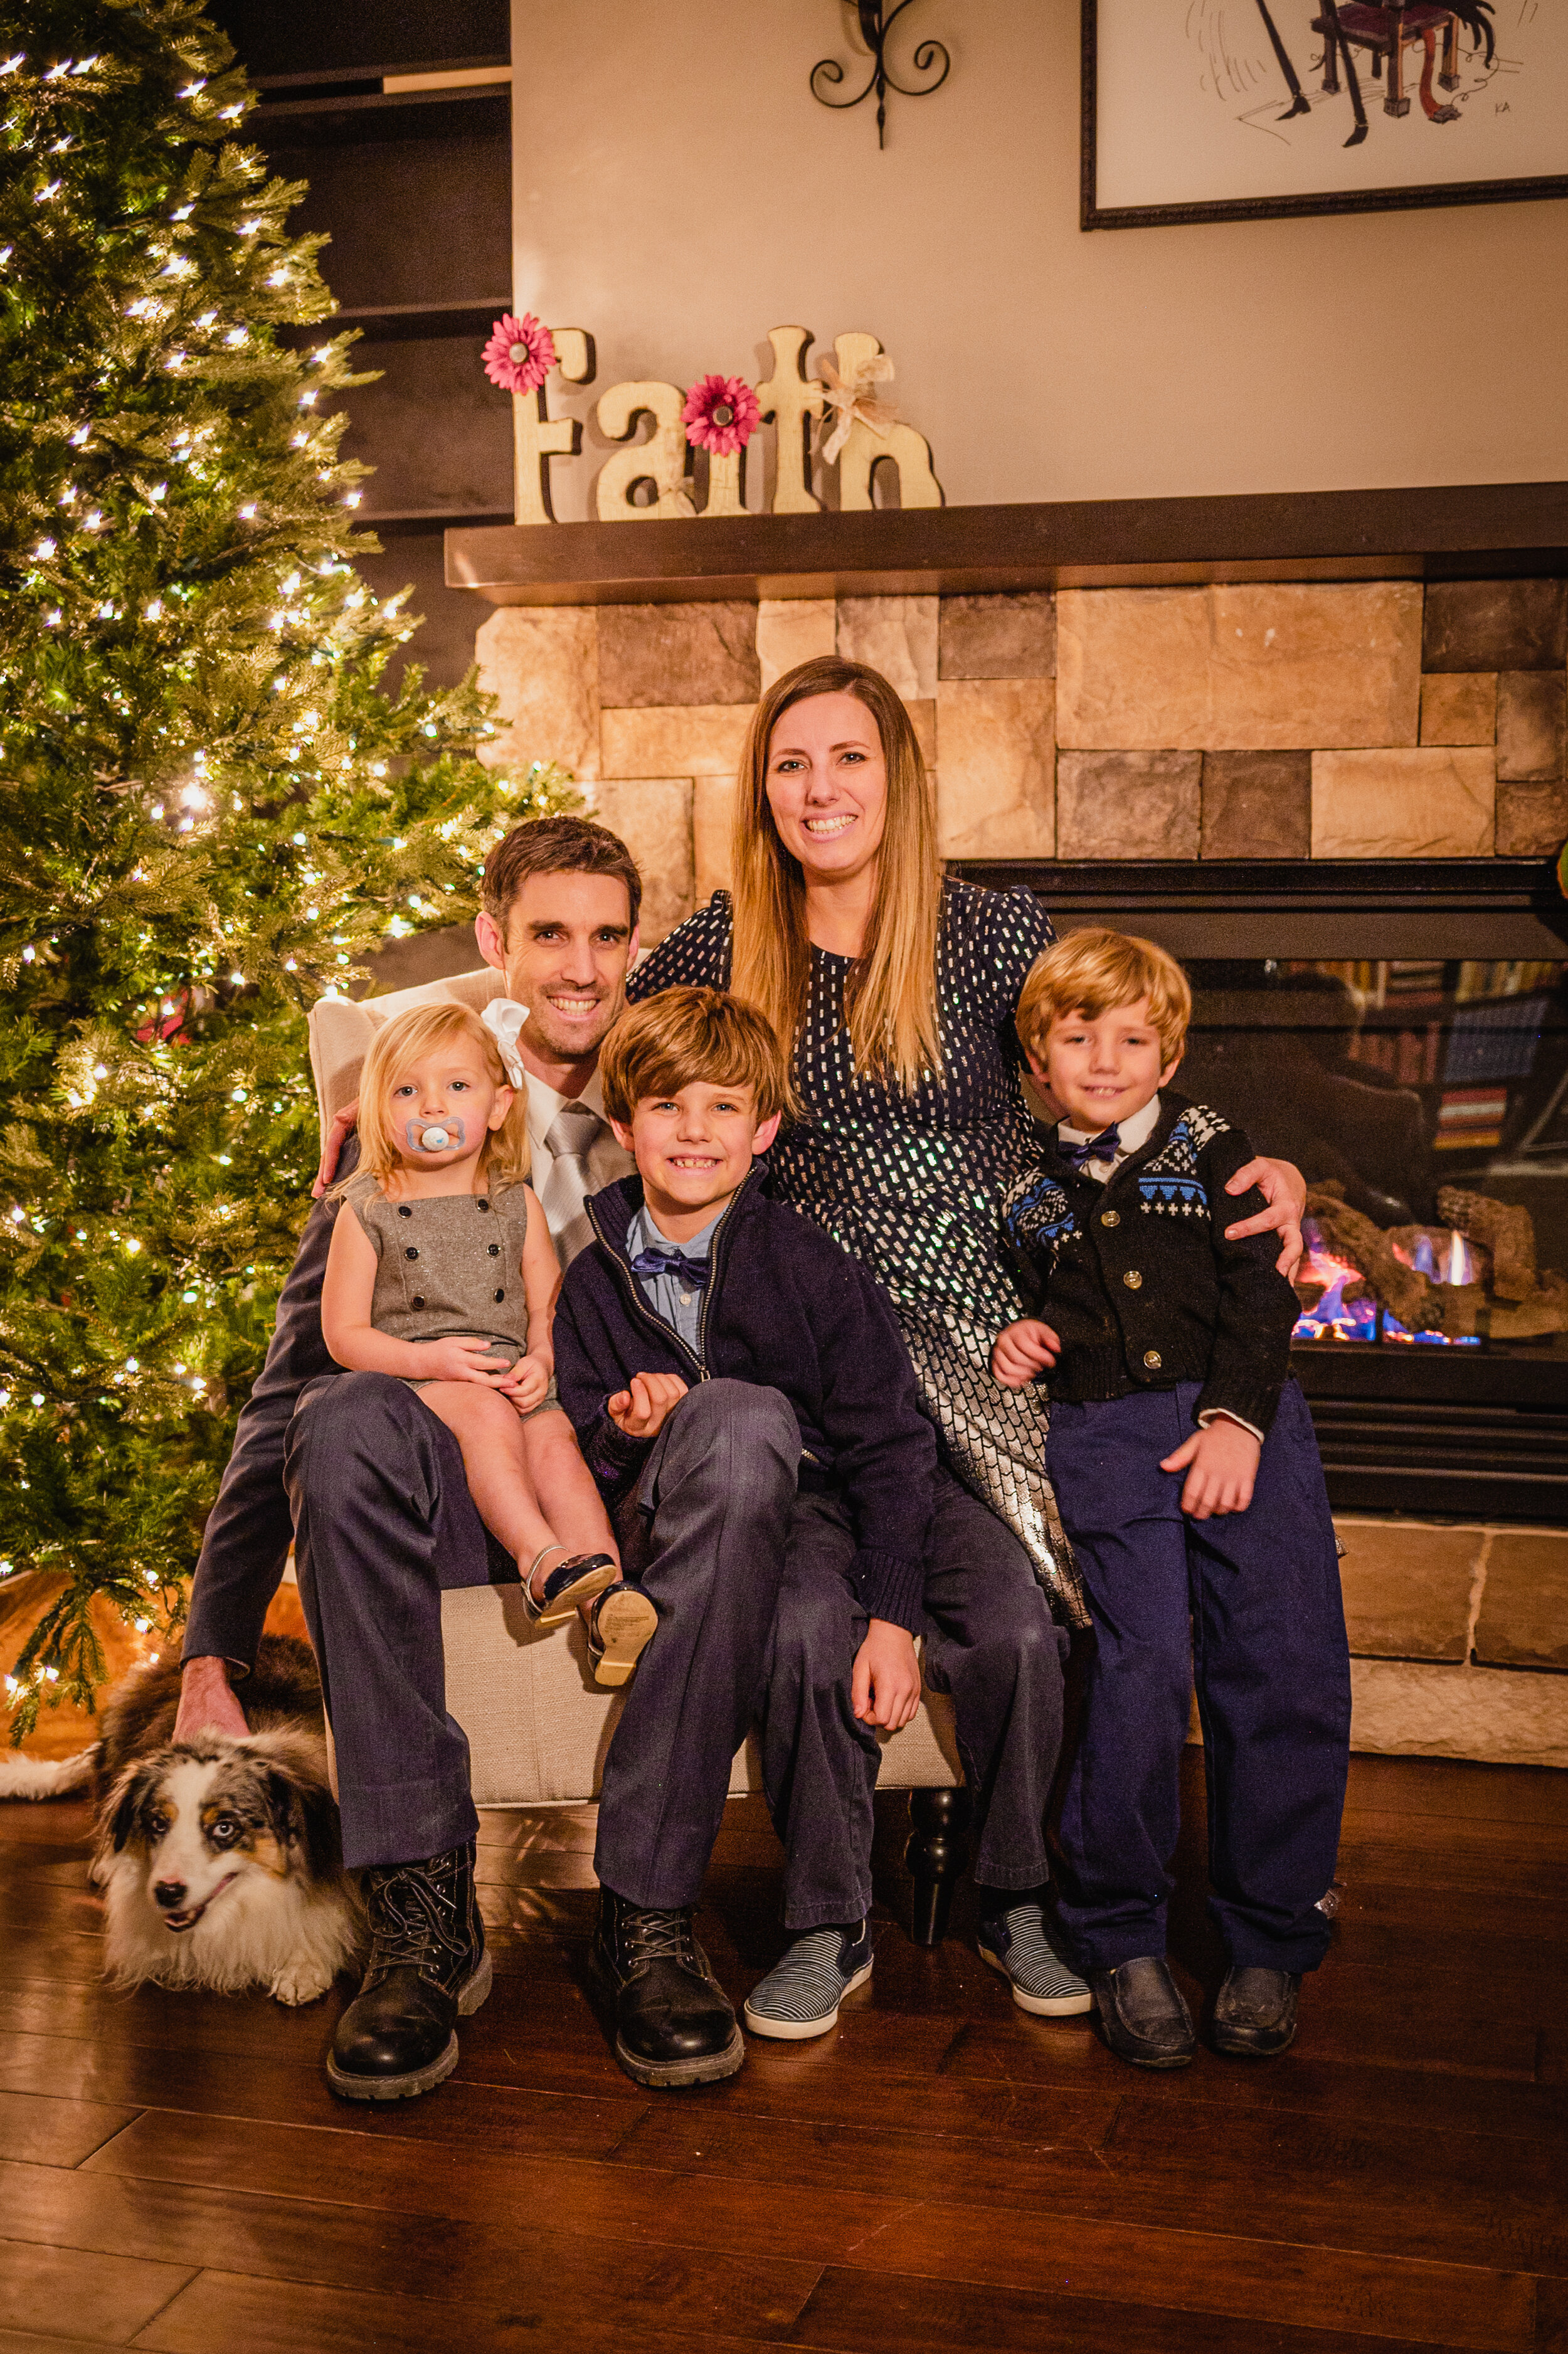
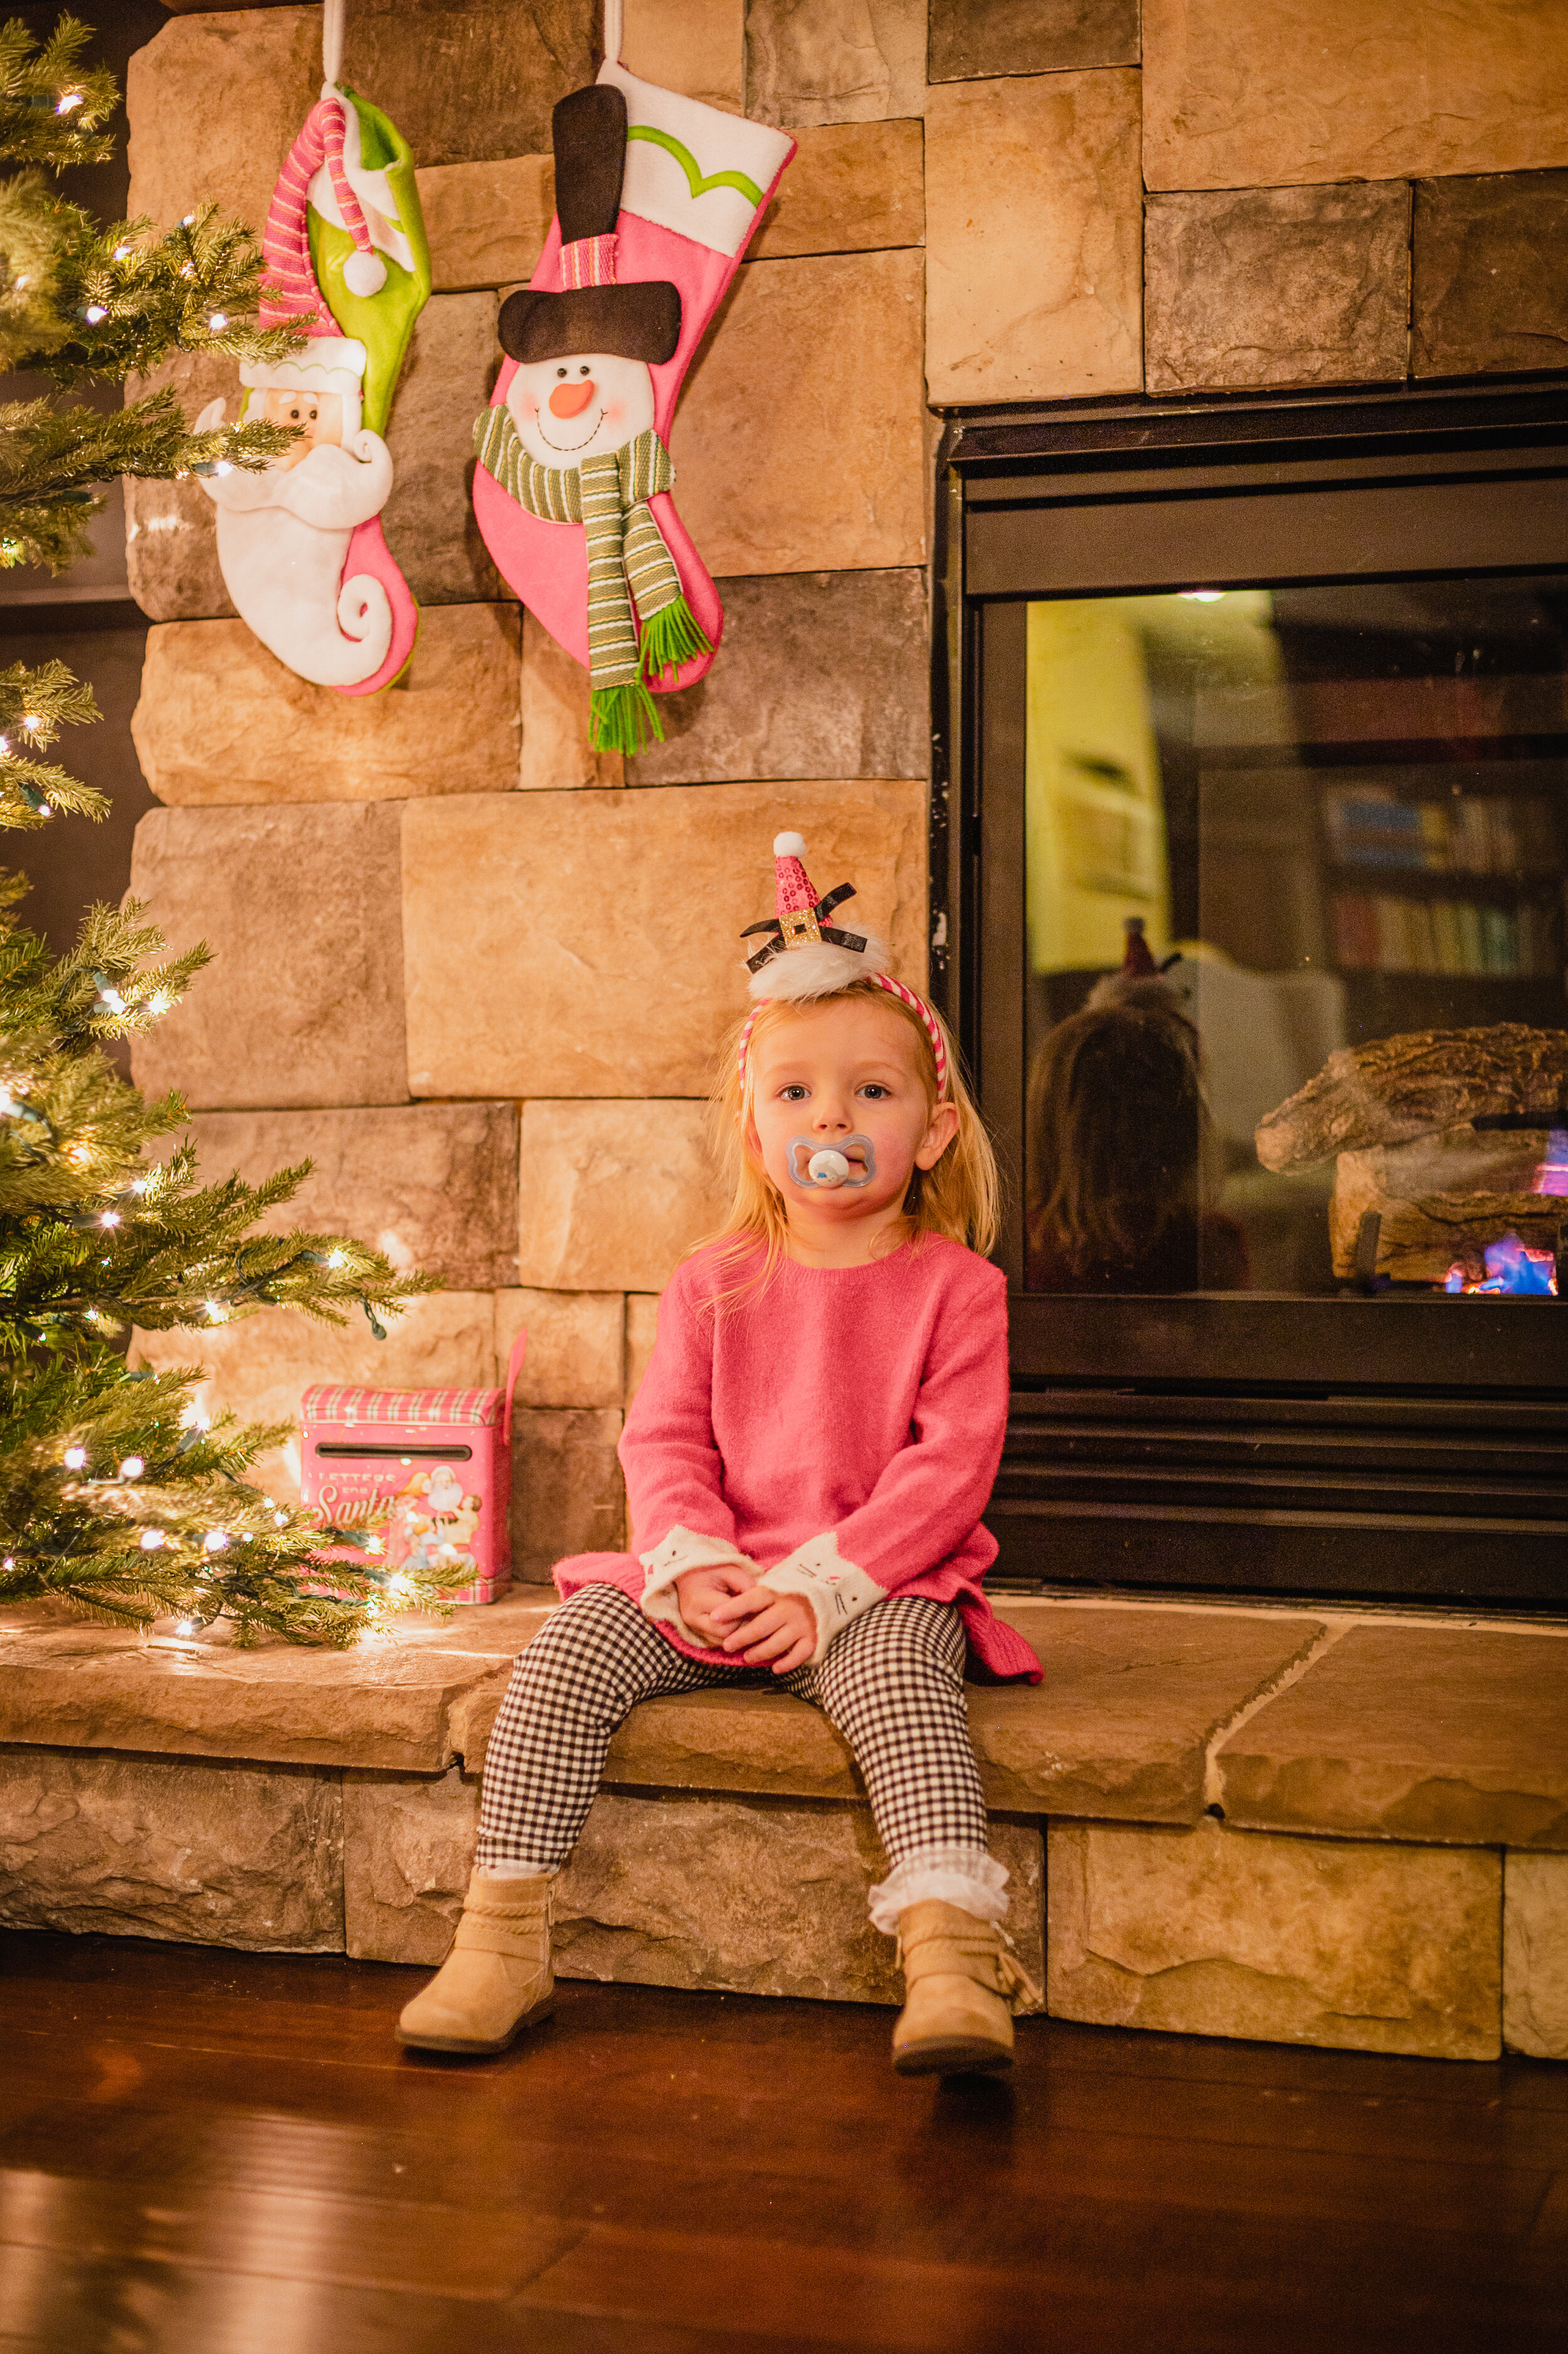
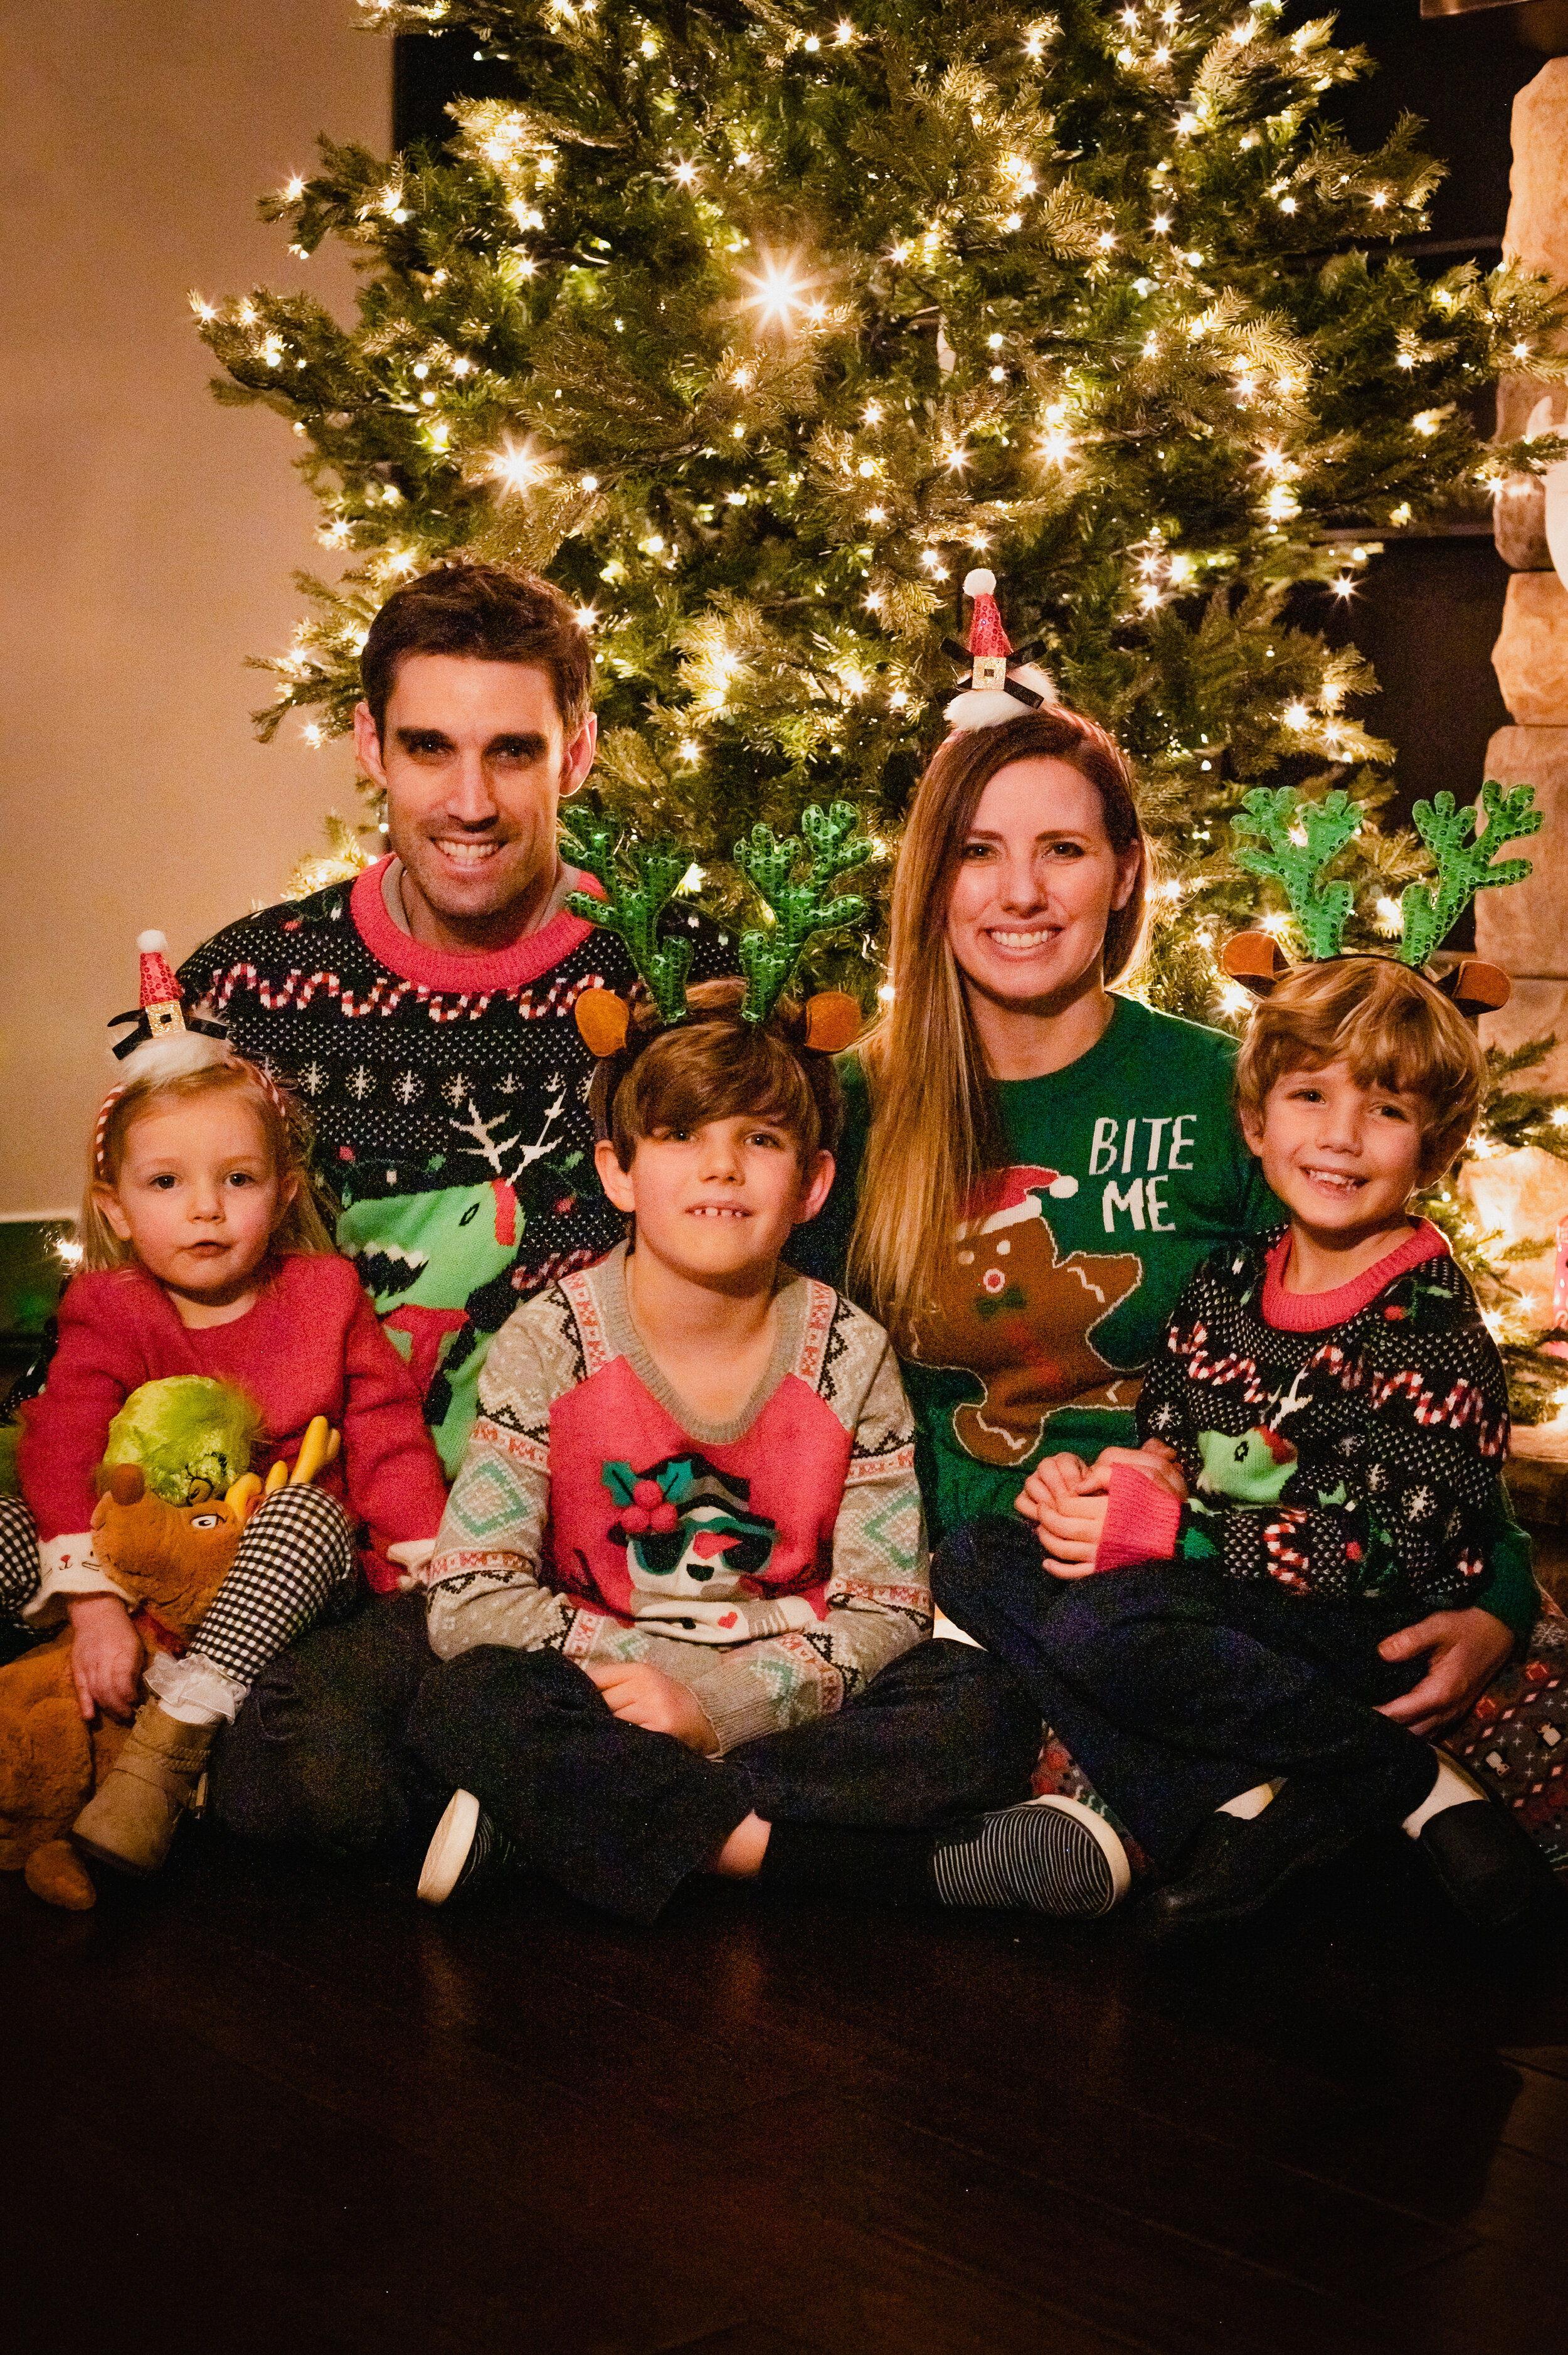
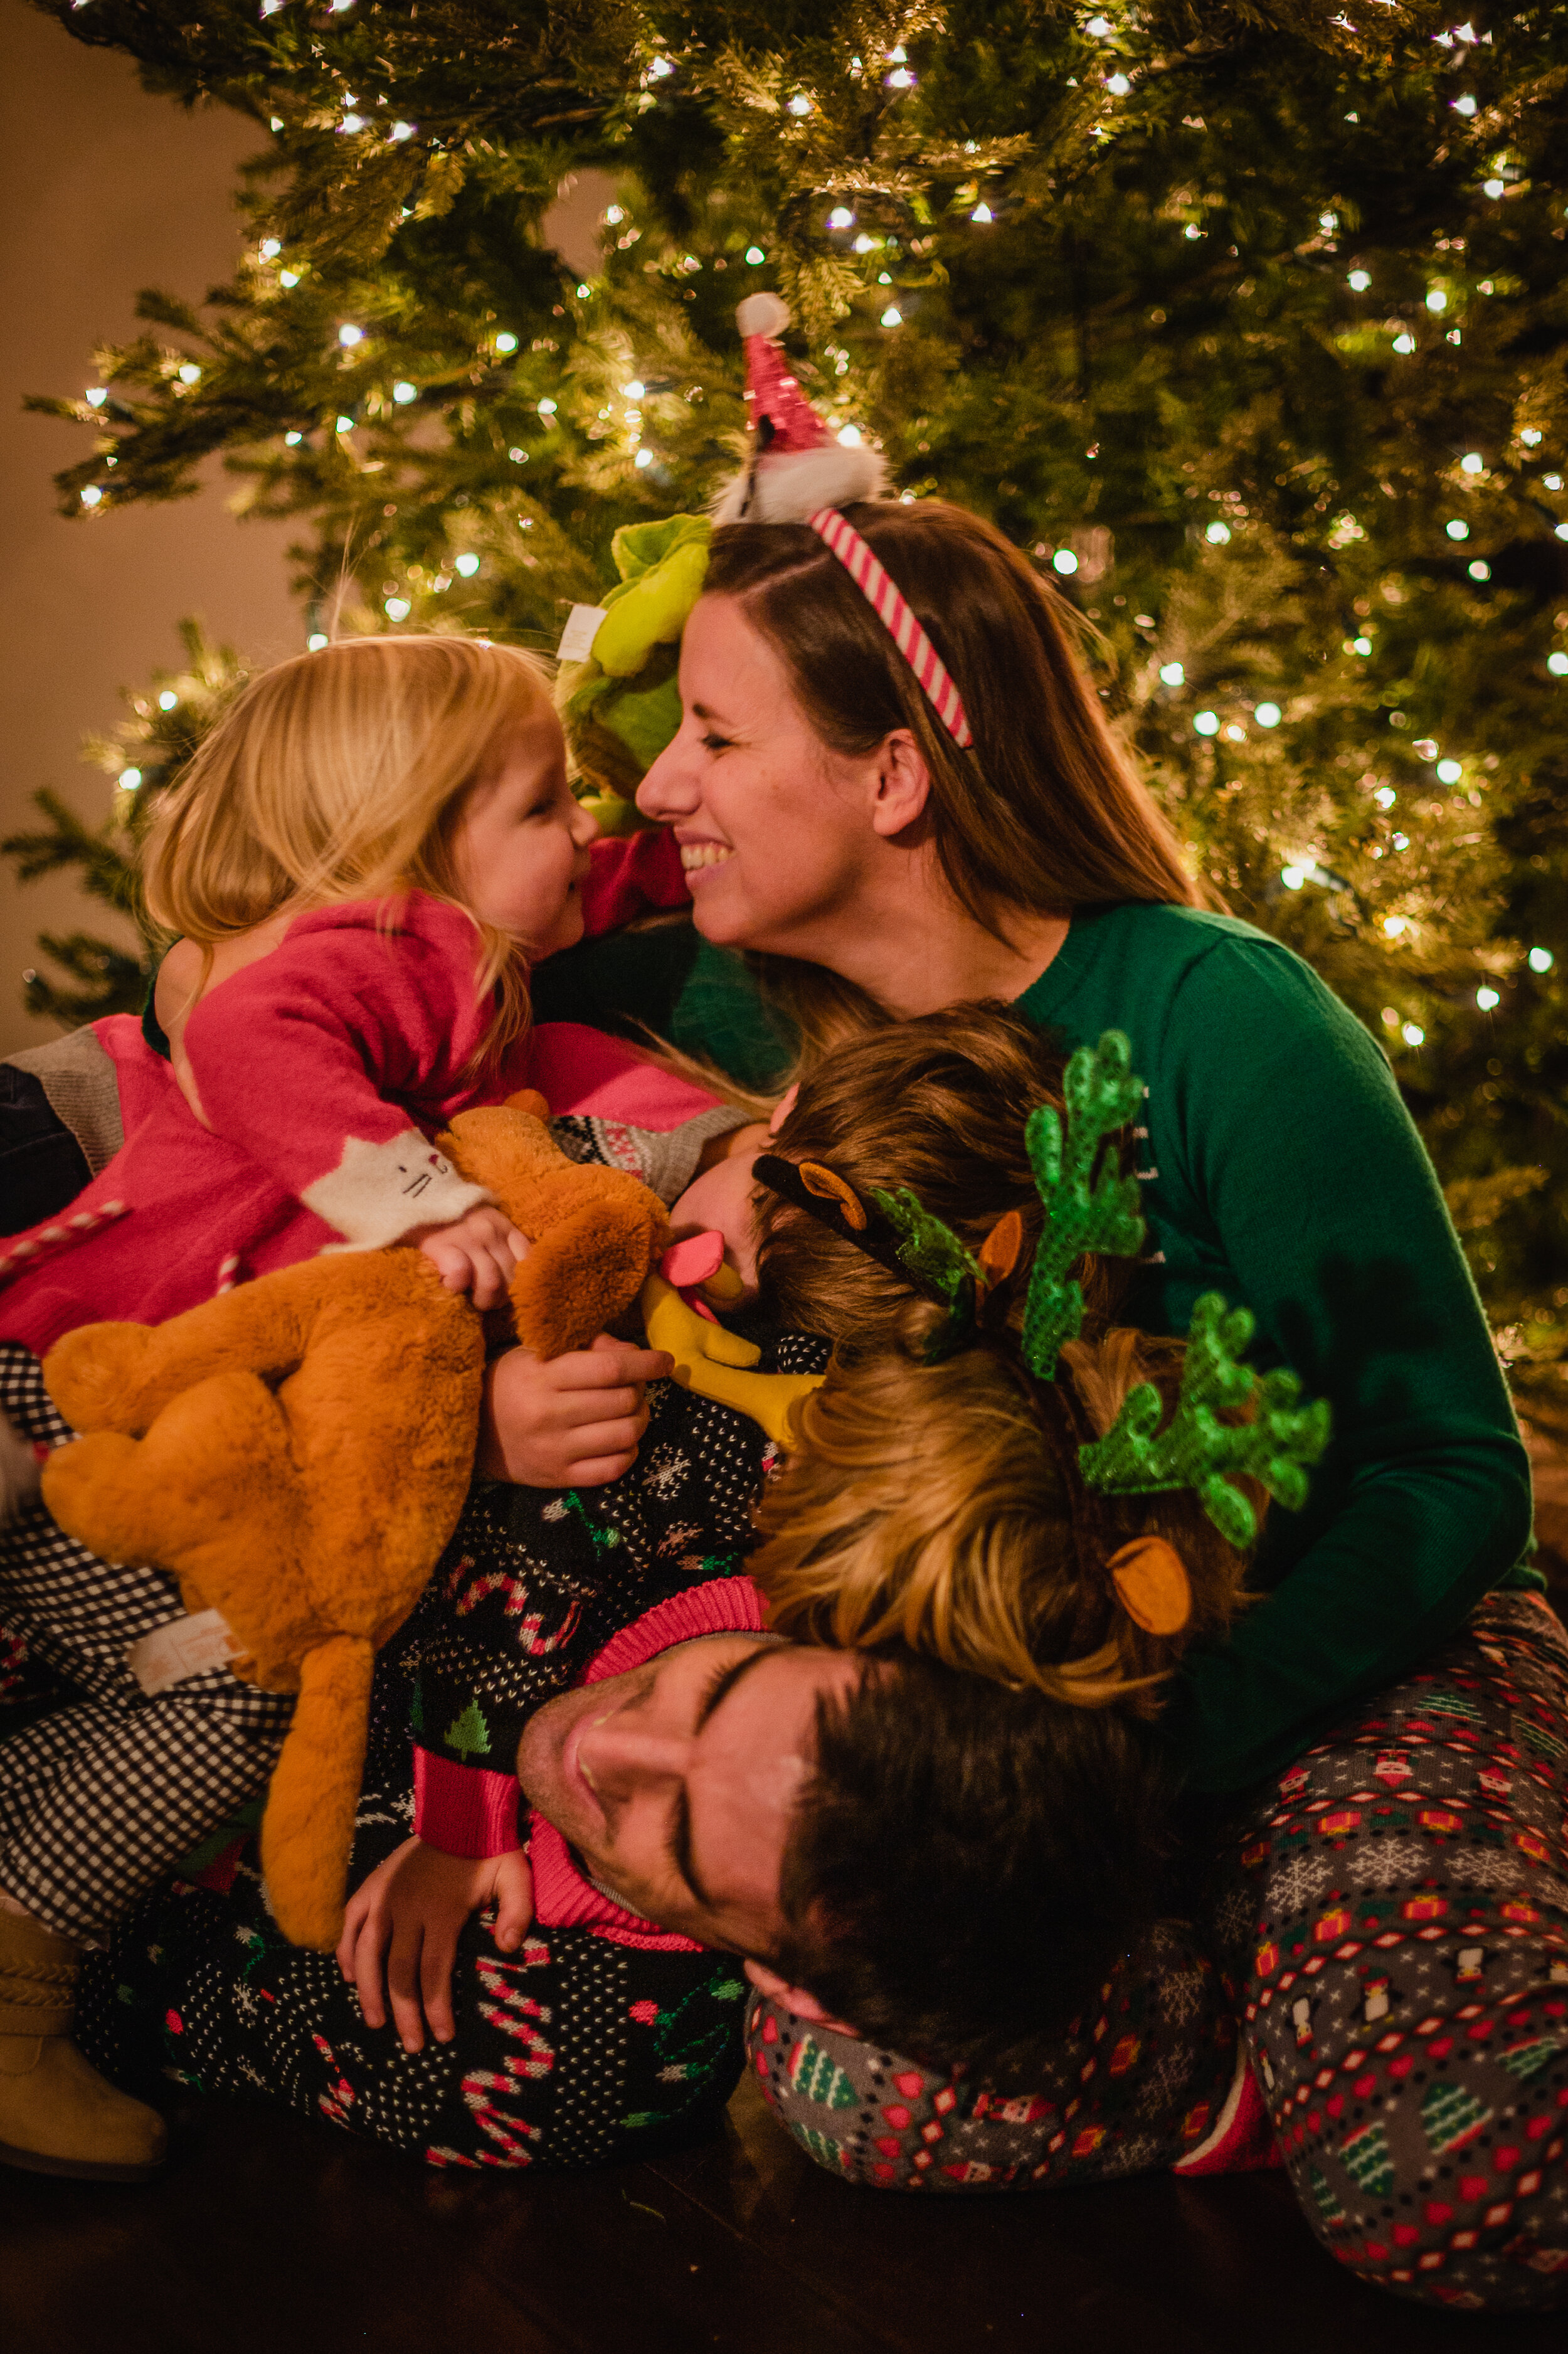
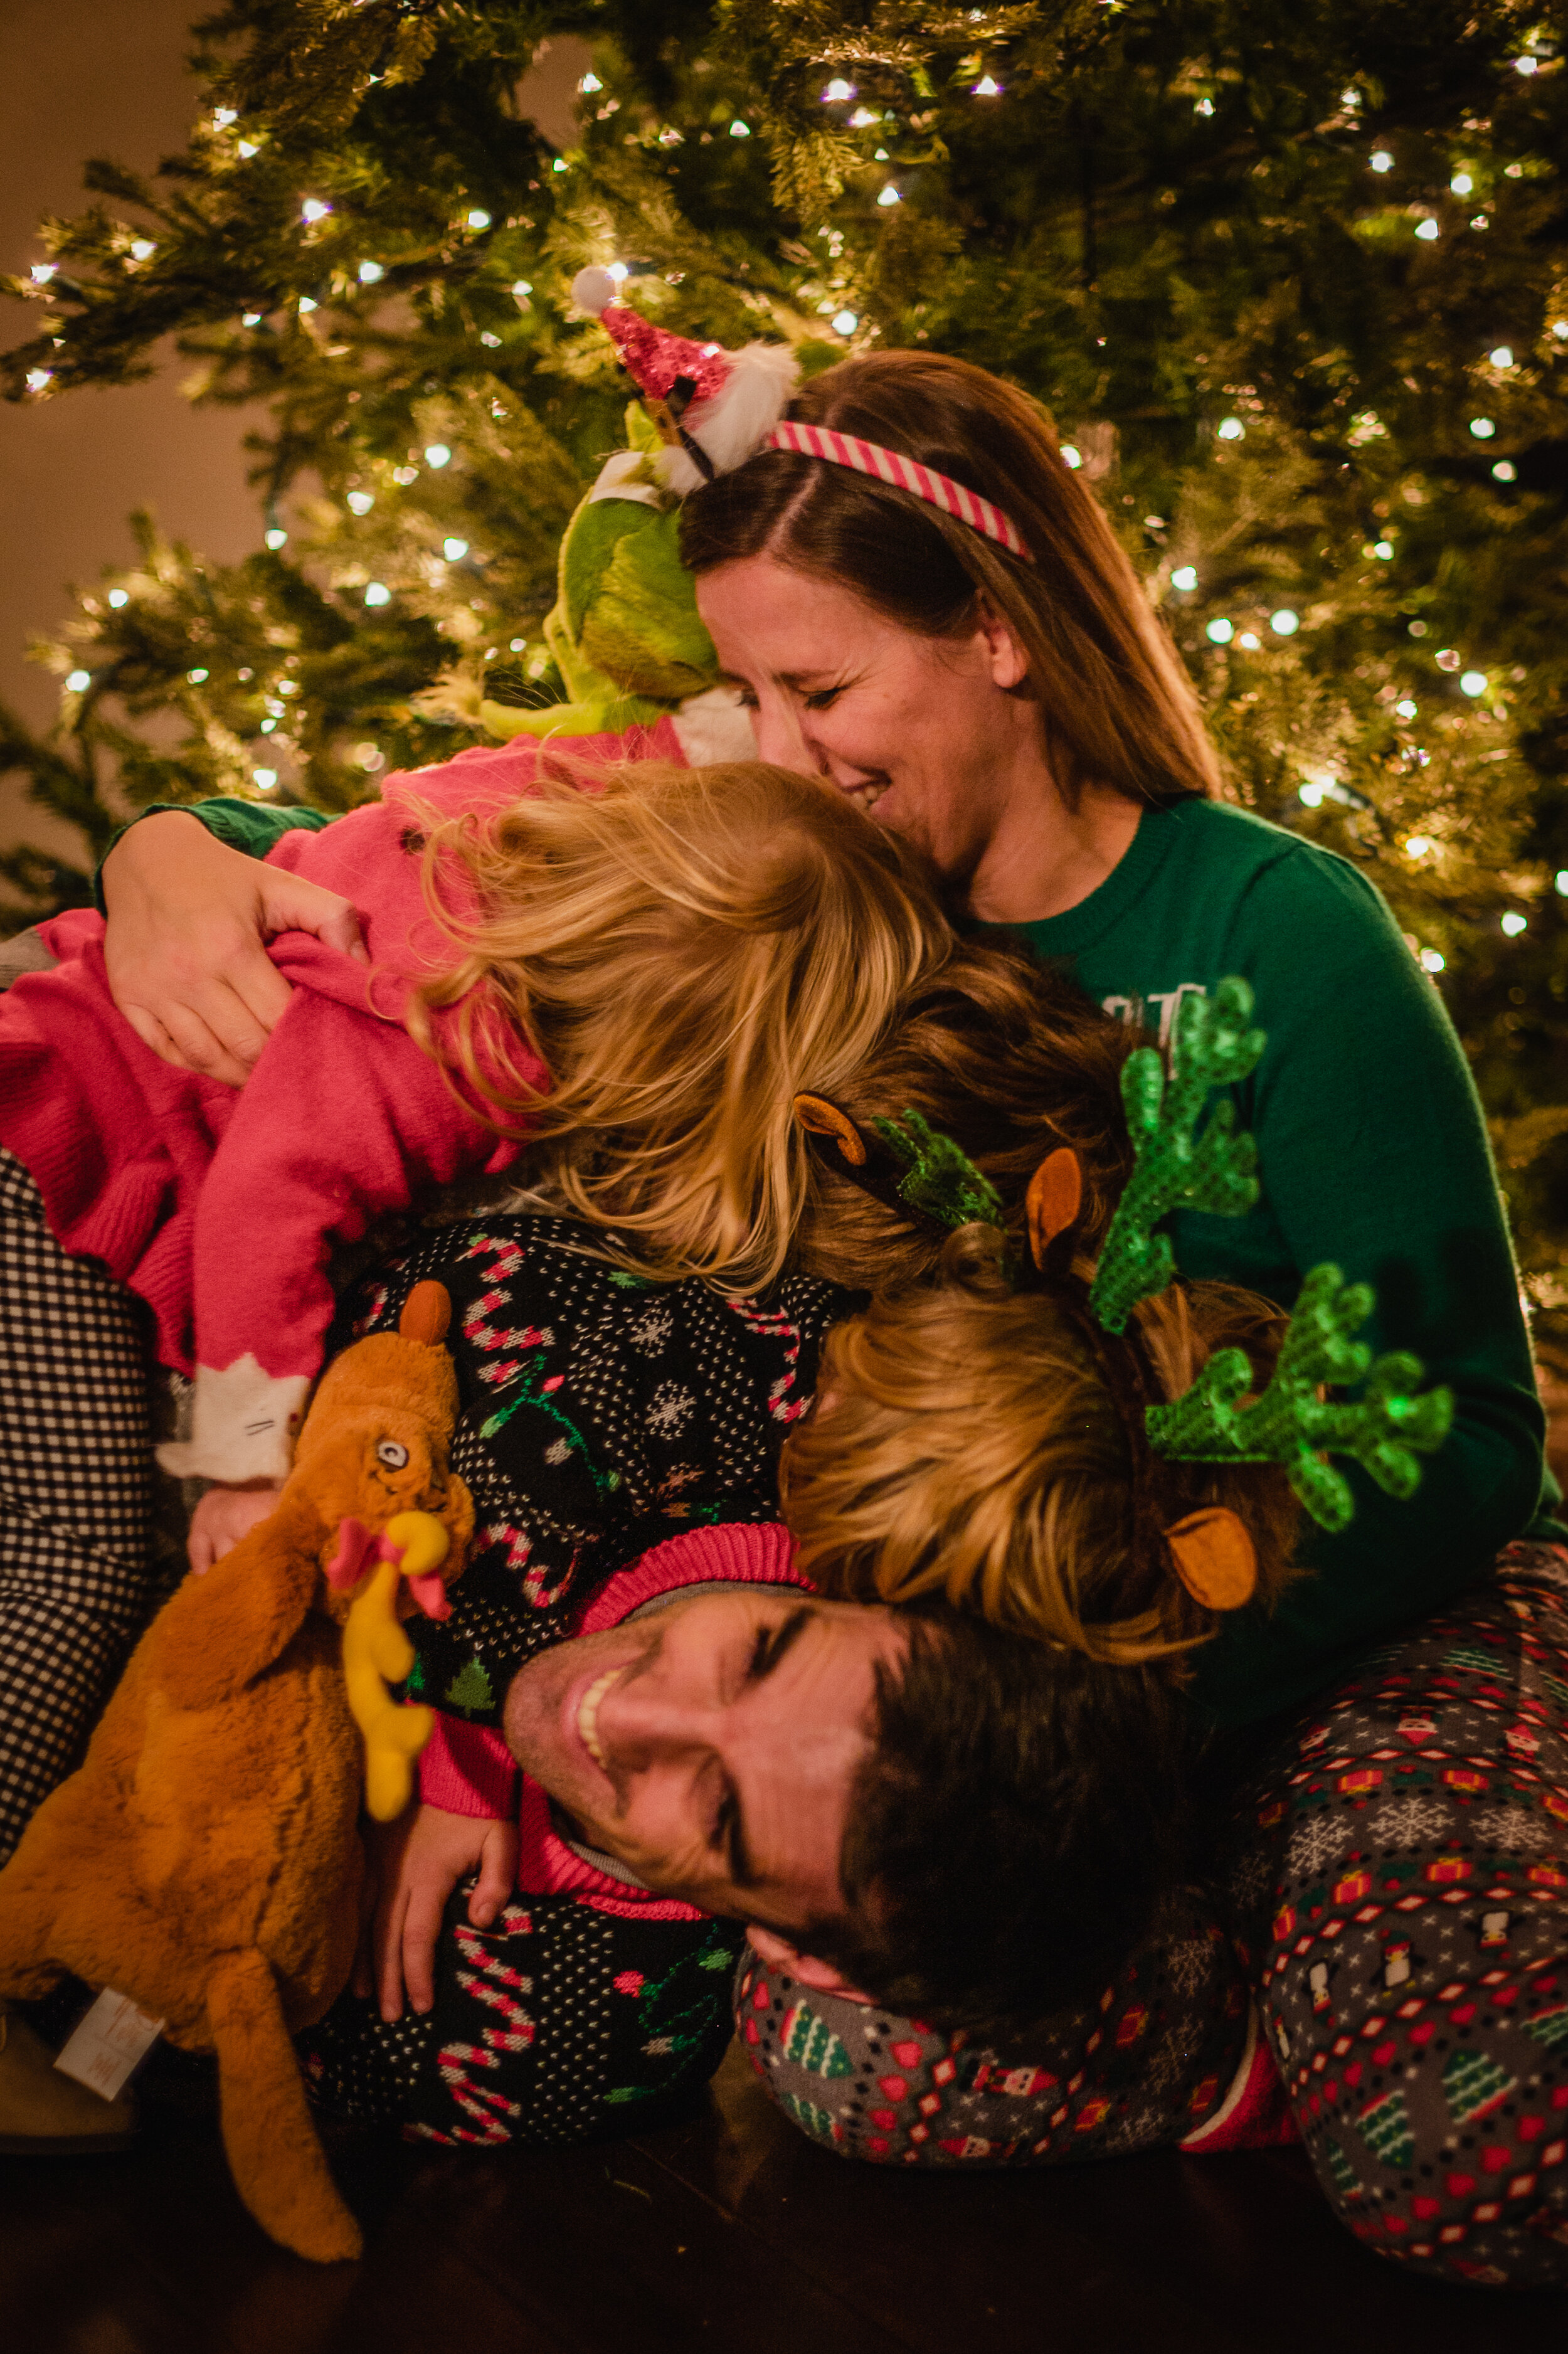
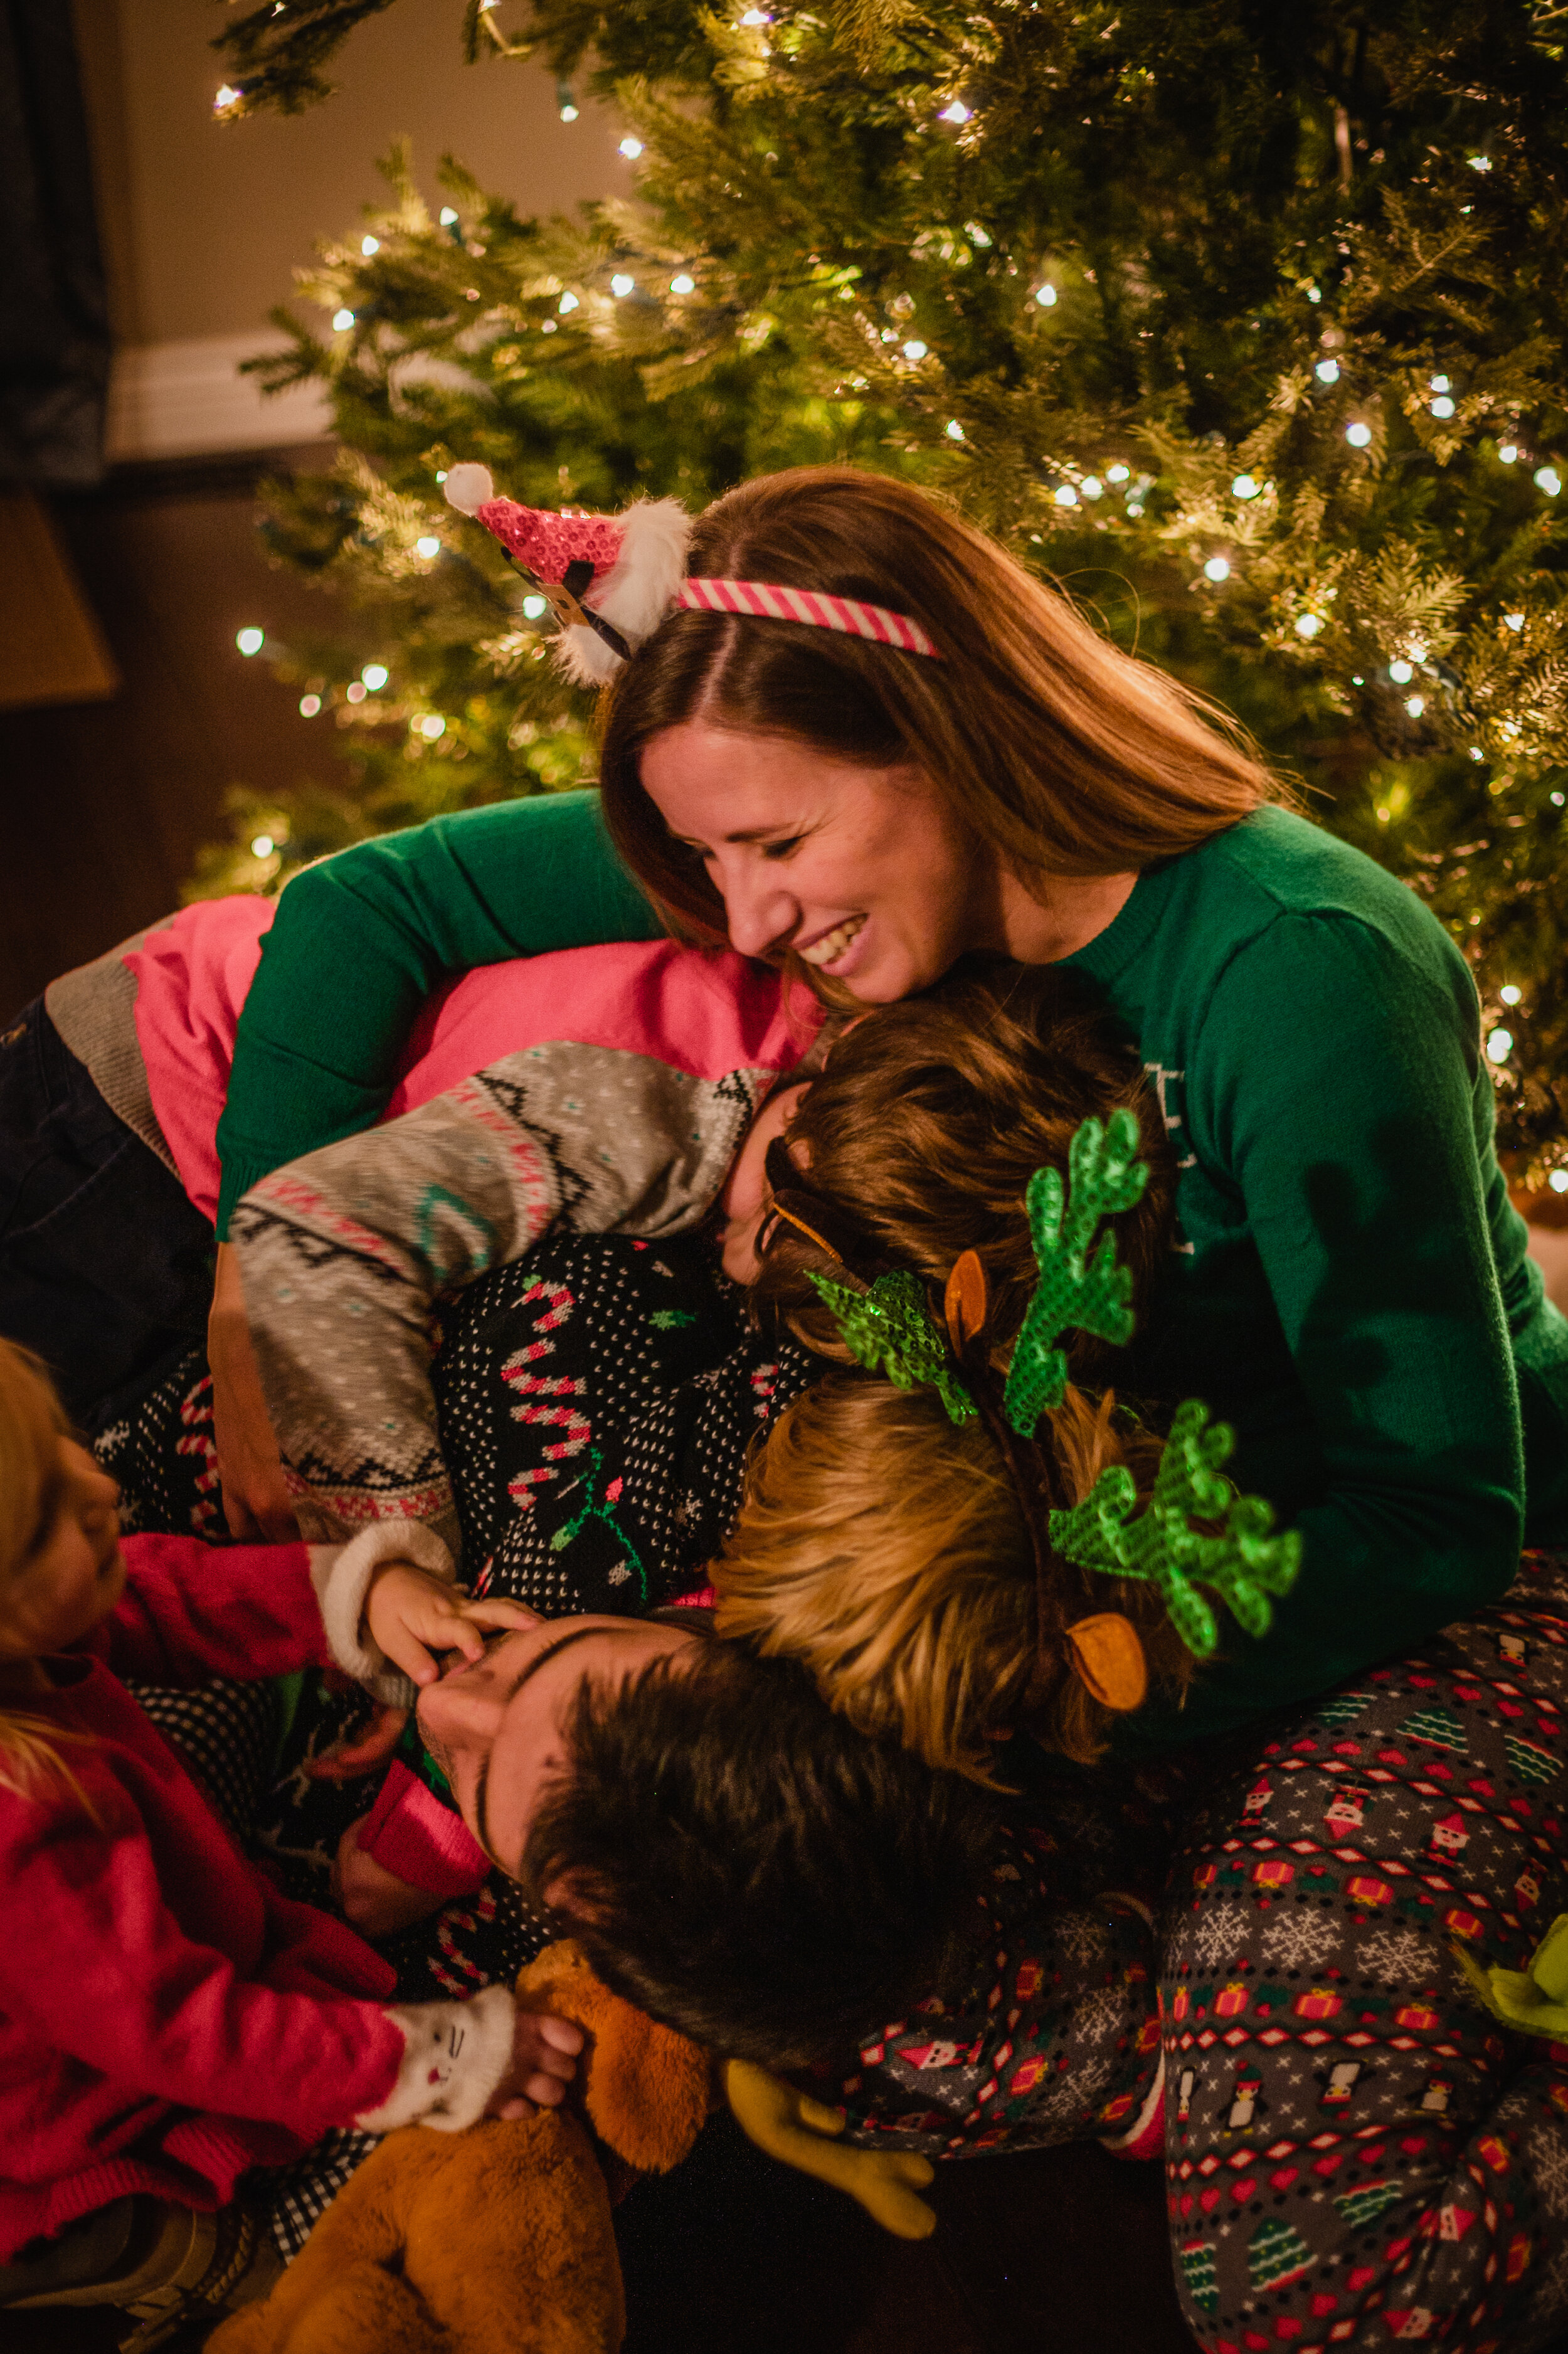
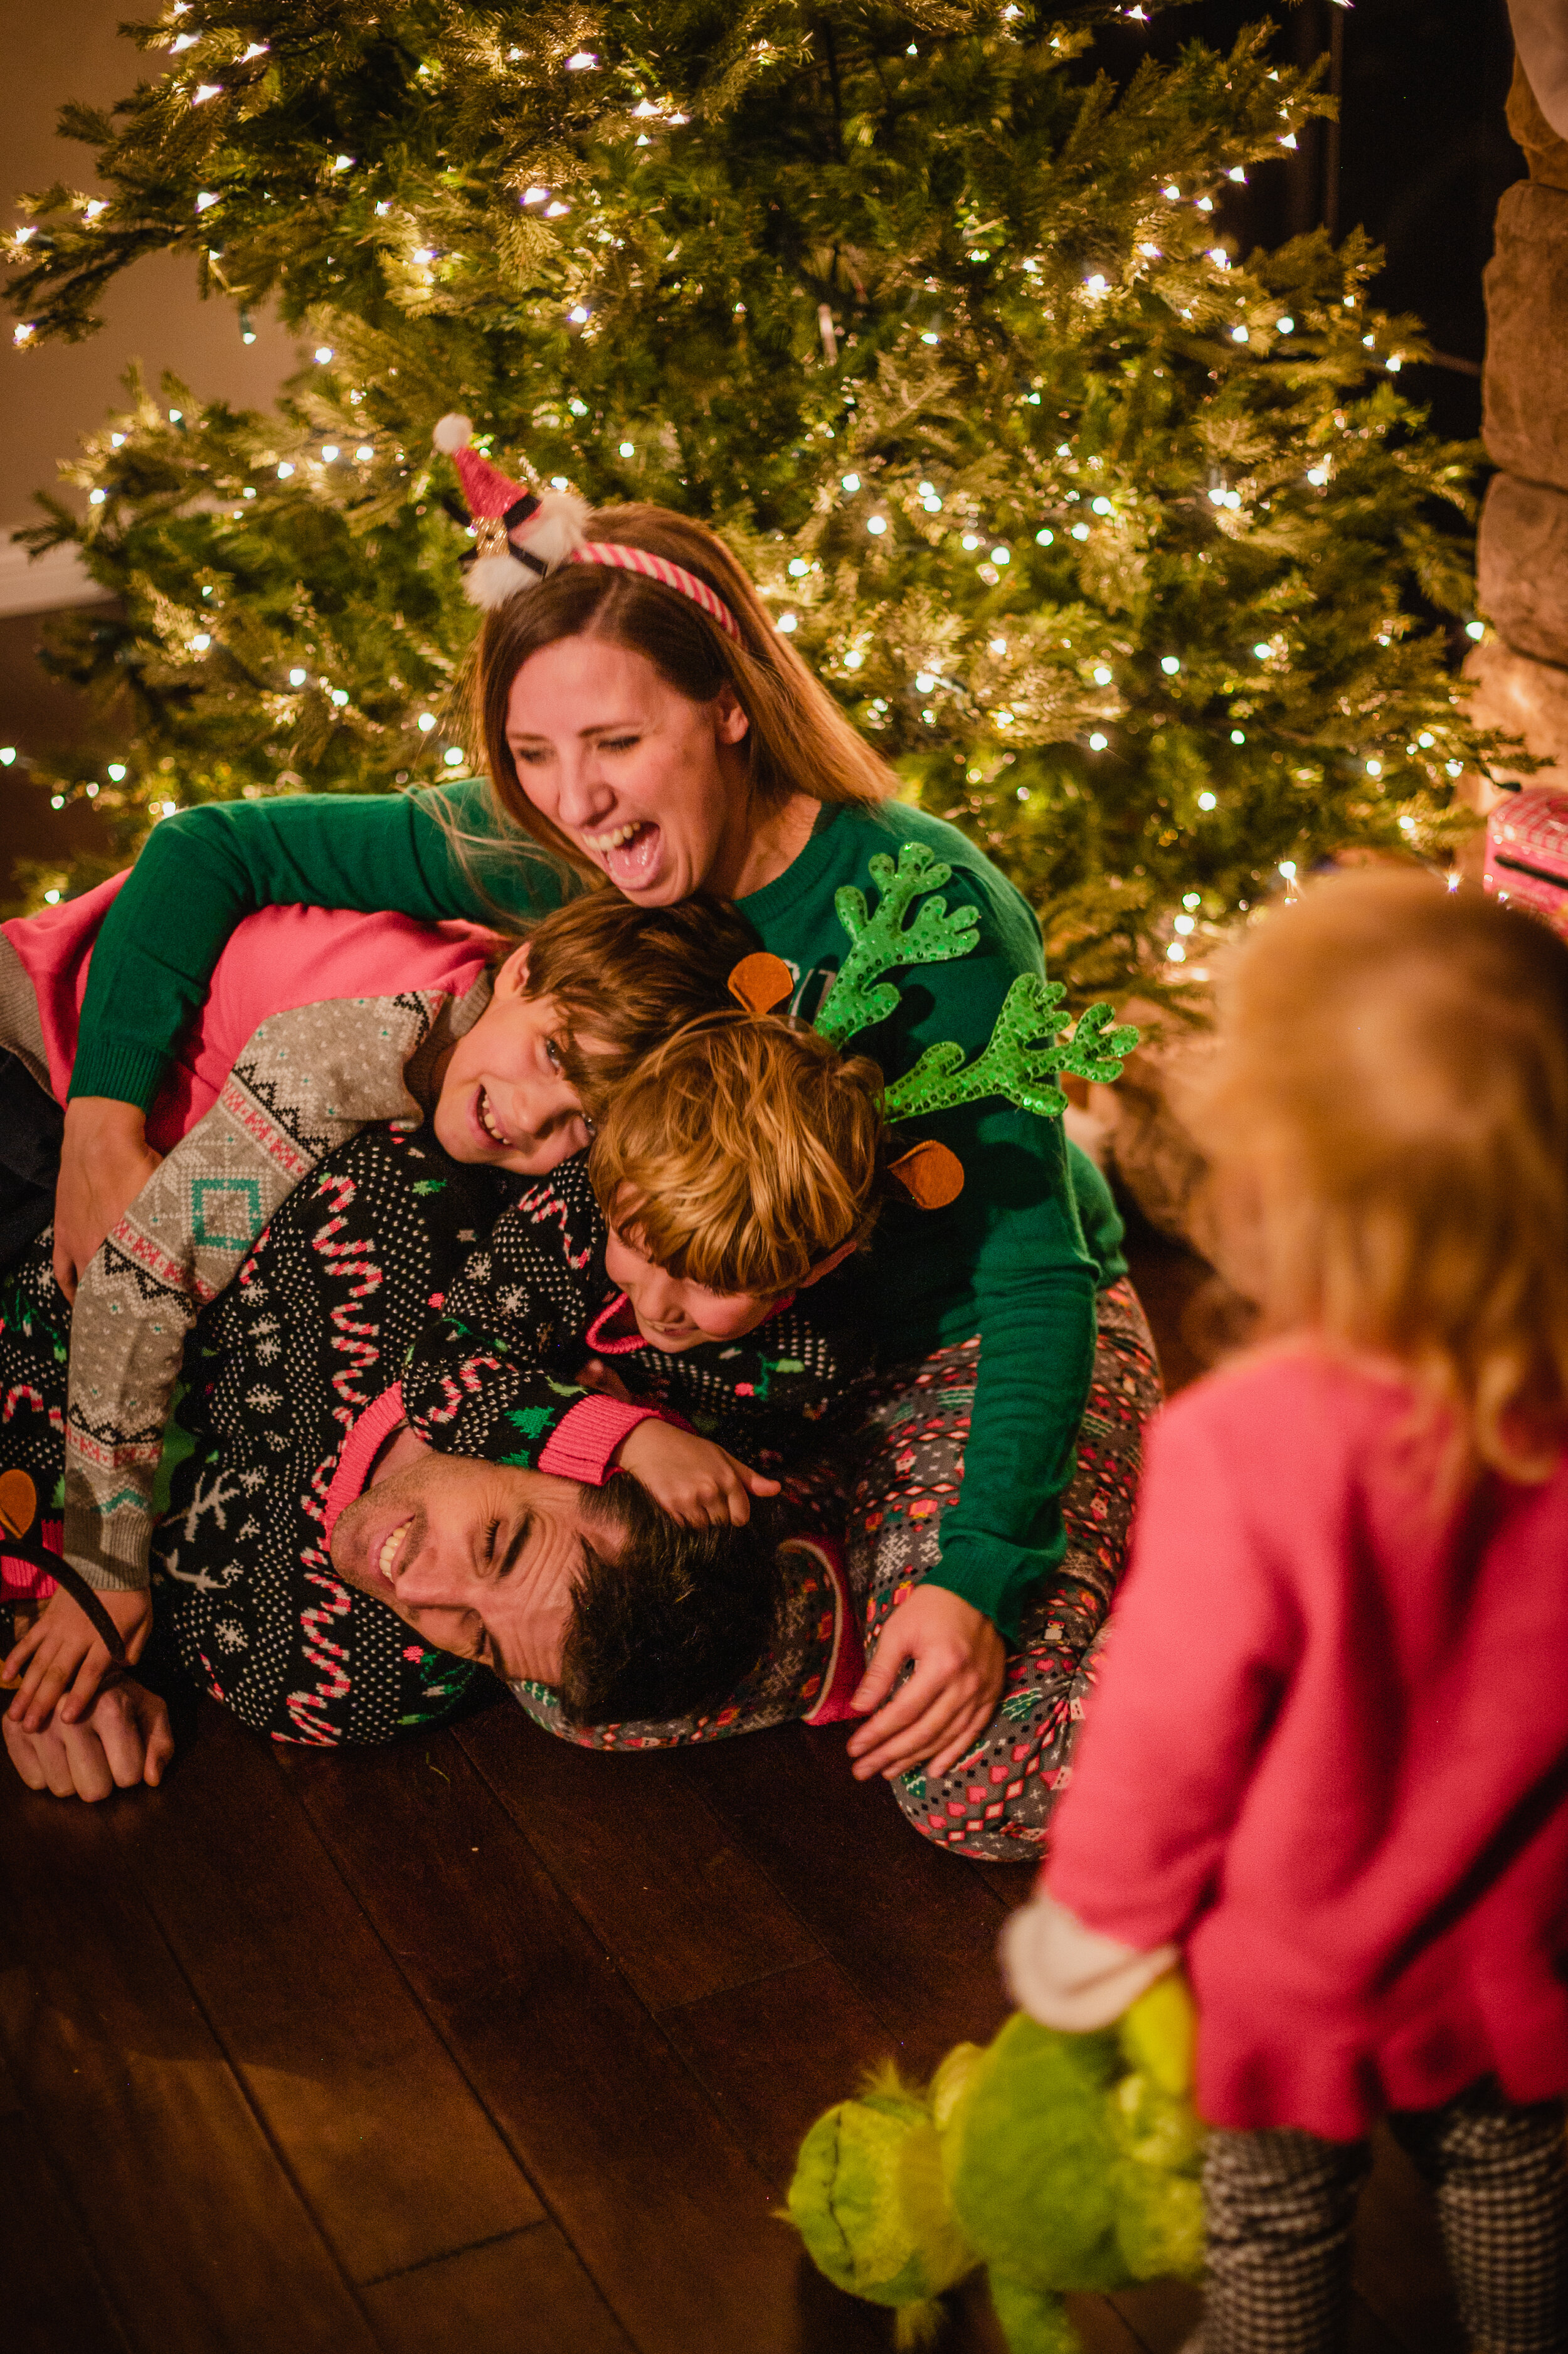
Family Christmas Session With the Southers

You all have seen those pictures of a happy couple or a family siting by the Christmas tree, matching pajamas, presents under the tree, maybe even hot chocolate in hand. Those kinda pictures, right? Well, I was feeling really festive and wanted to recreate that! I had never done anything like it before and I was ready to try it out, so I set out to set something up.
My main goal with this post is to help you avoid the mistakes and learning pains that I had to go through to get where I am now. I hope you find this info illuminating! (pun intended).
Okay, so my first obstacle: lighting. For indoor shoots, lighting typically is less-than ideal because it’s either too dark, or the lighting you do have casts a white balance that is too yellow. That being said, changing the white balance so that the whites in the images are true can help, but external flash is always a better alternative. In order to get quality shots indoors, you need to either shoot during the daylight by a window, an open door, or have an external flash hooked up to your camera.
Now, for this session, things didn’t quite happen as I expected then to. I got there with enough time to take pictures by the tree and let a little light in from outside so that I wouldn’t need to use an external flash. However, like what happens often in sessions, the kids weren’t dresses yet, the baby wasn’t up from her nap, and to top it all off, the tree wasn’t even decorated. So, by the time we got everything and everyone ready, the light was long gone. *tear*
What to do, what to do…? Well, I didn’t have an external flash, so that wasn’t an option. Secondary option was to use indoor lighting (not ideal, but better than nothing!) so I found a lamp and placed it as close to my subjects as I could without getting the lamp in the shot. I turned off all other lights in the house (except the Christmas tree), put my camera in aperture priority mode, set my white balance, set up my tripod, and shot my shoot. Note: a tripod is an absolute must when shooting indoors, especially if you don’t have an external flash because all your pictures will turn out blurry due to the required slow shutter speed.
The final product? Well, I’ll be honest and say the photos didn’t turn out how I wanted, but it was better than I had hoped considering the situation! I had to do a lot of doctoring to the images in Lightroom. There were some other hurdles, like the fact that while a tripod keeps the camera steady, that doesn’t mean that your subject will stay still (especially little kids). This aspect requires master skills of distraction and timing, haha.
Suffice it to say, I won’t make the mistake of leaving my external flash behind again. That being said, you might be curious to know what I use! I’ve included a link to an article that talks about great external flash equipment that every indoor photographer should be using. I’ve purchased a few of these items and they have not disappointed!
https://strobist.blogspot.com/2006/03/lighting-101-traveling-light.html
Please let me know if you have any questions! I hope this information helped and that your first indoor photography session goes a little better than mine. 🙂